Roadtrek

Roadtrek

Wednesday, January 22, 2014

RV Antifreeze

This article will likely surprise many who read it. I am going to reveal something that many RVers don't realize. RV Antifreeze freezes. Yes, the "pink stuff", the substance you purchase and put into the plumbing of your Roadtrek or any RV to protect the pipes from freezing in the coldest temperatures of winter, freezes. So are you wasting your money? Is this some type of scam? Actually, no it is not a scam and RV antifreeze really does protect your RV plumbing in the winter. The reason is in understanding the difference between RV antifreeze and what is commonly known about vehicle engine antifreeze.

Vehicle antifreeze is made to protect your engine's water cooling system from freezing in the winter and from overheating in the summer. It works by changing the freezing point of the water that it is mixed with and by also raising the boiling temperature of that same water for the hot summer months. Vehicle antifreeze is a highly toxic poison. It is made to be mixed with water when placed into the vehicles radiator.

RV antifreeze is made to replace the water that is in your RV plumbing. It is not made to be mixed with the water. When water freezes it expands. If there is water in a pipe or a valve and it freezes it expands in volume and overwhelms the space it is in and the result is that the ice bursts the pipe or valve. This can happen in any small space where there is water in the RV that will allow no room for the water to expand when it freezes and becomes ice. So, it is important when we winterize our RV to make sure that we remove all of the water and replace that water with RV antifreeze. This means the RV antifreeze has to go into the pipes, the valves, and the traps. It can go into the water tanks - fresh and/or waste tanks but as long as those tanks are empty - no water - they can be left empty because of their size. If a small amount of water were left behind in a water tank and it froze, there is so much room for expansion in the tank that it is not likely to do any damage at all. RV antifreeze is non-toxic and is safe for placing into drinking water systems. Now, I would not want to drink any of it, but what might remain in the pipes after flushing them out will not harm anyone, but I am told it does have a taste that many find unpleasant. This is why we flush our fresh water and hot water tanks several times when we dewinterize before using the water in our RV to drink.RV antifreeze is not to be mixed with water - it plainly states this on the bottle. It is to be used straight as it comes from the bottle.

But wait - I just told you that RV antifreeze freezes. The bottle of RV antifreeze says it protects to -50 degrees F! So if it freezes and it is in those small pipes and valves, how does it protect them in the winter? IT DOES NOT EXPAND WHEN FROZEN!


I read about this on several seemingly reliable sources. It has been stated that RV antifreeze will freeze below + 10 degrees F. This has been discussed in RV forums and on Roadtrek forums. There is always a question - does it really freeze?  I decided that I would find out for myself and I did an experiment - with Meryl's permission to use her freezer.  We recently came through a deeply cold week of temperatures below zero. I wanted to know for myself that while the Roadtrek was out on my driveway with its plumbing full of antifreeze it was not damaged. It is too late to do anything about that now, but why worry until the Spring. Here are the results of my experiment.

I started with approximately three ounces of straight out of the bottle antifreeze. A regular bathroom paper cup is three ounces.


I poured the antifreeze from the paper cup (used as a measure) into an empty plastic container. I marked the level of the antifreeze on the outside of the container.


This container was then put into our stand alone food freezer with the cover on the container. The temperature inside the freezer on the shelf next to where the container was placed read Minus 10 (-10) degrees F. That certainly would simulate the cold weather that recently has spread across much of the US and Canada. The freezer door was closed and the antifreeze in the container would be checked several times over the next 24 hours.


The first check was in five (5 hours)


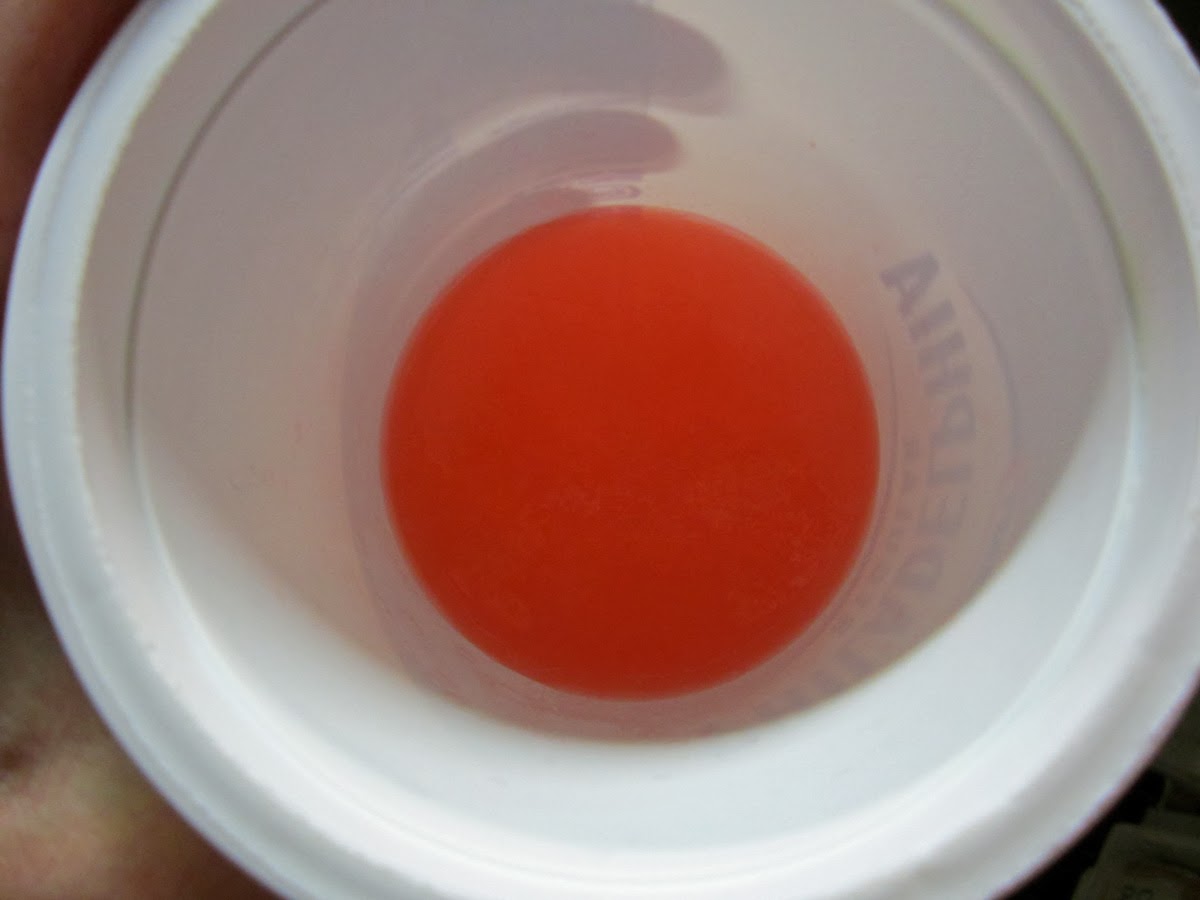
The antifreeze had turned to the consistency of ice cream. It was not slushy like the frozen carbonated drinks, but semi-solid.


I tried pushing my finger into it and my finger left an impression (hard to see in the photo near the center at about 2 o'clock) but did not push through. There was resistance from the frozen RV antifreeze preventing my finger from going through.

The next check was in 12 hours.


 At 12 hours the RV antifreeze was solid. More importantly, checking the level mark on the container the height of the antifreeze in the container had not changed. It was at the same mark and DID NOT EXPAND! (I could not get a photo to show the contents inside and the mark on the outside of the container.)


The RV antifreeze at 12 hours was the consistency of Italian ices (the confection). I took a toothpick and pushed it into the surface and the toothpick went down into the ice no more than about a half inch.

The next and final check of this stage of the experiment was in 24 hours.


 At 24 hours the RV antifreeze was much more solid. The toothpick tip just went into the frozen antifreeze and stopped. This was fairly solid. Not slush as some have said. The most important thing though was that the level of the antifreeze in the container did not change. The RV antifreeze does not expand! That is what is important. In a pipe, it will not expand and burst the pipe. In the small confines of a water valve, the RV antifreeze will not expand and damage the valve.

I could have ended the experiment here and had all the results that are needed, but I wanted to go one step further. There have been some recommendations - including by Roadtrek in their manuals - that in the winter one can mix a 50/50 water/RV antifreeze mixture and put that in the fresh water tank or directly into the toilet to flush the toilet. I wanted to see what would happen if the experiment was repeated using 50% water and 50% RV antifreeze mixed together. This would be the same as what is being said to put into the tanks which will go into the plumbing that can get very cold in very cold outside temperatures. What would happen? I wanted to find out for myself.

I let the RV antifreeze in the container melt and return to room temperature. I then took approximately three ounces of plain water (measured in the same paper cup) and added that to the container with the RV antifreeze. I mixed the two together, marked the level of the mix on the outside of the container, and put the container back into the freezer where the thermoeter was still reading minus 10 degrees F. Again, I would check over 24 hours.


 First check of water and RV antifreeze at 2 hours.


In two hours the mixture was freezing. The mixture was solid with a grain look to the surface.


I could not push the toothpick into the frozen mixture and this was just at two hours. Looking at the mark on the outside of the container, the mixture had expanded up over the mark to almost 1/4" inch higher than the mark. The mixture EXPANDED. This would do damage if in a pipe or valve at this temperature.

The next check of the mixture was at 5 hours.  The mixture is solid. It still has a grainy surface. The expansion level is about the same as it was at 5 hours. I could not put my finger into the mixture at all. The toothpick would not go in.

The next check was at 11 hours.


The mixture was solid ice. You can see in this photo that the toothpick just sits on top of the ice. The level of the mixture raised slightly more meaning more expansion.

The last and final check was at 24 hours. 


 This is solid ice. You can see the tiny cracks in the surface. You can see a small chip in the ice showing as white on the lower left of the photo just above.


The toothpick can only lie on top of the ice. It would not go through at all. When I looked at the level of the ice compared to where the liquid mixture started it measured 3/8" higher than than the mark. The frozen mixture expanded up 3/8"!  A mixture of 50/50 water and RV antifreeze will expand and that is just what you are looking NOT to happen. There is no way that I would ever mix RV antifreeze and water and use it to protect anything! I do not understand why such a thing would be recommended by anyone. Water alone expands 9 to 10% according to physicists. This seemed to expand about the same as plain water. Bad, bad, bad!

So what is learned from all of this - use RV antifreeze straight out of the bottle. When you winterize you are pushing whatever water is remaining in the pipes and valves out with the antifreeze as it is run through the pipe and through the faucet and toilet valves. When you are done all that is left is RV antifreeze in those places. Do not mix RV antifreeze with water and think that you are protected. You are not. If you are winter camping and want to use RV antifreeze to flush your toilet, only use straight out of the bottle RV antifreeze and never come close to filling your black tank in the process - make sure to dump before the tank is even close to full and then if you have a macerator, run antifreeze into the empty waste tank and then into the macerator to keep that protected between uses.  Of course, gambling is a big industry and a lot of people like to gamble. If you want to gamble like this the odds are definitely against you.


Wednesday, January 8, 2014

Traveling in the Winter in Your Roadtrek

While many who live where there are cold winters feel that the RV season ends with the Fall and traveling stops until the warm weather's return in the Spring. In the Roadtrek it is possible to travel in the winter when the temperatures are freezing outside. Of course, you have winterized and you do not want to put water into your pipes or tanks, but there are easy ways to deal with the lack of "on-board" water. And this not only works if you own a Roadtrek but works just as well if you own any other form of RV that does not have an on-board, winter, water system.

When we made our first winter trip, the first year that we had our Roadtrek, we looked at what we would need to be able to make a trip in December - after we had winterized. We came up with a few things that made this possible. The only real problem is the lack of water for drinking, cooking, washing and for flushing the toilet. Everything else that is in the Roadtrek will work just fine whether it is hot or cold outside. One advantage of a Class B camper van is that for many models - particularly the Roadtrek 190, you are inside the original body of the van and it is well insulated. Add heat to the inside and you have a very warm interior. The heat is already built in - your Roadtrek's furnace which will keep the inside warm down to very cold temperatures outside. So, if you solve the lack of water, there is little reason why you could not travel in the winter.

Now, let me detail talk for a moment, specifically about the Roadtrek 190 and its additional interior water tank designed to allow water to be used in cold weather. While this is true under certain conditions, it is not always practical in actual application. The tank is inside the van - located on the rear passenger side, inside the wall and below into the front cabinet. Roadtrek states that to use this tank, the interior must be kept warm at all times to prevent the inside temperature of the van to get to freezing. If you are going to be in the van 24 hours a day for the length of your trip, this is possible. You can run the furnace all of the time - whether you are inside or not - and keep the interior at a comfortable temperature and the water in the tank will not freeze. BUT, if you run that water down the drain and through the toilet into the waste tanks below the van on the outside, that water will freeze. Roadtrek's answer to this is to add antifreeze into those tanks. They do not specify if this should be RV antifreeze or vehicle antifreeze and as I understand it, vehicle antifreeze would damage the seals in the tanks. I will talk about RV antifreeze later in this article. So, while we are not in the van all of the time and I would not want my furnace running inside 24 hours a day we found an alternative.

First - drinking, cooking and washing water.

This was easily accomplished with a product from Brita - the Brita Water Dispenser.


We purchased this in Walmart and it cost about $50. There are other companies who make a similar dispenser. We choose this one only because it was there on the shelf in the store. It works well. Not only does it filter the water that you put in through the top that lifts off, but it also has a spigot just like the faucet on your sink. To fill this we take it to a restroom or utility sink at a campground and fill it up. It holds 18 cups of water and that actually lasts a good amount of time. In the absence of a sink to fill it with, a gallon of water from a Walmart store is $1. Certainly you could just pour water from a jug but with this you can create a sink with running water.

Now, this water has to go somewhere when you are washing or if you need to pour any water out for whatever reason, so now we needed a sink that would be easy to empty without the water going anywhere near or drains or tanks. This was accomplished with a storage box that fits into the Roadtrek sink, below the counter top, and with a lid and handle that will allow easy, no spill removal. Simple -


Here is the box that we found, open and in the sink. You can see that it fits the sink almost exactly. It completely covers the drain (which I would put a rubber disk over just in case). (In this photo the box is sitting over a paper towel placed there when we winterized and the pink spot is antifreeze that has dripped from the faucet since then.) The blue latches on each side close this box securely when you put on the lid.


The handle folds up and it is easy to lift this up out of the sink when full (I do it each morning before we leave for the day) and not spill any of the water inside. Notice in the front right corner that I have cut out a semi-circle in the corner of the flat of the lid. That makes a convenient pouring spot to pour the water out of the box. I take this to a campground restroom or utility sink and pour it out. (It would not be right to pour it outside on the ground.)

So here is the set up - winter sink with running water...


With this you  can get yourself a drink of filtered water, fill a pot to boil, wash your hands, or brush your teeth. No you can't take a shower, but you could take a sponge bath. What no hot water? Well, to the right in this photo is the stove and above is the microwave. Both will turn cold water into hot with not much effort at all.You certainly could wash dishes or pots if you needed to, but my suggestion is use paper plates, disposable plastic utensils, and paper cups on a winter trip.

OK - half of the water problem is solved. The more important half is now to come because sooner or later everyone has got to go!

I will first talk about our solution and we have been very satisfied with it. There are things that others do and I will talk about those later. There is something that I discovered in a camping store that goes by many names. One of the more curious names is a "wag bag". I do not believe that you will find any package labeled with that name but this is how these are often referred to on RV forums. This is a toilet waste bag. They are sold at camping stores and camping departments at a wide range in price and with different names and packaging. This is a double lined bag that contains a chemical powder and two closing seals for when the bag is to be disposed of. The chemical in the bag turns liquid into gel and also deodorizes whatever goes into the bag. To be direct - urine that goes into the bag becomes a semi-solid gel and feces that goes into the bag should not smell. The bag is sold to be inserted into several different types of stands - one a bucket with a toilet lid on top and another a frame with a seat that the bag attaches to. It just so happens, that the bag fits the Roadtrek (and likely any other RV toilet) exactly. You lift the lid and seat, put the bag down into the toilet and open it up so that it lines the bowl, lower the seat down and capture the part of the bag that will extend over the top of the bowl down under the seat and a little down the side of the top of the bowl. The bag will stay in place. How much you can use the bag depends upon what you do in the bag.


This is the bag that Walmart sells on their website. I purchase these bags at Walmart stores and they have different packaging - and a different name. These are distributed by Ozark Trails Camping Supplies which seems to be a Walmart distribution name. As I had said, the exact same bags will be found with other names and in different color boxes. They are packaged 6 bags to a box. The cost varies from $10 to $12 for a box.


We use these at night for when we go to bed and keep it set up all day in the event that an "emergency" stop is required. During the day we use public restrooms and back at the campground we use the campground restrooms. But in the middle of the night when nature calls you don't want to get dressed and hike out in the COLD to the restroom - the same thing in the morning when you get up. With just urine in the bag, we use one bag for one day/night. If feces goes into the bag, while they say no odors, I change the bag.

Now what do you do with the bag when it is time to dispose it. There are two seals on the bag and this is actually two bags - one inside the other. You zip-lock the inside bag and the pull the outer bag up and over the inner bag and seal that bag. Every company that makes these bags insists that it is legal to dispose of the bag into any sanitation receptacle (meaning garbage can). The bag gets heavy when full of gel, but lifting the seat and grabbing hold of the CLEAN sides of the bag it just lifts out. Seal the inside bag before lifting out, and then seal the outside bag. Carry it to the nearest outside trash can and throw it away. (I hate to think what will happen if any dumpster divers come across this - perhaps they will decide not to dumpster dive again.) As soon as I take one out, I put the next one in so that it is there if we need it - unless it is the last day of the trip and then we just deal with public restrooms until we get home.

Is this expensive? If you don't use this as a supplement to using public facilities and just use this, the answer is yes, depending on how many bags that you use each day. I have heard some say that they just take a heavy duty trash bag and put it in the toilet the same way, claiming it works just as well and is very inexpensive. Well, I have seen trash bags that leak and this is not a surprise that I want to have when I lift it out of the toilet and it leaks all over the inside of my Roadtrek. And the trash bag has no deodorizing unless you spraying deodorizing disinfectant into the bag with every use - and I don't think that you can just toss a regular trash bag with raw waste out into the garbage. But, if this is something that you want to do to same a few dollars, that is fine. The wag bags work well and I will continue to use them.

This resolves all water concerns about winter travel. I add one more thing to my winter "arsenal" and that is an electric space heater. I have found a nice one with a real thermostat that I also use when I "exercise" the Roadtrek's generator in the winter. It is made by Honeywell and I chose this one because of the thermostat.


This model also rotates side to side or can be pointed in any one direction. It is plugs into a 110 v outlet and is not too much to use if running the generator. It cannot be run with the usual 750w Roadtrek inverter. It generates a lot of heat, will off and on to keep the room temperature to whatever you have this set on and is quite. Some find the furnace fan to be loud and if this is something that you would rather not hear, then this does the job to warm the van nicely. It shuts off if knocked over and gets cool to the touch rather quickly when shut off. If it gets really, really cold this could be used in addition to the furnace.

Before you leave on any winter trip, fill your propane tank. During the trip keep an eye on the propane level. You are probably not going to need to refill but you don't want to find out too late that you needed to.

There is another alternative to using the toilet that I should mention, but this is not something that I would do. It is up to you if you would like to do this. I will include with this my concerns. You could flush your toilet normally by just using RV antifreeze. All you would need to do is put a little in the bowl if you will be defecating or not if you are urinating, and then when done, pour a sufficient amount of RV antifreeze from the gallon bottle to flush it all down into the black tank - just like you would do if you had water in the system. The first flush will empty the toilet line of RV antifreeze but that is OK as there will be no water in the system. Some fill their fresh water tank with RV antifreeze, turn on the water pump and flush normally. This sounds like a simple and much easier solution than the wag bags. Here are my concerns. You are going to need a lot of RV antifreeze on hand to do this if you pour from the jug. No matter where you put the RV antifreeze it will cost you a minimum of $3 a gallon. The black tank holds 10 gallons and that means if you fill the black tank, it has cost you almost $30, less what your waste displaced for antifreeze. To me that is expensive and I would not know where to put all of those gallon bottles of RV antifreeze.

As to putting it into the fresh tank - many do this when winterizing. I have read a number of comments from long time RVers that they would not do this because the fresh water tank will hold the taste of the antifreeze for some time after de-winterizing. If you never drink the water from your fresh tank, and some don't for their own reasons (we do), then there is no issue with taste. I have read that to reduce the cost of the antifreeze it has been recommended to mix the RV antifreeze half with water. They claim that this is no problem. Here is my concern and I state this with no personal evidence but with statements made by RVers who have had personal evidence. They say that RV antifreeze is not like vehicle antifreeze in how it works. Vehicle antifreeze which is a deadly poison lowers the freezing point of water and also raises the boiling point of water which is why it is used in your car engine's radiator in both winter and summer. The claim is that RV antifreeze does not do this. Instead, it takes the place of water in your system - and it actually will freeze to a gel consistency. There is no damage to your RV plumbing because when the RV antifreeze freezes (at around 10 degrees F) it does not expand. It is the frozen water's expansion in the plumbing that causes damage. If the liquid in the plumbing does not expand, no damage is done. So, what does adding water to RV antifreeze do? To me, it introduces an expanding liquid to a liquid that does not expand. Any expansion - it seems to me - is a potential hazard. Fact? Fiction? As I have said many, many times on this site, I am not an engineer nor am I a chemist. I am just a regular guy who is learning as I go along and share that with you - and I try to learn from a number of sources about the same thing, if it is something that I can not learn from my own experience. The bottle of RV antifreeze says do not dilute. That is good enough for me. Maybe one day I will try putting some RV antifreeze into the fridge freezer at home and see what happens. For now, if I am error then my error is on the safe side of the question. The wag bags are good enough, easy to store, and cheaper than all of that RV antifreeze.

If you do use RV antifreeze to flush your toilet, be sure to dump your black tank, flush with some RV antifreeze, and the pour some clean RV antifreeze into the tank to protect it again.

I will add one more thing about winter travel, particularly related to a Roadtrek 190. Under the van you only have seven to nine inches of clearance. I will not drive in the Roadtrek in snow that can become deep. The last thing you want to do is drive through a foot of snow with seven inches of clearance. I am not sure I would like the handling of such a heavy van on snow and ice. That is just my opinion. Some Roadtreks have much more clearance and this may not be an issue. I don't want to be scraping anything under the van on hard snow or frozen snow.

You now have the "how to" on winter travel. The where to is up to you. Be aware that in parts of the country with cold winters, many campgrounds close between the middle or end of October and March or April 1st (most often April 1st). If you do find a campground that is open in the winter all you need at your site is electricity. In the winter, we ask for a site that has electric and cable and that is CLOSE to the restrooms. I will look on the campground maps that are usually on their websites and find sites near the restrooms and when I call for reservations - sometimes needed in the winter and sometimes not - as for one of those sites.  While the campground may be open, some campgrounds only open some of their sites - so a large campground may be operating with very few sites in the winter and they may be the only one in the area that is open. So to be sure you have electricity to plug into when you get where you are going in the winter - make a reservation.

So now you are all set to head out on a winter trip. Before you go, check out your RV thoroughly. Test your furnace. Check your battery levels. Batteries run down faster in the cold. You don't want to get stuck with any system not working when RVing in the winter!