Roadtrek

Roadtrek

Wednesday, July 23, 2014

National Civil War Museum, Harrisburg, PA

Our most recent trip in the Roadtrek found us in Pennsylvania with some bad weather forecast. We were in PA for some outdoor places to go and with severe thunderstorms coming we kept moving our plans for those places off toward the end of the trip when, hopefully, the predicted improvement in the weather would actually take place. I started thinking about where to go in or around Lancaster, PA that was indoors other than outlet shopping - which we both had no desire to do. I remembered that a number of years ago we drove to Harrisburg, the Pennsylvania state capital and went to the National Civil War Museum. We remembered it as a good museum and decided to go back to avoid the storm (which in Harrisburg as it turned out, we totally avoided).


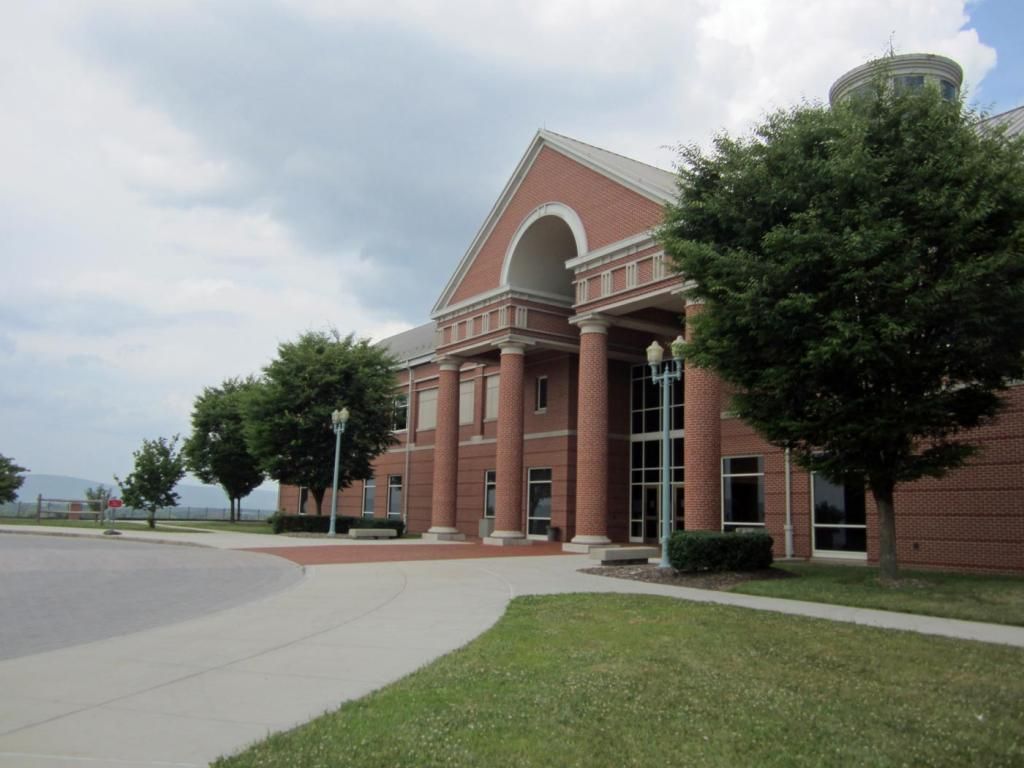
The National Civil War Museum is located at the top of a hill in Reservoir Park in the city of Harrisburg, PA. A GPS will bring you to the park entrance and there are clear signs to follow to the museum. Once you are up to the parking lot, the museum is actually further up the hill, just a short walk up some stairs and to the entrance. There was an RV and Bus section of the parking lot but I was able to park the Roadtrek in a regular parking space that allowed me to overlap the sidewalk with the front of the van. Other large vehicles nearby had done the same. It was not crowded the day we were there on a Wednesday though it was Fourth of July week. 


The museum is open seven days a week (closed some holidays) and the hours vary by the day of the week. Wednesday is the late day and the museum is open until 8 pm. There is an admission. Adults are $11, seniors $10, and students $9. You purchase your tickets in the museum store which is large and has a nice book section. Once you purchase your tickets you are told to take the stairs across from the store to the second floor where the exhibit galleries start.


The museum is a combination of artifacts, scenes that you walk into the middle of, and videos. There are ten galleries on the second floor (with more on the first) and you start your tour at the gallery, "A House Divided, 1850-1860" which sets the stage for the occurrence of the Civil War - how people felt and what the incidents and issues were before the start. Here besides cases of artifacts including Abraham Lincoln's hat box (shown below), you are introduced to some people - men and women - white and black - who lived during the war by videos in which they introduce themselves and you encounter various views and circumstances. These same people will appear throughout the museum on video screens as the war goes along.

Lincoln's Hat Box
This is one of the few Civil War museums located in the North and it very much reflects the Northern point of view (perhaps "attitude") toward the Civil War. This is a different prospective from Civil War museums in the South that I have visited. While I say this, this is not to say that both sides are not represented in the collections and many of the artifacts that I will share with you in photos taken on this trip are primarily Confederate - perhaps because these belonged to prominent and recognizable names.

You move along to the next gallery "American Slavery: The Peculiar Institution 1850-1860" in which there are exhibit cases along two walls and a scene of a slave auction that you walk into the middle of. This is done with mannikins who, while not animated, speak to each other so that you are in the midst of what is taking place.

From here you go on to "First Shots, 1861" and you find yourself standing in the middle of the first shots fired - the firing on Fort Sumter, South Carolina.  On one side of the darkened gallery is the fort and on the other side a cannon and two men who are firing it. You listen to the two men (again well done mannikins) and you will see the cannon flash and roar with corresponding hits lighting on the fort. Well done, especially with a good explanation accompanying artifacts of what took place and why.

The war has begun and you move on to "Making of Armies", a gallery of artifacts of recruitment, equipment and uniforms of both sides. What is interesting is that they have contrasted the two sides showing in parallel what each side's soldiers were given and used. This gallery continued along to the next with a similar theme - "Weapons and Equipment".

Union Blue Uniform

Confederate Butternut Uniform (No, not Grey)

The galleries continue along - "Campaigns and Battles of 1862", "Battle Map, 1861-1862", "Camp Curtain" (the largest Union camp in the Civil War and located in Harrisburg, PA) which is another scene that you walk into, "Why Men Fought 1861-1863", and "Civil War Music" where you will hear recordings of music from both sides and a collection of field and brass instruments of the period.

Blood stained Sleeve from General Pickett's Coat when wounded at the Battle of Gaines Mill, Virginia

Stonewall Jackson's Gauntlet

At this point you are lead down a flight of stairs with pictorial exhibits on the walls to the First Floor Galleries - another 9 exhibits. The first exhibit that you come into is "Gettysburg, 1863" and because of the proximity of this museum to the battlefield and that it is a battle fought in Pennsylvania, this is one of the largest galleries. You will see a Civil War cannon - and videos showing how it is loaded and fired. You will see videos of battle tactics and the loading and firing of muskets. The battle is well explained and there are many related artifacts in this gallery. As we entered the gallery I was reminded that this was July 2nd - day two of the three day battle and a very bloody day in history.  And there were some very important artifacts on display.

Robert E. Lee's Gauntlets
Robert E. Lee's Bible and Hat Cord
General George Pickett's Cap


Moving on in the museum, you come to "Costs of War" - Civil War medicine, "Women in the War", "Navy" - the war at sea, "Campaigns and Battles of 1864-1865", "Battle Map", "Theater" showing an award-winning video on the end of the war, "Lincoln: War and Remembrance" including "Meet Mr. Lincoln" an animated, computer Lincoln on a screen who answers questions, and an exhibit gallery with temporary, changing exhibits. At the end of the galleries there is an exhibit on Civil War Soldier Reunions with photographs and contemporary descriptions of what the men on each side remembered - and you see them meet each other in these photographs as old men who once faced each other in battle.

If you have any interest at all in the Civil War you can spend a full day at this museum. The museum is not without its faults - some of the labeling of artifacts is out of order, and there are exhibits in galleries that do not follow consistently in time sequence which can be confusing to anyone not familiar with Civil War details. All and all, it is well worth the trip and a very interesting museum for anyone who has an interest in the American Civil War or would like to be introduced to its history. There are artifacts here on a level that I have not seen elsewhere in a general Civil War collection in regard to whom they belonged to. The museum has 4,000 artifacts and 21,000 archival documents. That is quite a collection!

We had an enjoyable day. We will go back again at sometime in the future. And we avoided the storm and spent the day constructively entertained.


Wednesday, July 9, 2014

Don't Drop the Flashlight Down the TOILET!

Whether it is a Roadtrek or any other RV the one statement that comes up repeatedly on RV Forums is "The black tank monitor never works right!" - and that is so true. My black tank monitor has never shown empty. We have had the dealer/service center change two of the sensors - the bottom two - and this requires leaving the old sensors in place while two new holes are drilled into the black tank for two new sensors, and then after inserting and locking the new sensors into the tank, moving the outside wiring from the old sensors to the new ones. That did not work. Well, that worked for about a day and then the black tank sensor went back to showing 1/3 full. Our monitor either shows 1/3 or 2/3 full when it is empty - and sometimes it will change day to day between 1/3 and 2/3 when it is checked when empty. Then when we are on a trip after one or two flushes of the toilet the monitor will then show that the black tank is full - and remain that way until the tank is dumped when it will go back to 1/3 or 2/3.

I know all of the tricks that are suggested to correct this. Put a bag of ice cubes down the toilet into the black tank - NO BAG, JUST THE ICE CUBES - and drive for several hours. This did not change anything - and if you have a macerator don't do this unless it is a hot day and you know all of the ice will have melted by the time you dump the tank. Then there is flush the black tank method. With a macerator you cannot flush the usual RV way though a garden hose connected to the gravity dump hose which shoots water into the tank and cleans it out. You have to use a flexible wand - which we have - and then connect the hose (NOT A FRESH WATER HOSE) to the wand and then put the wand down through the toilet flap and into the black tank from the top down. The water pressure from the hose is supposed to clean and flush the black tank - and with the macerator you dump the tank after you do this. That did not do much. Instead of getting out and hooking up the wand which means pulling a garden hose into the Roadtrek through the door and then to the toilet. One word of caution - never let go of the toilet pedal when using a wand and let the flap close on the wand - you will break the toilet flap and you will be faced with an expensive repair bill. (I have not done it but I know someone who has.) I have poured gallon jugs of clean water down the toilet flush hole until the tank shows full and then dump again. This does about the same job as the wand - still 1/3 or 2/3 on the monitor after dumping this to empty. Then there is the GEO method. With the GEO method you put a mixture of laundry water softener and laundry detergent into the toilet and let it sit there until the next dump. This is supposed to clean the tank, the sensors and the laundry water softener (Calgon) is supposed to make the walls of the tank and the sensors slick so that nothing will stick to them. We tried this for a year - and it did not correct the monitor. We tried a combination of this with RV toilet chemical and that did nothing different. We just use RV toilet chemical now in the tanks to prevent odor, digest solids and toilet paper, and to lube the valves (the chemical I use has lube in it for this purpose). So I have tried it all and the sensors still don't work for the black tank. I happen to be lucky and the sensors do work for everything else - at least they appear to be accurate. Many find that the sensors don't work for anything -and again this is universal to RV and Travel Trailer.

So why would such poor sensors be used. I can't answer that. There are some sensors that claim to have a better design and there is even a sensor system that reads the level of contents inside the tank from outside - like sonar. The only system that I have heard really works is that outside system and it is called SeeLevel, if you want to look into it. But this article is not about that...

So how do you know when your black tank is full? It is simple you look into it. You can tell by looking into the toilet with the flap open and looking for water (or whatever else) coming up the waste pipe that connects the toilet to the black tank down below. There is only one problem. It is dark down that hole!

The way to look down into the toilet to see if the black tank is full is to use a flashlight. I have a nice little thee AAA batteries, 9 LED flashlight that fits nicely into the hand. It is more than bright enough to light up the inside of the waste pipe and if water is coming up - meaning the black tank is full - you will see it easily. I have only one problem doing this. I have been afraid that I will drop the flashlight and it will go into the bowl and down into the pipe and down into the black tank - and if that happens, disaster. It would require removing the black tank to get the flashlight out. There is nothing that will ruin a vacation more than having this happen. With a gravity dump toilet there is a slight chance that the flashlight might flow out, but with the macerator it will go into the macerator and destroy the macerator. I needed foolproof way to keep from losing the flashlight down the toilet. And I came up with one.

I created a paracord lanyard that holds the flashlight tight around my wrist so that it cannot slip off and even if I drop it, it is not going anywhere I don't want it to go!

What I have done is put a flashlight on a short leash that attaches around my wrist.  The flashlight does not have far to go as long as it is attached to the wrist with this lanyard. Of course, there are many ways to make one of these. I make mine from 550 Paracord that is made in the USA from nylon with a seven strand inner nylon core. The cord will support 550 pounds before breaking. Paracord is very popular and you will see bracelets (often worn to show support for our soldiers and first responders), key fobs, and other other accessories - like this lanyard. The slides on my lanyard are tied with a cobra knot and the end knot at the wrist is a decorative diamond knot. Any flashlight with a place to attach a cord or strap and anything strong for the strap will work. 

I seem to always be dropping things. The flashlight is now one thing I don't have to be concerned about falling down into waste pipe when I drop it. Now, when do you know when to start looking down into the tank to see if it is full. Ideally, you want to start to learn your family's pattern of use - how long typically does it take for all of you to fill the black tank - which in the case of the Roadtrek is only ten gallons. After a couple of years now, we have learned that after four to five days the black tank is just about full. After five days, it is certainly full. Knowing this, we will empty the tank after every four days on a trip. The tank should be at 2/3 when emptying - and of course, that is anyone's guess. If I am uncertain, I pour down water into the tank before we are going to dump it until - with the flashlight - I see the water coming back up the waste pipe. Then we dump the tanks.

And, of course, this cannot be reminded too often, after every time that you dump the black tank, immediately add at least one gallon of clean water into the tank. The black tank should never be dry. In the winter when winterizing, that gallon into the black tank is RV antifreeze instead of water. Keep the black tank wet and you will not have problems - this is said time and time again by RV and Travel Trailer owners.