Roadtrek

Roadtrek

Wednesday, October 23, 2013

PROPANE Part 1

Unless you have one of the new all-electric Roadtreks, you have a propane tank installed on your Roadtrek. The propane is used for heating your hot water, heating your Roadtrek with your furnace, running your refrigerator if you have a three way standard Roadtrek Dometic fridge, and cooking on your stove. If you have a Sprinter Roadtrek your electric generator is also powered by propane. This article will give you some basics about the propane system in your Roadtrek.

First I will share some very basic knowledge about propane. Propane is also called LP Gas. The L P is simply Liquid Propane. When propane is compressed it condenses into a liquid form. It is a property of propane that when uncompressed it changes into a gas. This is what makes it possible for propane to be carried in a tank. Natural gas cannot do this. So - basic number one - the propane in your propane tank is a LIQUID UNDER PRESSURE.

The propane tank in all Roadtreks that I am aware of is located in the rear, under the van chassis, behind the rear bumper.  A reader has shared that in older Roadtreks the propane tank is under the driver's seat floor with access to the fill and gauge is under the flip up step. At some point in change of year, Roadtrek moved the tank and access to the back of the van. To turn on the propane there is a valve located behind a cover right in the middle over the bumper. The valve that you see is a grey knob and like most valves is turned to the right to turn off and to the left to open. Clockwise to turn OFF. Counterclockwise to turn ON. In the compartment behind that cover there will be other components of the system - other than the on/off knob and a connection on a flexible hose to allow you to attach a portable gas grill to the Roadtrek's propane tank for outside barbecuing, don't touch anything else that is there. You will see an analog dial meter that will tell you how much gas is in the tank - though you can also find this out inside your Roadtrek on your monitor panel on the wall. There will be a place for a certified propane person to fill the tank and a pressure relief valve used when filling the tank. Propane is highly combustible. This is not something to fool with.

Let's take a tour of the propane system.

Here is where to look for the propane valve ->


 It is behind this cover ->


Open the cover by turning the white tab on each side to clear the cutout on the cover.
Here is everything "propane" for your Roadtrek ->


What you are looking at above is where to turn on the propane to use it in your Roadtrek and where a certified propane distributor will fill your propane tank for you. The yellow cap is the connection for the propane fill - DO NOT TOUCH THIS.  The red ring to the middle right is the overflow pressure relief valve for the propane. DO NOT TOUCH THIS. The grey it all goes into is the propane tank. What is not seen in this photo is the auxiliary barbecue connection hose which is to the left side and in this photo is tucked down behind the bumper. THE VALVE THAT YOU TURN IS IN THE VERY MIDDLE WITH THE BLUE LABEL.

Here is the ON/OFF VALVE that you will turn ->


Let's get to the systems that you have on your Roadtrek that use propane and what you need to do to get them to operate.

The first thing that you are going to do whenever you first turn on your propane is to light the stove to make sure that the propane is actually flowing through the system. You always want to do this so that you know that the propane has filled all of the gas lines. It is only at the stove that you can actually see the result of this first hand. So we will start with the stove.

STOVE

The stove is the only appliance without a self-lighting pilot light. You must light the stove with a flame that you produce with a match or a lighter. The best thing to get to light the stove is one of the extended reach butane lighters used for barbecues. This lets you get close without getting too close.

Open the glass cover that is over the two gas stove burners. Each has a knob. Look around the edge of each burner and you will see a small, thin brass tube coming up. This tube will be the pilot that will ignite the burner.  With the propane valve on in the rear of the Roadtrek, light the lighter in your hand. You only want a small flame. Turn on either one of the burners by turning and pushing its knob. Bring the flame to where that brass tube is (you will probably hear and smell gas flowing) and the gas should ignite. Adjust the knob to a low flame and let go. The burner is lit. Let it burn for a few seconds and then shut it off. Light the other burner the same way. Your propane is flowing through all of the propane system in your Roadtrek. Turn off the stove. Of course, if you are planning to cook right then and there, your stove is lit and ready to cook. In any case, when you are ready to cook on the stove, do the same thing to light it.

Let me just repeat again why this is done each time you turn on the propane. If you do not do this and go to start your hot water heater or start your 3 way fridge on propane, you cannot see the burner that lights with the burning propane. If the water does not get hot or the refrigerator does not start to cool (most likely with an ignition trouble light on the fridge control panel) you will not know why. By lighting the stove first you eliminate the problem that the propane may not be flowing. Once the stove lights you can be sure that there are no clogs along the propane line. Do be aware that this tells you nothing about leaks.

REFRIGERATOR

Most Roadtreks come with a Dometic three way absorption refrigerator. These work using propane, 12 volt battery power, or 110 volt shore power. Since I do not have this type of refrigerator I can not tell you any details about its operation. A detailed manual should have been included with your Roadtrek just for the refrigerator. I can tell you that this refrigerator does not work like your fridge at home which is a condenser system. An absorption refrigerator has ammonia running through it that must be heated and one of the ways it is heated is with a propane flame burner. To ignite that flame you need to have battery power and you should put your battery switch on before trying to turn on the fridge even when using propane. Do read the manual for your refrigerator. If you don't have one, you can download one for your model fridge on the Dometic website.


END OF PART 1
PART 2 NEXT WEEK

Wednesday, October 16, 2013

WASHING A ROADTREK

Washing the exterior of a Roadtrek is no different from washing a car, but the Roadtrek is much taller than a car. My Roadtrek is 8 feet 10 inches tall. Some Roadtrek models are taller. Many commercial car washes will not accommodate that height. In some areas there are commercial truck washes and they will be able to wash the Roadtrek, but in some areas those are few and far between, if there are any at all. When traveling I have seen some car washes that are nothing more than a large and tall bay that will fit the Roadtrek and you get a timed wash with soap and water through a wand attached to the wall or ceiling by a hose. You pay for so much time and do it yourself. There is nothing like that near me - and perhaps not near many others. When my Roadtrek gets dirty, I wash it myself.

The trick was figuring how to get up high enough to do at least a passable job of getting all that needs to be cleaned clean. A ladder works but you would need to be up and down on that ladder and moving it all around the sides to wash the Roadtrek. It really would take more of a scaffolding - and that was not something I was going to set up just to wash the Roadtrek. No, there had to be an easy and fast way and I came across what I needed by chance.

I was shopping in Costco one day and found this.


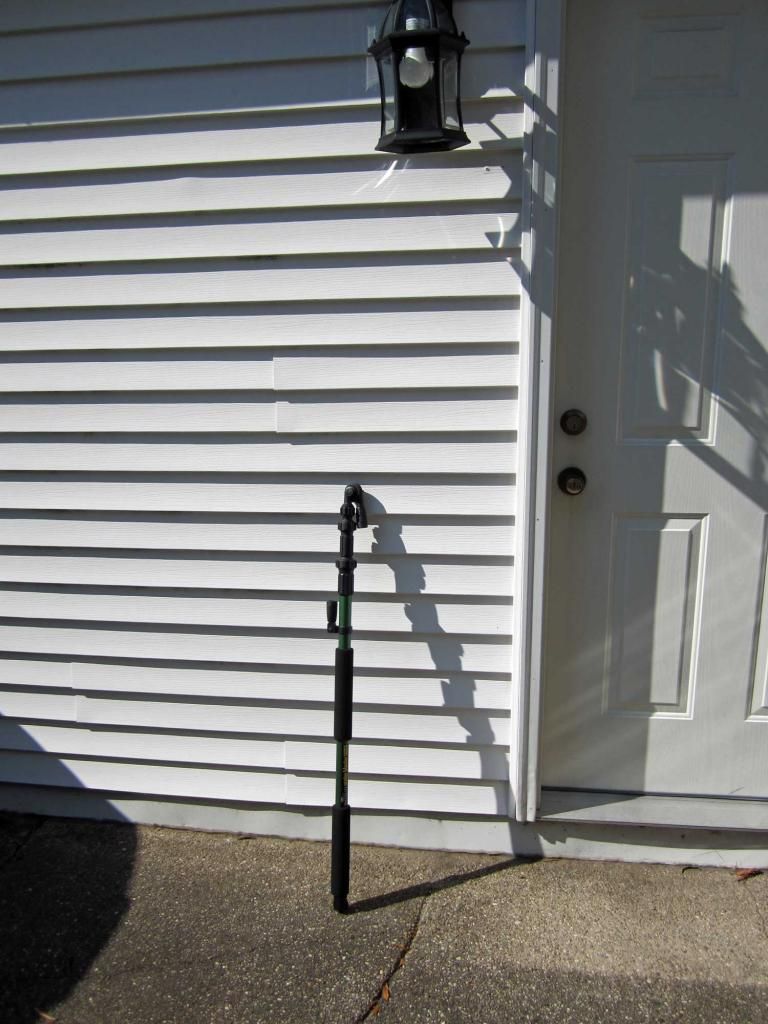
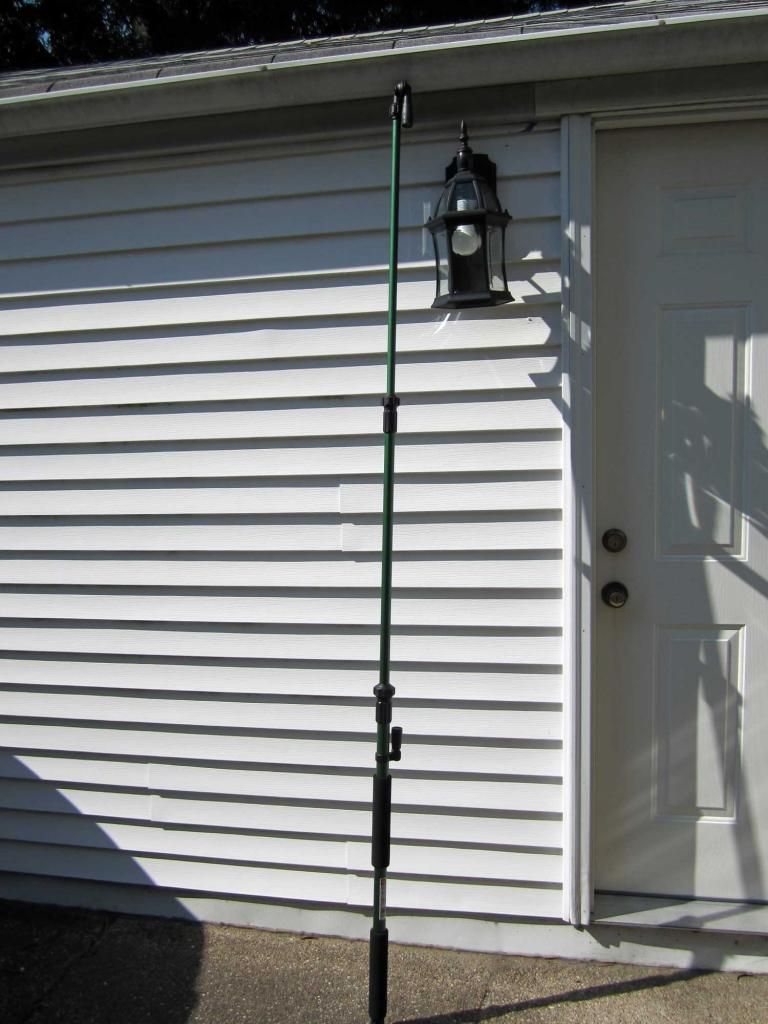
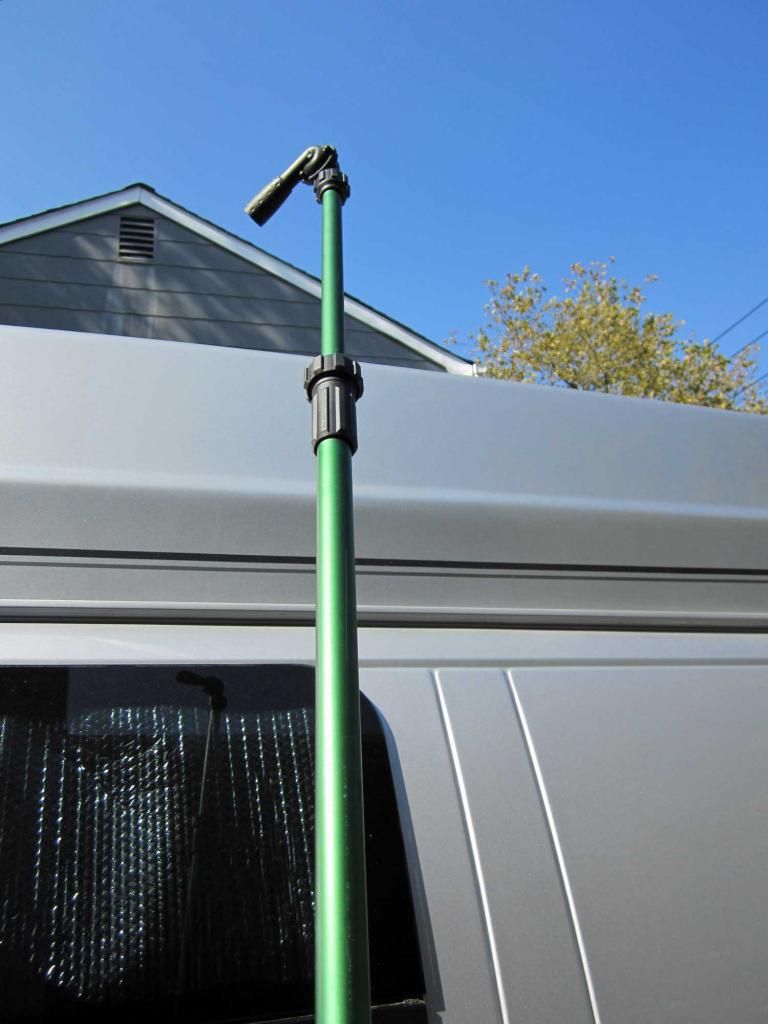
This is an extendable wand that connects to a garden hose, has a shutoff valve at the bottom, and extends well above the height of the Roadtrek. It is made not only for washing RVs but also cleaning gutters on houses. The water is under mild pressure when it comes out and includes two swappable nozzle ends. One end gives a straight stream of water with more pressure, and the other end gives a fan of water with less pressure. One screws on to the directional water end of the wand while the other is screwed onto a storage spot at the top of the lower section of the wand. The wand is made by Bonaire and no longer is found at Costco but is sold at Lowes. Here is a link. At the time of this writing it is $19.98. According to the link at Lowes the wand extends to 6 feet in height. It is possible that the wand I purchased at Costco extends longer as it reaches the roof of the Roadtrek from the ground.

Collapsed to its shortest length.
Fully extended.


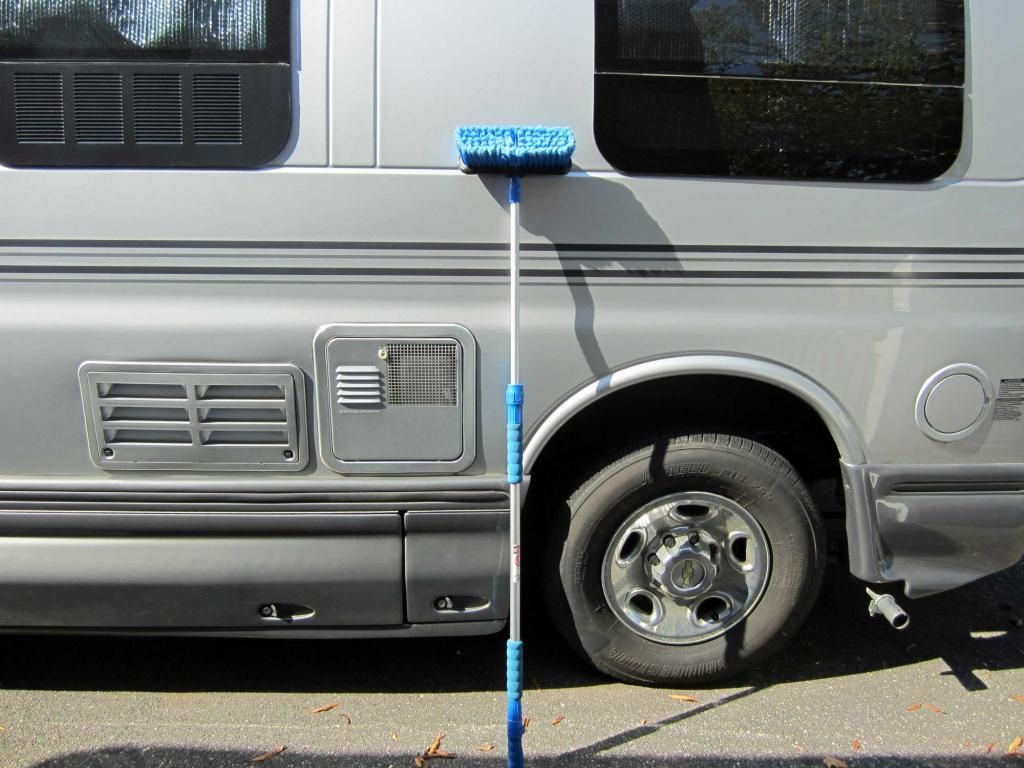
Of course, this is used connected to a hose and is held up with both hands so it will more than reach the top of the roof. Once I had this the rest was easy. Add to this wand a soft, car washing brush that will reach up high and this can be found at any auto store. I found mine at Walmart and while it is not as tall as the wand and does not easily reach the top of the roof. I can get it onto much of the roof by holding it up above my head and I am only using this to get soap onto the Roadtrek.


This brush can be used connected or not connected to a hose. There are some that not only connect to a hose but also can have car wash soap put into a dispenser on the brush. You want one of these made for car washing so that the brush will not scratch the finish.  I do not connect the brush to a hose but leave the hose connected to the wand. I use a bucket filled with vehicle soap and water.


Pick a car wash soap of your choice. This one is a wash and wax. There are many others to choose. The oval bucket (found at Walmart) works very well with the large brush head. 

Once you have all that you need the rest is simple and I can wash the Roadtrek in about 45 minutes or less. Mix the soap and water from the hose in the bucket according to the directions on the soap bottle.

Connect the wand to the hose and with the valve on the wand OFF extend it to a height that will reach where you need to reach. Turn the water spigot connection on full. Be aware that once the water valve on the wand is turned to ON the wand will get a little unmanageable so hold on tight.

First wet down the entire Roadtrek - top to bottom. Avoid spraying water into the vents and there are vents for the air conditioner, there are vents for the refrigerator, vents for the hot water heater, and vents for the furnace. Of course, water may drip in, but it is not a good idea to spray into these vents with water. Also avoid spraying directly down into the black tank vent on the roof.  And stating the obvious - do close all of the windows before you start including the roof fan vent!


With the entire outside wet you are going to start washing the Roadtrek. It is a good idea to start at the roof so that the dirt that comes down off the roof will be washed off when you wash the sides. I can only reach so far with the brush. When you are going to use the brush, turn off the valve at the bottom of the wand. The hose remains full of water and is not easy to move around with the long wand on the end. Set it down on the side out of your way. Put the brush into the bucket of soap and get it full of soap and water. Pull it out and reach up to get the brush onto the edge of the roof as far as you can. Brush the soap on and all around. There are components on the roof so you have to be careful. There is the top of the fan, there is the cap to the blank tank vent, and there is the antenna. You might have solar panels. I rely on the water from the wand to do most of the washing on the roof. Mostly I am washing the edges with the brush. I did notice that the inside of the rain gutter (the channels that run along the side where the roof meets the van get particularly dirty and I did use a foot high, folding step stool to get myself up to be able to see and reach inside that channel. GENTLY scrub with the brush with soap. I discovered that there is sealant in there to keep the roof water tight. Don't scrape off that sealing compound! Work in areas at a time with the brush - on the roof and in the gutters and rinse thoroughly with water from the wand. As you proceed you will get to the sides of the roof so only worry about the top and gutters now.

I now move on to the rest of the van and I do this in sections.  You may start anywhere. For a logical progression all around I start at the front of the driver's side where the fender and the wheel are. working from the edge of the hood down and as far as where the driver's door starts. Put soap and water on with the brush. Scrub with the brush gently and loosen all of the dirt and grime. The rinse with the wand. The water from the wand will push all of the dirt down and away. Wash from top to bottom.

As soon as one section is done move on to the next and move around the entire van this way. Soap with the brush, gently scrub, set the brush aside, turn on the water valve on the wand and rinse. I get the entire van in this manner washing about three foot sections at a time. Each side is three sections. The back doors are two sections - one door at a time. The front is done in two sections. Once you get to the front, you can use a step stool to get the brush up to the three skylight windows.

Once the van is entirely washed, I go around looking for black spots from road tar. These are easily removed with a bug and tar cleaner spray found in any auto store.

Give the undercarriage a rinse with the wand. The wand reaches nicely under the entire chassis. This is especially important if you live where salt is used on the roads in winter and you have driven your Roadtrek on salted roads. That salt will do a lot of damage underneath and it is a good idea to wash it off as soon as you can - though most of us have to wait until Spring to do that.

You may want to dry all of the places that you can reach. To do this use a chamois. I just let the sun do that job for me and it dries quickly with few streaks. 

If you are using a soap with wax, do not get the soap on the backup camera. The wax will obscure the camera lens.

Never use a power washer on your Roadtrek (or any RV). I am sure some will disagree, but when washing an RV is discussed this is always stated by many. There are a lot of places on an RV that are sealed and that sealant will be blown away by a power washer and you will then have leaks inside your RV. Skip the power washer. This wand has enough pressure to do the job and not do any harm used wisely.

I recently bought "Pocket Hoses" for my home to use in the garden. These are the hoses seen on TV that are small and then expand in length when filled with water. I thought that I would use this to wash the Roadtrek. I got halfway through the job when the hose burst. I suspect that being moved around so much on the asphalt driveway is what put an unrepairable hole into this thin walled hose. I suggest using a regular solid garden hose for the job.

With tools made for a job, the job is easy - and fast. As I said at the start, I can wash my Roadtrek in about 45 minutes or less that and includes set up and break down. I do not get very wet. It is almost impossible to wash any vehicle and stay completely dry. If used properly, this wand will not get you wet unless you are in the back splash.

So now you have a nice clean Roadtrek in less time than it takes to drive to have it washed and it cost you very little after the first wash, buying the tools and soap.