
When we purchased our house we liked that there were two chainlink fence gates that crossed the driveway at about the house-line and cut off the house's side entrance and the garage from the front of the driveway. At one point we had a circular driveway put in to avoid backing into the large avenue that we live on and with that we replace the chainlink fence with a white picket vinyl fence. We replaced the gates also with the equivalent in white vinyl. The left side of that gate stuck into the width of the driveway about two and a half feet. And that was just enough to make pulling the Roadtrek into the part of the driveway where it would have to go just too tight - especially if we ever would like access our side door - the door we most use as our entrance to the house - again. So the fence gates would have to go! Not a problem - I thought! Before - side opposite to the side that had to be removed. Both looked the same at the start.
 Before - side opposite to the side that had to be removed. Both looked the same at the start.
I figured that it would be no big deal. After all it was a vinyl fence - plastic. Plastic breaks, if nothing else, easily right? Well, I went out and tried to pull the cap off the post that gate was attached to. It would not come off, so I went to one of the other posts and gave a yank. With a small effort it lifted off and I looked inside. Not a problem! The post was hollow. Surely, the post that I needed to remove would be just the same. I got a block of wood and a hammer and started to hit the side of the cap on the post I needed to see inside of. With a few hits, it started to lift and I looked inside. Oh boy. It was not only filled to the top with cement, but the former metal post that supported the chainlink gate sat in the middle of the cement and down into the ground. It also looked like the vinyl post had attached itself tightly to the cement as well. There would be no pulling that up like a sleeve once I got the rest of the fence detached, as had been my plan.
So what to do. I went out to the Internet and started looking at ways to cut cement. Now, it seems like every project I start out to do I discover that there is one more saw that I do not own. I recently bought a reciprocating saw (like a sawz-all) that I never thought that I would need to cut off some branches on a large and overgrown holly bush that flourishes in my front garden. As I seem to be allergic to holly when it comes into contact with my bare skin (something I learned the hard way turning holly wood on my lathe), that project turned out to be an experience. I thought that perhaps I could use this saw to both cut the concrete and the metal pipe. While it should cut the metal without much of a problem, there did not seem to be a blade for it to cut concrete. Recommendations seemed to be a grinder with a cement cutting blade followed by a metal cutting blade ending with a metal grinding wheel to flatten the remaining pipe flush with the ground. I watched some You-Tube videos of the use of one of these, watched sparks flying everywhere and the control that seemed to be required to keep one of these in one's hands without doing great harm to one's self and got a bit leery.
I asked a friend what he would do. He is the type of guy who does physical things - with much more ease that I can. He suggested going at the cement with a sledge hammer and then cutting the pipe off at the base. Hmm. OK. Safer, but that plastic fence post around the cement was going to make cracking the cement even with a sledge hammer a tough job.
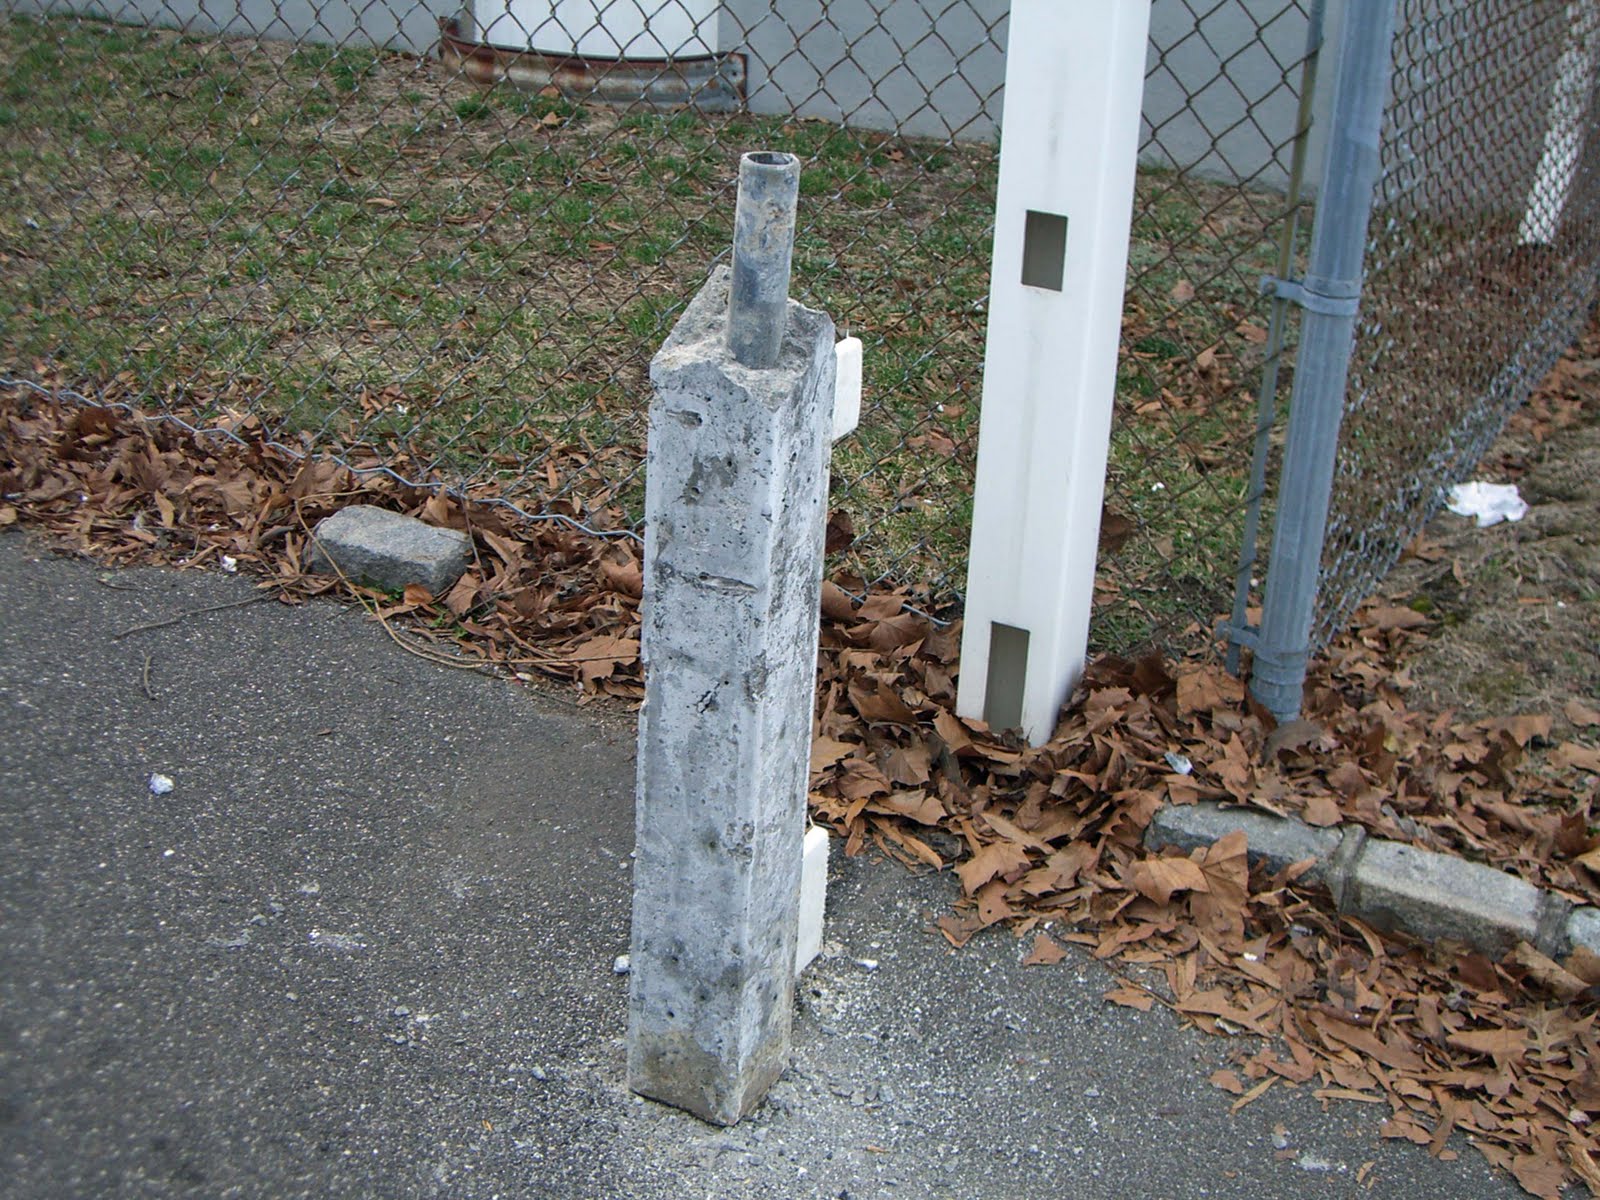
I decided to get started and see what would happen. I was able to easily unscrew the two gates from the posts. Only the left post was a problem. The right post could stay just as it was and the far left post - that did not stick into the driveway could stay as well. It was just the left post that the gate was attached to that had to be removed. I took my reciprocating saw and tried to cut off the fence portion from that post. I started the cut flush with the post. As soon as I passed through the plastic the cut stopped. The blade hit concrete. I had to move beyond the first picket to be able to cut through both the top and the bottom cross pieces of the fence. With that cut and a few cuts next to the other post (which was not filled with concrete) the fence came away and the two posts remained. I peered down at the concrete and top of the metal fence post. I took my shop hammer an whacked. It bounced nicely back up and did not bother the concrete at all.
I had a thought. I got out my crow bar. I put it under the post and hit in with the hammer. It seemed to go between the concrete and the asphalt on the driveway. I gave a lift and the concrete post and metal post inside seemed to move about a quarter inch. It went back down when I removed the tool. I tried this several times and did get a bit of movement, but that metal post was certainly cemented below ground as well. No hits to the top of the plastic was bothering the concrete any at the top of the post. I took a cold chisel - never had any use for it in
the twenty or so years that I have owned it and tried that with the hammer on the top of the concrete. Nothing- a little dust and a few marks. I tried the crowbar and the hammer at the top and found that the vinyl could separate from the concrete but that did not get me far.I then took the saw and cut two parallel cuts down the back of the plastic post about two inches apart. There was a space of about four inches from the top of the post to where the concrete started. What the heck, maybe I could get the crowbar down and bust the vinyl post off the concrete. That worked. It took a lot of effort and a few more cuts as I went down the post but I was able to break all of the vinyl post away - in many pieces but it was gone. Now I was left with a column of concrete with a metal pole going down the middle and two remaining pieces of the plastic fence crossbar with concrete inside.
I gave a few smacks with the hammer again and the cement just looked back at me and I swear it smiled. I took the cold chisel and placed it on the top of the column and hit it with the hammer. A few shards came away. My wife who is "always right" said that I should do this on the opposite corner as the metal pole seemed to be closer to the edge there and indeed the metal pole did seem to be coming up through the cement on an angle. I put the chisel next to the metal pole in that spot and against the concrete and whacked. A chunk game off. "So, I was right," she said. I proceeded to do the same and bit by bit chunks started to come off. When the chisel did not seem to do the job any longer, the edge of the crow bar did.
 Each time I hit the end of either the chisel or the crow bat with the hammer. Some resulted in small pieces of concrete coming away and some resulted in large chunks falling off. I worked my way around the pole and down.
I was using my shop hammer - a rather good one. My wife was concerned that I would ruin it and at one point suggested that we go an buy another hammer. As the time was now past five in the afternoon, I said that we would do that tomorrow if we did not finish the job. I kept at the column with the chisel, the crowbar and the hammer. I kept coming to points where no matter how hard I hit or where I placed the chisel or crowbar, nothing would come off. There were just dents in the top of the cement. I kept at it and then another small chunk would fall, and a few more hits would result in a large piece coming away. By this time it was, just one more large piece and we quit for the night - but I kept on until I hit a spot about halfway down the pole that no matter how hard I hit - nothing would come off any longer. That was the point that I stopped. I had been working at this for almost three and a half hours. There it was about 18" of concrete with a metal pole sticking up out of the middle.

The next day we went to buy a larger hammer. Recently, a Harbor Freight store opened near by. Before this the closest Harbor Freight store was a state away. I bought a three pound sledge that came to an angle on the back and had a foot long handle. I looked at the large sledge hammers with the long handles and tried lifting one. I barely could get it up off the display shelf and went right back to the smaller hammers. Anticipating the need to cut the metal pole when the cement was finally gone I also bought a set of saw blades that said that they would cut metal, stone, cement, brick, and wood. I had not seen such blades before and for $10 for the set (and a 20% off coupon) it was a must buy.
We got home - my shoulder was still sore from the day before - I got my new hammer and and took a whack at the plastic piece still attached to the side filled with cement. The cement disintegrated and the plastic broke. Hmm. I went to the top of the cement and whacked. Nothing. I used the point at the back of the hammer and swung hard and a large chunk came off. Hmm. I kept whacking up and down the column switching from the face of the sledge to the point. In about twenty minutes the last piece of cement came away from the bottom of the pole. It was done - at least the cement was gone. Now I had to cut the pole.
I went into my workshop and looked at the new blades that I bought and then looked at another blade that I had. I had not realized that the blade said "bi-metal" on it and this should cut the metal pole. Perhaps I would not need the new blades after all. I installed this blade into the reciprocating saw.
I saw a video on the Internet that showed cutting with this saw flush. It said hold the blade to the ground and let the saw bend the end up to clear so that it will cut. OK. Let's see. I started the saw, held the blade on the ground against the metal, raised the saw up slightly and started it. The blade began to cut. It went in less than half an inch through and then the cutting seemed to stop. My wife decided that I should move around the pipe with the saw so I tried that. It cut again but then stopped again without much progress. I worked at it some more but the cut was getting no bigger. I looked at the saw blade and most of the teeth were gone. I moved the blade to a spot with teeth and tried again. The cutting started again but then stopped again. More teeth were gone. Obviously, this was not the blade to be using. I got out the new blades, picked a six inch long one and put it in the saw. The blade started to cut but I only got about halfway into the pole. I hit the pole with the sledge hammer to open the cut and it bent enough for the cut to be easily accessed. I started again but was not getting very far and this blade looked like it was wearing down. I took a longer blade from the package and tried the cut. This time, I kept at it with steady pressure on the blade in the cut slot. It took about ten minutes but the pole got to the point where another small cut and it would fall. And so it did. To our surprise, the base of the pipe remaining in the ground was filled with cement. We looked at the bottom of the pipe and that was filled with cement also. It was not the metal grinding away all of the teeth on that first metal blade - it was the cement. It was lucky that the blades that I bought were good for both metal and stone.
The edges of the stump of pipe in the ground were sharp. I tried hitting the edge down with the hammer and it did not fully do the job to rid the sharp edge. I did not want anything ripping up my new Roadtrek's tires. I have used my shop stationary belt sander to grind metal so I decided that if that would work, then my hand belt sander should work as well. It marginally smoothed down some of the metal edge. The sledge worked better and I kept going at the edge all around until it was relatively smooth and down. There was still a five by five inch hole around the pole in crumbled asphalt and that would need filling.
At least the cement and metal pole were gone. A job that I did not think that I was going to be able to do. Later we went to the local home stores - actually both of the large home store companies looking for asphalt patch. One store had nothing. The other did have a bucket of patch that was perfect for the job - but the directions said that it must be 65 degrees F or warmer to apply it. This cold day at the end of March it was about 40 degrees. Last week we had some days of warm weather but those seem gone for awhile with forecasts in the forties. It seems like it will be forever before it gets to be 65 degrees again. By then it is likely that the Roadtrek will have arrived. It is just wait and see now...
But at least that pole is gone!

No comments:
Post a Comment