I always have a little apprehension before taking a trip - even before the Roadtrek, but with the Roadtrek I start wondering before a trip what will go wrong on this one. Last season we encountered some of the strangest weather - a snow storm in October, a hurricane, and an earthquake all on trips in our Roadtrek. Of course, the Roadtrek had nothing to do with the weather, but you do feel a little more vulnerable out in an RV when the weather starts to go bad than you do in a hotel room. Well, anyway, we planned a trip to Maryland at the end of April to attend a living history event at Fort Frederick in the town of Big Pool, Maryland. There will be an article all about the event in the near future.
When we ended our last trip of the season in 2011, we had a problem - or perhaps I should say - the nonoccurrence of a problem with our grey water tank valve. The grey water tank is the tank that holds sink and shower drain water. This is different from the black water tank which is the tank that holds waste and water from the toilet. The problem with the valve was that the pull handle that works the valve would not push in to close the valve. This resulted in the grey water mixing in with the black water when the black water tank was dumped. This is not a good thing and it had been fixed last Fall for the same problem at dealer/service. Not a month after the repaid the same problem reoccurred. I contacted them back at that time and we agreed that in the Spring we would be back to have this fixed - and this time I would like a new valve installed. There were no promises about a new valve, but they would repair the problem. Planning this trip in April, we would make a first day stop in Pennsylvania to take the Roadtrek to dealer service. While it was there, we would have them change the oil in the generator which needs to be changed after the first twenty hours of use. We would be heading after that to Maryland but decided that as we did not know how late it would be in the day before the Roadtrek would be ready - and if there was any problem that we needed to come back the next day - we better stay that night in Pennsylvania. We made a one night reservation at Old Mill Stream Campground in Lancaster, PA. From there we would be going to Hagerstown, Maryland to the Yogi Bear Campground. Reservations were made weeks before, even though it is early in the season. We would stay two nights in Maryland and come back to Lancaster on the way home rather than drive through - which we could have done, but we were in no hurry.
Traffic, of course, is impossible and we were delayed getting off Long Island, in New Jersey and in Pennsylvania. We arrived at dealer service in a little over three hours. They took the Roadtrek right in for service and we spent the next two and and a half hours walking around the small shopping center that is about a quarter mile away. When we got back to pick it up, we were told that the valve did not need replacing but that the long metal wire that attaches to the handle on one side and works the valve on the other needed to be shortened, stopped from slipping, and tightened down. I have to share that I have my doubts that this will be the last of the problem.
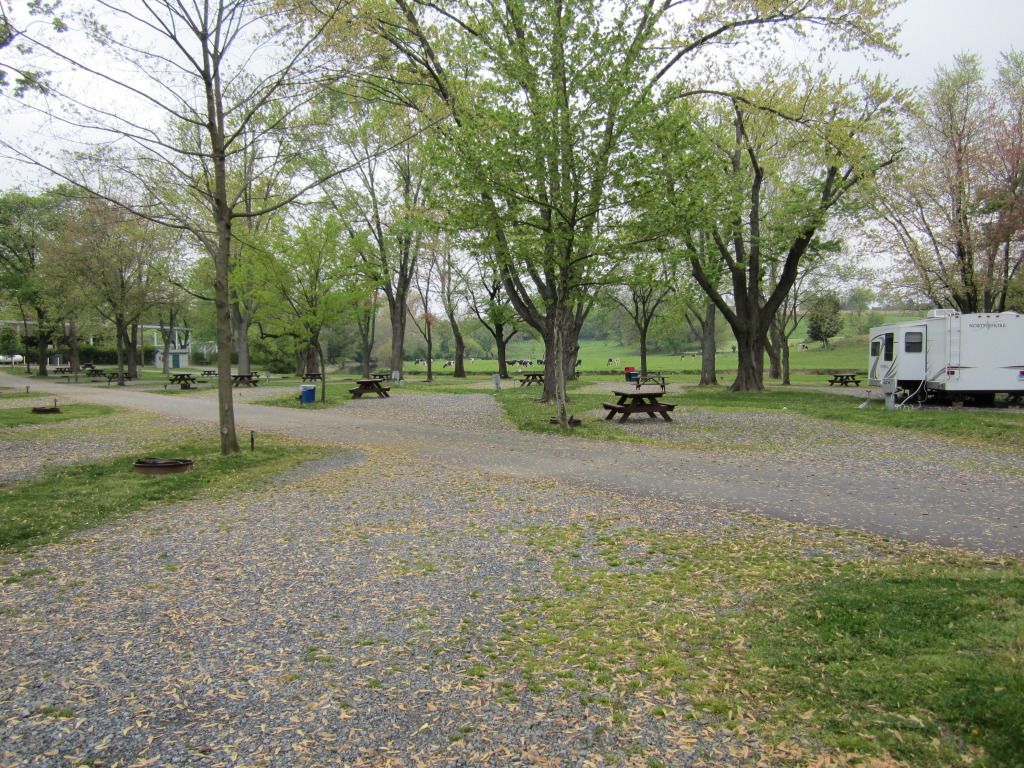
We then headed off to Lancaster. We stopped for dinner along the way, and eventually arrived and settled in at the campground. The space that we were assigned was told to us on a note left on the campground office mailbox. It was not a space that we have been in or near before and we followed the campground map to find the space. We got to where the space should be and Meryl got out to locate it, while I remained in the lane for directions as to where to back in. She came back perplexed saying that she could not find the space. I looked at the map and was pretty sure that we were sitting right in front of the space. At this campground the space numbers are marked on the electric hookup posts. I got out and walked over to what should be the space. There was the number on the back of the post. We pulled in and within a relatively short time found a spot on the gravel that was almost level. That was it for the night. We got out, hooked up the electric power cord and cable connection, and we were set for the night. We had filled our two fresh water tanks before we left so we had no need to connect to water.
One of the things that I got to play with on this trip is a new toy - a small Android tablet that has a five inch screen. It connects right up to the wifi signal at the campground and I can surf the web, read email, write articles, and so on. It worked great, though I did discover that writing anything of substance on a little screen keyboard is not ideal. The solution to that is a bluetooth keyboard that will connect wirelessly to the tablet and I quickly decided that one would be purchased when we got home.
Sleeping in the Roadtrek has become very comfortable. We got a good nights sleep. We slept late since we would only be traveling that day to Maryland. We stopped in Pennsylvania in a few of the places that we like to waste time at and we were off to Maryland. (If I detail those places, I will be telling you about these same places over and over again. If you look back at July 2011, you will see some of the places we went back to on this short trip.)
I wanted to arrive in Maryland in the daylight. We have been to Hagerstown many times in the past but never in an RV and never camping. The campground is actually located in Williamsport which is just outside of Hagerstown and is off on country roads. Even the GPS was having trouble locating the actual entrance and the route to get to it. The trip from Lancaster is about two hours and fifteen minutes. We arrived about 4:00 pm. I will write all about this Yogi Bear Campground in another article. Let's just say it was an experience!
The week before we left on this trip the weather had been wonderful. The temperatures were in the 70's! The second night in Maryland I started my little Android tablet, connected to the campground wifi, and got a weather alert on the screen for our location. There was a freeze warning over night. Temperatures would drop during the night to sub-freezing temperatures! How exciting! We had the heat pump on during the night and while it only works to about 40 degrees F, it kept us warm through the night. It did not start blowing cold - as it will when the temperature drops below 40 - so the actual temperatures where we were must have remained at around 40. All along the weather reports for that next day were that it would be "warmer". It was not.
I am going to skip over all of what we did in Maryland and bring us all back to Lancaster for the return trip heading home. Again, Maryland will be in two coming articles. We left Maryland on the late afternoon of Saturday, April 28th. We stopped for dinner along the way and did not arrive back in Lancaster until late Saturday night. Again, our space number was left for us in the mailbox of the office. This time it was easy to find the space, but once in the space I could not find a spot to get the Roadtrek level.
For us, being level on the site is only for comfort. For others whose RVs have propane refrigerators being level is very important. These refrigerators must be level to work properly. Almost all campgrounds claim to have level sites. We have wondered if what is level on a gravel site for a large bus size RV can also be level for our little Roadtrek. We have, so far, only been in one campground where the site was truly right on level - and that site was concrete pavement. On gravel sites, we get close, on a rare occasion get actually level, or don't even come near level. A big RV has levelers - mechanical legs that come down and adjust back to front, side to side until the RV is level. The Roadtrek is much too small and very much to close to the ground on the bottom to have any such device under the chassis. To level a Roadtrek you use large, square plastic blocks that look like giant "Lego" blocks. You put them against the front of back of the tires and drive up on them. We carry a set with us. We have used them once when we really could not get level at all. On this night, I was beginning to think that we were going to need to do this again.
What you do is drive around the space with the Roadtrek until you find a level spot. I have two bubble levels mounted inside the front of the Roadtrek - one on the dash and one on a straight part of the door. The dash shows level side to side. The door shows level front to back. I could just not find a spot and to get both level and in some spots both were way off. I drove all around that space - tried putting the Roadtrek diagonally in the space. Getting out I could see the slopes. I was getting angrier and more and more frustrated, but I was not going to give in. There had to be - or did there - a spot that was at least almost level. I got the front to back level and then keeping in that general spot moved a bit here and there to find an almost side to side level position. I gave up with the bubble just touching the level line. By then we were too tired to even bother pulling out the Lego blocks. Don't ask why we just did not pull them out to begin with. I announced an exasperated, "Good enough!", and shut off the engine. We went out to hook up and before we went in, Meryl asked if I wanted to turn on the propane. I asked her why as we don't usually turn on the propane - which has to be turned on from the outside. She said "in case there is another freeze warning". There is one thing that Meryl will tell you - Meryl is always right. I told her no, it would not be necessary to turn on the propane since the night before we were fine just with the heat pump.
Meryl is always right. There was another weather alert on the tablet - this one for Lancaster. It said over night freeze warning with temperatures dropping to sub-freezing temperatures possibly into the 20's. We went to sleep with the heat pump on. The heat pump by the way is a setting on the air conditioner. At about 6:00 am I was awakened by cold air blowing on my face. There are two directional vents for the air conditioner/heat pump that direct down onto the bed. My was pointing at my face. I reached up to feel the air blowing from the vent and it was COLD. This means that the temperature dropped below 40 degrees and with that the heat pump stops working - but it does not just shut down - that would make too much sense. No, it blows cold instead of hot. I reached over to the control panel - which is on the wall in the bed area and shut the unit off. I had the Android tablet at my side set as an alarm clock. I looked at the local weather reading - 34 degrees at the present time. I considered getting dressed and going outside to turn on the propane so that I could turn on the furnace inside and get warm, but decided that I would rather wrap up under the blanket and be a little cold than face the outside cold temperature. Yep, I should have listened to Meryl and turned on the propane last night!
Were the outside temperature the only thing that was unexpected, it would have been overall a great trip. As it was it was a very nice trip, but as has happened on so many other trips, there was a problem in the Roadtrek. This one, is not likely the fault of Roadtrek, but more likely has to do with the winterizing kit that I described was installed in the Roadtrek last November when we had the RV winterized. After flushing the toilet we could hear a hum in side the van. We were not sure where it was coming from but it was unlike any of the usual noises that one hears inside Roadtreks. We traced the sound to the cabinet where the water pump is located. This is where that winterizing kit was installed. I sounded like the water pump was running and it was not stopping - but it was a low hum and not the usual rumble that the water pump makes. I turned on the faucet to find little water coming out and then a burst of air and then more water, and more air and then water mixed with air. The water pump was sucking air. Where this air is coming from still remains to be determined and we are going back to the dealer service center sometime soon for this to be looked at and repaired. Basically, the pump is not priming because it is filling with air and not water - and there is more air than water. I won't go into further details. We shall wait to see what it is when it is repaired. Another unexpected trip to Pennsylvania is in our near future.
The morning that we were leaving the campground and would head home that night, we dumped the waste tanks at the campground. This should not have taken long but to dump partially full tanks you need to fill them up with water and this can take some time. All and all, with refilling one of the fresh water tanks so that we would have water on board for the trip home - just in case - it took about an hour and a half. With that all done, we left the campground to spend Sunday in Lancaster.
Sunday in Lancaster is not the best day to be in Lancaster. The Amish are a very religious community and there are a number of local businesses and restaurants that are closed on Sundays. There are a lot of places to shop and several outlet centers. There is also the farmlands to drive through. A Sunday for the Amish is either a "church" Sunday or a "visiting" Sunday. Either way the back roads in Lancaster are filled with buggies. We seemed to encounter them on the road always at almost the top of a hill or just before a blind turn. When driving in Lancaster and you come upon a buggy, always wait until the opposite lane of traffic is completely clear for some distance ahead - especially in a Roadtrek - and then pull into the opposite lane and pass the buggy. I have had long experience doing this with a car. It is a whole other thing with a Roadtrek where you are as wide as the lane.
Well, again, this trip proved to be one of our trips that something went wrong - the water pump. Sorry this article rambles a bit but the trip rambled and you get that experience reading this article. The coming articles about Fort Frederick 18th Century Market Fair and Hagerstown Yogi Bear Campground will be a bit more exciting - I hope.
Our travels in and life with a 2011 Roadtrek 190 Popular. An adventure in RVing by two people who have never been inside an RV or travel trailer before but find out of necessity that this is now their method of travel... In addition to our travels, you will find here many how to's about the Roadtrek and RVing in general, presented in a clear and concise way that are easy to follow - why reinvent the wheel when someone has done it before! DON'T PANIC
Roadtrek
Wednesday, May 16, 2012
Off on Our First Trip of the Season
Labels:
190,
Amish,
campgrounds,
camping,
Chevrolet,
Chevy,
Class B,
Maryland,
motorhome,
Old Mill Stream Campground,
PA Dutch Country,
Pennsylvania,
Popular,
Roadtrek,
RV,
travel,
vacation
Wednesday, May 9, 2012
Living in the Roadtrek - Hooking Up
Camping season is starting and I thought that I would give you some of the basics of hooking up a Roadtrek when you get to a campground. Pictured below is a typical campground site. This one is a site at Old Mill Stream Campground in Lancaster, PA. Here sites are gravel. There is a post with the 110 volt electric connections and the cable television connection. Next to that post is a pipe coming up from the ground with a fresh water spigot to connect your fresh water hose.
When you reserve a campsite what is included on that site depends upon what the campground offers and how complete a site you want. Not all campgrounds have cable television connections. Those that do may not have cable at all sites. Not all campgrounds have a sewer connection at every site. Those that don't generally have a central dump station. A basic site includes water and electricity. A full hook up site includes water, electric, and sewer. The cable television connection varies from campground to campground and may or may not be included at every site and may or may not be charged additionally for. What you pay for a site depends upon what you want at that site. If there is sewer connection at your site, there will be a closed pipe connection as shown below. You unscrew the cap, and dump into the hole. There will be a future article about dumping your tanks.
The Roadtrek has a 30 amp electric system. This means that a maximum of 3o amps of 110 volt power can be put into the Roadtrek. There is a thick electric cord with a 30 amp plug on the end. This is stored in the middle outside storage compartment, and comes out through an opening in the end of the storage compartment wall that comes out to a smaller, rear compartment that is open to the ground. You can see the storage compartments in this photo.
Below, you see the plug of the electric cord stored in the plastic liner of the opening between the two compartments.
This liner is designed to closee around the cord to prevent anything from coming into the inside of your storage compartment - like water, bugs, mice... This little hole has been dubbed the "mouse hole" by Roadtrek owners and it is often difficult to move the cord through that hole whether going in or out. You can see the other side of the mouse hole in the photo to the right. There is a cover that snaps into place when the cord is put away. When pulling the cord out, you flip this door up. When we first started we could not understand why the cord was not moving through until we got down and looked at what we thought should be the opening and discovered that there is a door there. You can also see in this photo where the water hose connects to the Roadtrek from the campground fresh water spigot. The water valve handle that you see there is part of the outdoor shower.
So, after you pull into your campground site, you are going to connect your 11o volt electricity first. You open the two compartment doors that you saw in the photo above, and pull out enough electric cord to reach the electric box at the campground site. You want to pull into the site so that the box is on the side of your electric cord. There is about 30 feet of cord. You can purchase an extension cord - specifically for 30 amp RVs that can extend this length if you need to. You should not need this at a campground. Ready to connect?
WAIT!
The electric boxes at campgrounds do not always work as they should. There may be a problem in the wiring or insufficient or too much voltage coming through the outlet. Any of this may seriously damage your RVs electric system if you plug into it. So what do you do? You test it before connecting. What you will need is a polarity tester which is found in most electric departments of big box stores and stores like Walmart. This is just a regular plug with led lights on it. If the LEDs light up in the correct pattern - which is shown right on the plug, you are good - and this means that the ground and the wires have been wired to the outlet correctly. To do this you will also need a 15 amp to 30 amp adapter. This test plug is a 15 amp house plug. The outlet that you want to test is a 30 amp outlet. The plug on a 30 amp outlet is much different and looks very much like the large plug that is on your household dryer. (Do not mistake these for the same plug - the one on your dryer is for a 220 volt line.) Any RV supply store including Walmart in the RV section sells an adapter. You want a 15 amp female socket to 30 amp male plug adapter. You plug your tester into the adapter and the plug of the adapter into the 30 amp outlet in the campground site electric box.
It is time to talk about what you will see when you open the door of the electric box. Most boxes will be set up for three types of amperage service - 20 amp (house type socket), 30 amp, and 50 amp. There will be three sockets inside and each will have its own circuit breaker switch. The 30 amp outlet is generally in the middle. It will have holes that match your plug and will be the same size around as your plug. The 50 amp outlet is for a much larger RV. There is a way to use that outlet for your 30 amp RV if there is no other, but I am not going to make this anymore confusing right now. The 20 amp outlet could also be used, but you will not have enough amperage in your Roadtrek to use all of the electrical appliances without tripping that circuit breaker - so for the moment - forget that too. You want the outlet that matches your Roadtrek plug. There is ONLY 110/120 volts coming out of any of these outlets - it is the amperage that changes. This is just like the current in your house, and can give you a serious shock if you are not as careful as you are plugging a plug into the wall of your house - but no more so. Before plugging anything in, make sure all circuit breakers are OFF. Even the ones you will not be using.
Now, when you are ready to test with your polarity tester, you plug into the 30 amp outlet with your tester connected through the adapter and then turn on the circuit breaker. Look at the result, and turn off the circuit breaker. If there is a problem with the reading, stop right there and go to the campground office and let them know. You need to be moved to another site or someone from the campground needs to come and fix the outlet.
The next test you will make is to check that the correct amount of voltage is coming out of the outlet. Again, you will need your adapter. You need a voltage meter. I found out that other than in RV supply stores, these are not easy to find and can be expensive. What I did was buy an item found at most big box stores called a "Kill A Watt". This is a multi-meter sold to check how much electricity different appliances use in your home. When it is plugged between an appliance and an outlet, it will show how many watts are being used by that appliance and since you pay your electric bill per watt you consume you can find out why your electric bills are so high. BUT this is not what we want this little meter for. If you plug this unit just into an outlet, one of the readings it will give you is how many volts are coming through. It has a digital readout. So I take my adapter, plug that socket into the Kill A Watt plug and then plug the 30 amp end of the adapter into the campground 30 amp outlet. Turn on the circuit breaker switch and look at the readout. The reading should be no lower than 110 and no higher than 132 - though you really do not want to be over 130. Turn off the circuit breaker and unplug the adapter from the electric box. If the reading is not correct, again, go to the campground office. Plugging into this outlet will damage your RV.
Everything OK with the tests? Then you are ready to hook up your power line. But WAIT!
Now, what? How complicated is this?, you must be thinking. You could just plug your power cable into the box, but it is a good idea to have something in your electric line that will protect your RV just in case. What you need is an RV power protection device. There are two popular makes - Surge Guard and Progressive. Both do the same job. Some prefer one over the other. There are models that can be wired permanently into your RV electric system and there are portable models that simply plug into the campground outlet and you plug your power cord into the protector outlet. These are not cheap and they are much, much more than a surge protector like what you plug your computer into at home. You can purchase these directly from the companies that make them or you can find them at RV supply stores. We chose the Surge Guard but only for convenience in ordering as it is the one that is sold at Camping World.
Above you see the Surge Guard plugged into the power outlet of the campground and the power cord of my Roadtrek. You also see that the electric box has your space number on it. You cannot mistake which box is the one you are supposed to plug into. At some campgrounds your box will be next to the box for the next space. Here there is only one box.
The power protector unit is going to monitor the voltage coming out of the box. Believe it or not, just because it tested correctly when you checked with your volt meter does not mean that conditions do not change in the voltage at the campground and the voltage go too low or too high. Also it will protect from spikes and surges due to lighting strikes. This is a must have. Repairing your RVs electric system and replacing your TV and electronics is far more expensive than the $300 plus that one of these sells for. You can buy a lock box that will prevent the theft of your portable power unit. Watch this video about the Surge Guard Power Protector.
When you have your power cord into the protector unit and then plug that into the campground box, you turn on the circuit breaker in the campground box. With the Surge Guard on my model an LED comes on to show that it is connected. There is a two and one half minute delay until power is sent to the RV. This is a safety feature to protect your air conditioner. After the very long two and a half minute wait, a second LED lights and there is a click. There is now 110 volt power in the Roadtrek. You can now run anything in your Roadtrek from the 110 volt outlets. If you exceed 30 amps you will trip the circuit breaker - likely both inside your Roadtrek and outside in the box. Everything that you plug in takes away some of those amps. Most electric appliances have the number of amps it will use printed somewhere on it.
Now you have your AC current running from the campground. If you have cable service at the campground you next will connect your Roadtrek to the cable connection on the electric post. We have been at sites where the cable connection is split and we connect right next to where the next door RV is connected. This is fine. There is a box in the rearmost outside side compartment with a coaxial connector. You must supply your own cable and you can buy this anywhere. It is the same coax cable used for your cable TV in your home. Open the box in the Roadtrek compartment. You can see the box here on the right. Screw one end of the cable onto this connector. You can get push on adapters for these connectors and they work a lot easier but the screw on connector is more secure. Next, connect the other end of the cable to the campground connector. That is all you need to do to connect. To use the cable you must go into your Roadtrek, make sure the A/B switch that switches from rooftop antenna to cable is switched correctly, and turn on the TV. Set the settings on the TV to SOURCE: CABLE and then scan for channels. Always scan for channels. You do not need a special cable box like you do at home. The campground is converting the cable companies decoded digital signal to an analog signal that does not need a converter box at each TV. Do not be surprised when you see that the signal through the cable is Analog.
BEFORE CONNECTING YOUR ROADTREK TO POWER MAKE SURE YOUR BATTERY DISCONNECT SWITCH INSIDE THE ROADTREK IS ON!
The Battery Disconnect Switch is on the above panel located to the right of the side Roadtrek door and it is the switch furthest to the RIGHT. When the switch is ON the red indicator light on the right of the switch lights. The switch says "Battery" and Battery Disconnect switch as it is known, is a poor name for what is does.
When you have your power cord into the protector unit and then plug that into the campground box, you turn on the circuit breaker in the campground box. With the Surge Guard on my model an LED comes on to show that it is connected. There is a two and one half minute delay until power is sent to the RV. This is a safety feature to protect your air conditioner. After the very long two and a half minute wait, a second LED lights and there is a click. There is now 110 volt power in the Roadtrek. You can now run anything in your Roadtrek from the 110 volt outlets. If you exceed 30 amps you will trip the circuit breaker - likely both inside your Roadtrek and outside in the box. Everything that you plug in takes away some of those amps. Most electric appliances have the number of amps it will use printed somewhere on it.
Now you have your AC current running from the campground. If you have cable service at the campground you next will connect your Roadtrek to the cable connection on the electric post. We have been at sites where the cable connection is split and we connect right next to where the next door RV is connected. This is fine. There is a box in the rearmost outside side compartment with a coaxial connector. You must supply your own cable and you can buy this anywhere. It is the same coax cable used for your cable TV in your home. Open the box in the Roadtrek compartment. You can see the box here on the right. Screw one end of the cable onto this connector. You can get push on adapters for these connectors and they work a lot easier but the screw on connector is more secure. Next, connect the other end of the cable to the campground connector. That is all you need to do to connect. To use the cable you must go into your Roadtrek, make sure the A/B switch that switches from rooftop antenna to cable is switched correctly, and turn on the TV. Set the settings on the TV to SOURCE: CABLE and then scan for channels. Always scan for channels. You do not need a special cable box like you do at home. The campground is converting the cable companies decoded digital signal to an analog signal that does not need a converter box at each TV. Do not be surprised when you see that the signal through the cable is Analog.
Electric and Cable all Hooked up - Campground End
Electric and Cable all Hooked up - Roadtrek End
Notice that the wires come down through the bottom opening of the compartment allowing the compartment to be closed and locked. Feed them down and through when making your connections.
Electric and Cable all Hooked up - Roadtrek End
Notice that the wires come down through the bottom opening of the compartment allowing the compartment to be closed and locked. Feed them down and through when making your connections.
Now, you have all of the electric hooked up and we when we stay at campgrounds, this is where we stop. We fill our two water tanks at home before we leave and refill them as they empty along the trip from the campground fresh water spigot. We do this because we come and go from the campground every day to sight-see. When we leave in the morning to see the sights or visit and attraction, all we need to do to unhook to leave is to unplug and put the wires away for the day. When you unplug - always click the circuit breaker in the campground box OFF before pulling the electric plug. This is just a safety precaution. If we also had the water connected it would take a lot more time to disconnect the hose, drain the water from the hose, and coil it up to put it away.
If you would like to hook up to the campground water supply the process is simple. What you need:
25 foot drinking water hose - these hoses are specially made with out lead and chemicals in the hose that can be harmful. The hoses are generally white in color with blue markings. Make sure the packaging of the hose states "Safe for drinking water". You may want one or more shorter lengths of hose also - they start at 4 feet, go to 10 feet, and go to 25 feet.
Pressure Regulator Valve - limits water pressure to no more than 40 psi so that the RV plumbing will not be damaged. Inexpensive ones can be found at all RV supply stores and Walmart. There are better valves with gauges and that can adjust different pressures. Your choice. We have been using a brass one that is found at Walmart.
In-line Hose Water Filter - optional - Available at RV supply stores and Walmart. This is a blue plastic filter that has screw on connections at each end. It comes with a reusable flex connector. You can buy packages of refills or just purchase the same kit again when the filter is dirty. You should get a year or more out of one of these filters depending on use.
The Roadtrek came with a snap on hose connector set screwed on to the City Water Fill. These are available at RV Supply stores also. You may not want to use one from a garden store, as it may not be lead free and drinking water safe. If you have one, snap off the end that connects to the hose and screw that to the end of your hose.
Connect your water connection AFTER connecting your electricity. You don't want to be standing in water puddles while you are plugging in your electric connections.
To hook up to the campground water - called "City Water" - you are going to connect from your Roadtrek City Water fill connection to the campground fresh water (or potable water) spigot. I use an additional four foot hose just to make it easier with all of the interconnections to be made. I carry two ten foot hoses, one four foot hose, and a twenty five foot hose. You will rarely, if ever, need all of these together (though at my house to reach the outside water faucet I need an additional 25 foot hose that we keep at home). You should also carry spare hose washers to keep the connections from leaking.
I connect the water filter connection to the campground water faucet. To the filter I connect the four foot hose and be sure to connect the filter with the arrows in the direction of the flow. At the end of the four foot hose I connect the pressure regulator. The pressure regulator must be connected in the right direction also and there are arrows to follow on the regulator. The ten or twenty five foot hose then goes on to the end of the pressure regulator and the other end of that hose goes on the the City Water connection of the Roadtrek which is pictured to the right. Both parts of the snap on cap are in place in this photo and you can also see a plug that is supplied with this connector by Roadtrek to plug into the end to keep road dirt out of your water supply. The connector makes this connection easier so that you do not have to reach into this tight space and screw the end of the hose to the inlet. So far this snap connector has not leaked. Once you have the hoses connected. You need to make sure that the City Water VALVE is in the correct position. That valve is pictured below in the top center of the photo and this is the correct position for the valve to be in to let water flow into your plumbing and to your sink and toilet. If this valve is in its other position it will not flow water into your plumbing but will fill your rear and eventually your front fresh water tank. I learned this the hard way on the first night we had the Roadtrek and watched as water overflowed my rear tank and shot all over the ground out of the relief valve. (There is a better way to fill your fresh water tanks - use the openings - one in the side of the driver's door frame and one in the frame of the passenger side, rear, cargo door frame. You just push a hose into the hole and let the water flow in until it comes up to the top of the opening. Shut it off quickly or stand back to not get wet.) When using a City Water connection you DO NOT turn on your water pump. If you are using water from your tanks, that is when you use the water pump.
If you would like to hook up to the campground water supply the process is simple. What you need:
25 foot drinking water hose - these hoses are specially made with out lead and chemicals in the hose that can be harmful. The hoses are generally white in color with blue markings. Make sure the packaging of the hose states "Safe for drinking water". You may want one or more shorter lengths of hose also - they start at 4 feet, go to 10 feet, and go to 25 feet.
Pressure Regulator Valve - limits water pressure to no more than 40 psi so that the RV plumbing will not be damaged. Inexpensive ones can be found at all RV supply stores and Walmart. There are better valves with gauges and that can adjust different pressures. Your choice. We have been using a brass one that is found at Walmart.
In-line Hose Water Filter - optional - Available at RV supply stores and Walmart. This is a blue plastic filter that has screw on connections at each end. It comes with a reusable flex connector. You can buy packages of refills or just purchase the same kit again when the filter is dirty. You should get a year or more out of one of these filters depending on use.
The Roadtrek came with a snap on hose connector set screwed on to the City Water Fill. These are available at RV Supply stores also. You may not want to use one from a garden store, as it may not be lead free and drinking water safe. If you have one, snap off the end that connects to the hose and screw that to the end of your hose.
Connect your water connection AFTER connecting your electricity. You don't want to be standing in water puddles while you are plugging in your electric connections.
To hook up to the campground water - called "City Water" - you are going to connect from your Roadtrek City Water fill connection to the campground fresh water (or potable water) spigot. I use an additional four foot hose just to make it easier with all of the interconnections to be made. I carry two ten foot hoses, one four foot hose, and a twenty five foot hose. You will rarely, if ever, need all of these together (though at my house to reach the outside water faucet I need an additional 25 foot hose that we keep at home). You should also carry spare hose washers to keep the connections from leaking.
I connect the water filter connection to the campground water faucet. To the filter I connect the four foot hose and be sure to connect the filter with the arrows in the direction of the flow. At the end of the four foot hose I connect the pressure regulator. The pressure regulator must be connected in the right direction also and there are arrows to follow on the regulator. The ten or twenty five foot hose then goes on to the end of the pressure regulator and the other end of that hose goes on the the City Water connection of the Roadtrek which is pictured to the right. Both parts of the snap on cap are in place in this photo and you can also see a plug that is supplied with this connector by Roadtrek to plug into the end to keep road dirt out of your water supply. The connector makes this connection easier so that you do not have to reach into this tight space and screw the end of the hose to the inlet. So far this snap connector has not leaked. Once you have the hoses connected. You need to make sure that the City Water VALVE is in the correct position. That valve is pictured below in the top center of the photo and this is the correct position for the valve to be in to let water flow into your plumbing and to your sink and toilet. If this valve is in its other position it will not flow water into your plumbing but will fill your rear and eventually your front fresh water tank. I learned this the hard way on the first night we had the Roadtrek and watched as water overflowed my rear tank and shot all over the ground out of the relief valve. (There is a better way to fill your fresh water tanks - use the openings - one in the side of the driver's door frame and one in the frame of the passenger side, rear, cargo door frame. You just push a hose into the hole and let the water flow in until it comes up to the top of the opening. Shut it off quickly or stand back to not get wet.) When using a City Water connection you DO NOT turn on your water pump. If you are using water from your tanks, that is when you use the water pump.
That is it! You are completely hooked up.
Newer Roadtreks cannot and do not remain hooked up to the sewer connection at the campground site. The newer Roadtreks have a macerator which grinds up sewage and do not use a gravity feed hose to flow sewage from the tanks to the dump hole. The macerator pumps the waste out and uses a much thinner hose than a standard RV dump hose. With newer Roadtreks - post 2007, I believe - you only open the sewer hole when you are ready to dump. Older Roadtreks have a standard gravity dump system. With these you can connect your sewer hose to the dump hole, open your grey tank valve (not toilet waste but just water from the sink and shower drains) and let water flow as you use it. You do not open your black tank valve until your are ready to dump as you do not want your black tank - toilet waste tank - to ever dry out. Some caution about sewer gases coming into the RV if you connect to the sewer and leave it that way while you are using the RV. Others say there is no problem and no odor.
Subscribe to:
Posts (Atom)