PART 1 WAS THE LAST ARTICLE
We have had many readers contact us to write an article with photos of how we store things in the Roadtrek when we travel. Meryl is a master of finding a place for anything to fit - in the house, in the car, and especially in the Roadtrek. I asked Meryl to write this article. Here again is Meryl...
PART 2:
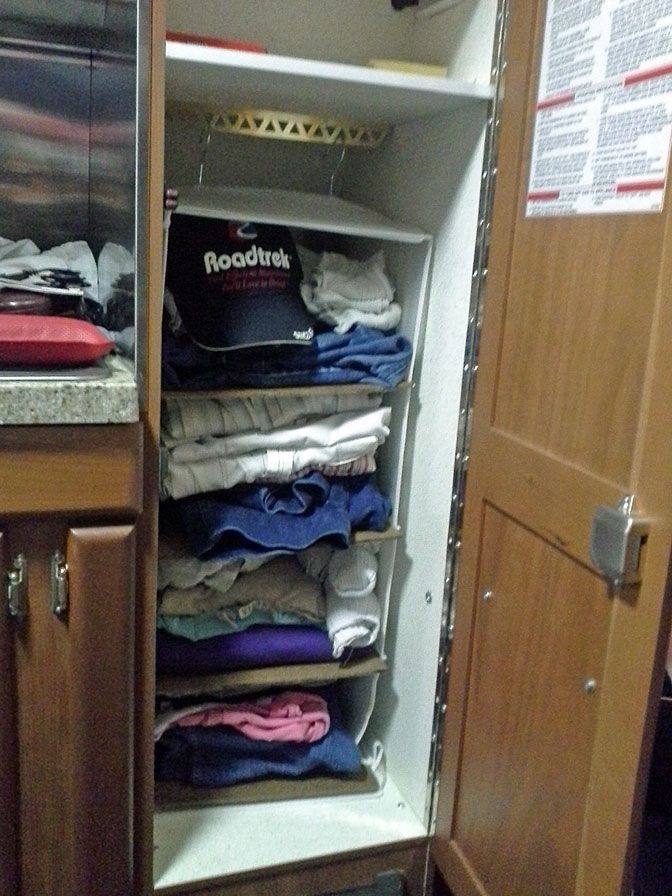
Next we move to the drawer. We have assorted small items that we might need during the trip - kitchen scissors, a day of the week pill box that has OTC medications in it - aspirin, acetaminophen, etc. Not that we take them daily, but different meds are in the different days for convenience and so that we don’t need to buy bottles of each for the rare times they might be needed while we are traveling. Hooks to go on either side of the Roadtrek and a rope to go across from them for laundry or drying towels are in here. Anything else like this is in here for easy access.
We have had many readers contact us to write an article with photos of how we store things in the Roadtrek when we travel. Meryl is a master of finding a place for anything to fit - in the house, in the car, and especially in the Roadtrek. I asked Meryl to write this article. Here again is Meryl...
PART 2:
Next we move to the drawer. We have assorted small items that we might need during the trip - kitchen scissors, a day of the week pill box that has OTC medications in it - aspirin, acetaminophen, etc. Not that we take them daily, but different meds are in the different days for convenience and so that we don’t need to buy bottles of each for the rare times they might be needed while we are traveling. Hooks to go on either side of the Roadtrek and a rope to go across from them for laundry or drying towels are in here. Anything else like this is in here for easy access.
We move now to the back part
of the Roadtrek. The overhead cubby next
to the kitchen holds 3 plastic boxes that stack on each other. One box is items that we pack into our last
minute bag as we go to bed the night before and get up in the morning before
our trip - spare eyeglasses, prescription medications, etc. The other 2 boxes stay in the Roadtrek and
each of us has one. This is the stuff we
need to pull out at night for getting ready for bed and for getting ready in
the morning. Toothbrushes and paste,
hairbrushes, combs etc. We each put in
our box what we decide we need. I keep a
spare charger for my cell phone in mine, husband (you know, "Me" in the site title) does not. Next to these boxes in the cabinet there is a
small open top plastic crate. This holds
items we might need during the evening or the morning, such as husband’s razor,
that are a little too big for our individual boxes. By having an open top crate they do not fall
out when the cubby door is opened. We
also keep a lightweight tarp that comes in a case in here so we can easily
throw it on the bed below so that if we need to go on the bed in our street
clothes the bed is protected. On top of
all these boxes we keep a folded plastic shower curtain, which we use to cover
the back of the bed if it may rain, so that when we open the back cargo door in the
rain the bed will not get wet. By
keeping it on top it keeps the items below it from shifting (except when we
need it on the bed of course). We keep
these items in here as it is easy to reach them from the aisle and they are
near the kitchen counter, where most of them will end up.


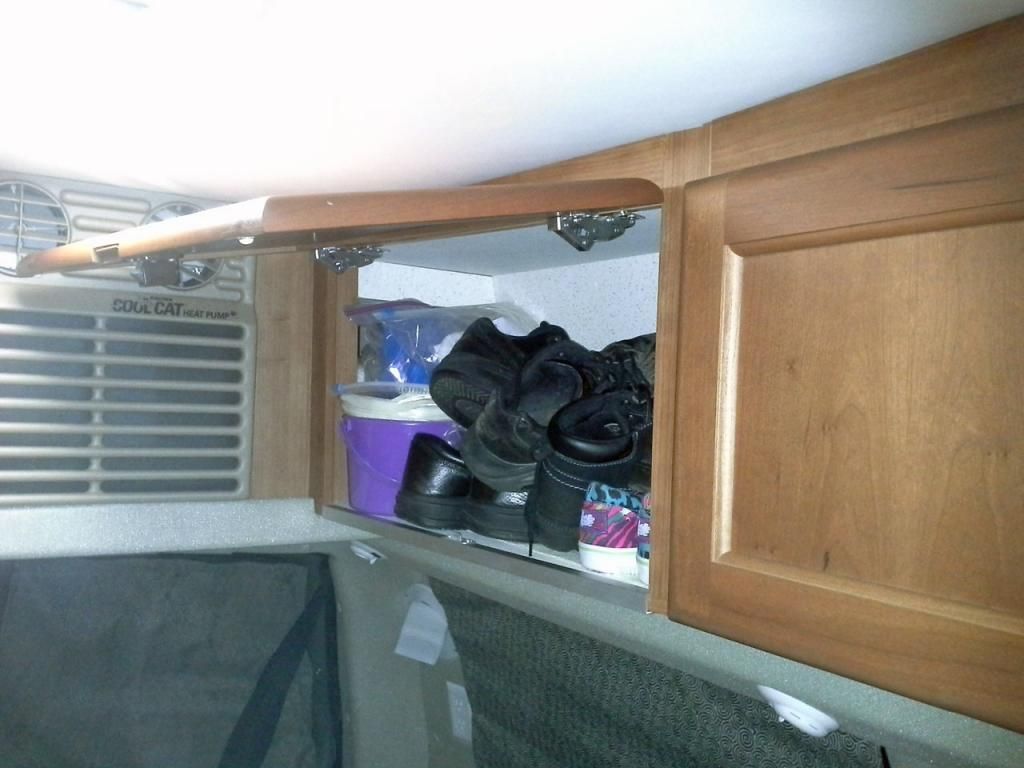
The next cubby back on this
side has odd items. In the back area of
the cubby we keep spare tee shirts to sleep in case we are cold at night. There is a spare set of pillow cases in case
they are needed. All of these are in
plastic zip bags to keep them fresh.
There is also a small plastic pail to use when we go to the shower at a
campground to hold items needed for same.
In front of this, in the opening of the cubby door, I keep our spare
shoes. The spare shirts and pillow cases
are out of the way, but can be relatively easily reached from the bed, which is
where they would be needed. The spare
shoes are generally only used if the weather changes. Generally we know about the change and can
switch our shoes from the bed in the morning, but since they are in the door
area, they can also be grabbed from the aisle in front of the bed if
needed. I have 2 plastic mattress covers
on top of the shoes. These are to cover
seats if it is raining heavily and keep them dry and also helps hold the shoes
in place.

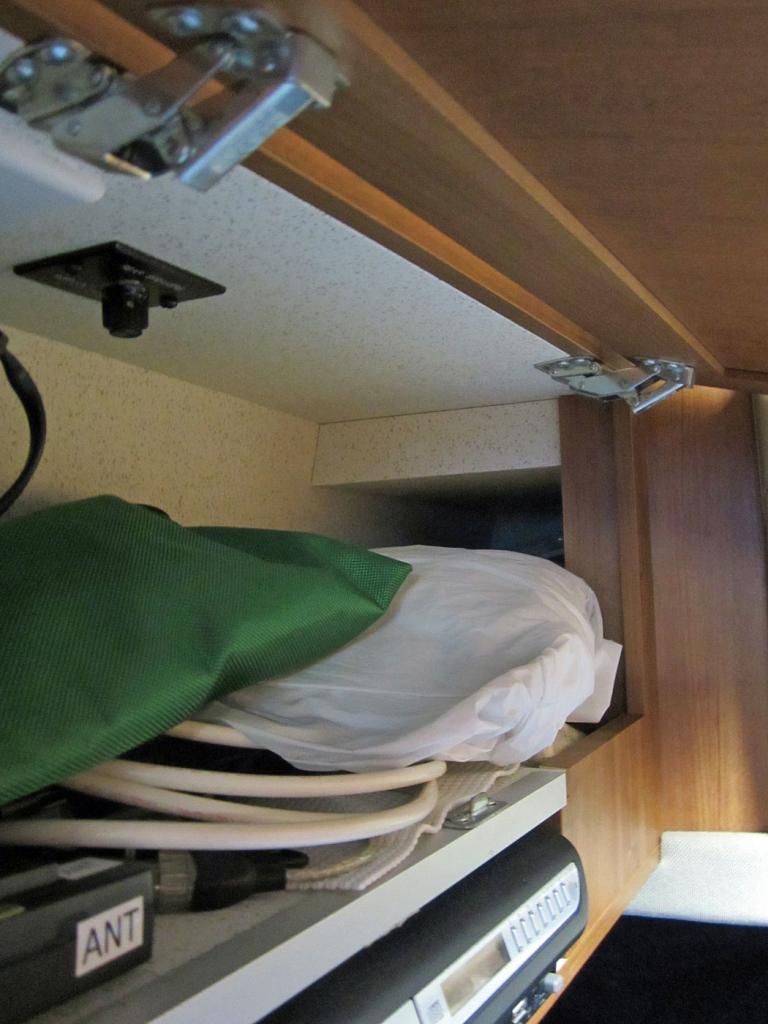
In the cubby on the passenger
side is all the TV related equipment as the TV is on this side. To the rear of the cubby I have shower towels
and washcloths also in zip bags. I find
this cubby is harder to reach as it is slightly higher than the ones on the
opposite side as it is above the DVD player shelf. So these items can be accessed for use, but
during the night it would harder to reach stuff in here quickly than on the
other side. The pail on the other side
should logically be in here, but since there is electronic equipment in the
front I did not want anything which is not soft to prevent damage to the equipment.

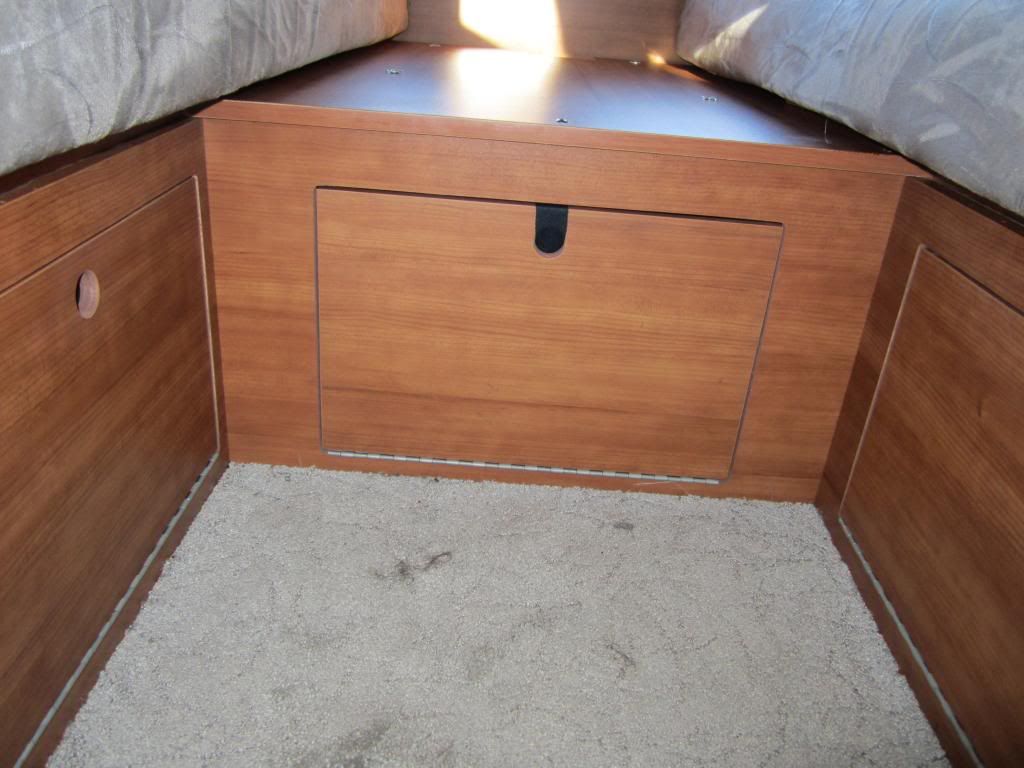
Now to go backwards a minute,
I have under bed storage. Since we do
not have the automatic power bed/sofa we have extra storage. We have a bench seat along each side of the
Roadtrek, with an area filled in between them across the aisle at the rear of the Roadtrek. Under the seat area on the driver’s side,
next to the section with the water heater, etc. we have a cubby. This serves different purposes depending on
the trip. Often it travels empty. If we have the bed broken down while going
for service, etc. it holds laptops and such.
If we are on a long trip it holds a laundry bag with an additional week’s
clothing and after switching, the laundry bag with the dirty clothing. A matching cubby on the opposite side already
has items, such as the jack, in it and I keep a handheld vacuum in here. Note that these 2 cubbies are where one
would put one’s feet if one has one seat across the back that opens to a bed automatically. In the cubby which sits
opposite the water heater section there is the indoor water tank along the
inside of the outside wall. I keep a
spare box of tissues, roll of paper towels and toilet paper in here between the
water tank and the door to this cubby. I
basically keep items in these cubbies which are not needed on a constant
basis. I am the only one who can access
these items when the bed is set up and anything in the center storage section
(next paragraph) has to be pulled out to get to them. There is a cubby door to
the area under the area filled in between the 2 bench seats at the back of the
Roadtrek, but we have this area filled from the back and I don’t use this area
for anything we need from inside.

When the bed is made up into
a king bed (as opposed to making up the bed area as 2 twin beds) the area
between the bench seats under the bed makes another storage area. We have a 2 section holder that we bought at
Harbor Freight intended to be used in car trunks, which is just short of the
height of this section and takes up about 80% of the space across and 80% of
the space front to back.

I put our "last minute" bag (stuff we need at home up until we leave is all tossed in here to come out to the Roadtrek for a trip) in here, sometimes laptops, stuff we buy en route, etc. I also use the space to the side of it for laptops and a travel printer on some trips (leaving more space inside it on those trips) and the space in front of it for my backpack if I bring it. This space, like where food is stored, varies on each trip as to what is traveling where. Items here are a bit large to find other places to keep it in the Roadtrek. I use 3 of the tension curtain rods across the front of the items (which may be further in than the front of the section) to help hold the items in place. If I need to access the cubby under the driver’s side of the bed the holder needs to come out (and I need to climb under the bed in this opening to get to the cubby to get stuff out). If I need to access the cubby with the spare paper goods I just need to move whatever is in the front. The holder can be folded down for storage or if we need to get something else large into this area. On one occasion I managed to get 2 cast iron flower pot holders into this area, on a diagonal mostly under the stuff there normally, and protruding out the front of the section into the aisle.

I put our "last minute" bag (stuff we need at home up until we leave is all tossed in here to come out to the Roadtrek for a trip) in here, sometimes laptops, stuff we buy en route, etc. I also use the space to the side of it for laptops and a travel printer on some trips (leaving more space inside it on those trips) and the space in front of it for my backpack if I bring it. This space, like where food is stored, varies on each trip as to what is traveling where. Items here are a bit large to find other places to keep it in the Roadtrek. I use 3 of the tension curtain rods across the front of the items (which may be further in than the front of the section) to help hold the items in place. If I need to access the cubby under the driver’s side of the bed the holder needs to come out (and I need to climb under the bed in this opening to get to the cubby to get stuff out). If I need to access the cubby with the spare paper goods I just need to move whatever is in the front. The holder can be folded down for storage or if we need to get something else large into this area. On one occasion I managed to get 2 cast iron flower pot holders into this area, on a diagonal mostly under the stuff there normally, and protruding out the front of the section into the aisle.
On the bed we put the laundry
bag during the day and evening. It is
moved to the third seat when we use the bed.
We also have small plastic baskets that we put eyeglasses, cell phone,
etc. in at night and these are left on the bed with a few items not needed during
the day. Items left on the bed are
pushed to the side and placed behind the kitchen and the toilet cabinet so they
don’t fly forward in a fast stop.
There is a cabinet which
hangs over the bed on the passenger side and has the TV attached to it. (Older model Roadtreks had the TV on the driver's side.) It has 3 shelves. The top shelf holds 2 plastic boxes, similar
to those used for food (again, crumpled plastic garbage bags helps keep these
in place). One holds first aid supplies
and the other sewing supplies, both for emergencies. The rest of this shelf is DVDs that “Me”
(husband) has put here. The middle shelf
has an assortment of fabric zipper bags that “Me” has put in, that hold electronic accessories, chargers, camera related items and computer related items, as well as a box of latex gloves for use in
dumping or anything else messy. On the inside
cabinet wall along this shelf to there is velcro which holds the
remotes to the TV and DVD player on the cabinet wall when they are not being used.
These items are here as they are easy to reach and fit the space. The bottom shelf, which is considerably
larger than the others, is one of those areas which holds different items on
different trips. In it normally is an
empty gallon water bottle for use when we need to fill the toilet when we want
water to flush the black tank without hooking up to the city water.
There is a battery operated lantern and the rechargeable power pack for the lantern. There is a small, Bluetooth keyboard. On various trips it
will also hold camera equipment, sweatshirts, my embroidery case, etc. (If this section is full with something else
my embroidery case will go in the same section as the towels already
mentioned.) What goes on this shelf is
stuff we need to be able to access and is too large to go in the smaller
sections/shelves.

END OF PART 2 - PART 3 IS THE NEXT AND FINAL ARTICLE IN THIS SERIES