Roadtrek

Roadtrek
Showing posts with label storage. Show all posts

Wednesday, September 3, 2014

Storage and How We Store Things in the Roadtrek - Part 3

PART 2 WAS THE LAST ARTICLE

We have had many readers contact us to write an article with photos of how we store things in the Roadtrek when we travel. Meryl is a master of finding a place for anything to fit - in the house, in the car, and especially in the Roadtrek. I asked Meryl to write this article. Here, once again, is Meryl...

PART 3:

 On the shelf over the toilet we have 2 fabric crates.  One holds cleaning type items - like Lysol spray, spray cleaner, etc.  The other holds personal type items - q tips, shampoo, bar soap for showers, etc.  On top of the box with personal stuff is the privacy curtain we made which hangs from the shower curtain track so that one can use the toilet en route without having to stop and pull the back window curtains closed.  Next to these boxes are a few latex gloves in a zip bag to use as it is easier to have a few out than pull the box out each time.  These are basically bathroom related items.  On the floor of the toilet compartment (we have an aisle toilet, not the permanent bathroom option) we have 2 boxes of camping toilet bags (wag bags).  Just in case something happens with the toilet we have these to use and we use them during winter trips when we travel without using the water system.  There are 2 boxes as one would shift around too much.


In the storage under the seat of the third front seat (in front of the toilet compartment) I have another set of personal and kitchen towels and another set of sheets and pillowcases sealed in plastic zip bags so that they can be changed on long trips.  The toilet chemicals are also in here.  I have a large accordion folder with the various instruction books and manuals in folders. A hair dryer is in here.   There is also a second spare  roll of toilet paper in here as it is easier to access quickly if needed.  We have quilted foil inserts (Reflectix) for some of the windows and they are also in here.  It is an area that can be reached fairly easily, but still takes some work, but is large.


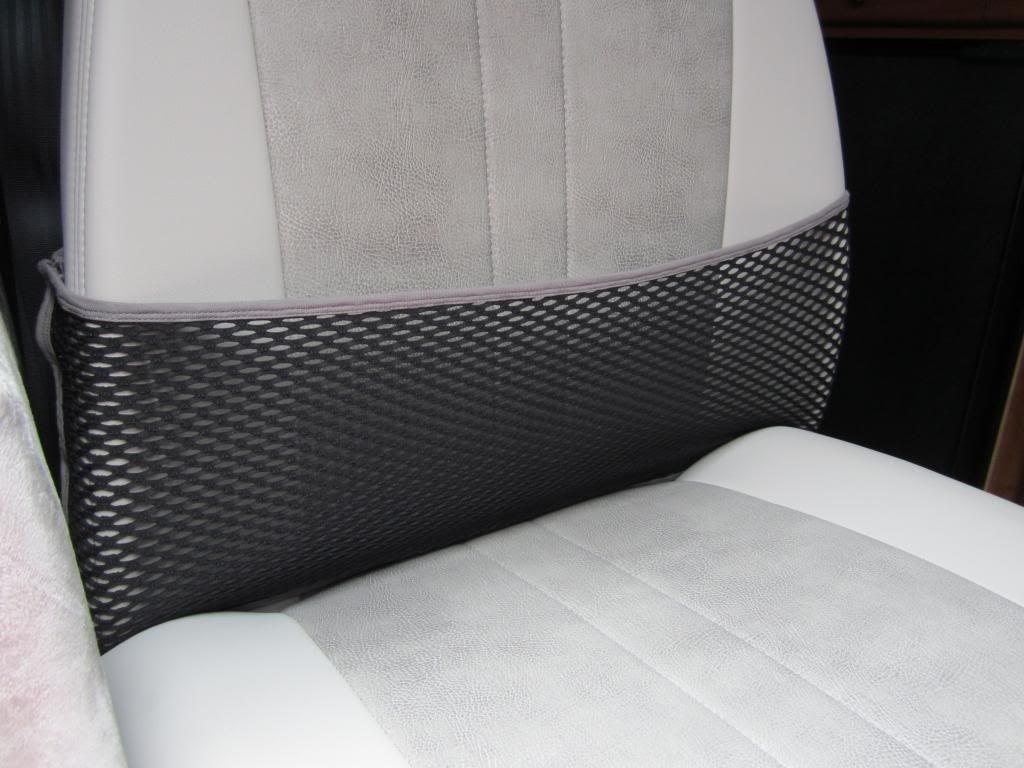
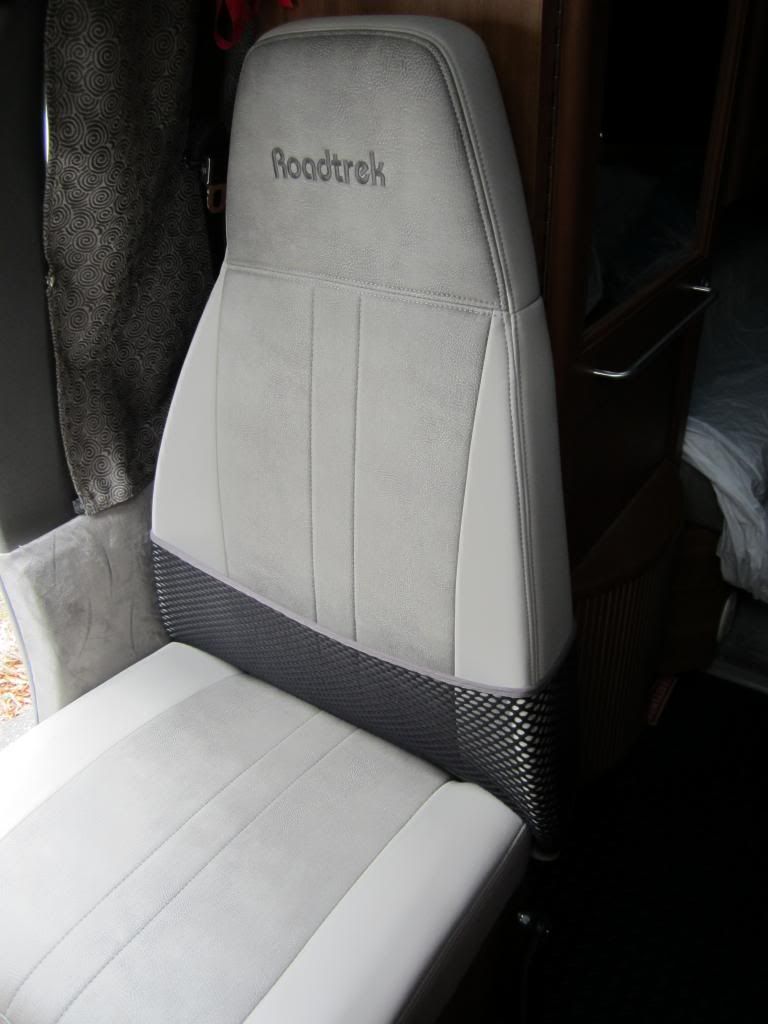
We have a mesh net that goes around the back of the third seat which can hold magazines, brochures, etc. on the front of the seat.  It is a convenient place for these.


On the shelf over the door we have hats to wear if it is sunny and a jacket for me is rolled up in here.  There is a folding “gopher”, the thing to pick up items dropped on the floor (or items at the back of the space under the bed if one does not want to crawl under.)  In the pocket for the opera window covers we keep a folder with maps of and information about campgrounds which we go to on a regular basis.   


We have the overhead front drawer, which was an option when we ordered the Roadtrek.  This holds an assortment of items - folded up rain jackets, a zippered bag with tools, a rechargeable electric drill/driver,  another with spare parts, a clipboard that holds stationery items inside, two pop up garbage cans - one for garbage and another to hold wet umbrellas if needed - and a vinyl box to hold magazines brought along to read..  There is more than this, but this is all I can remember.  The items here are fairly light in weight and are used from nightly to as needed and need to be easy to access. 


In the pocket on the back of the passenger seat is a fold up umbrella and a very small fold up seat.  On the floor behind the seat (in the carpeted front area, not the dropped floor) is a bath mat rolled up that we use as a door mat for the second passenger door when it rains.

In my map pockets I have reflective markers that we put out on the campsite ground when we find a level spot so we can find it again, walkie-talkies to use when pulling in and finding level, as well as when we pull out of our driveway at home.  A red light flashlight to use when hooking up at night (red LED does not attract mosquitoes).  Rubberized, knit gloves to use when setting up in wet or cold weather.  Coupon holders (I have travel coupons and coupons for food and stuff and for restaurants that I pull from our car and house hen we travel.)  I also have an envelope that holds items I have collected at home for this trip - reservations, brochures, etc.  Car charger for laptop, basically stuff I might need from the seat while riding or on my way out the door.

In the compartment over the windshield, I have a spare pair of glasses, more spare parts - such as fuses - and other small items that are rarely used as this is not an easy section to access with the sliding top draw in front of it. 

The glove compartment holds glove compartment items.  We also have a plastic box between the seats which holds other items related to or needed while driving.  On the top of the glove compartment I have sunglasses and we have the labeled, leather tags that that we made to snap onto the steering wheel at night to remind us to check and take care of everything we need to before we drive off in the morning.  During the day we keep a remote thermometer for the refrigerator in one of the cup holders over the glove compartment.

I have no idea what “Me” has in his map pockets other than sunglasses and eyeglasses.

Moving back behind the driver’s seat where we started, in the pocket there is a folding umbrella.  On the floor between the seat and the closet (where we started) there is a very small folding table, a windshield reflector, and a small folding step "Me" made.    
 
On the shelf over driver’s door is “Me’s” jacket rolled up as mine is on my side. 


 Wherever there is space that needs to be filled to keep stuff from moving I put the crumbled plastic store bags or sweatshirts if we bring them.

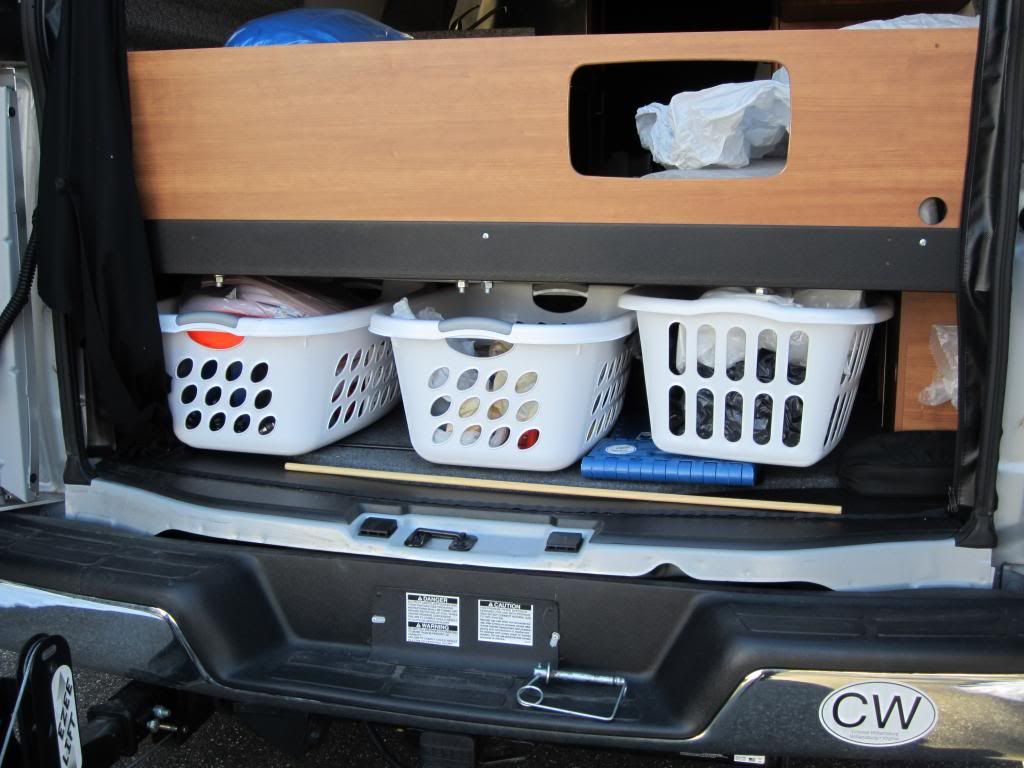
In the rear of the Roadtrek, accessed from outside, we have 3 laundry baskets to hold assorted tools and items we buy en route.

In the storage section outside under the driver’s side we have a thin coiled general use garden hose,  a can of bug spray (sealed in a plastic bag) and a spare TV cable wire.  There are leveling blocks, the water filter, a piece of swimming pool noodle, 3 potable rolled water hoses stacked on each other with a small plastic box in the middle of them with water related items (such as a water pressure device, hose washers, etc.), then a slightly larger plastic box with electric related items such as polarity and voltage testers, 30 amp to 15 amp converter and vice-versa, 50 amp to 30 amp adapter converter, a portable RV surge/power protector , a TV coax cable wire and, of course, the Roadtrek's electric line to attach us to the campground’s electricity.  I try to keep the water related items separate from anything, such as the bug spray, that one would not want near one’s drinking water.
I think that covers everything.  There are always odd items (both in that they are not normally with us and often in what they are) that have to be fit in on different trips.  It is generally a quandary where to put them, but I always manage to find a place that fits them, even if it does not seem the most logical place.


Wednesday, August 6, 2014

Storage and How We Store Things in the Roadtrek - Part 1


We have had many readers contact us to write an article with photos of how we store things in the Roadtrek when we travel. Meryl is a master of finding a place for anything to fit - in the house, in the car, and especially in the Roadtrek. I asked Meryl to write this article. May I introduce Meryl...

Hi.  This is Meryl.  I was asked to write about where  I store stuff in the Roadtrek and why I store stuff where I do.  Remember different Roadtreks are in different formations and yours may have different storage areas.

I have found that storage space in the Roadtrek is limited and that it is not always sized conveniently to use for what one needs to store in it.  This can result in something not fitting into a space or there being too much empty space left around the items in a storage area.  The trick is to maximize the storage space and fill in empty spaces around stuff so that the stuff does not shift around and break or make noise when one is traveling.  This often results in some odd combinations of stuff stored together and stuff not always in a place which makes sense.

I will start just behind the driver’s seat, because I have to start somewhere.  There is a closet that is designed to have about a dozen hangers in it.  We put in a set of hanging shelves that are intended for sweaters and such.  The shelving unit is about 6 shelves in length, but there is only room for four of the shelves, the bottom two are collapsed.  We each use 2 shelves.  I find that the shirts for each of us will take up a section and a spare pair of jeans and underwear and socks for each of us will take up the other 2 sections.  I can fit up to a week’s worth of clothes in these shelves by careful planning and squeezing of stuff.  We plan to replace the hanging unit with shelving which would allow us to use more of the space and fit more clothing, but have not had a chance to do so.  On the shelf in the closet above the hanging area we keep our slippers.  On top of the closet is an electric fan.


Next back is the kitchen.  We do not cook in the Roadtrek.  I, therefore, only need to have foods for snacks and occasional lunches from farmer’s markets, although I do bring a couple of cooking pots and dishes just in case.  Under the sink/stove/counter we have a small cabinet with 3 shelves.  The bottom shelf, which is the tallest, we have put a plastic drawer in.   


When we travel on longer trips I put soup cans, and such in it.  I use Snapware boxes for food storage so that it is sealed off from attracting animals and usually put a larger box (10 in x8.5 in) with saltine crackers either in the drawer (if I don’t have soup and such) or on top of the drawer as I could not figure out how to put stacks of crackers in the limited size top sections where I put food.  If we are traveling in winter without water in the tanks, I put a box on top of the drawer that we put in the sink at night so that we can wash, etc. and not have the water in the sink. The next shelf up has a large plastic box without its lid, which holds pots, paper plates and cups and other kitchen items that we do not normally use on trips. I put pot holders between the pots to keep them from banging together.  The top shelf also has a large plastic box without its lid.  I don’t keep the sink counter insert in the sink and keep it under this box.  This allows the box to slide like a drawer.  It has the more common kitchen stuff we use when traveling - cups, napkins, plates,  silverware, a plastic measuring cup that I use in the microwave for heating water.  I put paper plate between the regular plates to keep them from hitting together.  If we travel in cold weather without water I will generally switch the paper items from the lower box to the top one and the real plates and cups to the lower one as the top box is much easier to pull in and out for use.  On the sides of all three shelves I have boxes of plastic bags - mostly zip locs in different sizes.  This uses the wasted space and keeps the boxes and drawer from sliding around.  Next to the drawer on the bottom shelf I also keep a collapsible dish pan.  Crumbled shopping bags are in both boxes around items to keep them from shifting about.  In the box on the inside of the door of this cabinet is dish washing liquid, liquid hand soap and mouthwash in plastic bags.

I made a double pocket holder for the microwave to keep the plate safe - one pocket holds the plate, the other the turning piece. The pocket was made from bath towels, sized and stitched together. I keep the roll of paper towels currently in use in here as it is convenient and helps keep the microwave plate in place.  I also have a piece of swimming pool noodle which stands up and down between the plate and top of the microwave to keep the plate in place when traveling.


I have 2 thin sections at the top of the kitchen section for storage.  The lower one is shorter across, but is taller.  The top is longer across as it sits above the microwave, but is very short in height.  


 I have found that Snapware food units are very good for storing food.  I was told to make sure that food is sealed airtight so that it does not attract any sort of vermin or animals and these do a good job.  I use 4.25 in x4.25 in (1.25 cup), 4.25 in x 6 in (2 cup), and 6.25 in x8.5 in (4.5 cup), all of which are 2.25 in. high, boxes in both of these sections.  I also use taller versions - the 4.5 cup in a 4.5 in. height which is 10.8 cups, and the 2 cup in a 6.25 in height which is 7.3 cup in the lower of the two sections as these do not fit in the top section.  I use different sizes for different items, for example, tea bags go in the smallest size, snack bars go in the 4.5 cup and cereal and applesauce cups go (separately) in the 7.3 cup size.   I don’t use round boxes as they waste space.   I sometimes use both sections and sometimes use one or the other section depending on the length of the trip and the amount of food (snacks) we have brought.  Our last trip I put all the food items in the lower section.  This time we are away a couple of days less and I did not have enough of the food containers to properly fill the lower section, so I lined them up in the upper section.  They never fill this section across completely, so I stick crumpled plastic shopping bags to fill the extra space.  I have a tension curtain rod (from Walmart, they are like the tension bars sold for RV refrigerators, but cheaper and easier to deal with as they are not doubled) and I put it across the top of front of the lower section to help keep the containers in place.  I also stick crumbled up plastic shopping bags around any spaces in this section.  When we travel on longer trips I fill both sections.  Every time I use these sections the boxes fit differently as different ones are used.  When I use only one section for food the other section will be filled with whatever fits and needs to be stored - the fabric bags I use to bring the food items in and out of the Roadtrek, laundry bags (we bring our clothes into the Roadtrek in them and then use them for laundry) or even sweatshirts. I use Snapware as they have flat tops and stack well (and I bought 2 sets of them on sale at Costco).  I have similar boxes from other brands that work as well and use them in other places in the Roadtrek.  The Snapware company has recently changed them and new ones may not fit in the space the same or have the same volume.

I think that why the clothes and kitchen items are where they are is fairly obvious, so I offer no further explanation. I offer no explanation about the refrigerator for the same reason, other than to mention that I use a tension curtain rod, as previously mentioned, on the front of each of the 2 shelves in our fridge to keep items from sliding forward and out when the door is opened after driving.

END OF PART 1  - PART 2 IS THE NEXT ARTICLE


Wednesday, November 6, 2013

Fast and Easy Way To Add Shelves to a Roadtrek Wardrobe Cabinet

In our 2011 190 Popular Roadtrek we have a wardrobe cabinet behind the driver's seat. It is set up with an RV "rod" to hang hangers from. Not many articles of clothing will fit in this cabinet if one tries
to hang them on hangers. It is possible to carry a more than a week's clothing in this cabinet by adding shelves.
 

The fastest way to install shelves is to purchase a soft-sided hanging shelf or "cube" unit from a closet or home store. These are found in almost every discount store, department store, linens store, etc. We looked at several before we found one that was going to fit just right inside the Roadtrek cabinet.

One thing to be aware of is that any of these that you buy will be too long for this short cabinet, but that is not a problem. Once inside the excess shelves will fold flat at the bottom. The one we selected, shown in the photo above, fits the width of the cabinet. As you look at the photo, you are seeing the rear dining table leg through the translucent vinyl back of the unit. We don't use the rear dining table, but if you did, it is no problem to get it out past the soft shelves. The unit did not come with the boards that you see on our shelves. I added these. Without the boards the shelves do sag down under the weight of the clothes and will limit the space that you can stack in on the shelf below. All I did was measure the soft bottom of each shelf, and cut out a piece of thin fiber board to those measurements. Now our shelves have solid bottoms.

To use the shelves, just fold and stack your clothes. Everything comes our nice and neat with no wrinkles. And we can put over a week's clothing on the four shelves that you see here.

One thing that made this particular soft shelf unit best were the two hangers that it hangs from. These make it stable in side the cabinet and it does not move around while driving. There is no noise from this unit while traveling - even with the fiberboard shelf bottoms.

We found this unit at Target. We had purchased two others at other stores. This is the only one that had two hangers and the only one that fit the space perfectly.  Some units like this have a soft tube to put around the closet rod - this type will not work with the RV closet "rod".

This method of adding shelves is inexpensive and all it takes to install it is hang it up. If you decide that you want to hang from hangers, all it takes is to take this out and let it fold flat to store.

Now, this works well, but I have been thinking about more permanent shelves in this cabinet. To do that I want to have shelves that are adjustable in height. I also want to be sure that the shelves do not move while the Roadtrek is traveling. With all of the shakes and rattles that you get when driving on even some of the smoothest roads, I don't want to add another source of noise with shelves bouncing with every bump in the road. To do this I have been looking at hardware that would let me sandwich a shelf in-between a top and a bottom clip on each corner. This is not that hard to find and stores like Home Depot and Lowes do sell systems that will let you do this (though they are not intended to use two clips in this way). Since we don't use the rear table we have been considering removing it all together and eliminating the pole in this cabinet which would limit the size of the shelves that could be fit in. One option is to cut the shelf around the pole. This is a project on the list of things to do in the Roadtrek "at some point". In the meantime the soft shelves work just fine.


Wednesday, April 24, 2013

GIZMOS FOR YOUR ROADTREK #1

Every so often I come across something that has a good use for the Roadtrek - either inside or outside. I will be sharing these with you in articles as we go along. I have no connection to the companies that make these and I am receiving nothing to endorse them or write about them.

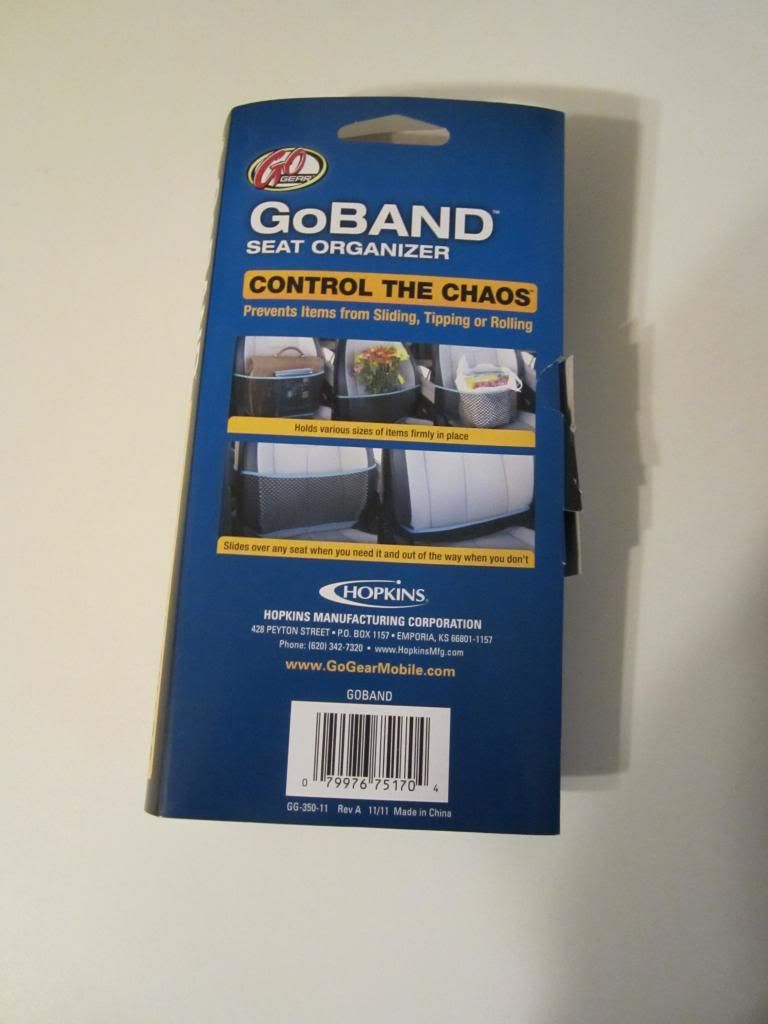
Two things that I have found recently is something called a GoBand Seat Organizer and related to use with the Roadtrek, the Kord Manager. Let's look at the GoBand first.

Our 190 Popular has three front seats - the passenger seat, the driver's seat, and a third seat. Other models have an additional fourth seat up front. We find that third seat very useful to keep things on while we are driving - in the winter our coats go here. In the summer, we start collecting small packages that get placed on the seat. With small packages, things do start to move and fall while driving and we have used the seat belt to hold them in place. We have also  We also tend to drop magazines there that we want to read during the trip (instead of screwing a rack on the wall inside the bathroom cabinet). Since getting the Roadtrek we have been looking for a better way to carry magazines, books, and all of the brochures that are picked up for attractions along the way. There are seat organizers that go on the back of seats, but until now we have not seen one that goes on the FRONT of a vehicle seat. While walking through the auto section in KMart I came across the GoBand.

It just happens that the GoBand has a video and I will share that with you here -


In the Roadtrek this slips over the seat back cushion (after taking it out of its lock on the wall behind) and moves down to the bottom of the seat.


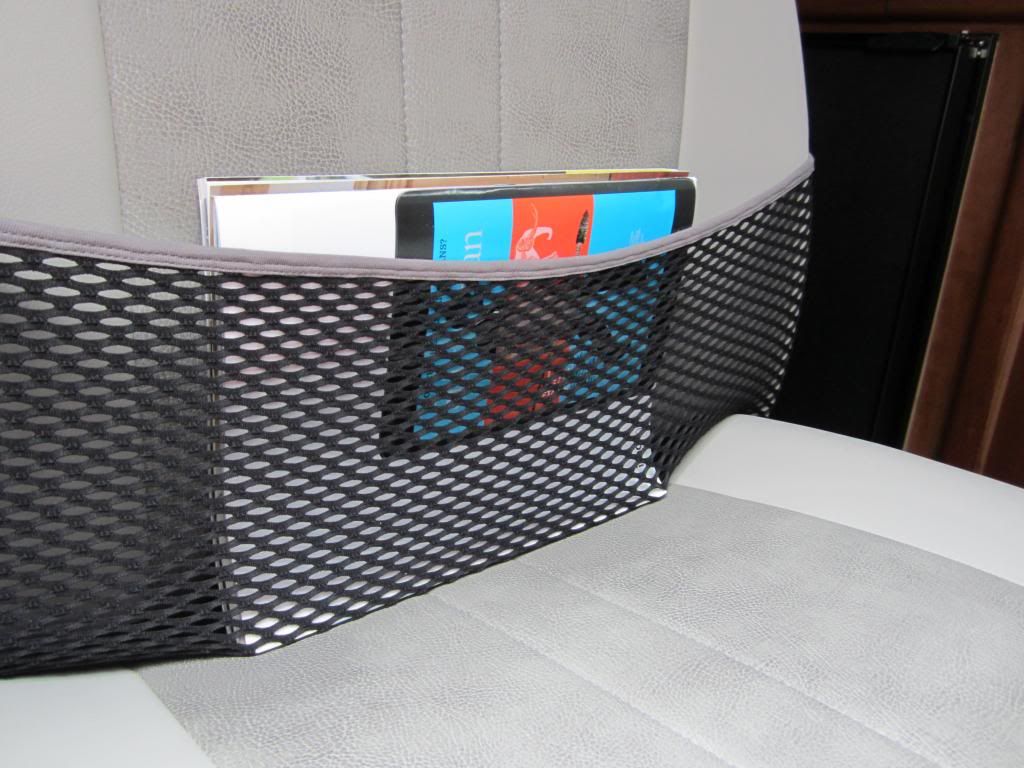
You get a nice expandable pocket on the seat back and if someone is going to sit there, you just push it down to the bottom as shown in the video. Here it is with a stack of magazines -


Of course, as you are moving the magazines will slide down a bit - and expand the pouch, but they are held in place and that is what is important.


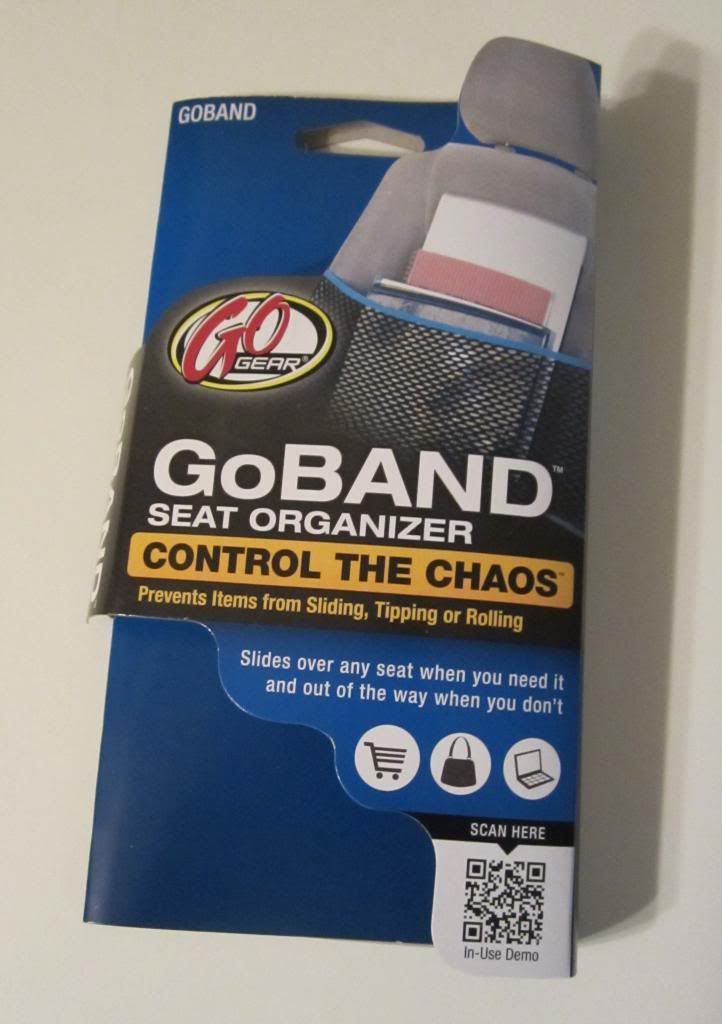
This can be found at KMart Stores in the auto section. It costs $8.19. Here is what the packaging looks like.


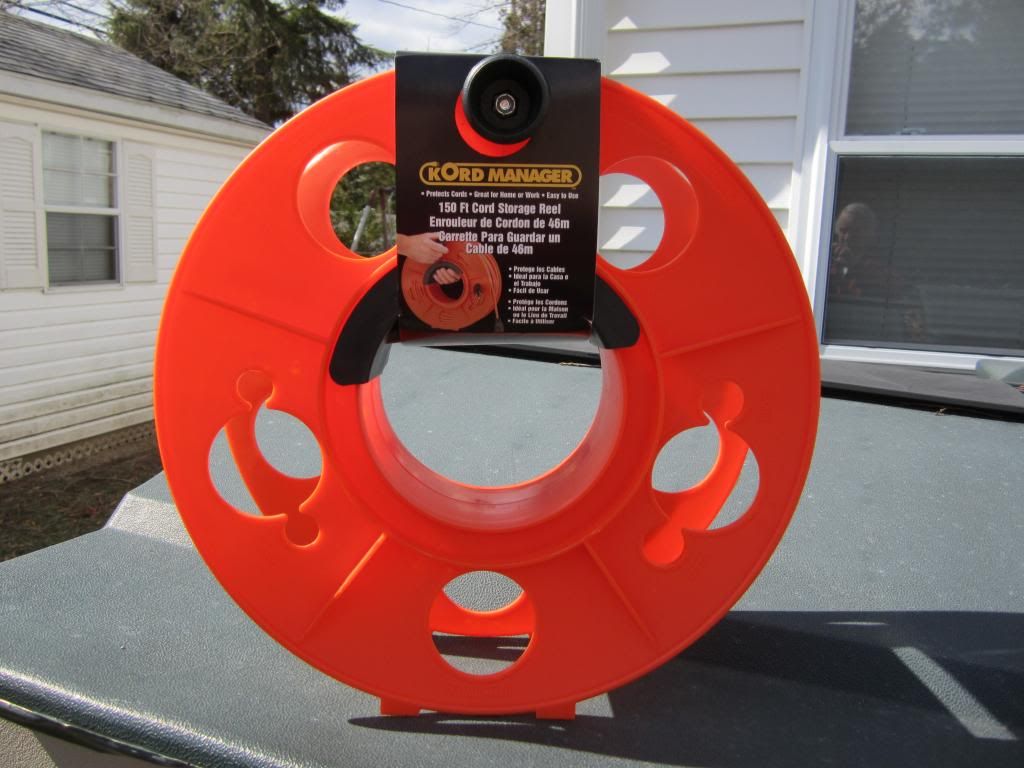
The other item I want to share with you now is not directly for the Roadtrek but for a 30 amp extension cord that you may have for your Roadtrek. We keep ours in our porch and once this nice small bundle of electric cable is removed from its packaging it never gets small and easy to store again. It is heavy and rolling it up can become unwieldy especially in the cold which is when we most use the cord to charge the Roadtrek batteries in the winter. Up until now it just gets rolled as best we can get it and plopped down on a shelf on the porch. Then I found the Kord Manager in Walmart in the Electric section.  Here is the Kord Manager -


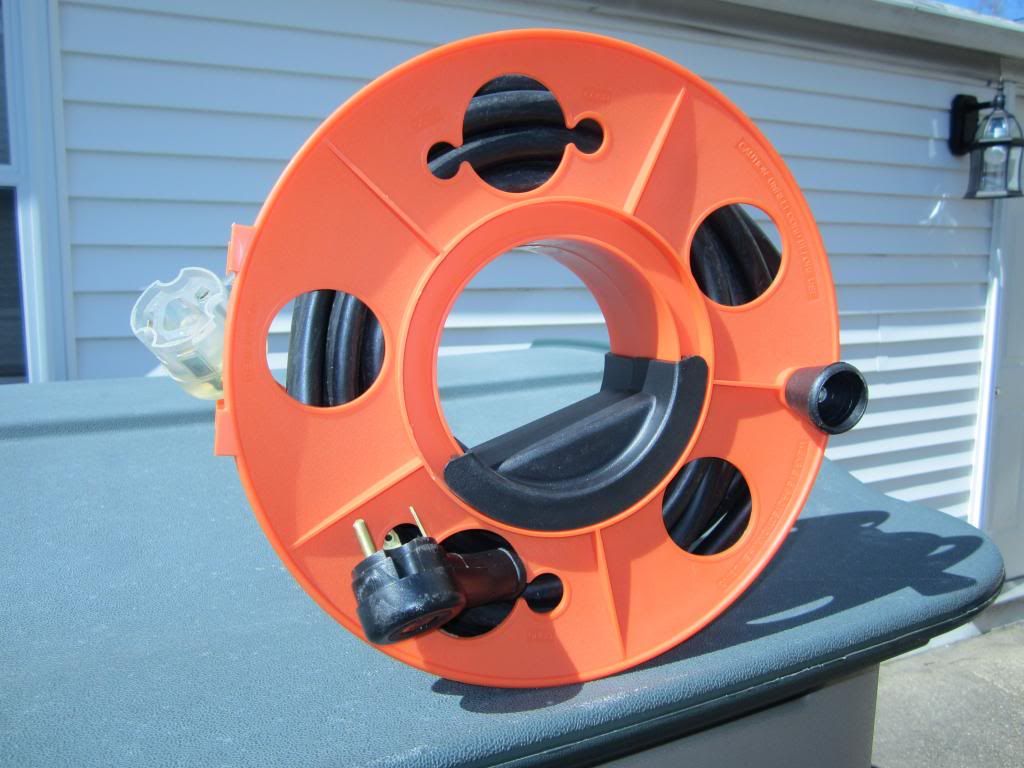
It is a reel with a handle that when combined with a sliding center becomes a crank that rolls the cord up onto the reel in your hands. The plug and socket are large on a 30 amp cord and they will just fit through the holes on the side.


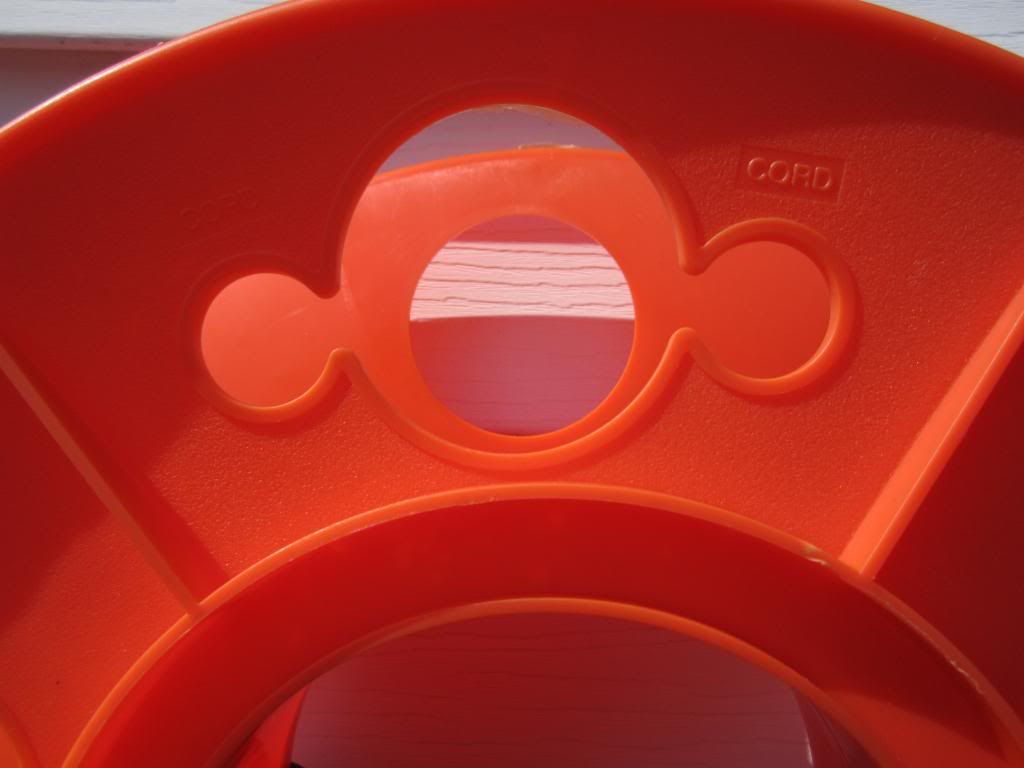
 To use you put either the socket or the plug into one of the holes. There are two holes with smaller holes on the sides in two sizes. While the larger hole looks like it should fit the large 30 amp cord
gauge it does not. This is not that important as the size of the plug or socket will keep it in the hole.  Once the plug or socket is through the hole, you hold the black sleeve in the middle with one hand and crank the knob with the other hand. The cord will roll up onto the reel very easily.


Our extension cord is 30 feet. You can see here hoe that fits. A longer 30 amp cord may not fit.
  The Kord Manager costs about $10 in Walmart. It has made rolling, unrolling, and storing our 30 amp extension cord much less of a chore.


Wednesday, March 6, 2013

The NON-Power Sofa/Bed Roadtrek

When we were shopping for a Roadtrek, the only models that were available to see on dealer's lots and at RV shows were one's with the rear power sofa/bed. We knew that older Roadtreks had a non-powered bed and that, actually, the powered sofa/bed that was so popular now was actually an option. By ordering a Roadtrek 190 or 210 without that option, there would be the older design, non-power sofa/bed in the rear. What we wanted to do was see one. We looked at photos that Roadtrek owners posted on various forums and we did get a glimpse of some older Roadtreks with this design - but none of the photos that we saw were detailed and we were not sure if what we would get by ordering our Roadtrek this way would be the same as in the photos.We ordered the Roadtrek without the power sofa/bed sight unseen, and hoped that it would be as described. It was and we have been very happy with it. Much happier than if we had decided to order the Roadtrek with the rear power sofa/bed.

I have had a number of readers ask me about what the back of my Roadtrek looks like without the power sofa/bed in the rear. I have also been asked if it adds or takes away storage.  In this article you will see exactly what the back of my Roadtrek looks like without the power sofa/bed.


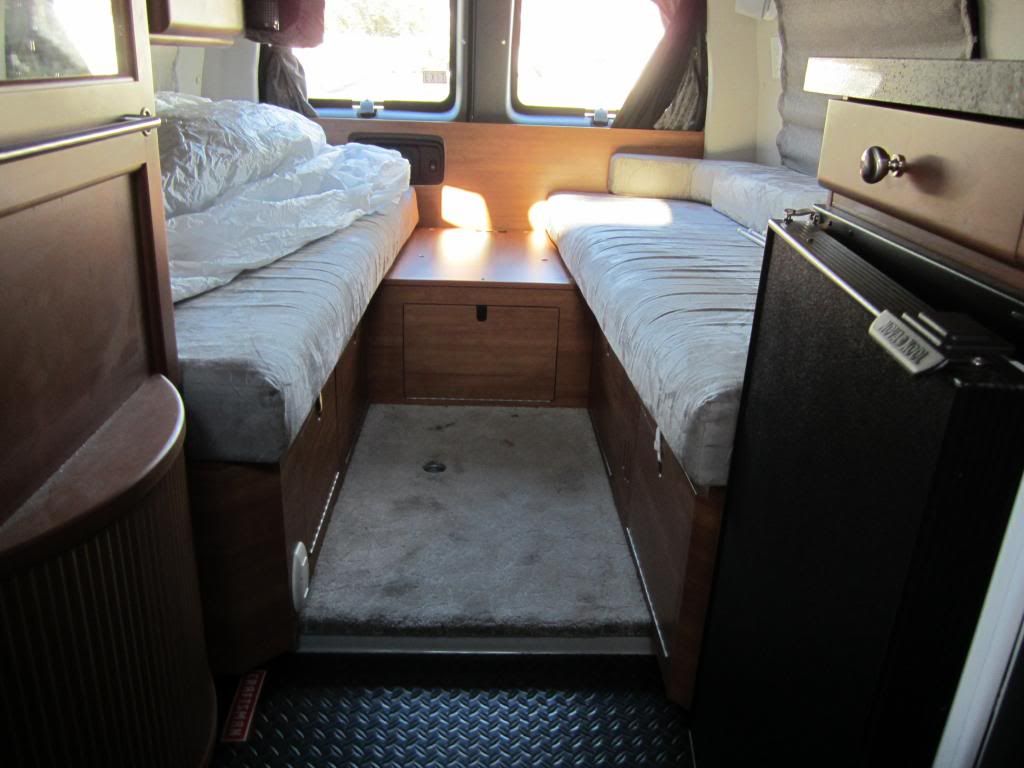
This is my Roadtrek looking from the front to the back. I am standing just about in front of the kitchen sink, taking the picture back to the rear cargo door windows. What you see here is the middle of the bed platform in the very back (the Roadtrek comes with a cushion that fills in this space and two seat belts in this location at the back). Above the platform and below the windows is a short, wood headboard/backrest. At the floor you see five cabinets - two on each side and one in the middle. As you see this right now, this is set to be the twin beds - or two sofas - one on each side for sitting. The aisle in the middle is about 29 inches wide. With the rear cushion put back in the middle of the back, there would be more seating.  We removed the middle cushion and it now is stored in our basement. When making this into the king bed, that cushion is not used and has to be placed somewhere inside the Roadtrek. It was a pain to have this always in the way - so we no longer take it with us.

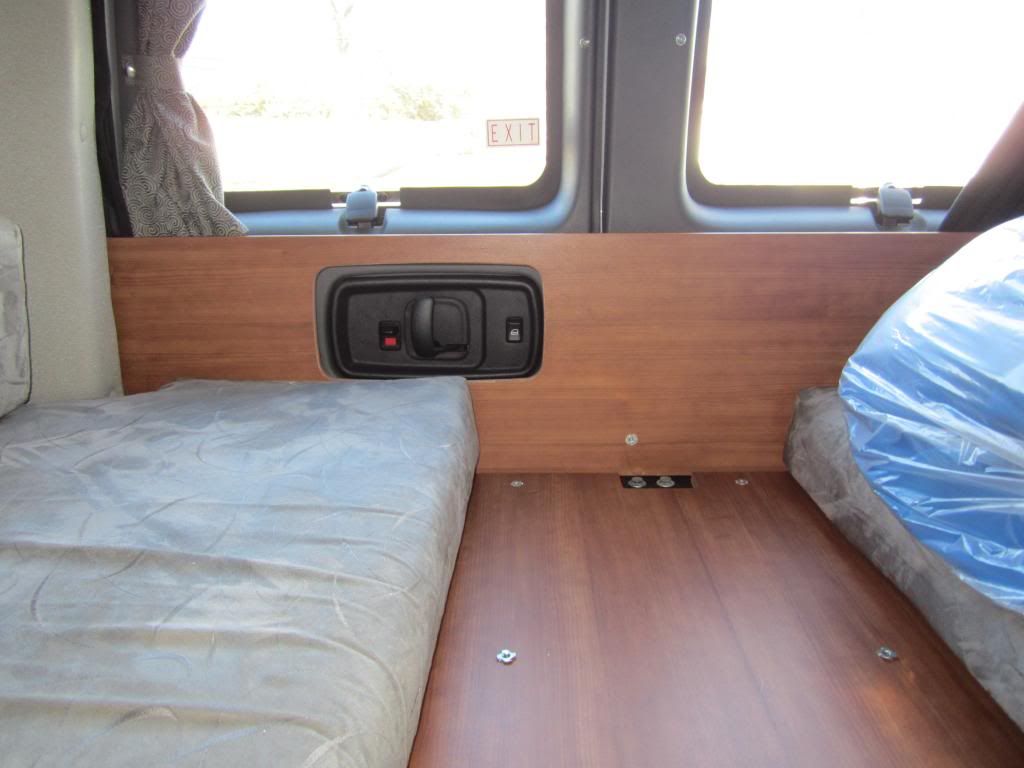
Here is a close up of that section in the back between the bed cushions. On the left over the cushion, you are seeing, through a cutout in the backboard, the rear cargo door release so that you may open the rear cargo door from the inside in the event of an emergency and you had to get out.  When the cargo doors are closed - as they usually are - you are just a couple of inches from the backboard to the door.  In the very middle on the platform right below the back board are two bolts that are where the seat belts once were. I removed the belts as we will never have anyone sitting back here.


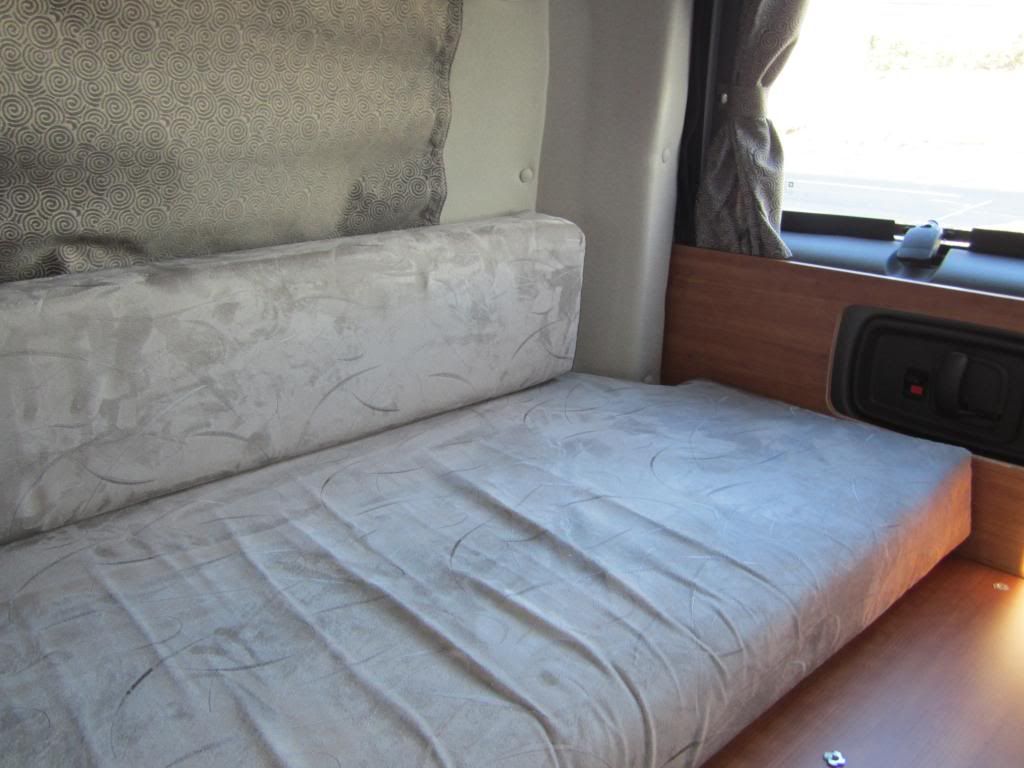
The back set up as a sofa. You are looking at the passenger side of the Roadtrek.


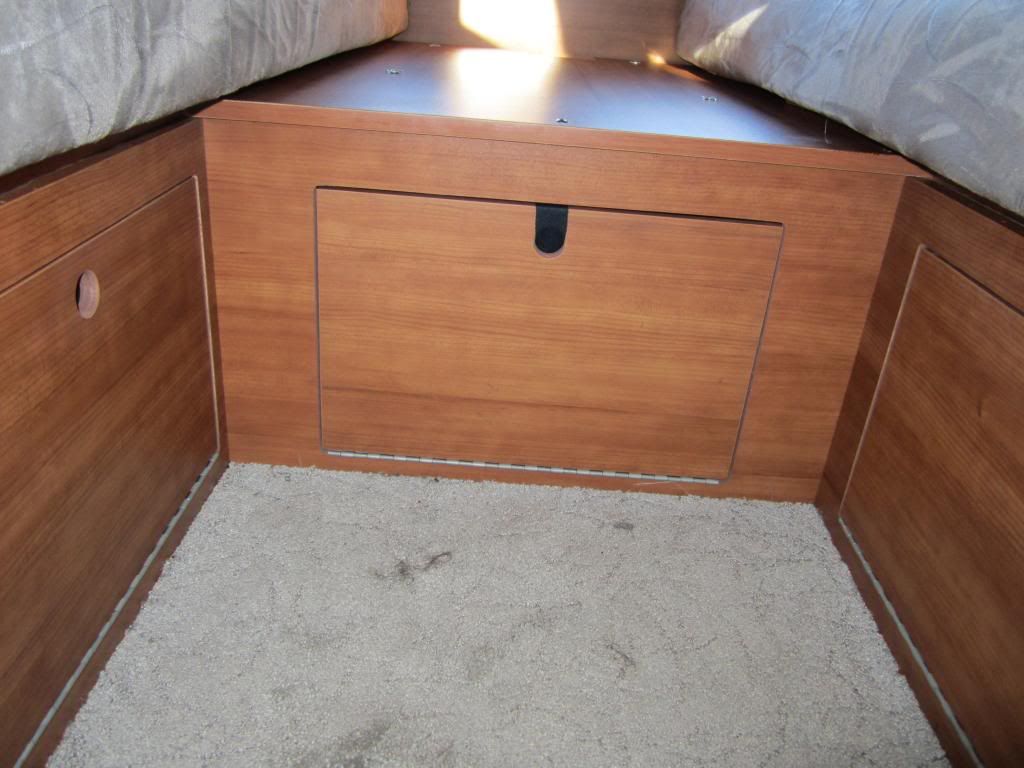
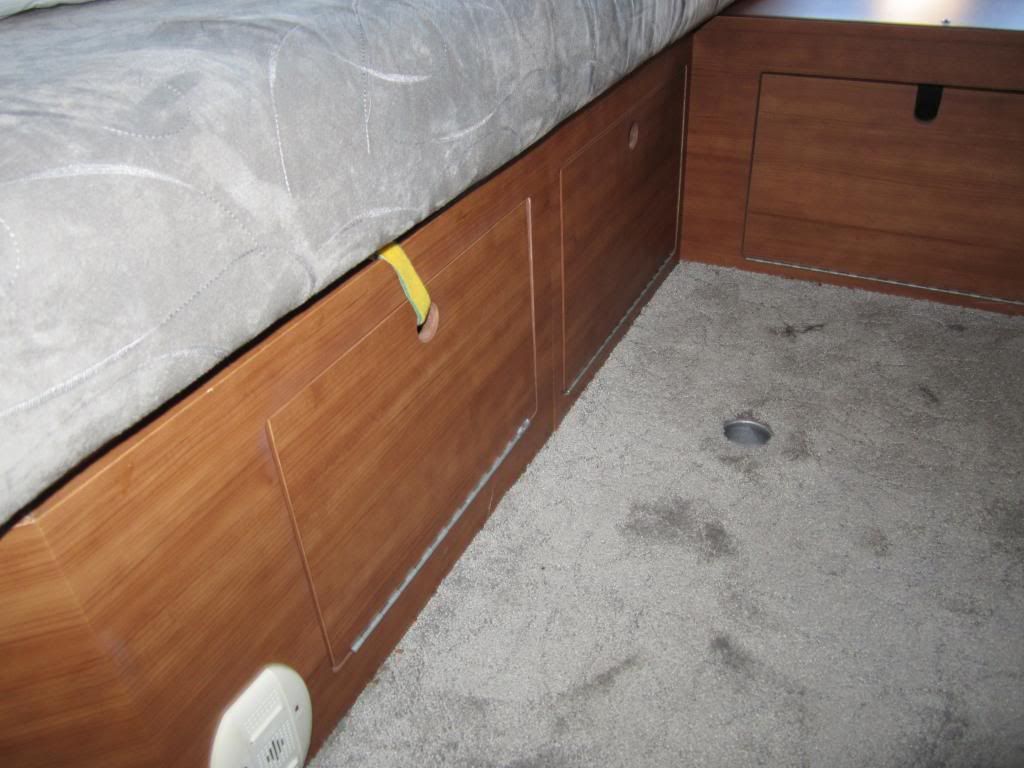
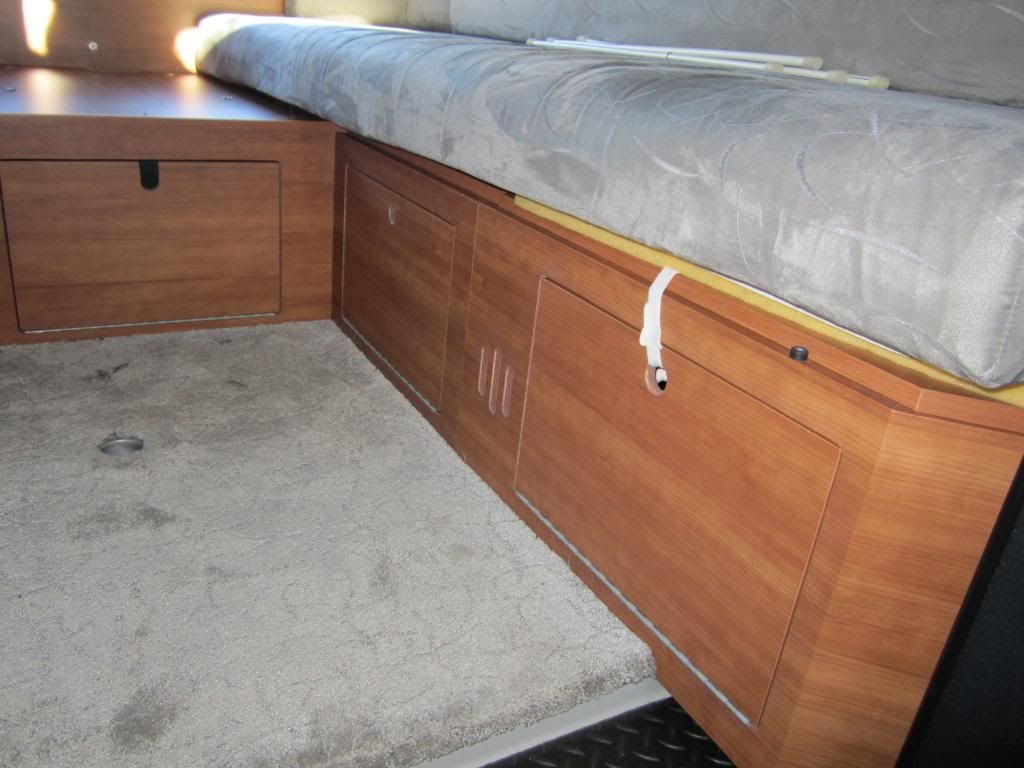
Without the power sofa/bed there are storage cabinets on the floor that you would not have with the power sofa/bed. 


This is an access door directly to the under bed storage area that is most accessed through the rear cargo doors. This is not added storage but added access to storage that you cannot access from inside with the power sofa/bed.


This is the passenger side of the rear aisle. The front cabinet has a small storage area available to you. Behind that storage area is part of the interior fresh water tank. The cabinet on that side is all storage. You may wonder what that yellow band is - this is a velcro strip that we added - not to keep the cabinet closed - it has a very good cabinet latch, but to hold another door above in the platform down to keep it from making noise when on a bumpy road - part of my noise quieting around the Roadtrek. On the floor in the carpeting offset toward the back is where the rear table pole is inserted to assemble the rear dining table.


Here is the passenger side of the rear aisle. The cabinet in the front is not storage but contains the hot water tank, the water pump, and the various valves that need to be turned for summer mode/winter mode and hot water bypass. The slots that you see in the middle are the surround sound system's subwoofer. That speaker can be accessed through the front cabinet. The cabinet to the rear is all storage and bigger than the one on the passenger side. Again, you see one of my velcro noise strips in the front. 

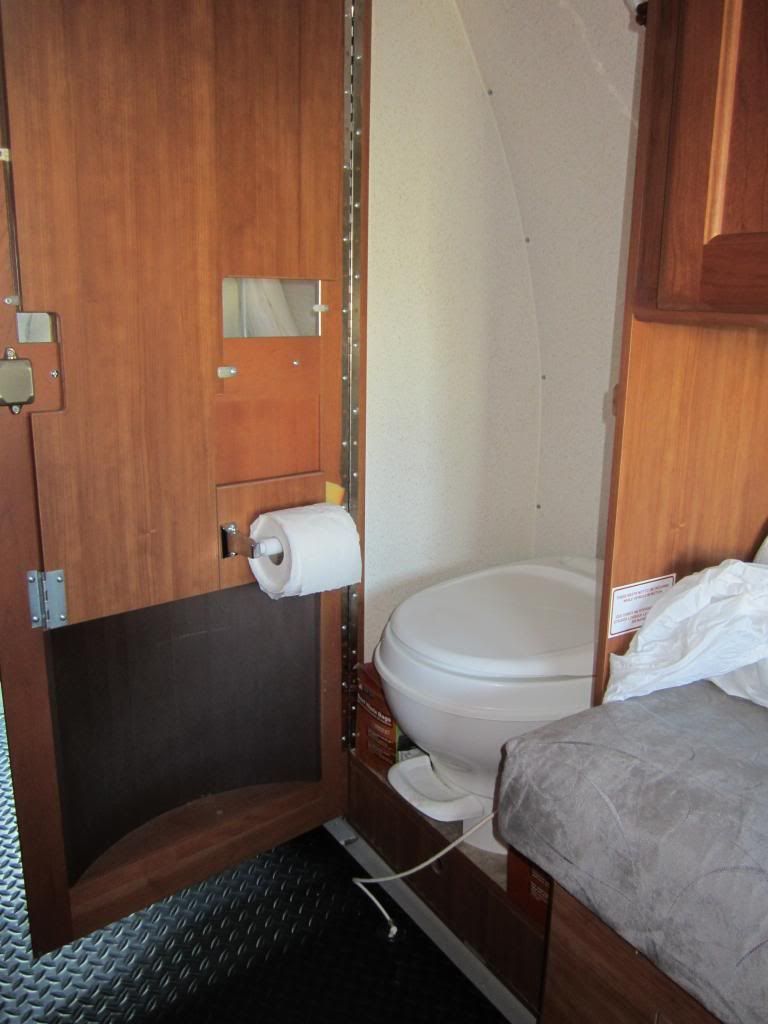
I want to show you also how it is in the back when the aisle bathroom door is open. As you can see below the bed/sofa on the passenger side ends right at the wall of the bathroom. When anyone asks about privacy in a Roadtrek, my answer is that there really is no privacy. Prior to one or so years before my model year, Roadtrek did away with the rear privacy curtain that separated the toilet from view of the bed/sofa area. I am not sure why - as it was a good thing to have. You can use the shower curtain pulled halfway out in its place but this is not as convenient as the rear privacy curtain was. There is still a privacy door toward the front and that folds out from the back of the bathroom door that you see here. When you open that there is a large mirror on the back of the door that is revealed. Also you can clearly see here how your feet are in the aisle when using the toilet.


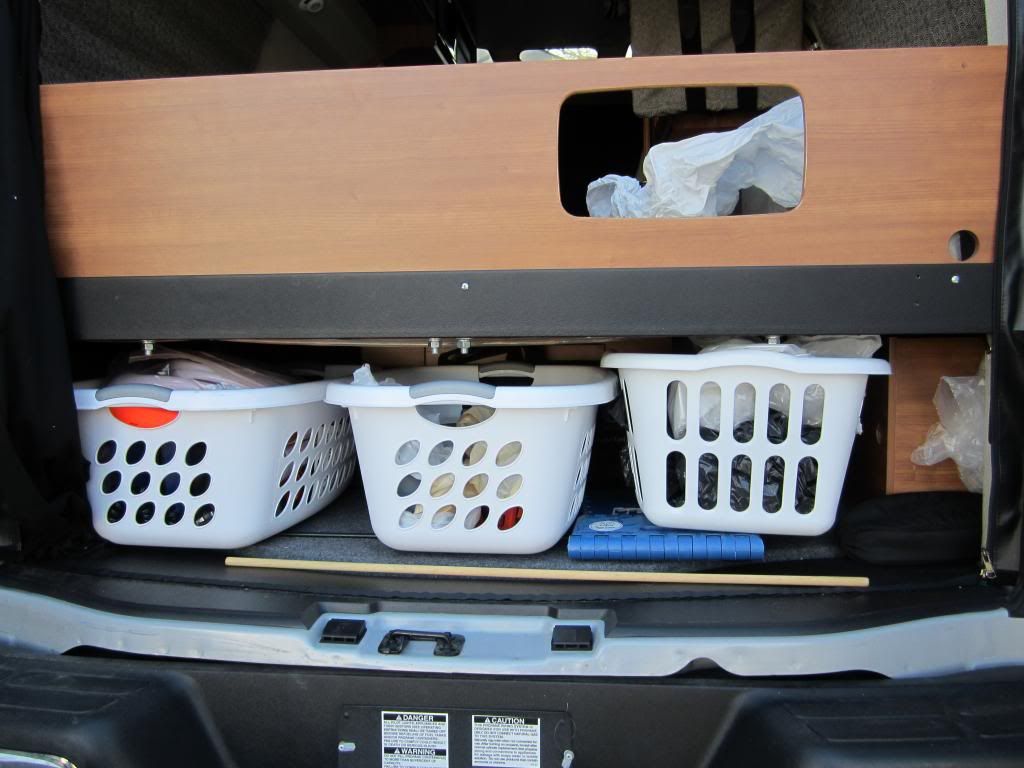
Now, what about the under bed storage accessed from the rear cargo doors? Here is a good photo showing the full rear storage area.  Both cargo doors are open. At the top right you see the cutout on the backboard for the inside cargo door release.


Under the bed you see that I can put three laundry baskets. We have done this just for convenience in what we store under the bed and getting out what we need more easily. The space is deeper than it looks as I have something stored along the entire back length of this area. If you do not have the Continental Spare Tire Kit, the spare tire is kept on the right side of this storage area, taking away a lot of space. The height from floor to the platform is about 11 inches. To the right is where we found the inverter.


Here is an angled view of this same space. 


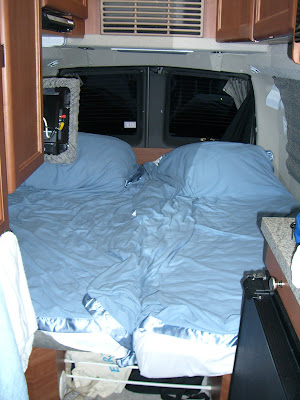
Finally, here is the back of my Roadtrek with the bed made into king size. You can sleep back to front or side to side. Below the bed you can see how the aisle can be used for additional storage when traveling if you keep the bed made up. A couple of pressure spring curtain rods keep items under the bed in the aisle from coming forward.