Roadtrek

Roadtrek

Wednesday, May 27, 2015

Interior Water Tank Fill Tube Nozzle

In our last article and in other articles in which I have written about sanitizing our fresh water tanks and de-winterizing, I have spoken of a continuing problem that we have had each year when sanitizing the tanks. When we get to the point that we need to flush the bleach and water mixture out of the rear, interior, fresh water tank the water backs up and pours out of the fill hole in the door frame when just a gallon or less of water has gone down into the tank. At that point nothing that we have tried to get the water to fill that tank has worked consistently. What seems to work one year has not worked the next. We have tried all ways that we can think of to get this tank to fill. The odd thing is that this only happens on the first fill after the tank has has water/bleach from sanitizing. My thought has always been that the bleach causes a gas bubble to form that is keeping the water from coming down the tube. Last year I started researching what RVers so when they can't fill a fresh tank looking for descriptions of the same behavior - back up well before the tank is filled. What I came up with were a number of recommendations to fill the tank from the bottom of the tank to the top - and not from the gravity fill tube. So how would could I do this? My first thought was to try AGAIN to fill that back tank with the city water connection - BUT that did not work.  I came up with the following "tool" - and it has worked now two years in a row.

I have been trying to come up with a name for this "tool". A long time ago a computer software engineer was working on a software tool that would enable the scanning of documents. He wanted
a really good name to go with this tool that he put a great deal of work in. Other software tools had interesting names and he wanted one too. In the end what he came up with was TWAIN". If you have a scanner you will know about TWAIN. What does TWAIN mean - ready - "Tool Without An Interesting Name!  I played around with combinations of letters and really did not come up with anything that worked for my special "Interior Water Tank Fill Tube". I have been thinking of calling it the "Bottoms Up Tool" and that may be what I decide on. For now we will just refer to it as the Interior Water Tank Fill Tube. It works - and you can make one too and I will tell you how.


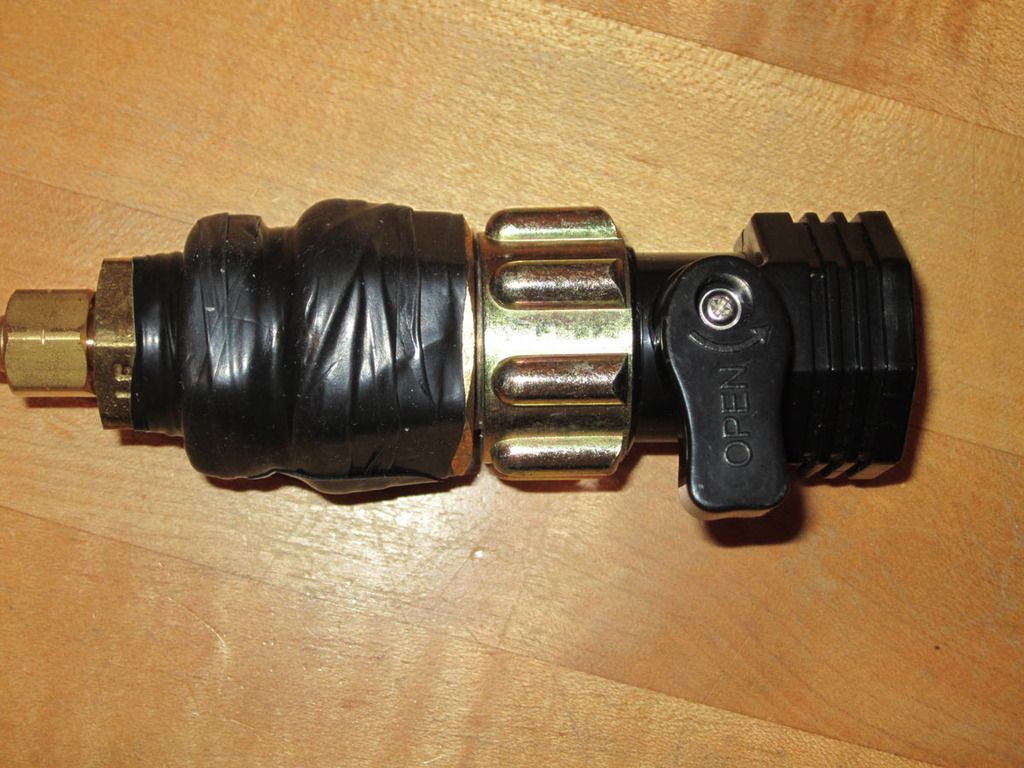
This was assembled with parts from Home Depot in the plumbing and garden departments. Al of the parts are potable water plumbing safe brass with the exception of the tube and the shut off valve at the end. What you need is a brass nipple fitting for a 3/16" inner diameter tube that has the opposite end a male screw end able to connect to the next brass fitting and the size may vary by what you can find for the next piece. 


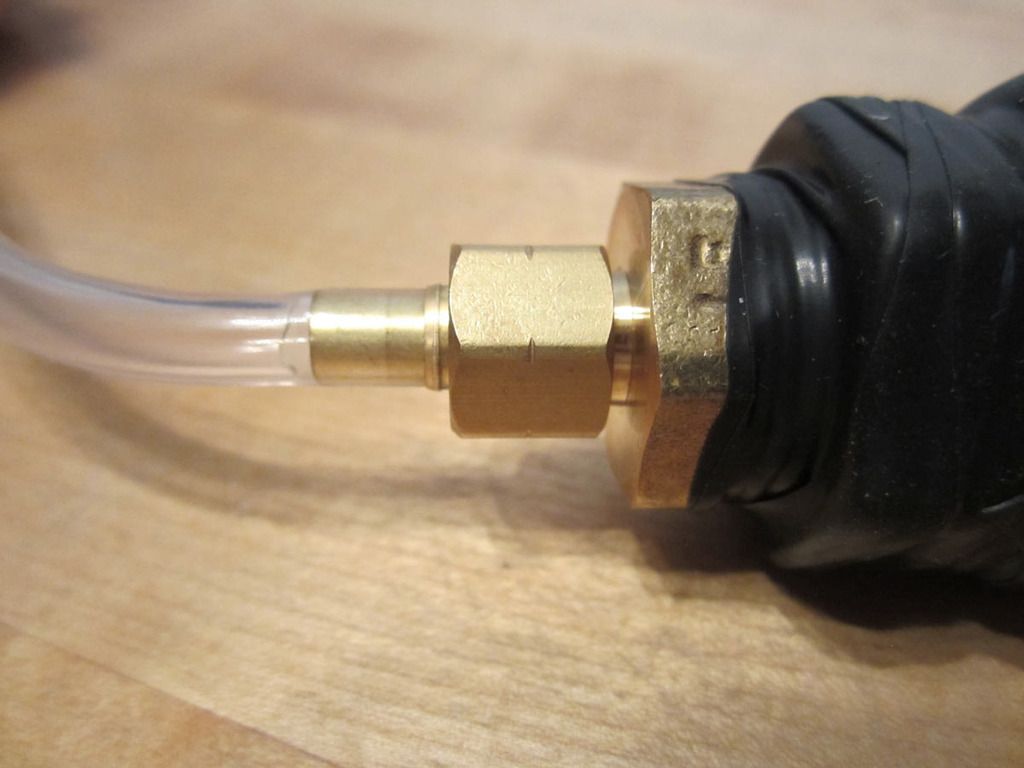
The next part is has a garden hose female screw end on one end and the other end a female screw on end sized to match the male screw end of the last part. This is basically it. I wish I could tell you the specific part numbers. I had them for this article and they were lost. But it is not hard to match up the correct parts if you do some looking in the plumbing department. You may want to ask for help. You may get strange looks when you tell them what  you are putting this together for. You may find it necessary to put a fitting between the two parts to reduce one to fit the other. For what was available in the store, I had to do that.  One more thing to be aware of is that the part that will connect to the water hose from your spigot must be specifically sized for garden hose. I learned in this venture that garden hose is a different thread from the same size part for pipe plumbing.


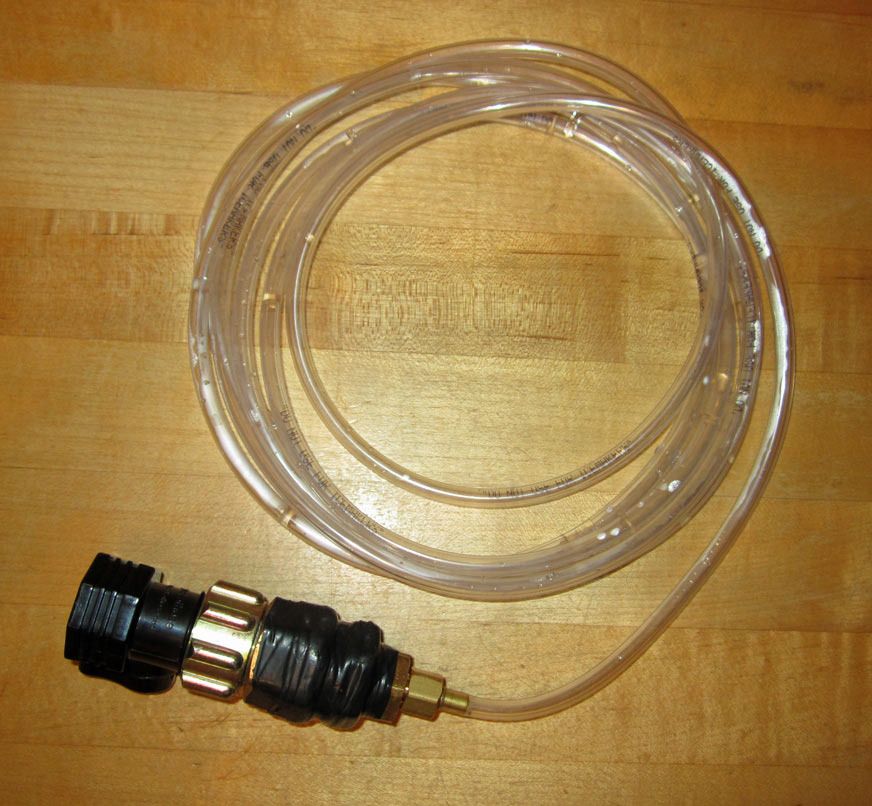
Now, this does not work with the tube that you are making this to use to fill your tank. You need tubing that is 5/16 outer diameter and 3/16" inner diameter. The 3/16" to match the brass nipple that you are using.

Next you want to put a shut off valve on this so that you can turn the water off right there when you are finished filling. This is found in the garden department and is just a standard plastic garden hose shut off valve. 


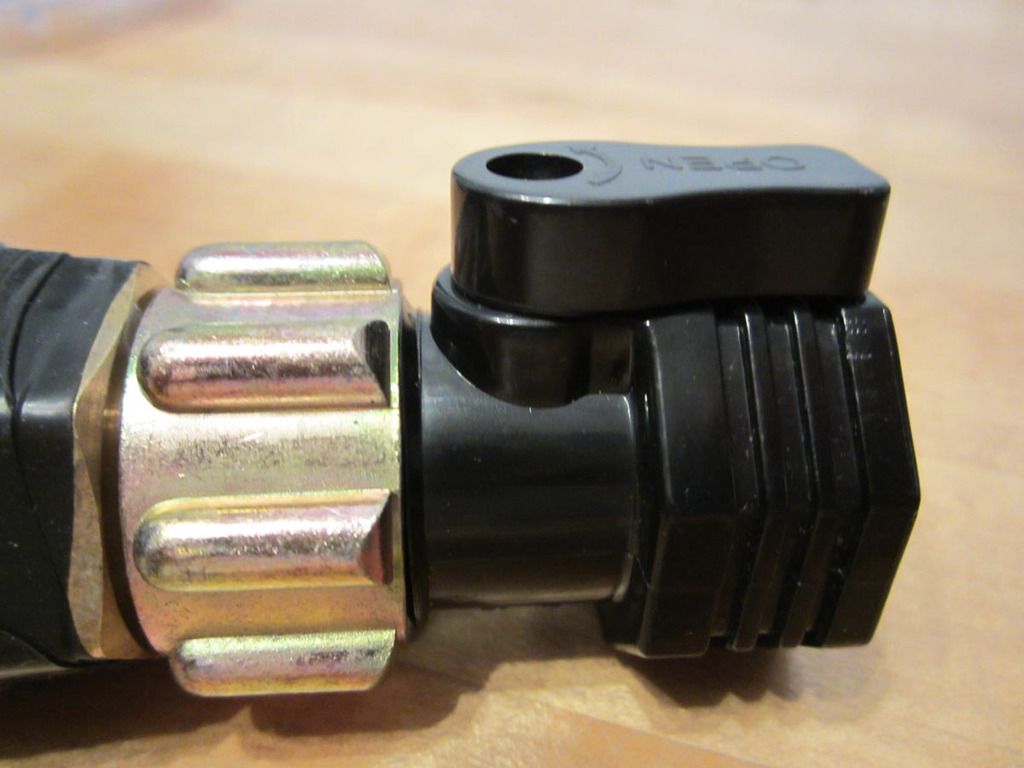
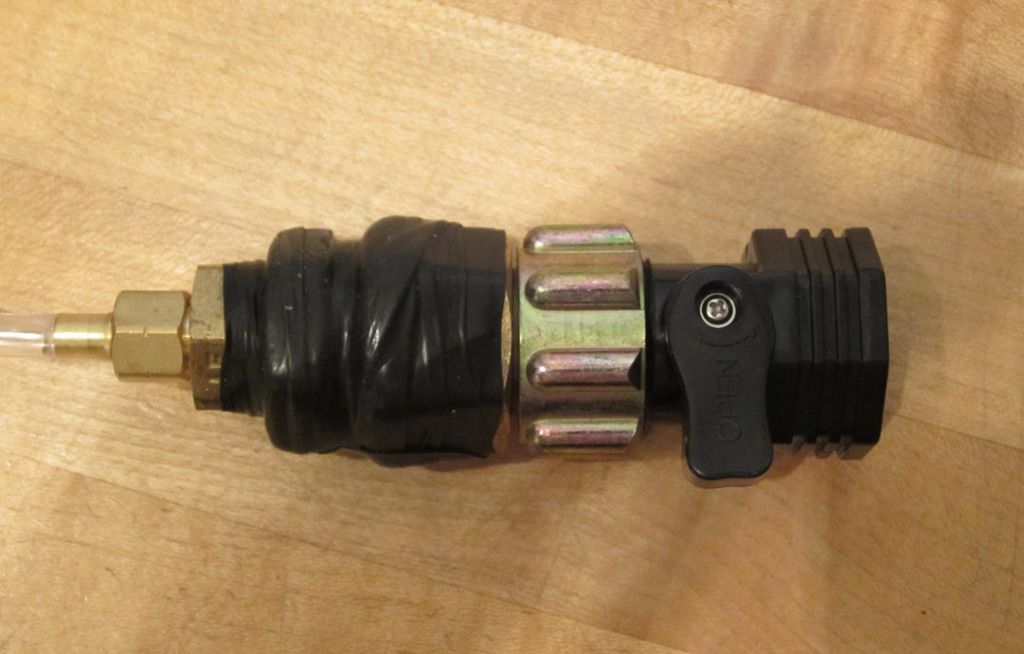
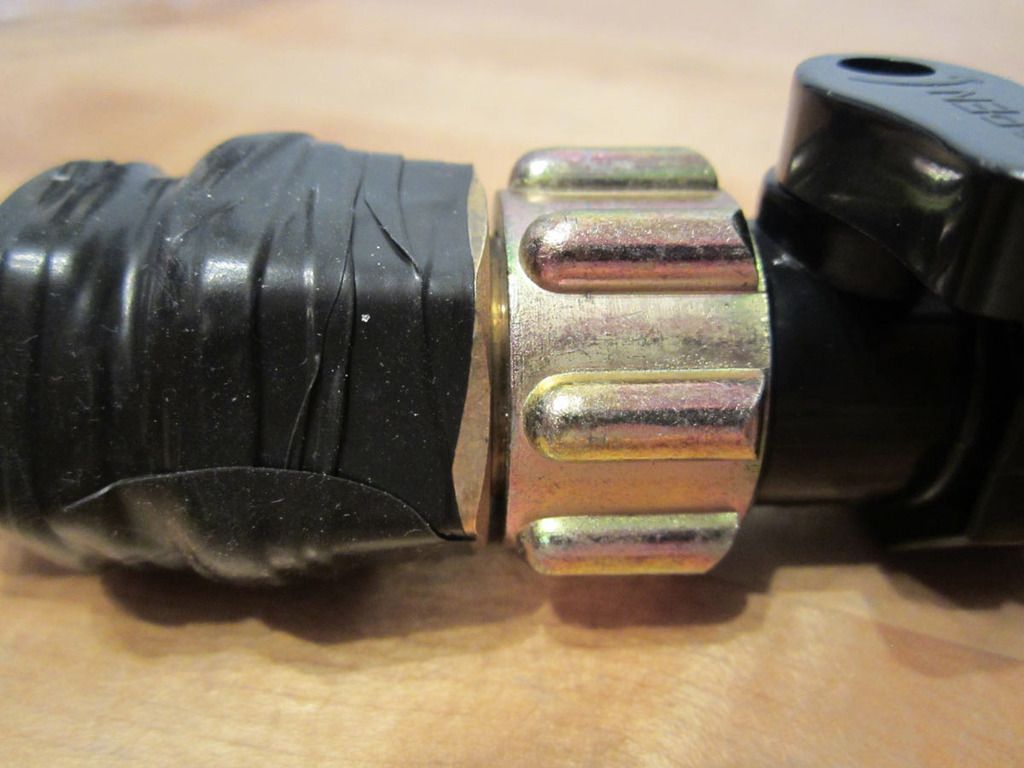
Assemble the brass parts tightly together. I found that even with pipe tape on the threads there were leaks so I got some plumbers tape - also found in Home Depot's plumbing department and wrapped the joints from top to bottom. This is the black wrapping that you see in all of the photos. This tape is pulled around and holds on its own - and it has not come off in two years.


Push about ten feet of tubing onto the nipple and then screw on the hose shut off valve on the other end. You are not going to put ten feet of tubing into the fill hole on the tank but you want a good amount outside with you. Just in case that tubing comes flying off the end, you want plenty outside so that there is no way that it can wind up inside the tank!


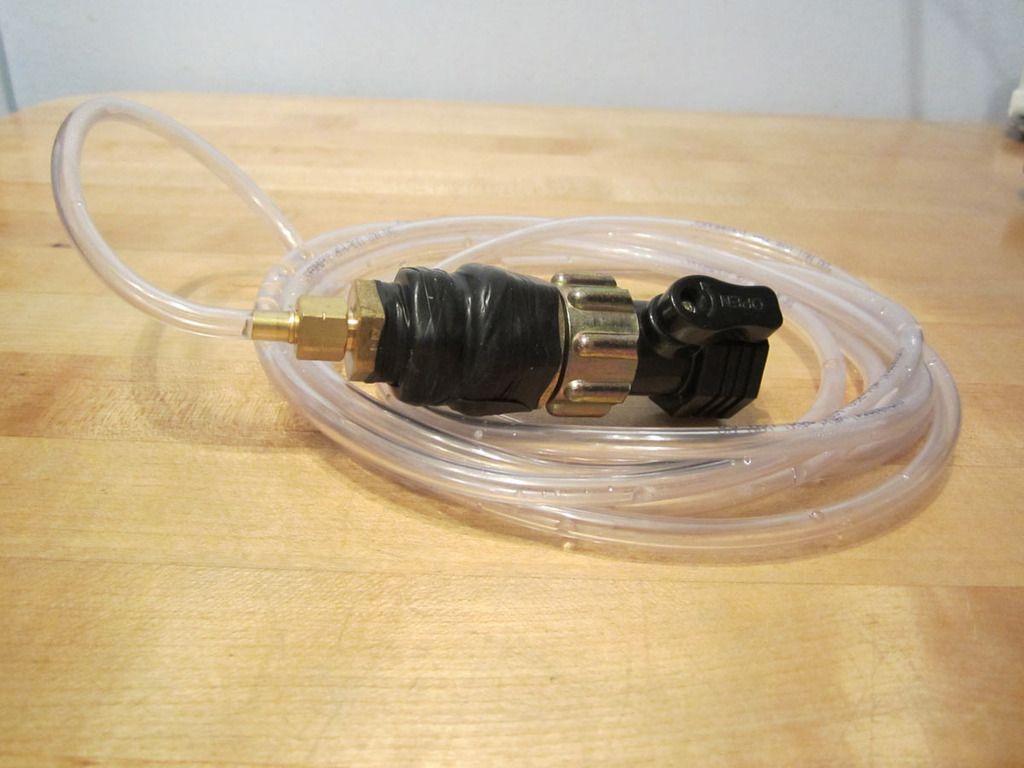
After putting it all together run some water thought it to clean out the fittings and you are ready to use it.

So here is how to use it. Attach your fresh water hose to the end. Turn on the water so that it runs slowly. Don't put the water on full force. Use less than half force or less. Turn turn on the valve on the "tool" and make sure the water is flowing, everything is holding together, and the shut off the valve. Open your rear tank door fill and push the tube down the fill hole until you are sure it has to be not only inside the tank but at the bottom of the tank. Hold the rest of the tube outside and turn  on the valve. You will see the water coming out of the nozzle when it starts.

NOW - here is something that happened and it may happen to you. As the water started going in using this, suddenly it came back up and out the fill hole - similar to before but not as much. It will spurt out once and may spurt out again the same way  BUT then it will stop and the water will continue and now fill the tank so keep going if you see that one or two spurts. Perhaps it is that bubble clinging to its last moments before it is gone. If someone is inside looking at the tank sensor they will see the progress of the tank filling. It takes a while - even though this is the smaller tank - as the water is running slower and is coming out from the much narrower tube rather than the regular hose. Once filled - done!

I keep mine in the Roadtrek. This fill problem actually happened to us once when filling in hot Virginia afternoon heat. This would fix that too. Now, if you don't have a Roadtrek 190 or a 210 you may want one of these anyway - as RVers without Roadtreks and without two fresh tanks have had this same problem too.


Wednesday, May 13, 2015

Sanitizing the Fresh Water Tank(s)

We already have three articles on dewinterizing and sanitizing, but I get a lot of questions specifically about sanitizing the fresh water tank(s) and I thought that having an article just on this would be helpful. I will repeat the steps here but read the whole article before you follow these steps -

  1. TURN HOT WATER BYPASS VALVES TO HOT WATER FLOW.
  2.  USE CITY WATER LINE TO FILL HOT WATER TANK BY RUNNING CITY WATER INTO THAT TANK. (NOT CITY WATER FILL - REGULAR USE OF CITY WATER)
  3. DISCONNECT CITY WATER CONNECT FROM HOSE.
  4. *PUT ONE HALF CUP BLEACH INTO THE FRONT EXTERIOR FRESH TANK. (PRE-MIX THE BLEACH IN A GALLON JUG OF WATER BEFORE PUTTING IT INTO THE FRESH TANK - DO NOT PUT PURE BLEACH INTO THE TANK.)
  5. *PUT ONE QUARTER CUP BLEACH INTO THE REAR INTERIOR FRESH TANK. (PRE-MIX THE BLEACH IN A GALLON JUG OF WATER BEFORE PUTTING IT INTO THE FRESH TANK - DO NOT PUT PURE BLEACH INTO THE TANK.)
  6. TOP OFF WATER IN TANKS WITH HOSE.
  7. DRIVE BACK AND FORTH TO MIX THE BLEACH INTO THE WATER.
  8. TURN ON BATTERY SWITCH AND WATER PUMP.
  9. **TURN ON EACH FAUCET HANDLE PLUS INSIDE AND OUTSIDE SHOWER ONE HANDLE AT A TIME SMELLING FOR BLEACH TO COME THROUGH WITH EACH. NOT THE TOILET.
  10. LET BLEACH SIT IN TANKS FOR AT LEAST FOUR HOURS.
  11. DRAIN WATER TANKS.
  12. FILL WATER TANKS AGAIN.
  13. **REPEAT STEP 9 SMELLING NOW FOR NO BLEACH SMELL.
  14. DRAIN TANKS THROUGH THE LOW POINT DRAIN.
  15. REPEAT STEP 9. IF BLEACH SMELL AGAIN REPEAT FROM STEP 12.
  16. DRAIN TANKS OR LEAVE FULL FOR TRIP
* IF you have a single fresh water tank (which is the capacity of the two tanks combined, use 3/4 cup of bleach for the one tank. - Mix it with water first. 

If you have seen our step by step de-winterizing and sanitizing article you will note that Step 4 has been changed. Do not put pure bleach down into the tank. Mix it with water first by pouring the bleach into a gallon jug with a little less than a gallon of water - to have room for the bleach in the jug. There is a lot of discussion on various RV forums about just how much bleach to use. Some say a quarter cup, some say a half cup - as I have here, and some talk about a full cup of bleach or more. Fresh tanks vary in size from type of RV to RV. The Roadtrek has smaller fresh water tanks than most RVs and you really want to take that into consideration when you prepare your bleach mixture for sanitizing. With a 190 or 210 and their two fresh water tanks you are going to be putting the bleach/water mixture into each tank. It occurred to me this year when sanitizing that perhaps too much bleach was going into the interior, rear, smaller fresh tank. I cut that down to 1/4 cup of bleach. Some of the bleach is going to flow into the hot water heater when you open the hot water faucet - and you will be adding some bleach into that tank in this manner. See the asterisk just above for single tank systems.

Make sure you use a recent bottle of bleach. We had a bottle of bleach that was not past the expiration date stamped on the bottle but when I poured the bleach into the jug of water there was no strong smell of bleach. It was faint at best. I did what my chem professor instructed so long ago and put my nose not over but near the open bottle and waved my hand toward my nose over the top of the bottle - no strong bleach odor. This resulted in a quick trip to the supermarket for a new bottle of bleach and this one could be smelled as soon as the bottle was opened and it was strong in the water as well. You will waste all of your time and efforts with an old bottle of bleach.

Everything else is pretty straight forward as always with just one more exception. See that double asterisk ** on Steps 9 and 13. While I was doing these steps this year I realized that everything smelled of bleach at the sink. The water seemed to smell of bleach as it came out of the faucet but when it was off I still smelled bleach. That is because the bleach water was now in the sink and the sink smelled of bleach. So - get a paper cup - any size - and when you open the faucets and the showers to smell bleach, run the bleach water into the cup - just an inch will do. Smell what is in the cup. This way you know it is the water from the tanks and plumbing that you are smelling. I flushed the tanks twice and I thought I still smelled bleach - but it was not coming from the water now - it was coming from the sink with the bleach water that had run into it before.

Can it sit for more than four hours? Yes, it can. Some say to let it sit for 24 hours. Bleach mixed with water in these proportions will dissipate after about four hours.What you are left with is water with a bleach smell and no potent bleach. The bleach's work is done in four hours. If you run out of time and it has to sit until the next day - no problem!

The sanitizing process is the most time consuming of the de-winterizing process. And it is only because it takes time to fill the tanks, wait the time for the bleach to work, and then flush the tanks - and flush again if needed.

Do you need to do this more than once a year? If you use your RV 12 months a year, you may want to do this twice or even three times a year. If you let your RV sit a long time - months (not weeks or one month) between trips you might want to do this again before you use the RV again.What you are doing is killing any mold or bacteria that may have developed and grown inside your fresh water tank.

Now - every year that we have sanitized the tanks after de-winterizing we have experienced the same problem with the second tank - the rear interior tank. When we try to refill the tank after draining the bleach and water out of it, water starts to go in and then when the tank sensor shows one third (which can be anything from a quart of water to actually one third full) the water backs up the fill hole and pours out - with no more water going into the tank. This does not happen with the front exterior tank at all - just the rear tank. We have dealt with this in different ways each year. Last year I created a tool to deal with this and I will tell you all about that tool, or perhaps it is more a gizmo, with photos in our next article.