This article gets
into some very technical explanations which I have tried to simplify as best as
I can!
There are two key components of the battery charging system
in the Chevy Roadtreks. The two components in some cases work independent of
the other. In other cases they work together. The equipment for these two
components also vary by year and model of the Roadtrek.
One of these components charge the Roadtrek battery or
batteries (which also depends on year and model) when the engine is running.
The other of these components charges the Roadtrek battery or batteries when
the Roadtrek is plugged in or running the generator.
Before we go any further – none of what is in this article
applies to Roadtreks that have the optional electric system components that
began to make their appearance in late 2013 and beyond. These are – Roadtrek
designed Ecotrek lithium ion batteries, solar panels, the underhood generator,
and a system Roadtrek designed called VoltStart. (Voltstart monitored the coach batteries voltage
and when the voltage dropped automatically started the Chevy engine to run the
optional underhood generator to recharge the batteries. There was also an
option to get Voltstart which would start the Onan generator when the battery
voltage dropped and the battery (batteries) needed to be recharged.) Also any
modification to the Chevy Roadtrek’s electrical system by an owner to include
lithium ion batteries, solar panels, a
DC to DC charger, replacement of the TrippLite inverter/converter/charger, etc
makes anything in this article not apply to your Chevy based Roadtrek. Any of these options and owner modifications
changes what needs to be on when, what does what, and how things work in regard
to the electrical system.
What Roadtreks does this article apply to - any Roadtrek
with the standard basic electrical system – and though this article we will
talk about what that consists of.
This article is not going to be broken down in parts – it
will be one article with everything in it – and, therefore, it may be
long. So let’s get started.
First we are going to look at how driving the Chevy
based Roadtrek or running the Chevy
Roadtrek’s engine charges the batteries (battery).
Year and model effects this.
Chevy Roadtrek 170, 190, 210 and Chevy Roadtrek Simplicity models and
Ranger Models (the Chevy based Simplicity was a scaled down 170 or 190 –
Roadtrek later names a non-Chevy based Roadtrek the Simplicity – and that is
not included here. The Ranger was also a scaled down Chevy based 170 or 190
with options to include some of the features of the regular 170 and 190. Both the Simplicity (which was short-lived)
and the Ranger were an attempt to reduce the price of a Roadtrek to make it
more affordable). Year determines also what electrical components Roadtrek is
installing.
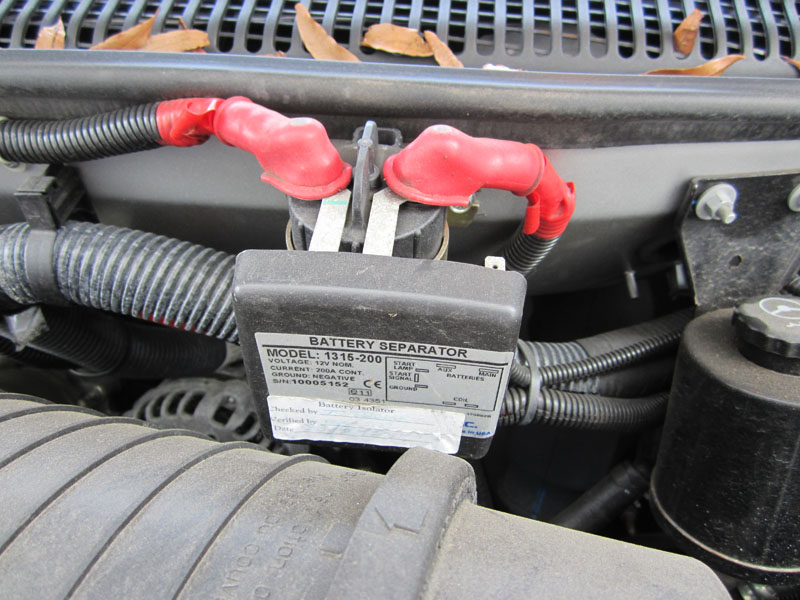
Early Roadtreks and
into the mid 2000s for the Chevy based Roadtreks have a battery isolator
installed by Roadtrek in the engine compartment. The battery isolator connects the engine
battery with the Roadtrek coach battery(ies). A cable is run from the coach
battery(ies) to the engine and is connected to a battery cable connection on
the battery isolator. Between the cable and the isolator Roadtrek installs a
self-resetting circuit breaker. A cable connected to the engine battery is also
brought to the battery isolator and also has a self-resetting circuit breaker
between the cable and the connection to the isolator. There is a ground cable also attached. Here
is a photo of a Roadtrek battery isolator – under the hood against the back
engine wall.
 |
THIS PHOTO COMES FROM RED ROVER
|
The battery isolator works in only one direction – from the
engine battery to the Roadtrek battery(ies) and only charges the Roadtrek coach
battery(ies). Of course, the engine battery is charged normally by the van
alternator. So why mention this - when
you are plugged in to shore power or running the Roadtrek generator – if you
have one – the engine battery is NOT charged by the battery isolator.
This continues in the Roadtrek standard electrical system until
2007 later year built Chevy Roadtreks and then 2008 and beyond – with the
standard electrical system. According to
the creator of the Roadtrek Electrical Simulator in his written NOTES that
accompany the Simulator, in 2008 Roadtrek changes from a battery isolator to a battery
separator as at this point Roadtrek found that the isolator was not working
as it should when connected to a TrippLite 750 inverter/converter/charger. (The 2005s have a TrippLite 600
inverter/converter/charger. Per the Roadtrek brochures for 2006 and 2007, they
have the TrippLite 750 but they do not change over to the battery separator for
these years and remain with the battery isolator though some later built in
2007 Roadtreks may have the battery separator. This is a photo of the battery separator, Notice the simpler and fewer connections.
What is the difference between the two?
The battery separator does the same thing as the battery
isolator but in a different way electronically. They are connected the same
way. They both charge the Roadtrek coach battery(ies) when you drive but it has
an added feature – it is bidirectional – which means not only does it charge
the coach batteries when the engine is running but it also charges the engine
battery WHEN THE ROADTREK IS PLUGGED IN OR RUNNING THE GENERATOR!
I can best explain how the battery separator works as I am
most familiar with that. The battery
separator monitors the battery voltage – the separator monitors both sides –
the engine battery voltage and the Roadtrek coach battery voltage. The battery
separator used by Roadtrek is the Sure Power 1315-200 (BIDIRECTIONAL) 12
VOLT 200 AMP BATTERY SEPARATOR.
There are two voltages that the battery separator looks for. When either battery – the engine battery or
the Roadtrek battery(ies) is below the “disconnect threshold” (which is 12.8
volts DC) the relay is opened connecting the two sides – engine battery to
Roadtrek battery(ies). This starts charging of one or the other of the two
sides. Which? If the engine is running
the engine battery is charging the Roadtrek battery(ies). IF you are plugged into SHORE POWER OR
RUNNING THE GENERATOR then the Roadtrek battery(ies) are charging the engine
battery at the same time the TrippLite is charging the Roadtrek battery(ies). When the “connect threshold” voltage (which
is 13.2 volts DC) of the battery(ies) being charged is reached the battery
separator shuts off charging. The
battery separator is designed when it is off to preserve the engine battery at
12.8 volts – which is 100% of the engine battery’s capacity to start the
engine.
This is very confusing to most and is from the Sure Power
documentation for the battery separator. These voltage numbers to most of us
are not important – BUT if a mechanic needs to test the battery separator (or a
battery isolator – he needs these numbers to make it connect and disconnect.
While we are paused for the moment, I want to explain simply about 12 volt
battery voltage. It would seem that when
a 12 volt battery is fully charged, if
you read the voltage of the battery it would read 12 volts. That is not what it
will read. If it is fully charged it will read between 12.7 and 12.8 volts. Between
12.2 and 12.4 volts the battery is half charged. At 12 volts it is one quarter
charged. At 11.9 volts it is
DISCHARGED! Deep cycle batteries should
not be allowed to go below half charge. On the Roadtrek monitor panel half
charge is the two bottom LEDs lit – on the digital panel that would be the
bottom two indicators. AT THIS POINT THE ROADTREK BATTERY(IES)
NEED TO BE RECHARGED! GOING BELOW THIS POINT THE BATTERIES WILL LOSE CHARGING
CYCLES - HOW MANY TIMES A BATTERY CAN BE
CHARGED TO FULL.
Back to the battery separator – when you plug in the
Roadtrek to shore power and have someone stand next to the front driver’s side
of the hood of the van you will hear a CLICK. That click is the battery
separator connecting the batteries together on each side – engine and Roadtrek
sides connected – and charging!
When you start the engine, IF YOU LISTEN VERY CLOSLY, you
will hear a faint CLICK. The battery separator just connected the batteries and
they are charging. Want to be sure – go to the monitor panel on the wall and
turn on the battery switch and press the test button – the battery column will
be lit top to bottom – top LED or indicator is labeled C for CHARGING! The Roadtrek battery(ies) are being charged by
the engine separator.
A QUESTION THAT OFTEN IS ASKED:
DOES THE BATTERY WALL
SWITCH NEED TO BE ON WHEN THE ENGINE IS RUNNING TO CHARGE THE ROADTREK BATTERY(IES)? THE ANSWER IS A SOLID NO! THE BATTERY(IES)
WHEN THE ENGINE IS RUNNING WILL STILL CHARGE WHEN THE BATTERY
WALL SWITCH IS OFF! CAN THE BATTERY
SWITCH BE ON IF YOU WANT IT TO BE ON – AS FOR RUNNING THE FRIDGE ON DC WHILE
DRIVING? YES, OF COURSE! THIS IS YOUR CHOICE AND EVERY THING WORKS AS IT
SHOULD.
WHAT HAPPENS IF THE BATTERY
SEPARATOR OR A BATTERY ISOLATOR GOES BAD?
Things happen on either the engine side or the Roadtrek side
of the electrical system that cannot be explained by any logical reason. The engine battery could be drained dead. The
Roadtrek battery(ies) could be drained dead. Both could be drained dead.
Electrical things start happening that just do not make sense!
When this happens take the Roadtrek to either an RV shop or
a vehicle mechanic who understands battery separators or battery
isolators. These units are common in
food trucks, refrigerated trucks, etc.
Any vehicle where there is a battery for the engine that needs to be
connected to a battery for the coach that gets charged by the engine battery
when the engine is running. The mechanic who works on my Roadtrek surprised me
when I bought my Roadtrek to him because the coach batteries were not charging
and draining fast. He tested the battery separator - I gave him the two
documents from Sure Power that have all that is needed to test it – and he
tested the two self-resetting circuit breakers.
The diagnosis – the battery separator was not putting out any power to
the Roadtrek side. The battery separator needed to be replaced. That time I was lucky because a week before I
decided to order a new Sure Power Battery Separator to carry in the Roadtrek
just in case and it arrived the day before. I brought it to him and he removed
the old one and installed the new one. It was very easy – simple swap of wires
and attach to the wall into the same screw holes that held the original. I highly suggest that you get one to carry as
a spare. They are not found locally – I
had to order that one on the other side of the USA.
WHAT HAPPENS IF YOU DO NOT HAVE A SPARE AND IT IS
DRAINING THE ENGINE BATTERY AND YOU ARE
STUCK!
First make sure a mechanic has told you that the battery
separator is not working correctly. Ask the mechanic to remove the cables from
the Roadtrek battery(ies) and the Engine battery from the Separator (or
isolator). Ask them to secure these
cables and wrap the ends with electrical tape so that they do not short out
under the hood – also to label them to which goes where. (The BIDIRECTIONAL Sure Power does not matter
which battery cable goes on which side) The battery isolator matters and the
correct cables need to be connected to the correct connections. This should take the battery separator or
isolator out of the system and allow the battery sides to work independently of
the other. This does mean THE ROADTREK BATTERIES WILL NOT CHARGE AS YOU
DRIVE OR RUN THE ENGINE. THEY WILL STILL CHARGE WHEN YOU PLUG IN OR RUN THE
GENERATOR. WITH THE BATTERY SEPARATOR YOUR
ENGINE BATTERY WILL NOT CHARGE WHEN YOU
PLUG IN OR RUN THE GENERATOR. IT WILL
CHARGE NORMALY WITH THE VAN ALTERNATOR LIKE ANY OTHER CAR OR VAN.
This will get you home or to your destination. If you are
on a long term trip try to find the battery separator on the Internet and have
it shipped to the location you will be at within the delivery time – and then
you can have it installed and all put back together.
There are two PDF documents that I cannot attach to this
article. Both are documents for the Sure Power battery separator written about
here. They are worth having and being
able to share with any mechanic if your battery separator needs to be tested. Use
the EMAIL US! Link on the right column of this article and ask me to
email it to you. I will do so as soon as I see your email!
MOVING ON AND
IT GETS A LITTLE EASIER TO UNDERSTAND!
The second charging component in a Roadtrek!
This is also dependent on year and model of your Chevy
Roadtrek. To charge your coach battery(ies) when you are plugged in or running
the generator (if you have a generator) your standard electrical system
Roadtrek either has a CONVERTER/CHARGER or a TRIPPLITE
INVERTER/CONVERTER/CHARGER. Roadtreks 2004 or earlier have a
Converter/Charger. (Someone with a 2004 is going to say I HAVE ONE!!! – you may
– how come – Roadtrek starts putting newly adapted equipment sometimes in a
late year built Roadtrek so sure it is possible that someone will have a 2004
with a TrippLite! But according to the 2004 brochure – you have a
converter/charger). Roadtrek started
offering a stand alone inverter to the Roadtreks that only have a
converter/charger as an option. Some will have it and some will not.
In 2005 Roadtrek installs the TrippLite 600 watt
inverter/converter/charger into each of the 2005 Chevy based Roadtrek models.
In 2006 Roadtrek installs an upgraded TrippLite 750 watt
inverter/converter/charger. The main difference between the two is that the 600
has 150 watts less of inverter wattage from the 750. Right here we need to
clarify something very important. Many
refer to the TrippLite – either 600 or 750 – as “the inverter”. The inverter is JUST ONE of the functions of
the TrippLite. The other two functions
is that it is a converter and a charger. By calling it “the inverter” it makes
it very confusing trying to determine what a problem with it one is referring
to. Some one asks – “Do I put the
inverter on?” - is that do I put the inverter function wall
switch on or do I put the TrippLite on? Well, most of the time the TrippLite is
always on – (we will get deeper into that as we go along) – and it is supposed
to be. All the wall switch that says INVERTER on it does is start the inverter
function working.

THE TRIPPLITE
THE INVERTER FUNCTION WALL SWITCH
If you have a 2005 – you do not have an inverter wall switch.
The connection for it is on your TrippLite 600 but Roadtrek chose for some
reason not to connect it. This means
that it is always has the inverter function on which can drain your Roadtrek
coach battery(ies). To stop this there is a slide switch on the TrippLite that
needs to be changed – more about this coming.
Ok – what does the inverter function do?
The inverter function changes 12 volt DC power into 110 volt
AC power. 600 watts and 750 watts is not
a lot of wattage and will not power a lot. Because of the limitation Roadtrek
only connects three or four outlets to the inverter function on the TrippLite.
These outlets also work normally when plugged in or running the generator. But
if you have cannot plug in or run the generator (lots of campsites have noise
restrictions after a specified hour at night) and you want AC power to watch TV
– plug in your laptop, charge your cell phone – you can turn on the inverter
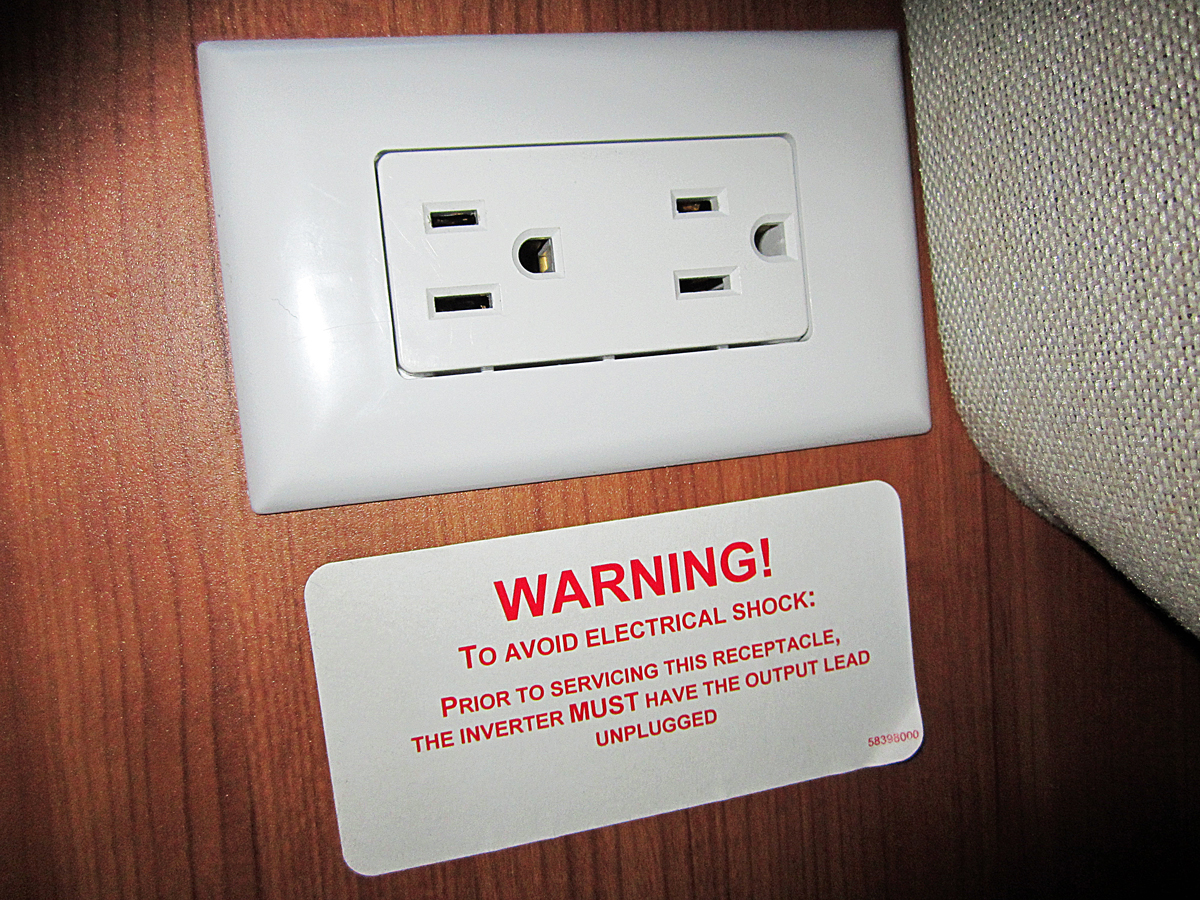
wall switch and plug in. The outlets most commonly connected to this are the outlet
the TV and home entertainment center is plugged into, the outlet over the
kitchen counter, and the outlet the optional coffee maker is plugged into or
would have been plugged into. They all work on DC. Roadtrek put this sticker
above or next to the outlets connected to the inverter function in my 2011 190
Popular.

What does the Converter function do?
The converter is the opposite of an inverter. It changes 110
volts AC into 12 volts DC. Plugged in or running the generator and you have
lights, the water pump, the furnace, the hot water heater, etc. working!
What does the Charger function do?
The charger charges your coach battery(ies) when you are
plugged in or running the generator. It
us putting 12 volts DC into the battery(ies) to charge them.
The TrippLite wants the battery switch on BEFORE you plug in
or run the generator. In Roadtrek put a sticker saying this in some Roadtreks.
So, before you plug in, turn on the battery switch. You need the battery switch on anyway to
start the generator.
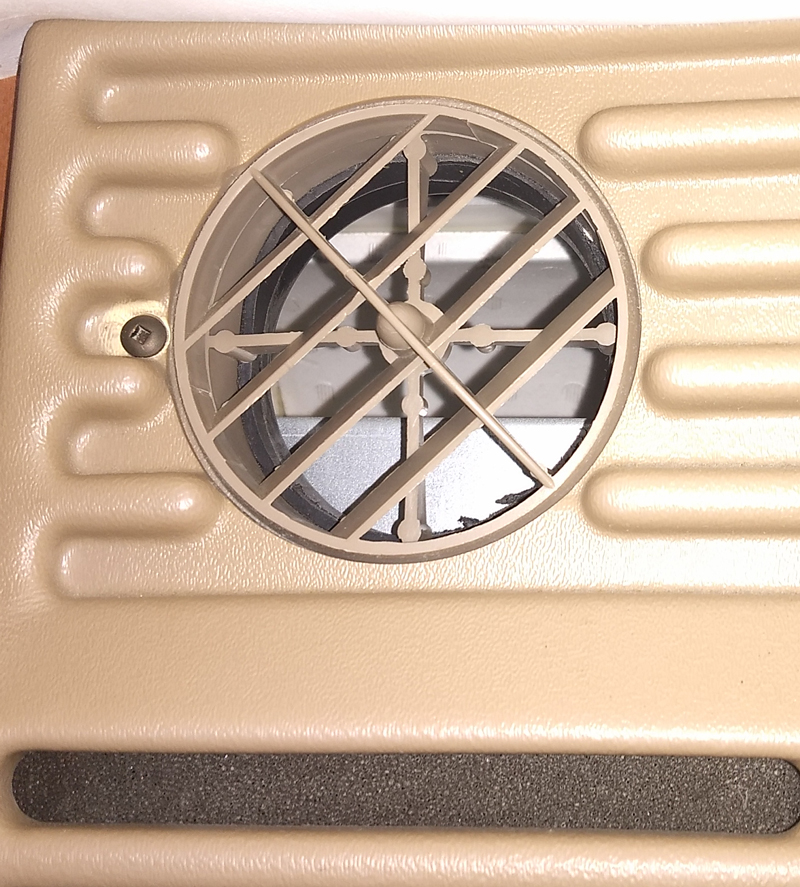
The TrippLite has a cooling fan on the front. When the
TrippLite needs to cool itself down so that it does not overheat – the fan
starts. The question so many new Roadtrek owners ask – and I asked also – What
is that humming noise coming from below the bed? Getting the answer is like
being accepted into the ‘club’! It IS the FAN running when it has to. It is not
constant. It is intermittent. Over time in the Roadtrek you will get so used to
it you will not even notice it. Can it be turned off – NO! It will turn itself
off when it is cooled down. I asked a service tech at the dealer I bought the
Roadtrek at new – he laughed and said, “Every one asks that! – and he laughed.
He told me the answer and smiled. Now, you know the answer too! I am not familiar with the converter/charger
Roadtrek used before the TrippLite but I suspect it too has a fan.
Where is the TrippLite – it generally is close to where the
battery(ies) is/are outside. Mine is behind the passenger side cargo door. Rather than go through the story of my search
for it – I will link that article here.
https://roadtrek190popular.blogspot.com/2013/02/in-search-of-elusive-roadtrek-inverter.html
On the front of the TrippLite there is a slide switch on the
upper right front. There are three
positions – left – AUTO/REMOTE --- center – DC OFF - right – CHARGE ONLY.
AUTO/REMOTE - Enables the inverter function switch
on the wall to work. By turning the wall switch on when it is enabled the
inverter function puts 110 volts into the outlets it is connected to. In this
position the battery(ies) do charge – just as they would in Charge only.
DC OFF – This position disconnects the TrippLite from the
coach battery(ies). This is how to turn off the TrippLite if you want to. The
batteries are directly connected to the TrippLite and the TrippLite bypasses
the battery wall switch. More about this later. In DC OFF – when plugged in or
running the generator THE BATTERY(IES) DO
NOT CHARGE.
THIS IS SURE TO RAISE THIS QUESTION – IF IT IS IN DC OFF
WILL MY COACH BATTERY(IES) CHARGE WHEN
DRIVING AND THE ENGINE IS RUNNING. YES –
YES, THEY WILL STILL CHARGE- It is the battery separator or battery isolator
that is charging them when you are running the engine or driving.
IF YOU ARE REMOVING THE ROADTREK COACH BATTERY(IES)
OR REPLACEING TRIPPLITE SAYS TO DISCONNECT IT FROM THE BATTERY(IES)
– PUTTING IT IN DC OFF ELECTRONICALLY DOES THIS! THIS IS SIMPLER THAN REMOVING
THE BATTERY CABLES FROM THE TRIPPLITE.
ONCE THE BATTERY(IES) ARE BACK IN PLACE
AND INSTALLED – TAKE THE TRIPPLITE OUT
OF DC OFF!
CHARGE ONLY – Disables the inverter function wall switch.
If you put the TrippLite into this setting the inverter wall switch NO LONGER
WORKS until you set the slide switch back to Auto/Remote. Why would you want to
do this? If you forgot to turn the
inverter wall switch OFF the inverter outlets are LIVE – and even with the
battery switch off and nothing plugged into any of the inverter function
outlets – the batteries in the Roadtrek will drain as if something was plugged
in using the inverter function. If you tend to put that switch on by accident –
in some Roadtreks (like mine) the porch light switch is below it – your coach battery(ies)
will drain. If you have a 2005 this is how you can turn off the inverter
function when you have no remote inverter function switch on the wall.
Back to DC OFF - The TrippLite has a small consistent
drain on the Roadtrek coach battery(ies).
I had the mechanic who works on my Roadtrek check this and confirmed
that yes there is a drain. I then put my TrippLite into DC OFF and had him
check for a drain again – NO DRAIN! When
I got my Roadtrek new I was finding the coach batteries were down to half
charge in 30 day. I then would plug in and recharge the batteries regularly at
the end of each month. Over the years and the batteries got older, the time between needing to charge was becoming
less and less – to about half a month or less.
When I got new coach batteries I decided to keep the TrippLite in DC OFF
while it sat on the driveway. When I need to plug in or run the generator I
first go to the TrippLite and slide the switch over to Auto/Remote – so that
the batteries will charge. Then once the TrippLite is on I put on the battery
switch and plug in or start the generator. After we are done doing whatever we
are doing inside the Roadtrek or outside the Roadtrek on the driveway DC OFF is
turned on again. When we are leaving on
a trip – I put the TrippLite to Auto/Remote and it stays on that the entire
trip. TO BE SURE I DO NOT FORGET TO SET
IT TO AUTO/REMOTE WHEN IT NEEDS TO BE IN THAT SETTING I MADE A LABEL AND PUT IT UNDER MY BATTERY
SWITCH TO REMIND ME.

SLIDE SWITCH IS ON THE UPPER RIGHT
Looking at the above photo you can see the label below that says Auto/Remote, DC OFF, and Charge Only. When you slide the switch into one of these positions it should CLICK into place - listen for the click. If you do not hear it then the switch is between two positions - even if it looks like it is where it is supposed to be.
You also see in this photo the blue plug cable. This is the cable that runs through the walls of the Roadtrek to the front passenger side to the Inverter Function Wall Switch. The back of that switch is a matching socket with a matching plug in it. The cable is the same as used for wired computer networks - called a LAN cable.
The TrippLite has a variety of settings. All of these settings were set in by Roadtrek
when it left the Roadtrek factory to where they should be. The most common
setting to change is Battery Type. If your Roadtrek came with wet cell deep
cycle batteries the battery type DIP Switch is set to wet cell (there are no
labels for the DIP switches – all needs to be looked up in the TrippLite
manual). If you change to AGM batteries you must change the battery type DIP
switch to AGM – the manual says this setting is for GEL batteries – TrippLite
has confirmed that the same position applies to AGM batteries.
IF YOU DO NOT HAVE A TRIPPLITE MANUAL – AGAIN, CONTACT ME
BY EMAIL WITH THE EMAIL US! LINK ON THE RIGHT COLUMN NEXT TO THIS ARTICLE
AND I WILL EMAIL THE MANUAL I HAVE TO YOU. IT IS A 750 MANUAL BUT THE 600 HAS
THE SAME SETTINGS AND POSITIONS.
The manual is very good to have as the LEDs on the front
of the TrippLite can be used to troubleshoot electrical problems and how to
reset the TrippLite if it overloads.
It is also important to know is that the TrippLite does
not like being plugged into shore power in a GFCI outdoor or indoor outlet.
This applies to plugging the Roadtrek at home. I have never had a problem
plugging into any 30 amp outlet at a campground – I have never come across one
that was obviously GFCI so either they are not or the GFCI reset is not
visible. While building codes frown on
it – change the outlet you plug the Roadtrek into at home to a standard home
non-GFCI outlet.
As we are on GFCI outlets - the outlets that Roadtrek
connected to the TrippLite’s inverter function are all on one shared GFCI
circuit. One of the outlets has the TEST and RESET buttons on it. Often this is
the outlet that the TV is plugged into – inside the cabinet over the TV in my
Roadtrek. If you plug into one of these
outlets – whether on the inverter function OR plugged in or running the
generator does not work – then all of the inverter function outlets do not
work. Find the outlet with the reset button – press the TEST button first and
then press and hold the RESET button and let go to reset the GFCI circuit. Then
all of the outlets on that circuit will work! THIS MUST BE DONE WITH
ELECTRICITY IN THE SYSTEM – PLUG IN IF YOU CAN.
YOU PROBABLY COULD DO THIS IF THE INVERTER FUNCTION WALL SWITCH IS ON.
IF THERE IS NO AC POWER IN THE OUTLETS THE RESET WILL NOT WORK!
WHAT CAN GO WRONG WITH THE TRIPPLITE?
I have not had problems with the TrippLite and we bought our
2011 new. When we had problems with the new batteries we bought – which I have
written about – and I took it to the Roadtrek dealer we bought the Roadtrek
from because I can trust them – they did check the TrippLite thoroughly and
found no problems with it (what they found was one of the new batteries was
defective and had to be replaced – which they handled under warranty for me –
even though I did not get the batteries from them (I should have!)
Like any piece of technology there can be problems but I
have found that in must cases that I am told about or read about, it is due to
some change done in the Roadtrek that was not followed with changes to the
settings on the TrippLite or some wiring issue, etc. Or trying to match the
TrippLite with lithium ion batteries (same with the battery separator). There
is no mention at all about Lithium Ion batteries in the TrippLite manual. Some
claim there are things to do to make it work – but hook up to lithium ion
batteries and thinking the TrippLite is just going to work and then get
surprised that it doesn’t. In my experience with the company, I have found when
I did contact TrippLite to ask them a question was that the company responded
to my email request quickly and were very responsive.
SOMETHING TO BE AWARE OF WITH THE TRIPPLITE:
The TrippLite has a problem with being plugged into a GFCI shore power outlet. It will trip the GFCI switches on that outlet cutting off all power from that outlet. For example- you plug the Roadtrek's shore power cord into a home outdoor GFCI outlet using a 30 amp socket to 15/20 amp plug adapter and what will happen is the GFCI circuit in the outlet will TRIP and there will be no AC voltage power going into the Roadtrek. If you push the RESET switch on the GFCI outlet with the Roadtrek still plugged into it - it will NOT RESET. This mostly happens with home outdoor outlets which commonly are GFCI outlets. We have never had this problem plugging the Roadtrek into a campground outlet. We have never come across a 30 amp campground outlet that is GFCI with test and reset switches on the outlet. There may be a central GFCI circuit for that outlet that is common to that and other campsite power outlets - but none have ever failed to provide voltage to our shore power cord and the Roadtrek. So what do you do? The simplest solution is to replace that home outside outlet with a standard 15 or 20 amp home outlet with no GFCI on it. This has been found to be so by many Roadtrek owners who have the TrippLite inverter/converter/charger. "SOME" have said that if they turned the inverter function switch on the wall in the Roadtrek on FIRST before plugging the Roadtrek's shore power cord into the GFCI outlet, the GFCI did not trip. I cannot say if this is true or not. When we first plugged the Roadtrek into our home outside outlet that was a GFCI outlet and the GFCI tripped in the outlet, we replaced that outdoor outlet with a standard 20 amp home outlet - the breaker in the house connected to that outlet is 20 amps.
PUTTING IT ALL TOGETHER!
The only interconnection between the battery separator
system and the TrippLite is with the Bidirectional Sure Power Battery Separator
when the TrippLite and the coach battery(ies) with the Roadtrek plugged in and
running the generator.
There are clearly two charging systems in the standard Chevy
based Roadtrek models and years. The two are designed to interact with each
other.
Even with all that I know about these systems – I still have
some questions myself. This article has been in the planning since 2018. Every time I thought to sit down and start
writing it, those questions kept me from writing. Back in 2018 my Roadtrek was having some
problems and I was not sure if it all did not come down to the battery separator.
I contacted two Roadtrek/Internet friends who have a lot more understanding of this
type of technology than I did at the time.
The three of us went back and forth over email figuring this all out -
together. Well this article is written
now. I have written so much of this article so many times in answer to
questions I get by email and by questions asked to all in Facebook Roadtrek
Chevy groups and on forums. It was time to put it all down an in one place so I
can refer back to this article when questions come.
Thanks for reading the whole thing and getting down to
here. I am always happy to answer
questions that get emailed to me. I have mentioned the Email Us! link on
the column to the right of this page. As soon as I see the email I tend to just
respond to it right then. Be patient – I
am not online all day - though sometimes it feels like I am, but that is OK! And if you take anything away from this article I hope that it is that you will no longer refer to the TrippLite as "the inverter".