Roadtrek

Roadtrek
Showing posts with label inverter. Show all posts

Tuesday, July 16, 2024

TWO BATTERY CHARGING SYSTEMS IN A STANDARD CHEVY ROADTREK ELECTRICAL SYSTEM


This article gets into some very technical explanations which I have tried to simplify as best as I can!

 There are two key components of the battery charging system in the Chevy Roadtreks. The two components in some cases work independent of the other. In other cases they work together. The equipment for these two components also vary by year and model of the Roadtrek.

One of these components charge the Roadtrek battery or batteries (which also depends on year and model) when the engine is running. The other of these components charges the Roadtrek battery or batteries when the Roadtrek is plugged in or running the generator.

 Before we go any further – none of what is in this article applies to Roadtreks that have the optional electric system components that began to make their appearance in late 2013 and beyond. These are – Roadtrek designed Ecotrek lithium ion batteries, solar panels, the underhood generator, and a system Roadtrek designed called VoltStart.  (Voltstart monitored the coach batteries voltage and when the voltage dropped automatically started the Chevy engine to run the optional underhood generator to recharge the batteries. There was also an option to get Voltstart which would start the Onan generator when the battery voltage dropped and the battery (batteries) needed to be recharged.) Also any modification to the Chevy Roadtrek’s electrical system by an owner to include lithium ion batteries, solar panels,  a DC to DC charger, replacement of the TrippLite inverter/converter/charger, etc makes anything in this article not apply to your Chevy based Roadtrek.  Any of these options and owner modifications changes what needs to be on when, what does what, and how things work in regard to the electrical system.

 What Roadtreks does this article apply to - any Roadtrek with the standard basic electrical system – and though this article we will talk about what that consists of.

 This article is not going to be broken down in parts – it will be one article with everything in it – and, therefore, it may be long.  So let’s get started.

 First we are going to look at how driving the Chevy based  Roadtrek or running the Chevy Roadtrek’s engine charges the batteries (battery). 

 Year and model effects this.  Chevy Roadtrek 170, 190, 210 and Chevy Roadtrek Simplicity models and Ranger Models (the Chevy based Simplicity was a scaled down 170 or 190 – Roadtrek later names a non-Chevy based Roadtrek the Simplicity – and that is not included here. The Ranger was also a scaled down Chevy based 170 or 190 with options to include some of the features of the regular 170 and 190.  Both the Simplicity (which was short-lived) and the Ranger were an attempt to reduce the price of a Roadtrek to make it more affordable). Year determines also what electrical components Roadtrek is installing.

 Early Roadtreks and into the mid 2000s for the Chevy based Roadtreks have a battery isolator installed by Roadtrek in the engine compartment.  The battery isolator connects the engine battery with the Roadtrek coach battery(ies). A cable is run from the coach battery(ies) to the engine and is connected to a battery cable connection on the battery isolator. Between the cable and the isolator Roadtrek installs a self-resetting circuit breaker. A cable connected to the engine battery is also brought to the battery isolator and also has a self-resetting circuit breaker between the cable and the connection to the isolator.  There is a ground cable also attached. Here is a photo of a Roadtrek battery isolator – under the hood against the back engine wall.

THIS PHOTO COMES FROM RED ROVER

 The battery isolator works in only one direction – from the engine battery to the Roadtrek battery(ies) and only charges the Roadtrek coach battery(ies). Of course, the engine battery is charged normally by the van alternator.  So why mention this  -  when you are plugged in to shore power or running the Roadtrek generator – if you have one – the engine battery is NOT charged by the battery isolator.

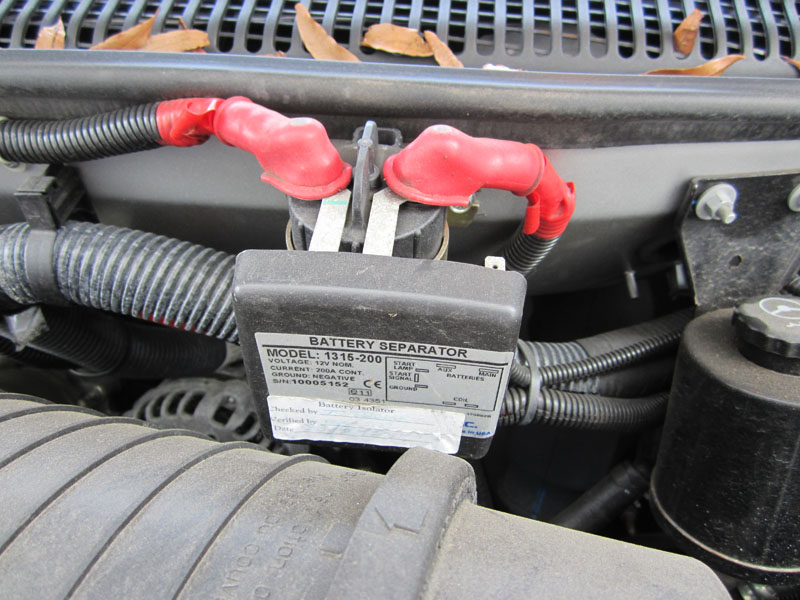
 This continues in the Roadtrek standard electrical system until 2007 later year built Chevy Roadtreks and then 2008 and beyond – with the standard electrical system.  According to the creator of the Roadtrek Electrical Simulator in his written NOTES that accompany the Simulator, in 2008 Roadtrek changes from a battery isolator to a battery separator as at this point Roadtrek found that the isolator was not working as it should when connected to a TrippLite 750 inverter/converter/charger.  (The 2005s have a TrippLite 600 inverter/converter/charger. Per the Roadtrek brochures for 2006 and 2007, they have the TrippLite 750 but they do not change over to the battery separator for these years and remain with the battery isolator though some later built in 2007 Roadtreks may have the battery separator. This is a photo of the battery separator, Notice the simpler and fewer connections.


What is the difference between the two?

The battery separator does the same thing as the battery isolator but in a different way electronically. They are connected the same way. They both charge the Roadtrek coach battery(ies) when you drive but it has an added feature – it is bidirectional – which means not only does it charge the coach batteries when the engine is running but it also charges the engine battery WHEN THE ROADTREK IS PLUGGED IN OR RUNNING THE GENERATOR! 

I can best explain how the battery separator works as I am most familiar with that.  The battery separator monitors the battery voltage – the separator monitors both sides – the engine battery voltage and the Roadtrek coach battery voltage. The battery separator used by Roadtrek is the Sure Power 1315-200 (BIDIRECTIONAL) 12 VOLT 200 AMP BATTERY SEPARATOR.  There are two voltages that the battery separator looks for.  When either battery – the engine battery or the Roadtrek battery(ies) is below the “disconnect threshold” (which is 12.8 volts DC) the relay is opened connecting the two sides – engine battery to Roadtrek battery(ies). This starts charging of one or the other of the two sides.  Which? If the engine is running the engine battery is charging the Roadtrek battery(ies).  IF you are plugged into SHORE POWER OR RUNNING THE GENERATOR then the Roadtrek battery(ies) are charging the engine battery at the same time the TrippLite is charging the Roadtrek battery(ies).  When the “connect threshold” voltage (which is 13.2 volts DC) of the battery(ies) being charged is reached the battery separator shuts off charging.  The battery separator is designed when it is off to preserve the engine battery at 12.8 volts – which is 100% of the engine battery’s capacity to start the engine.

 This is very confusing to most and is from the Sure Power documentation for the battery separator. These voltage numbers to most of us are not important – BUT if a mechanic needs to test the battery separator (or a battery isolator – he needs these numbers to make it connect and disconnect. While we are paused for the moment, I want to explain simply about 12 volt battery voltage.  It would seem that when a 12  volt battery is fully charged, if you read the voltage of the battery it would read 12 volts. That is not what it will read. If it is fully charged it will read between 12.7 and 12.8 volts. Between 12.2 and 12.4 volts the battery is half charged. At 12 volts it is one quarter charged.  At 11.9 volts it is DISCHARGED!  Deep cycle batteries should not be allowed to go below half charge. On the Roadtrek monitor panel half charge is the two bottom LEDs lit – on the digital panel that would be the bottom two indicators. AT THIS POINT THE ROADTREK BATTERY(IES) NEED TO BE RECHARGED! GOING BELOW THIS POINT THE BATTERIES WILL LOSE CHARGING CYCLES - HOW MANY TIMES A BATTERY CAN BE CHARGED TO FULL.

 Back to the battery separator – when you plug in the Roadtrek to shore power and have someone stand next to the front driver’s side of the hood of the van you will hear a CLICK. That click is the battery separator connecting the batteries together on each side – engine and Roadtrek sides connected – and charging!

 When you start the engine, IF YOU LISTEN VERY CLOSLY, you will hear a faint CLICK. The battery separator just connected the batteries and they are charging. Want to be sure – go to the monitor panel on the wall and turn on the battery switch and press the test button – the battery column will be lit top to bottom – top LED or indicator is labeled C for CHARGING!  The Roadtrek battery(ies) are being charged by the engine separator.


A QUESTION THAT OFTEN IS ASKED:

DOES THE BATTERY WALL SWITCH NEED TO BE ON WHEN THE ENGINE IS RUNNING TO CHARGE THE ROADTREK BATTERY(IES)?  THE ANSWER IS A SOLID NO!  THE BATTERY(IES) WHEN THE ENGINE IS RUNNING WILL STILL CHARGE WHEN THE BATTERY WALL SWITCH IS OFF!  CAN THE BATTERY SWITCH BE ON IF YOU WANT IT TO BE ON – AS FOR RUNNING THE FRIDGE ON DC WHILE DRIVING? YES, OF COURSE! THIS IS YOUR CHOICE AND EVERY THING WORKS AS IT SHOULD.


WHAT HAPPENS IF THE BATTERY SEPARATOR OR A BATTERY ISOLATOR GOES BAD?

Things happen on either the engine side or the Roadtrek side of the electrical system that cannot be explained by any logical reason.  The engine battery could be drained dead. The Roadtrek battery(ies) could be drained dead. Both could be drained dead. Electrical things start happening that just do not make sense!

When this happens take the Roadtrek to either an RV shop or a vehicle mechanic who understands battery separators or battery isolators.  These units are common in food trucks, refrigerated trucks, etc.  Any vehicle where there is a battery for the engine that needs to be connected to a battery for the coach that gets charged by the engine battery when the engine is running. The mechanic who works on my Roadtrek surprised me when I bought my Roadtrek to him because the coach batteries were not charging and draining fast. He tested the battery separator - I gave him the two documents from Sure Power that have all that is needed to test it – and he tested the two self-resetting circuit breakers.  The diagnosis – the battery separator was not putting out any power to the Roadtrek side. The battery separator needed to be replaced.  That time I was lucky because a week before I decided to order a new Sure Power Battery Separator to carry in the Roadtrek just in case and it arrived the day before. I brought it to him and he removed the old one and installed the new one. It was very easy – simple swap of wires and attach to the wall into the same screw holes that held the original.  I highly suggest that you get one to carry as a spare.  They are not found locally – I had to order that one on the other side of the USA. 


WHAT HAPPENS IF YOU DO NOT HAVE A SPARE AND IT IS DRAINING THE ENGINE BATTERY AND YOU ARE STUCK!

First make sure a mechanic has told you that the battery separator is not working correctly. Ask the mechanic to remove the cables from the Roadtrek battery(ies) and the Engine battery from the Separator (or isolator).  Ask them to secure these cables and wrap the ends with electrical tape so that they do not short out under the hood – also to label them to which goes where.  (The BIDIRECTIONAL Sure Power does not matter which battery cable goes on which side) The battery isolator matters and the correct cables need to be connected to the correct connections.  This should take the battery separator or isolator out of the system and allow the battery sides to work independently of the other. This does mean THE ROADTREK BATTERIES WILL NOT CHARGE AS YOU DRIVE OR RUN THE ENGINE. THEY WILL STILL CHARGE WHEN YOU PLUG IN OR RUN THE GENERATOR. WITH THE BATTERY SEPARATOR YOUR ENGINE BATTERY WILL NOT CHARGE WHEN YOU PLUG IN OR RUN THE GENERATOR.  IT WILL CHARGE NORMALY WITH THE VAN ALTERNATOR LIKE ANY OTHER CAR OR VAN.


This will get you home or to your destination. If you are on a long term trip try to find the battery separator on the Internet and have it shipped to the location you will be at within the delivery time – and then you can have it installed and all put back together.

 There are two PDF documents that I cannot attach to this article. Both are documents for the Sure Power battery separator written about here.  They are worth having and being able to share with any mechanic if your battery separator needs to be tested. Use the EMAIL US! Link on the right column of this article and ask me to email it to you. I will do so as soon as I see your email!


 MOVING ON AND IT GETS A LITTLE EASIER TO UNDERSTAND!

 The second charging component in a Roadtrek!  

 This is also dependent on year and model of your Chevy Roadtrek. To charge your coach battery(ies) when you are plugged in or running the generator (if you have a generator) your standard electrical system Roadtrek either has a CONVERTER/CHARGER or a TRIPPLITE INVERTER/CONVERTER/CHARGER. Roadtreks 2004 or earlier have a Converter/Charger. (Someone with a 2004 is going to say I HAVE ONE!!! – you may – how come – Roadtrek starts putting newly adapted equipment sometimes in a late year built Roadtrek so sure it is possible that someone will have a 2004 with a TrippLite! But according to the 2004 brochure – you have a converter/charger).  Roadtrek started offering a stand alone inverter to the Roadtreks that only have a converter/charger as an option. Some will have it and some will not.

In 2005 Roadtrek installs the TrippLite 600 watt inverter/converter/charger into each of the 2005 Chevy based Roadtrek models. In 2006 Roadtrek installs an upgraded TrippLite 750 watt inverter/converter/charger. The main difference between the two is that the 600 has 150 watts less of inverter wattage from the 750. Right here we need to clarify something very important.  Many refer to the TrippLite – either 600 or 750 – as “the inverter”.  The inverter is JUST ONE of the functions of the TrippLite.  The other two functions is that it is a converter and a charger. By calling it “the inverter” it makes it very confusing trying to determine what a problem with it one is referring to. Some one asks  – “Do I put the inverter on?”  -  is that do I put the inverter function wall switch on or do I put the TrippLite on? Well, most of the time the TrippLite is always on – (we will get deeper into that as we go along) – and it is supposed to be. All the wall switch that says INVERTER on it does is start the inverter function working.


THE TRIPPLITE

THE INVERTER FUNCTION WALL SWITCH


If you have a 2005 – you do not have an inverter wall switch. The connection for it is on your TrippLite 600 but Roadtrek chose for some reason not to connect it.  This means that it is always has the inverter function on which can drain your Roadtrek coach battery(ies). To stop this there is a slide switch on the TrippLite that needs to be changed – more about this coming.

Ok – what does the inverter function do?   

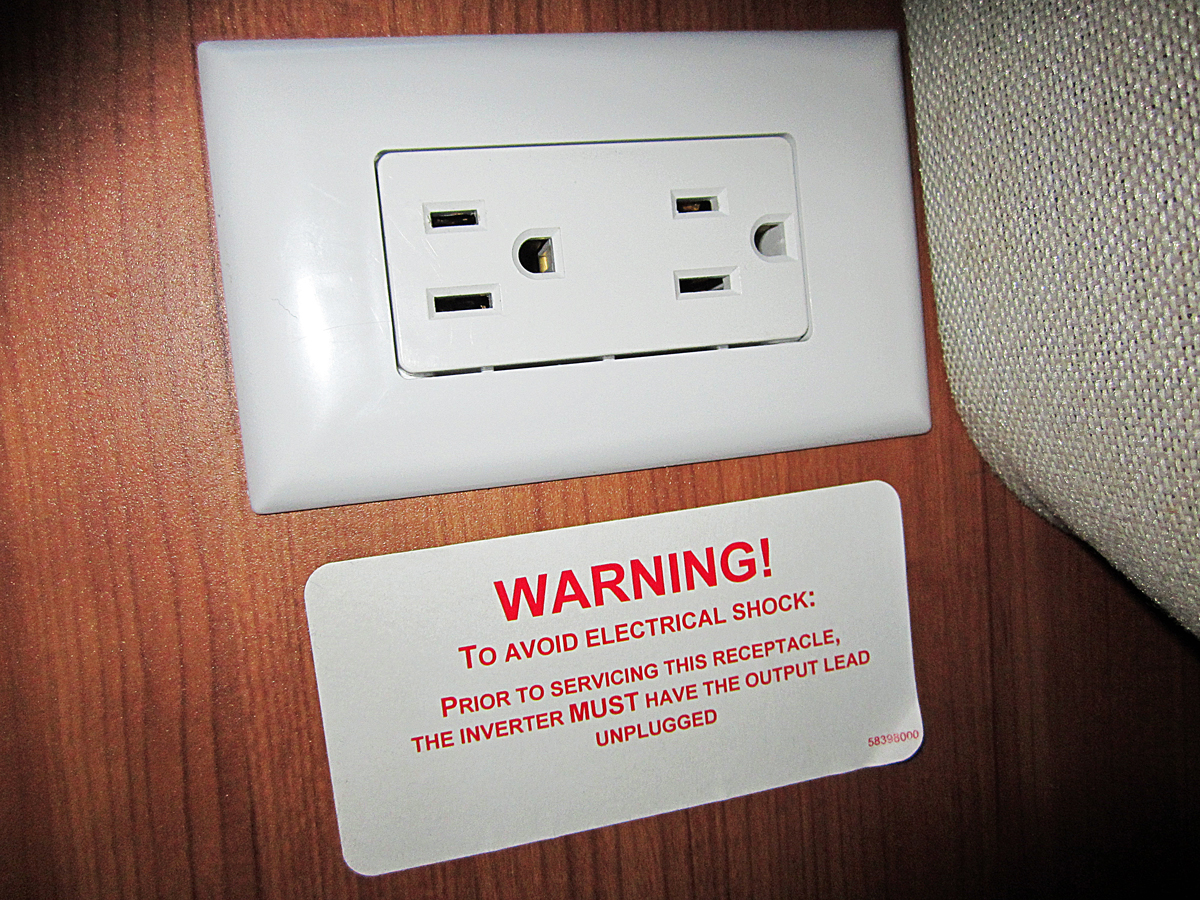
The inverter function changes 12 volt DC power into 110 volt AC power.  600 watts and 750 watts is not a lot of wattage and will not power a lot. Because of the limitation Roadtrek only connects three or four outlets to the inverter function on the TrippLite. These outlets also work normally when plugged in or running the generator. But if you have cannot plug in or run the generator (lots of campsites have noise restrictions after a specified hour at night) and you want AC power to watch TV – plug in your laptop, charge your cell phone – you can turn on the inverter wall switch and plug in. The outlets most commonly connected to this are the outlet the TV and home entertainment center is plugged into, the outlet over the kitchen counter, and the outlet the optional coffee maker is plugged into or would have been plugged into. They all work on DC. Roadtrek put this sticker above or next to the outlets connected to the inverter function in my 2011 190 Popular.


What does the Converter function do?

The converter is the opposite of an inverter. It changes 110 volts AC into 12 volts DC. Plugged in or running the generator and you have lights, the water pump, the furnace, the hot water heater, etc. working!


What does the Charger function do?  


The charger charges your coach battery(ies) when you are plugged in or running the generator.  It us putting 12 volts DC into the battery(ies) to charge them.

 The TrippLite wants the battery switch on BEFORE you plug in or run the generator. In Roadtrek put a sticker saying this in some Roadtreks.


So, before you plug in, turn on the battery switch.  You need the battery switch on anyway to start the generator.


The TrippLite has a cooling fan on the front. When the TrippLite needs to cool itself down so that it does not overheat – the fan starts. The question so many new Roadtrek owners ask – and I asked also – What is that humming noise coming from below the bed? Getting the answer is like being accepted into the ‘club’! It IS the FAN running when it has to. It is not constant. It is intermittent. Over time in the Roadtrek you will get so used to it you will not even notice it. Can it be turned off – NO! It will turn itself off when it is cooled down. I asked a service tech at the dealer I bought the Roadtrek at new – he laughed and said, “Every one asks that! – and he laughed. He told me the answer and smiled. Now, you know the answer too!  I am not familiar with the converter/charger Roadtrek used before the TrippLite but I suspect it too has a fan.


Where is the TrippLite – it generally is close to where the battery(ies) is/are outside. Mine is behind the passenger side cargo door.  Rather than go through the story of my search for it – I will link that article here. 

https://roadtrek190popular.blogspot.com/2013/02/in-search-of-elusive-roadtrek-inverter.html

 On the front of the TrippLite there is a slide switch on the upper right front.  There are three positions – left – AUTO/REMOTE --- center – DC OFF -  right – CHARGE ONLY.


AUTO/REMOTE - Enables the inverter function switch on the wall to work. By turning the wall switch on when it is enabled the inverter function puts 110 volts into the outlets it is connected to. In this position the battery(ies) do charge – just as they would in Charge only.


DC OFF – This position disconnects the TrippLite from the coach battery(ies). This is how to turn off the TrippLite if you want to. The batteries are directly connected to the TrippLite and the TrippLite bypasses the battery wall switch. More about this later. In DC OFF – when plugged in or running the generator THE BATTERY(IES) DO NOT CHARGE. 


THIS IS SURE TO RAISE THIS QUESTION – IF IT IS IN DC OFF WILL MY COACH BATTERY(IES) CHARGE WHEN DRIVING AND THE ENGINE IS RUNNING.  YES – YES, THEY WILL STILL CHARGE- It is the battery separator or battery isolator that is charging them when you are running the engine or driving.


IF YOU ARE REMOVING THE ROADTREK COACH BATTERY(IES) OR REPLACEING TRIPPLITE SAYS TO DISCONNECT IT FROM THE BATTERY(IES) – PUTTING IT IN DC OFF ELECTRONICALLY DOES THIS! THIS IS SIMPLER THAN REMOVING THE BATTERY CABLES FROM THE TRIPPLITE. ONCE THE BATTERY(IES) ARE BACK IN PLACE AND INSTALLED –  TAKE THE TRIPPLITE OUT OF DC OFF!


CHARGE ONLY – Disables the inverter function wall switch. If you put the TrippLite into this setting the inverter wall switch NO LONGER WORKS until you set the slide switch back to Auto/Remote. Why would you want to do this?  If you forgot to turn the inverter wall switch OFF the inverter outlets are LIVE – and even with the battery switch off and nothing plugged into any of the inverter function outlets – the batteries in the Roadtrek will drain as if something was plugged in using the inverter function. If you tend to put that switch on by accident – in some Roadtreks (like mine) the porch light switch is below it – your coach battery(ies) will drain. If you have a 2005 this is how you can turn off the inverter function when you have no remote inverter function switch on the wall.


Back to DC OFF - The TrippLite has a small consistent drain on the Roadtrek coach battery(ies).  I had the mechanic who works on my Roadtrek check this and confirmed that yes there is a drain. I then put my TrippLite into DC OFF and had him check for a drain again – NO DRAIN!  When I got my Roadtrek new I was finding the coach batteries were down to half charge in 30 day. I then would plug in and recharge the batteries regularly at the end of each month. Over the years and the batteries got older,  the time between needing to charge was becoming less and less – to about half a month or less.  When I got new coach batteries I decided to keep the TrippLite in DC OFF while it sat on the driveway. When I need to plug in or run the generator I first go to the TrippLite and slide the switch over to Auto/Remote – so that the batteries will charge. Then once the TrippLite is on I put on the battery switch and plug in or start the generator. After we are done doing whatever we are doing inside the Roadtrek or outside the Roadtrek on the driveway DC OFF is turned on again.  When we are leaving on a trip – I put the TrippLite to Auto/Remote and it stays on that the entire trip.  TO BE SURE I DO NOT FORGET TO SET IT TO AUTO/REMOTE WHEN IT NEEDS TO BE IN THAT SETTING I MADE A LABEL AND  PUT IT UNDER MY BATTERY SWITCH TO REMIND ME.


SLIDE SWITCH IS ON THE UPPER RIGHT

Looking at the above photo you can see the label below that says Auto/Remote, DC OFF, and Charge Only. When you slide the switch into one of these positions it should CLICK into place - listen for the click. If you do not hear it then the switch is between two positions - even if it looks like it is where it is supposed to be. 

You also see in this photo the blue plug cable. This is the cable that runs through the walls of the Roadtrek to the front passenger side to the Inverter Function Wall Switch. The back of that switch is a matching socket with a matching plug in it. The cable is the same as used for wired computer networks - called a LAN cable.

The TrippLite has a variety of settings.  All of these settings were set in by Roadtrek when it left the Roadtrek factory to where they should be. The most common setting to change is Battery Type. If your Roadtrek came with wet cell deep cycle batteries the battery type DIP Switch is set to wet cell (there are no labels for the DIP switches – all needs to be looked up in the TrippLite manual). If you change to AGM batteries you must change the battery type DIP switch to AGM – the manual says this setting is for GEL batteries – TrippLite has confirmed that the same position applies to AGM batteries.


IF YOU DO NOT HAVE A TRIPPLITE MANUAL – AGAIN, CONTACT ME BY EMAIL WITH THE EMAIL US!  LINK ON THE RIGHT COLUMN NEXT TO THIS ARTICLE AND I WILL EMAIL THE MANUAL I HAVE TO YOU. IT IS A 750 MANUAL BUT THE 600 HAS THE SAME SETTINGS AND POSITIONS.

 The manual is very good to have as the LEDs on the front of the TrippLite can be used to troubleshoot electrical problems and how to reset the TrippLite if it overloads.


It is also important to know is that the TrippLite does not like being plugged into shore power in a GFCI outdoor or indoor outlet. This applies to plugging the Roadtrek at home. I have never had a problem plugging into any 30 amp outlet at a campground – I have never come across one that was obviously GFCI so either they are not or the GFCI reset is not visible.  While building codes frown on it – change the outlet you plug the Roadtrek into at home to a standard home non-GFCI outlet.

As we are on GFCI outlets - the outlets that Roadtrek connected to the TrippLite’s inverter function are all on one shared GFCI circuit. One of the outlets has the TEST and RESET buttons on it. Often this is the outlet that the TV is plugged into – inside the cabinet over the TV in my Roadtrek.  If you plug into one of these outlets – whether on the inverter function OR plugged in or running the generator does not work – then all of the inverter function outlets do not work. Find the outlet with the reset button – press the TEST button first and then press and hold the RESET button and let go to reset the GFCI circuit. Then all of the outlets on that circuit will work! THIS MUST BE DONE WITH ELECTRICITY IN THE SYSTEM – PLUG IN IF YOU CAN.  YOU PROBABLY COULD DO THIS IF THE INVERTER FUNCTION WALL SWITCH IS ON. IF THERE IS NO AC POWER IN THE OUTLETS THE RESET WILL NOT WORK!


WHAT CAN GO WRONG WITH THE TRIPPLITE?


I have not had problems with the TrippLite and we bought our 2011 new. When we had problems with the new batteries we bought – which I have written about – and I took it to the Roadtrek dealer we bought the Roadtrek from because I can trust them – they did check the TrippLite thoroughly and found no problems with it (what they found was one of the new batteries was defective and had to be replaced – which they handled under warranty for me – even though I did not get the batteries from them (I should have!)

 Like any piece of technology there can be problems but I have found that in must cases that I am told about or read about, it is due to some change done in the Roadtrek that was not followed with changes to the settings on the TrippLite or some wiring issue, etc. Or trying to match the TrippLite with lithium ion batteries (same with the battery separator). There is no mention at all about Lithium Ion batteries in the TrippLite manual. Some claim there are things to do to make it work – but hook up to lithium ion batteries and thinking the TrippLite is just going to work and then get surprised that it doesn’t. In my experience with the company, I have found when I did contact TrippLite to ask them a question was that the company responded to my email request quickly and were very responsive.

 SOMETHING TO BE AWARE OF WITH THE TRIPPLITE:

The TrippLite has a problem with being plugged into a GFCI shore power outlet. It will trip the GFCI switches on that outlet cutting off all power from that outlet. For example- you plug the Roadtrek's shore power cord into a home outdoor GFCI outlet using a 30 amp socket to 15/20 amp plug adapter and what will happen is the GFCI circuit in the outlet will TRIP and there will be no AC voltage power going into the Roadtrek.  If you push the RESET switch on the GFCI outlet with the Roadtrek still plugged into it - it will NOT RESET.  This mostly happens with home outdoor outlets which commonly are GFCI outlets. We have never had this problem plugging the Roadtrek into a campground outlet. We have never come across a 30 amp campground outlet that is GFCI with test and reset switches on the outlet. There may be a central GFCI circuit for that outlet that is common to that and other campsite power outlets  - but none have ever failed to provide voltage to our shore power cord and the Roadtrek.  So what do you do?  The simplest solution is to replace that home outside outlet with a standard 15 or 20 amp home outlet with no GFCI on it. This has been found to be so by many Roadtrek owners who have the TrippLite inverter/converter/charger.  "SOME" have said that if they turned the inverter function switch on the wall in the Roadtrek on FIRST before plugging the Roadtrek's shore power cord into the GFCI outlet, the GFCI did not trip.  I cannot say if this is true or not. When we first plugged the Roadtrek into our home outside outlet that was a GFCI outlet and the GFCI tripped in the outlet, we replaced that outdoor outlet with a standard 20 amp home outlet - the breaker in the house connected to that outlet is 20 amps.

PUTTING IT ALL TOGETHER!  


The only interconnection between the battery separator system and the TrippLite is with the Bidirectional Sure Power Battery Separator when the TrippLite and the coach battery(ies) with the Roadtrek plugged in and running the generator. 

 There are clearly two charging systems in the standard Chevy based Roadtrek models and years. The two are designed to interact with each other.  

 Even with all that I know about these systems – I still have some questions myself. This article has been in the planning since 2018.  Every time I thought to sit down and start writing it, those questions kept me from writing.  Back in 2018 my Roadtrek was having some problems and I was not sure if it all did not come down to the battery separator. I contacted two Roadtrek/Internet friends who have a lot more understanding of this type of technology than I did at the time.  The three of us went back and forth over email figuring this all out - together.  Well this article is written now. I have written so much of this article so many times in answer to questions I get by email and by questions asked to all in Facebook Roadtrek Chevy groups and on forums. It was time to put it all down an in one place so I can refer back to this article when questions come.

Thanks for reading the whole thing and getting down to here.  I am always happy to answer questions that get emailed to me. I have mentioned the Email Us! link on the column to the right of this page. As soon as I see the email I tend to just respond to it right then.  Be patient – I am not online all day - though sometimes it feels like I am, but that is OK! And if you take anything away from this article I hope that it is that you will no longer refer to the TrippLite as "the inverter".



Wednesday, March 5, 2014

Questions from Readers - Important To Know About the Inverter

Here is another question from one of our readers. In the process of answering this question I learned something new (to me) and it is something that is very important to share.

Here is the question emailed to us -

" If you are not hooked up to  any external power, and not running the generator, and your battery switch off, but the inverter switch is on, will you have AC power at the inverter outlets? I do, and for the first time ever that I can remember, the battery was on low just today. A big surprise to me!!"

When I read this question I began to write that this had to be something wrong. If the battery switch is OFF how could there be 12 volt power to invert to 110 volts into the outlets connected to the inverter? I proceeded to write an answer about all of the things that could be wrong. I also went into an explanation of what the inverter wall switch is and does (which I will include here in this article). Then I decided before I sent off my answer to go to the Roadtrek Electric Simulator and do a simulation test of what happened in the Roadtrek that initiated this question. I tried it with two Roadtrek year's models. The first simulation was done for a 2010 Roadtrek 190 - with the Tripp-Lite 750 watt inverter/converter/charger all in one unit. The second simulation was done for a 2004 Roadtrek 190 - with no Tripp Lite but a separate inverter unit and a separate converter/charger unit. The third and last simulation was done for a 2010 Roadtrek Sprinter - which has a different Tripp-Lite all in one.

The results that I found surprised me. With the BATTERY SWITCH OFF and the INVERTER WALL SWITCH ON - and no other power sources such as generator of shore power, THERE IS 110 volt POWER IN THE INVERTER CONNECTED OUTLETS for both the 2010 Roadtreks - both the 190 and the Sprinters. (The 2010 models are the last models represented in the simulator but with the 190 models up to 2013 and maybe 2014 the wiring and components are the same (providing none of the new ETrek like electric components have been installed.) The Sprinters without ETrek components are the same as well. They contain a Tripp-Lite all on one inverter/converter/charger.

The 2004 Roadtrek 190 simulation found what would be expected - with the Battery Switch OFF and the Inverter Switch ON there is NO POWER in the inverter connected outlets. None of this applies to Roadtreks before 2006.

For the Roadtreks 2006 and after, if you leave the Inverter Wall Switch ON, and the battery switch is OFF you are drawing power from the batteries into the outlets and anything that is connected to those outlets - the TV, the Home Entertainment Center unit is draining your coach battery (ies). To me this is a very bad situation. While most of us have been believing that if the battery switch is OFF there is no 12 volt power coming through, it is coming through the Tripp-Lite and into those outlets.

I have read many comments and questions about the Roadtrek regarding mystery drains on coach batteries. Now we know one more place to check if your batteries are draining. Also be aware that with the Inverter Wall Switch ON even when the Battery Switch is OFF those outlets are LIVE and 110 volts can give quite a jolt! The bottom line is only turn on the Inverter Wall Switch when you want to use the power in the inverted outlets right then. When you are finished using those outlets with the inverter, turn off the inverter wall switch. I know that some keep the Inverter Wall Switch ON when plugged into shore power to take advantage of the Tripp-Lite's power protection functions. If you do this, make sure to turn that Inverter Wall Switch OFF when you unplug from shore power!

I have explained the Inverter Wall Switch in the Roadtrek before but I will explain it here again. The wall switch on the inverter is actually a remote control switch - there are three states of the inverter - Off, Charge Only, Auto/Remote. These three states are found on the switch on the inverter unit itself. That switch on the inverter unit is generally left on the Auto/Remote position. The wall switch remotely controls those last two functions - Auto/Remote = which is the function that includes sending inverter power to the wall outlets - and Charge Only which puts no power in the outlets but allows the inverter's charger function to charge the batteries when running the engine, plugged in, or running the generator. With the wall switch ON you are in Auto/Remote function. With the wall switch Off you are in Charge Only function. Tripp Lite has its own remote control panel with more functions and indicators, but Roadtrek made its own  switch and attached it to the remote port on the inverter unit (the port looks like a network cable connection and uses the same type of plug and wire). The Tripp Lite panel is larger than the Roadtrek switch and is available as an option from Tripp Lite.

If you do not have a Tripp-Lite inverter, test this for yourself with a volt meter and putting the Inverter Wall Switch ON and the Battery Switch OFF and carefully test the outlets connected to the inverter for power. 

Wednesday, February 5, 2014

Extreme Winter and Charging the Roadtrek Batteries

This winter has been extreme all over the country. In the west there are droughts, in the mid-west, central and eastern states there is extreme cold and deep snow. This has is the worst winter that Meryl and I have experienced with the Roadtrek. Since we got her it has been cold and it has snowed but there has been nothing like this. As a result the temperatures are taking their toll on our Roadtrek's batteries.

I wrote in a recent article, "After Winterizing", I spoke about our schedule to keep the batteries charged. I have a schedule to plug the Roadtrek into shore power at our house on the 28th of every month (28th chosen because of February) and I exercise the generator for two hours on the 15th of every month. This schedule has been fine until now. With single digit and below zero temperatures day after day, and wind chills that bring those down even lower, I have been going out at least once a week to check to see that the battery level is still on the green LED on the monitor panel inside the Roadtrek. Suddenly with these temperatures combined with what seem like regular snow storms, a once a week check is not seeming to be enough.

I looked at the battery monitor panel a week ago before a snow storm and everything looked fine. The 28th came on the day of another snow storm and when I was able to get into the Roadtrek to check the batteries the level had dropped to the red LED second from the bottom. This one is labeled "F" for Fair which is an indication to me that the batteries are getting too low and need to be charged as soon as possible. You really never want that monitor to read at the bottom red LED - "L" for Low.

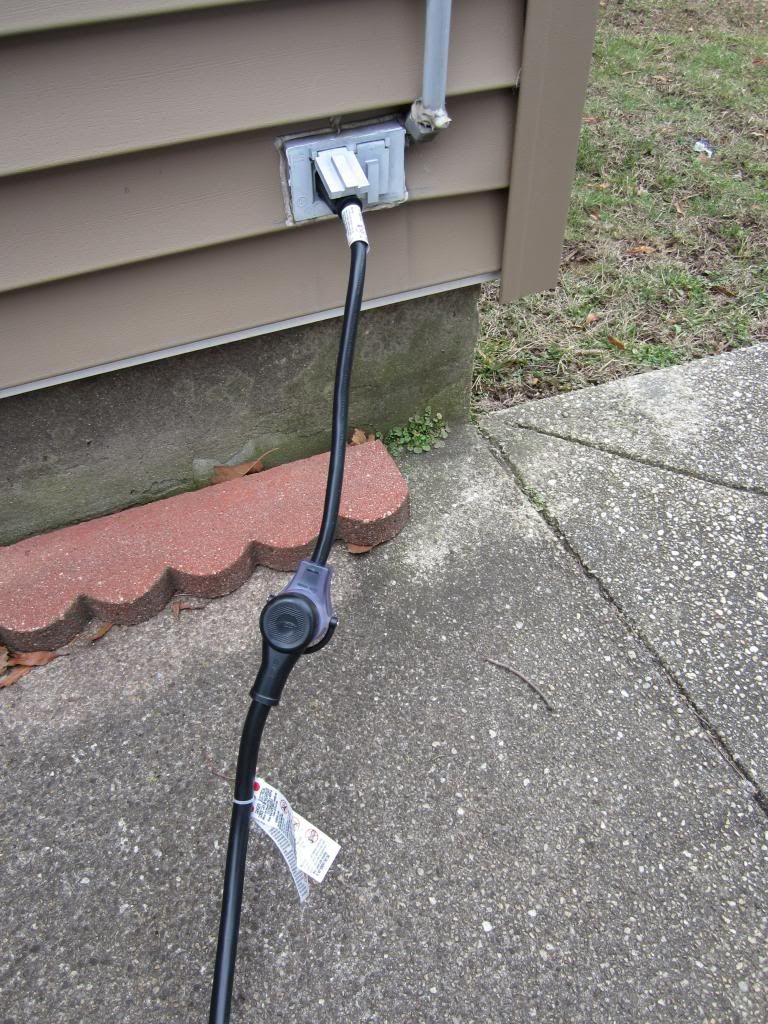
Had this been an ordinary, no snow, normal winter temperature day - normal being upper 20's into the mid-30's or higher - I would have pulled out the RV extension cord, plugged that into my Surge Guard Power Protector, and connected that to the Roadtrek's cord - which needs to be pulled about four feet out for the two electric cords to reach the outside outlet in the rear of my house. This would have been plugged into that outlet and the Roadtrek would have charged for 12 hours. That is our usual routine.  But the snow was coming down and would not stop until the next morning. The night temperatures were going into single digits. And the forecasts for the coming days were as uncertain as they always are. All of this and the Roadtrek's batteries needed to be charged.

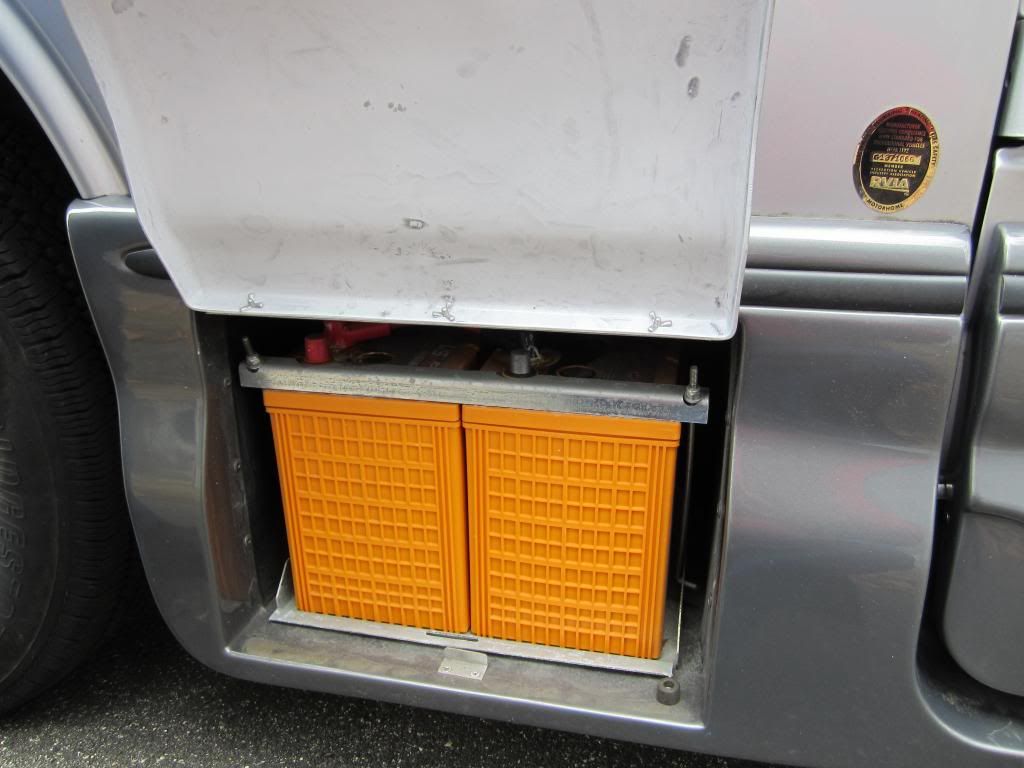
Let me stray a moment to talk about Roadtrek 190 Populars from 2011 on and why I have to rely upon the Roadtrek's battery monitor LED panel which I know some of you will say is highly inaccurate and does not provide a much needed digital reading of the battery voltage. In 2010, the Roadtrek 190 came with two coach battery compartments. All were outside - one was located behind the rear passenger wheel on the side of the van and one was located on the same side in front of the rear wheel. The one in front of the wheel contained a tray on which the battery slid out. The one behind the wheel opened with clear and easy access to the battery that was there. In 2011 for some reason, Roadtrek changed this design. For one thing, they changed from using wet cell batteries to AGM batteries for 12 volt coach power. The new design put both batteries into one battery compartment located where the former compartment was in front of the rear wheel. From the outside you see the same compartment door as before, but once you look inside the compartment, there now sit two batteries on a fixed platform that no longer slides out for access to the batteries. Without getting deep into this compartment there is no access to the battery terminals and therefore no convenient way to touch the test leads on an electric voltage meter to the terminals and read what the actual voltage is. There are also no 12 volt outlets inside the Roadtrek (not since several model years earlier) to be able to use that to connect a voltage meter to - another way that many with such outlets read the actual voltage of the coach battery(ies). So what I am stuck with are the LEDs on the battery monitor panel. There are estimates of the battery level and the LEDs - this is from the Notes for the Roadtrek Electric Simulator - "The “C” light will be on if the voltage is above about 12.7 volts, the “G” light comes on at about 12 volts, the “F” light comes on at about 11.3 volts. The “L” light will come on with less than 5 volts." Notice that the "L" is less than five volts. This why you never want the battery to fall that low - it will potentially damage the battery and charging the battery(ies) back will take much longer.  I know that one Roadtrek owner with a much older model was able to wire a small digital voltage meter into the back of the monitor panel and have the reading show on this meter affixed to the wall adjacent when pressing the test switch. This is not something that I am confident in doing myself. It has been suggested to tap into an empty fuse spot in the fuse box, but when I looked there are no accessible empty fuses spots and certainly no ground wire that is accessible - and I am not about to remove the fuse panel to look for what may be available inside. So, again, I rely on the LEDs which under ordinary circumstances - in that normal winter world that may or may not exist any more - the future will tell.

So - here I am, in the snow and I am not sure how close to that second LED going out and the bottom LED remaining the Roadtrek actually is. I had to charge as soon as possible.

The next day when the storm was over, the temperatures were not much better and they would remain that way for at least two days with maybe or maybe not a rise after that. First I had to shovel the path out of the house, the driveway, the sidewalk, and attempt to shovel a path to the rear of the house that had not really been shoveled since the last storm a week before. I got enough cleared in the back of the house to get to the outlet, but all the while I was realizing that I would have to deal with the other problem of charging the Roadtrek in the cold - the lack of flexibility of the Roadtrek's power cord and the RV extension cord. The RV extension cord was secondary. I could just drag that into the house after use and warm it up to put the long, wild snake of a cord into a store-able condition. The Roadtrek's power cord is located in the lower outside storage compartment and comes out through what has been called a "mouse hole". The mouse hole is located on the rear side of the compartment and comes out into the next covered section where the city water connection is. The "mouse hole" is made up of a flex opening - a round of plastic that is cut like a pizza in the middle. The Roadtrek plug is pushed through this plastic with the flex fingers holding it on place and not permitting any little critters to crawl in around it into the storage compartment. On the outside of the "mouse hole" is a flip cap with space inside the "mouse hole" outer cup for the plug to sit in. We learned the hard way that getting the plug through those so-called flex fingers and into that cup section looks a lot easier than it actually is - and this is in the heat of summer - and you never want that plug to pull back into the storage compartment. In the winter there is no flex. And in just regular winter cold, the cord is difficult to pull out and even more difficult to push back in. Now with this so-called Arctic Vortex this cord if it came out too far from the opening was going to be a problem getting back in - and with this weather, I was not going to let this plug just hang out after the charging was finished. There was no way that I was going to pull it out enough to meet up with the RV extension cord to reach the backyard outlet.

I have two outlets outside and one outlet inside a small porch where our house's side door is. The second outside outlet is in the front of my house - close to the Roadtrek, but to get to it one must go into the front garden and the front garden is where two winter storms' snow was put when shoveled. This outlet was not an option. The outlet inside the porch would work - as long as it was not connected to any wiring for other electric service inside the house, and I had to check the circuit breakers to see if it was - it wasn't and surprisingly it was a 20 amp outlet. The only thing that shared that line was the porch light which does come on with an electric eye but that would not be a problem with 20 amp service.

I don't really know how much amperage the Roadtrek's charging system uses. Once the Roadtrek is plugged into shore power and nothing else is turned on inside the only thing that comes on other than the Tripp-Lite 750W Inverter/Converter/Charger is the microwave (at least the microwave display panel lights up). In my Roadtrek with the all electric refrigerator the fridge turns to 110 volt power automatically but the dial inside is turned to Off. I tried looking at the Tripp-Lite specs but did not see this listed.

When we were finished shoveling and after a short break in the house for feeling to return to our fingers, we went out to charge the Roadtrek. My first thought was to charge for a several hours into the early night and then charge again longer the next day with hopes that maybe it would be warmer. Our usual routine of charging twelve hours straight involves a trip outside at about 2 am to shut it all down and put everything away. With our late night schedule this is not a problem normally. Yes, we are late night people and 2 am is not an issue for us at all. But at 2 am there were temperatures in the low teens predicted and that would be a problem. After we got it all going we decided together that we would just leave it charging overnight until the next day and let it charge for 24 hours - no problem with AGM batteries and no problem with the Tripp-Lite that would allow the charging to continue without a problem is the Roadtrek was always plugged in.

We decided to forget for this time plugging in the Surge Guard. The power from our house should be fine without it. We worked the Roadtrek power cord less than a foot out of the "mouse hole" pushing out from the inside. The cord was very cold and very stiff.  The RV extension cord is kept on a reel inside the porch an while it was cold in there, the cord did roll off the reel to the floor of the porch - maintaining the coils which it does not do when it is warmer. We got out the Plug Dogs - the pull handles for RV plugs. These are one of the BEST things that we have bought for the Roadtrek. Over and over they prove their extreme value and benefit! We also got out the 30 amp female to 15/20 amp male adapter plug cord. I went inside the Roadtrek and turned on the battery switch - necessary before plugging into shore power. A Plug Dog went onto the plug of the extension cord and one went onto the female socket of the adapter. The adapter has a plastic pull on the socket but with this cold I was not going to trust that not to break if pulled on. Two more Plug Dogs were used between the Roadtrek plug and the RV extension cord socket. I am so glad that I ordered four Plug Dogs when I got them. The Roadtrek plug was hard to get into the extension cord socket and I was afraid to force it as I did not want them to be stuck together due to the extreme cold. I managed to get them together and the adapter plug was plugged into the wall outlet in the porch. The porch door when closed would have to sit on the cord and the door would sit out about an inch open as a result - letting a lot of cold into the porch. I went  into the Roadtrek to check that all was well and the batteries were charging (shown as C on the panel monitor when the test button is pushed). I pushed the test button and... Nothing. Oh boy! Now we had to troubleshoot.

We don't often use that porch outlet and perhaps it was not working. The light attached on the same line works fine. We found a lamp and plugged it into both sockets on the outlet and the lamp lit. The extension cord and the adapter were tight together. This put the problem either inside or outside of the Roadtrek. I first went to the Roadtrek plug which we had hanging in mid-air plugged into the extension cord. As soon as I touched them, they fell apart. There was the answer - simple but now, to get them together as they need to be I was going to have to push them together hard - which even in the summer means put them on the ground and using a foot to apply enough pressure for them to mate. This is only a problem with the heavy rubber socket on the extension cord. The Roadtrek plug plugs easily in and out of a campground 30 amp socket. OK. If I had to force them together I would have to hope that they would come apart - and hopefully, in this cold the Plug Dogs would work as well as always. I got the plug and socket mated, put it on the ground and gently with my foot pushed them firmly together. Meryl plugged the adapter into the house outlet and I went in again to check. Yes! The test switch showed Charge on the battery LEDs. I decided to unplug the microwave. While the lit display panel should not make a difference I decided that it was easy enough to just have the Tripp-Lite charger circuits running on the 110 volt electric circuit.

We left it to charge for 24 hours. Twice after plugging in I checked that all was well inside and it was still charging. I was. The next day was sunny and felt warmer though the thermometer was not showing any better than the day before. We went out about 2 pm to shut it down and put it all away. The Plug Dogs did their job well on the Roadtrek plug and extension cord socket that sat out all night and with a sharp yank the two separated. Thank goodness! The adapter and extension cord was not as easy and it took several yanks to get these apart even though they had been inside the porch all night. They did come apart and I thought how good it was that I did not rely on just one Plug Dog and the adapter's little plastic pull ring that is screwed like a hinge around the upper half of the socket. With a little effort I was able to get the RV extension cord back on the reel. The Roadtrek plug was pushed reluctantly (on the cord's part) back through the "mouse hole" and into the cap. Done.

Lessons learned. In extreme cold, checking the battery voltage level once every week may not be enough. I will be checking twice a week in temperatures like this. With this weather it may be a good idea to charge the batteries twice a month and will check the level just before exercising the generator and then plug in the next day if the battery is low. The generator does charge the batteries but not enough in the two hour run. With this weather consider moving to a warmer climate - but heck, it snowed and froze over in Virginia, Georgia, and parts of Florida this past week (the week I am writing this).

Asides - you can charge the Roadtrek coach batteries by driving. This is fine for some - maybe many - but we live on a four lane avenue that has steady traffic. It is difficult to pull out in good weather. I am not sure that the area of the cut into the street is even large enough for the Roadtrek to get in and out of - plus I would not want to drive it now on the roads here that are thick with salt - and where would I drive for two hours?

If the coach batteries are too low or dead, the generator will not start - even if you run the van engine as a boost. If you think of the Roadtrek as a shelter in the event of a power outage which can happen during these cold, snowing, and iced conditions, it is no good to you if the batteries have no charge.

When you charge the coach batteries you are also charging the van battery. This is important in the winter as well!

If you have a Roadtrek with the new solar panel option, the batteries will charge in the light of day from the solar panel and inverter charging circuits. This is one big benefit to the optional solar package. 

Well, I had intended this as a short article. It is longer than I anticipated but adding the whys and what happens to this small tale is perhaps more important to you all than the tale itself. Stay warm!


Wednesday, March 13, 2013

Charging the Roadtrek Batteries

There is a lot of discussion on various forums and readers have asked me about charging the Roadtrek batteries during periods of non-use. Some are interested in attaching trickle chargers to keep the batteries charged. With Roadtreks with the Tripp-Lite three way inverter, all you need to do to charge the all of the batteries fully at the same time and that includes your one or two coach batteries and your vehicle battery. Roadtreks with model years of 2005 and earlier will only be  charging the coach batteries in this way.

This is as simple as plugging the Roadtrek into shore power and you can do this at home. In this article - even though it is simple - I will take you through the steps and show you what is involved in plugging the Roadtrek in.

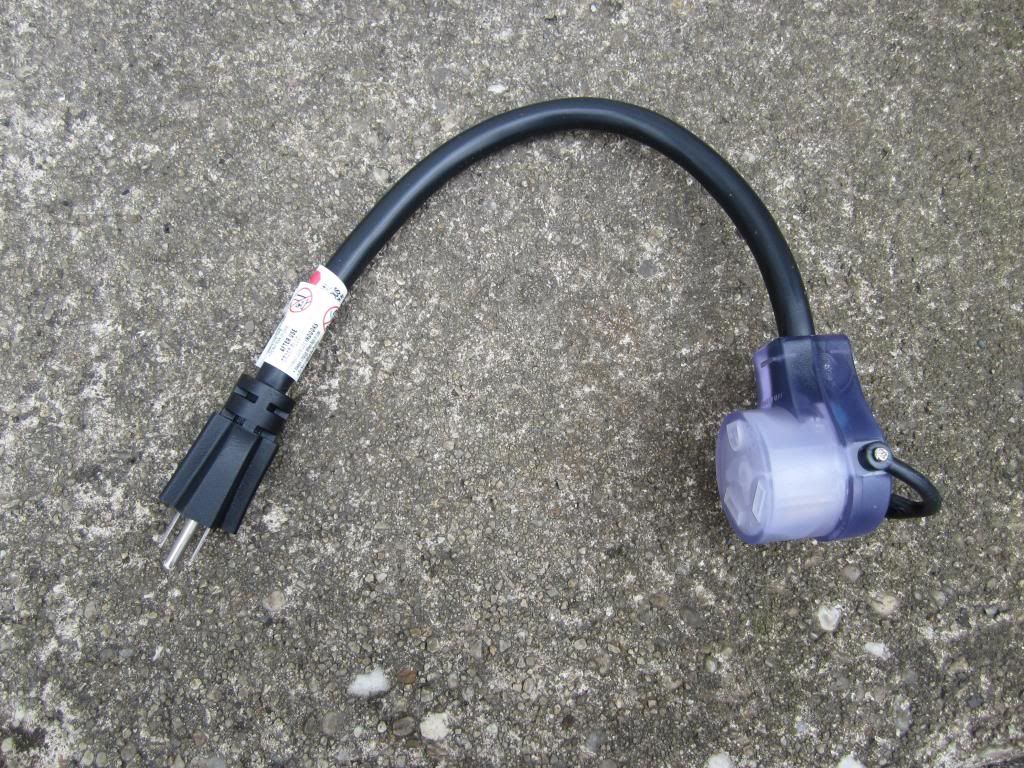
You will need a few things to do this. You will need a 30 amp socket to 15 amp plug adapter and that looks like this:


This adapter can be purchased at any RV supply store and even Walmart in the RV section of the auto department. You may see this type or you may see just a plug with a socket on one side and a plug on the other. The one shown here is called a dogbone adapter and it is the easiest to disconnect from your power cord because of the handle on the back of the socket. It is worth the few dollars more to buy this type.

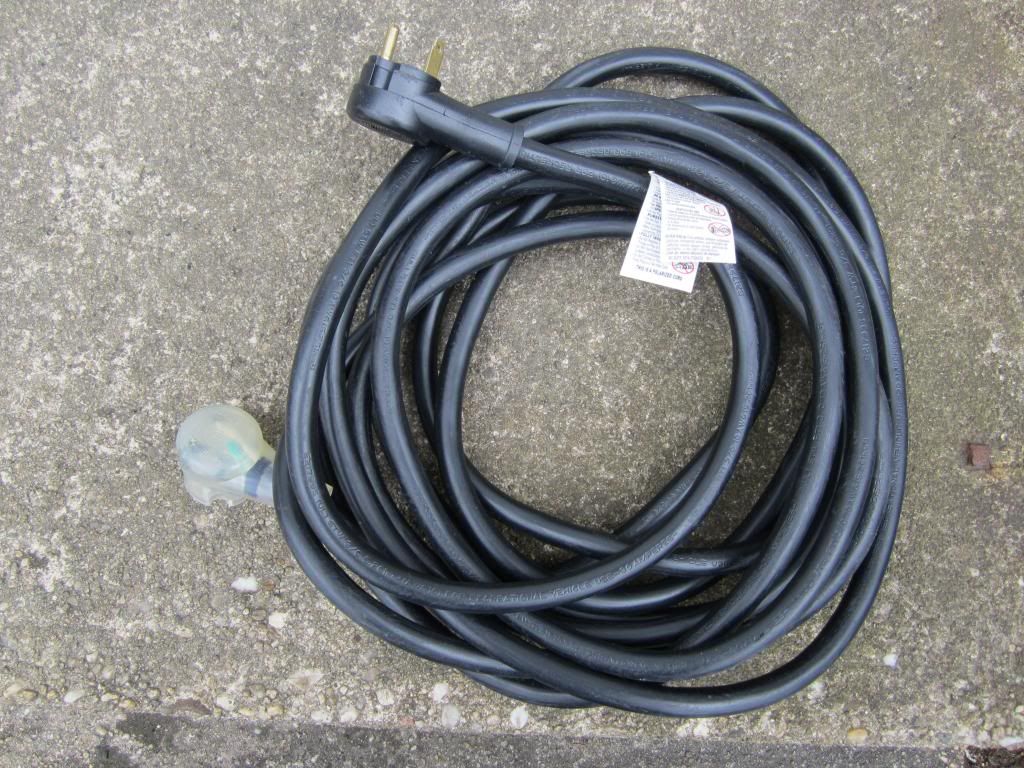
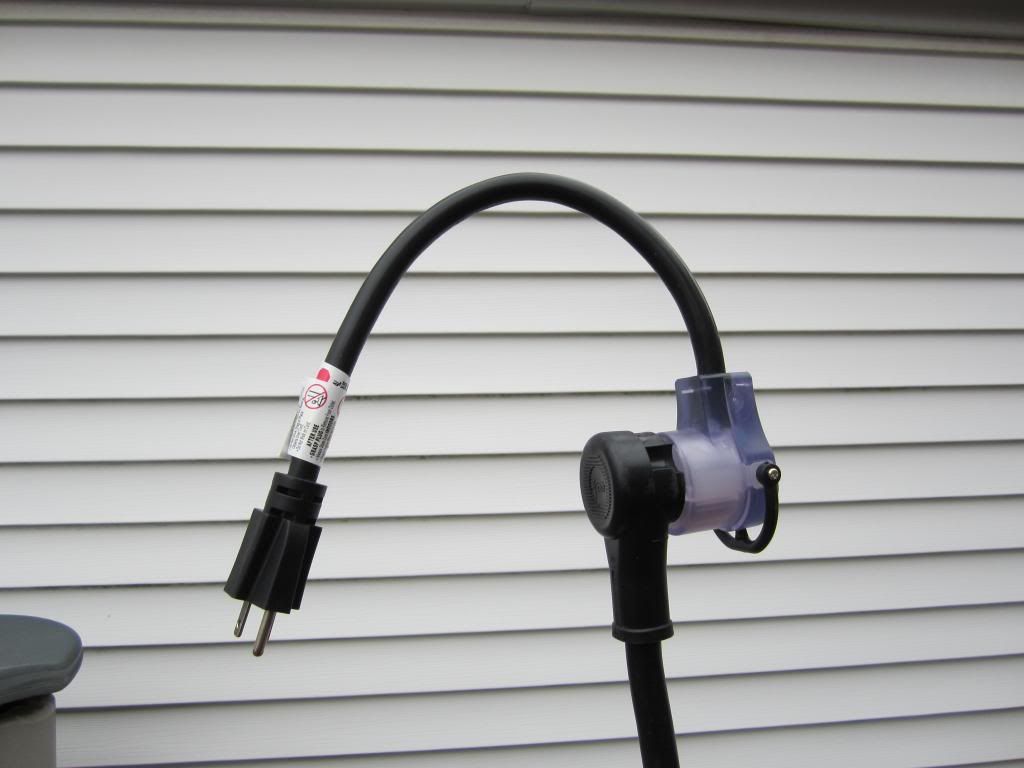
If your Roadtrek power cord does not reach the outlet at your house, mine doesn't, you will need an RV extension cord. I have written about this before and it is worth repeating. You want an extension cord that matches the 10 gauge wiring of your Roadtrek cord. Never use a household extension cord. The cord you want will look like this:


This RV extension cord was purchased in Walmart - again in the RV section - for $50 and is 30 feet long. You will find this cord in RV stores also and lengths vary from 25 feet to 50 feet. The socket on this cord lights up when plugged in showing that there is power in the cord. That is nice, but I would rather have a cord with a plug and socket that has pull grips on the back. If your outlet is within reach of your Roadtrek's power cord plug you DO NOT need an extension cord. Just follow the steps leaving the extension cord off.

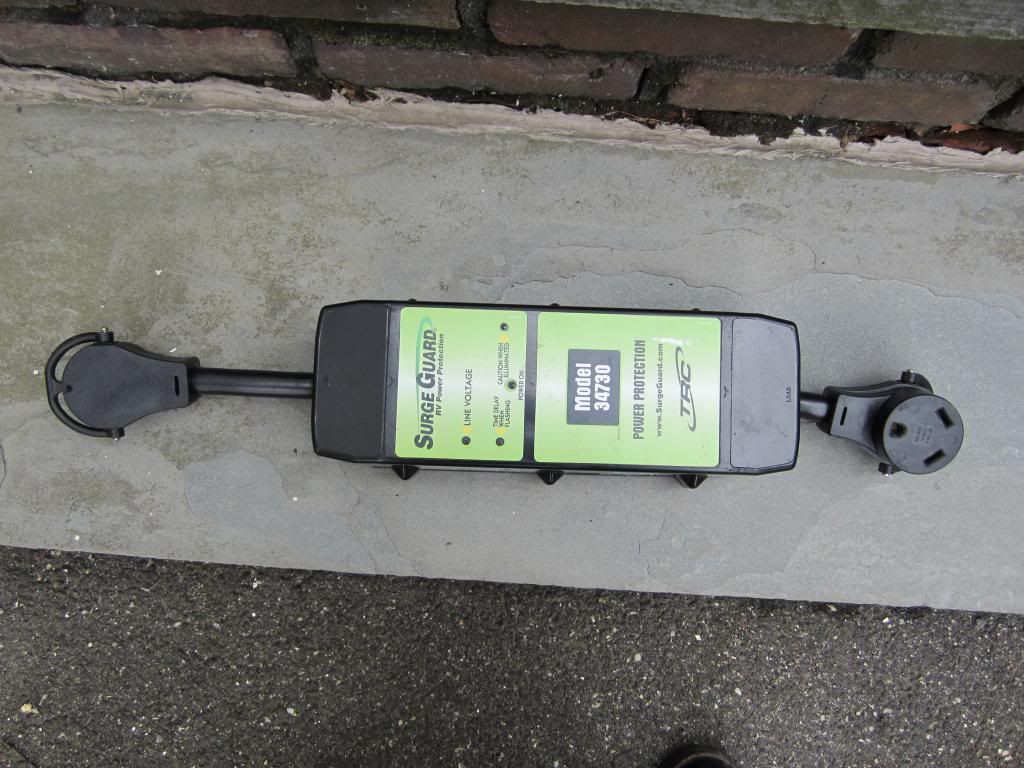
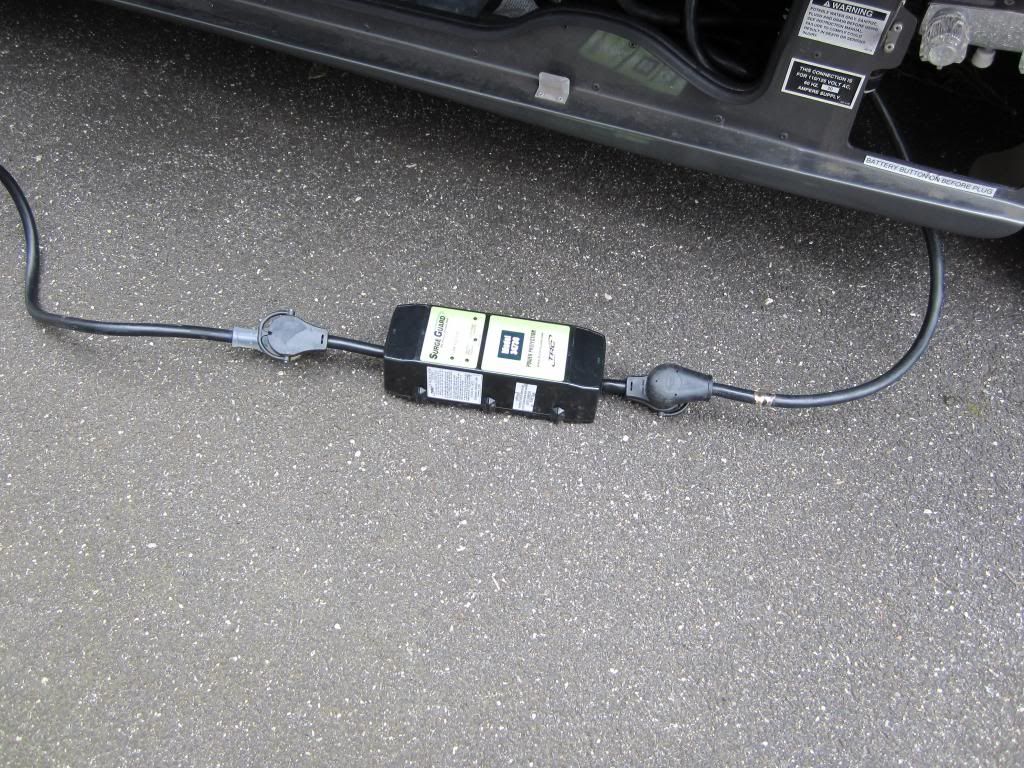
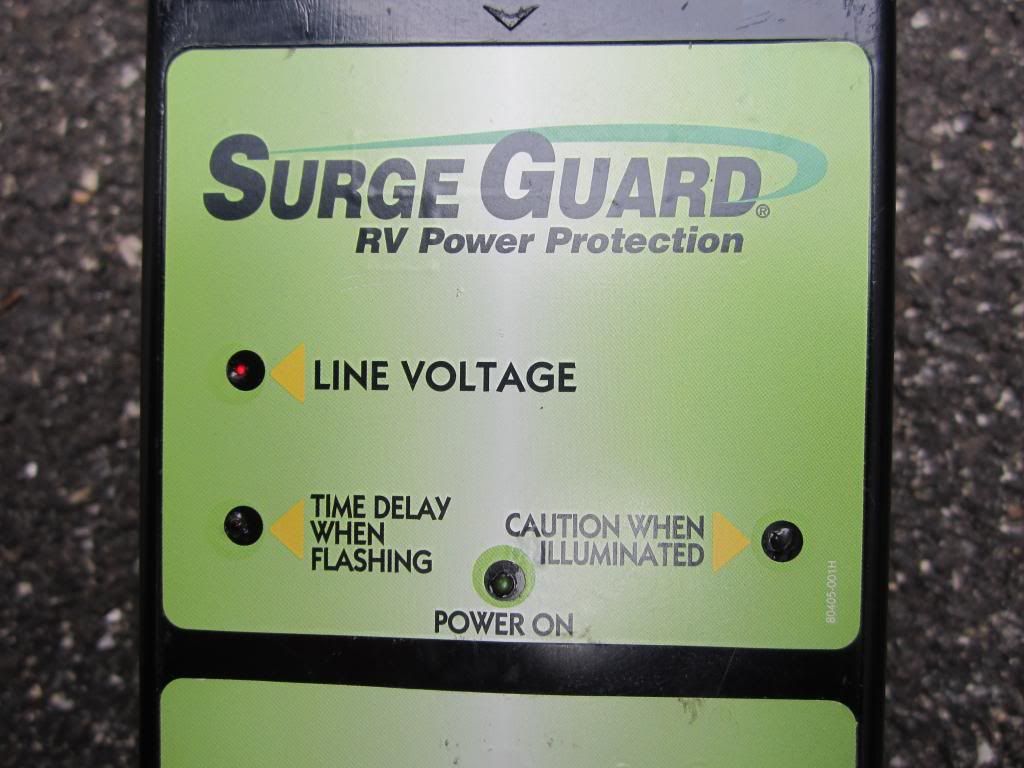
The other thing that you will need - though it is not absolutely necessary but is a wise thing to use here - is a power/surge protector. Even though I am plugging in at my own outlet on the outside of my own house, I do not trust that there cannot be a power surge coming through the wiring at any time. We have had power surges in the house and we have lost electrical devices that were not surge protected - one nearly resulting in a serious fire - had we not been present when it happened.  Here is my Surge Guard. The choice of Surge Guard or Progressive is yours. Only get the model from either company that monitors and stops the flow of electricity if voltage changes in addition to surge protection. There are portable units and permanently installed units. This is a portable unit and you will find it only in RV supply stores - and some of those do not stock them regularly. Here is my Surge Guard 30 amp unit (your Roadtrek is 30 amp and you want a unit that is also 30 amp):


With these three pieces of equipment, you are ready to begin.

First - go inside your Roadtrek and turn on your battery switch. There is a large sign inside my Roadtrek near that switch that says to turn it on whenever connecting to external power, and that is why I do it. Leave this on through the whole time you are charging and plugged into shore power.

Here is the switch - press and release and the red LED will light showing the switch is ON:


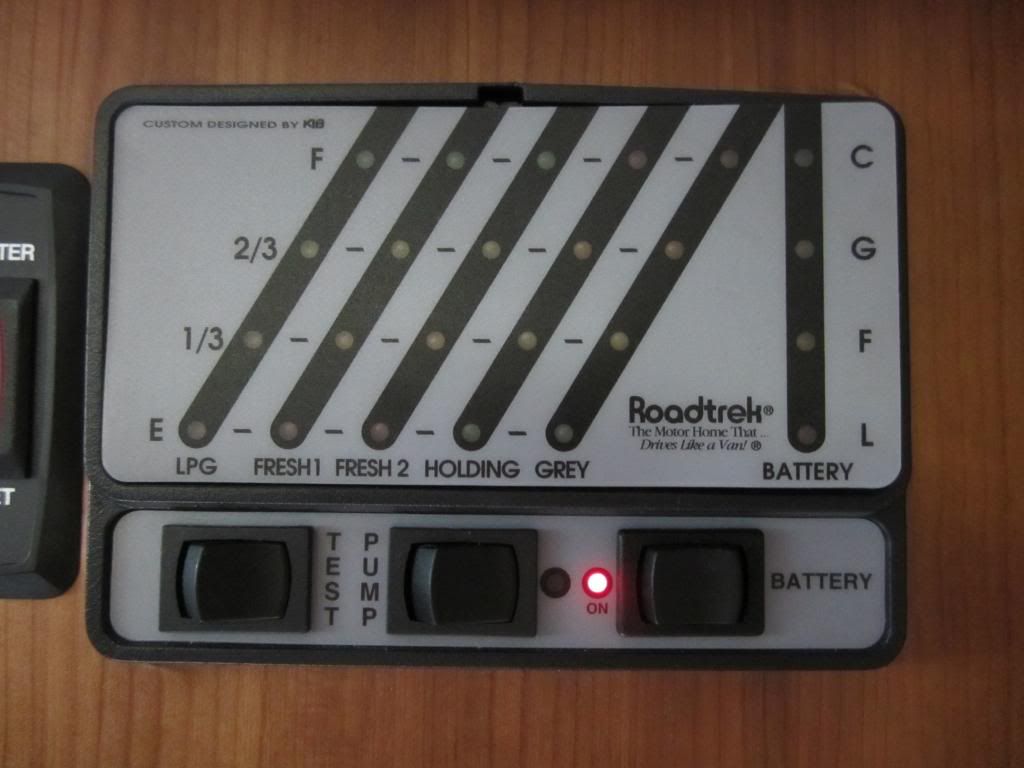
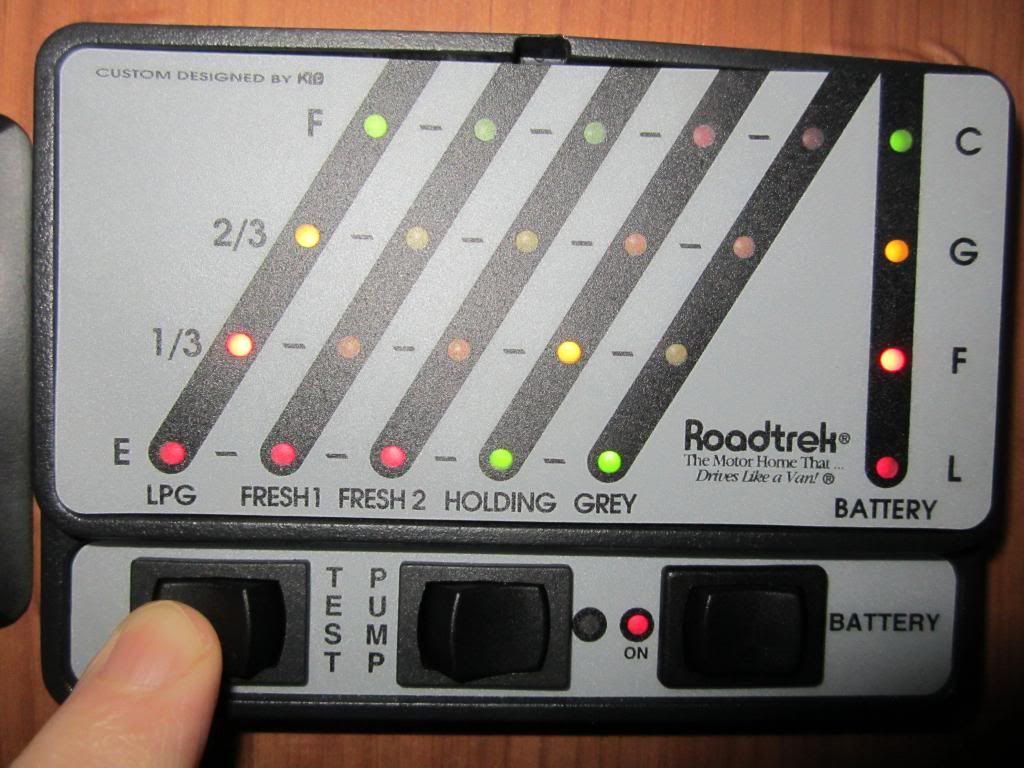
While you are inside at the monitor panel, press and hold the TEST switch on the left in the photo above and see what your Battery Level is:


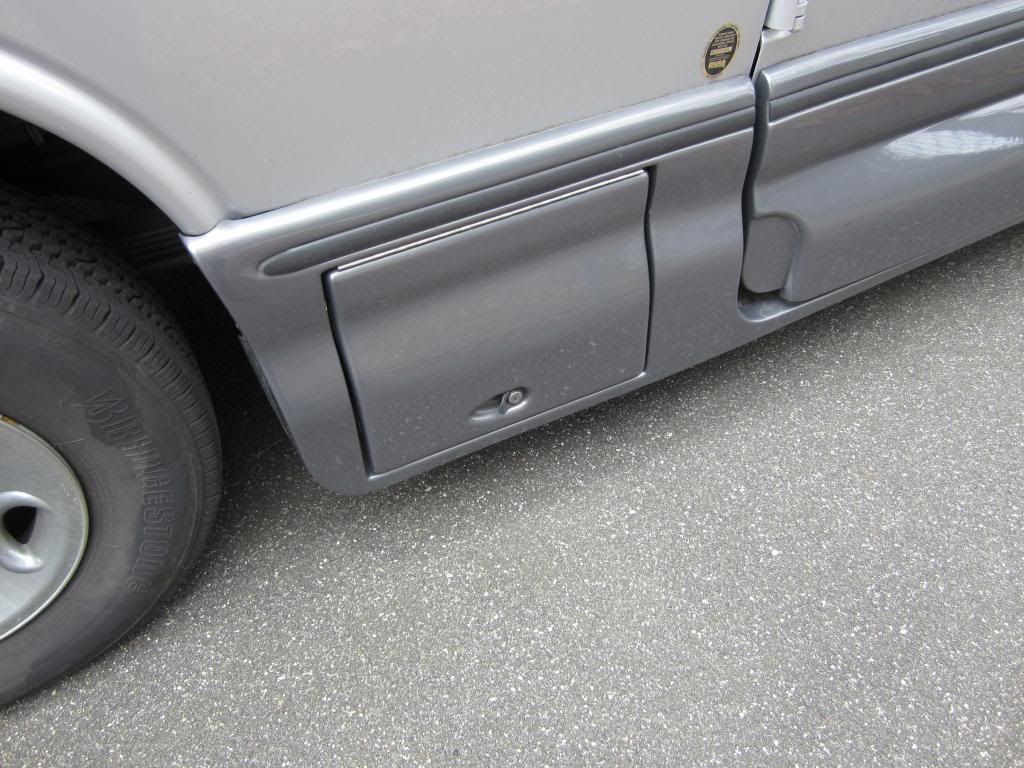
You see here that my battery is on the second LED from the bottom. When the batteries get to this point you want to charge them. The bottom light indicates that the battery level is LOW - see the "L" and this is not a good thing for the batteries. Some people with older Roadtreks will use a an automotive voltage meter and test the battery directly at the battery posts. This is not easy to do on Roadtreks 2011 (mine) and later. In newer Roadtreks - 190's and 210's in particular (as I do not know the battery location in the Sprinter models), the batteries were changed by Roadtrek from wet cell batteries that require regular maintenance to maintenance-free AGM batteries. With this, Roadtrek discontinued the use of a slide out draw that the batteries sit on in a compartment on the outside of the passenger side of the van and replaced that with an access hatch that no longer slides out. Here is the compartment, closed, on my van - this is in front of the rear passenger side tire:


Here is a view inside with the locking door open so that you can see the two AGM 6 volt batteries connected together. The tray they are sitting on does not move:


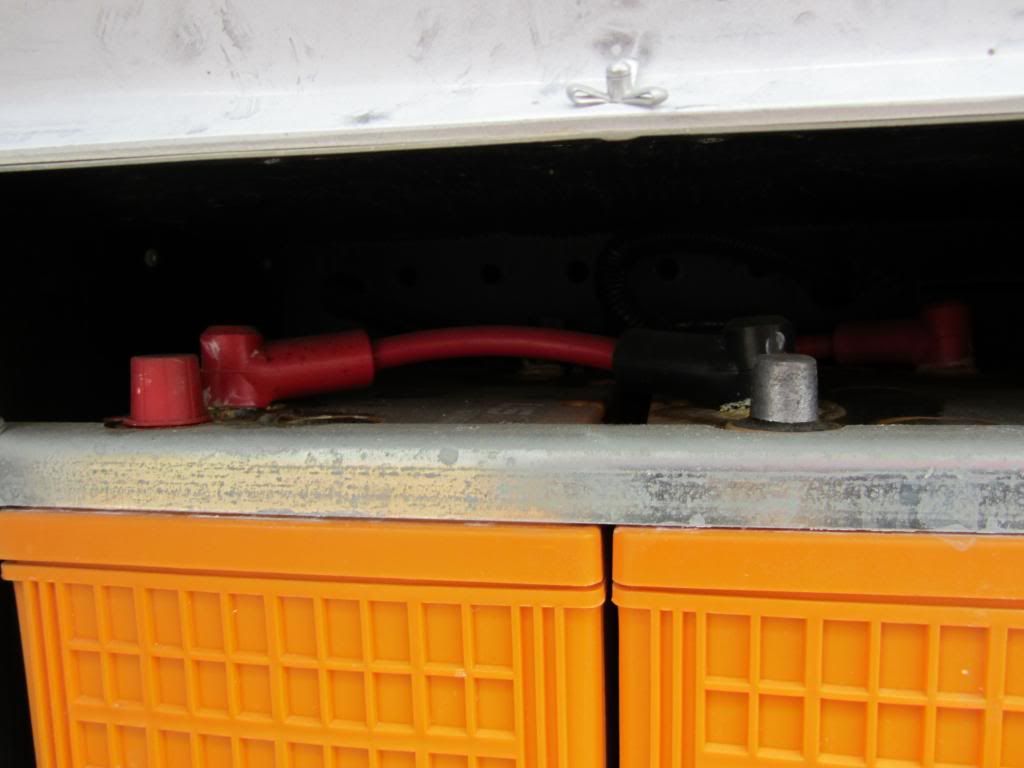
Here is a close up view of what you can see of the top of batteries from outside - there is no real room to reach in (and there really does not need to be unless you want to get to the terminals with a volt meter):


OK - this was all just an aside to show you the batteries and why the monitor panel is important. In addition, you should know that in the newer Roadtreks there is no 12 volt outlet socket inside - older Roadtreks did have these. There are places where you could wire one in yourself. I have not. With one you could use a voltmeter that plugs into a 12 volt vehicle outlet.

Now - back to getting all of your batteries charged.

The next step - and really folks, I am going through the steps simplistically just so that what you need to do is clear - is to start plugging everything together.


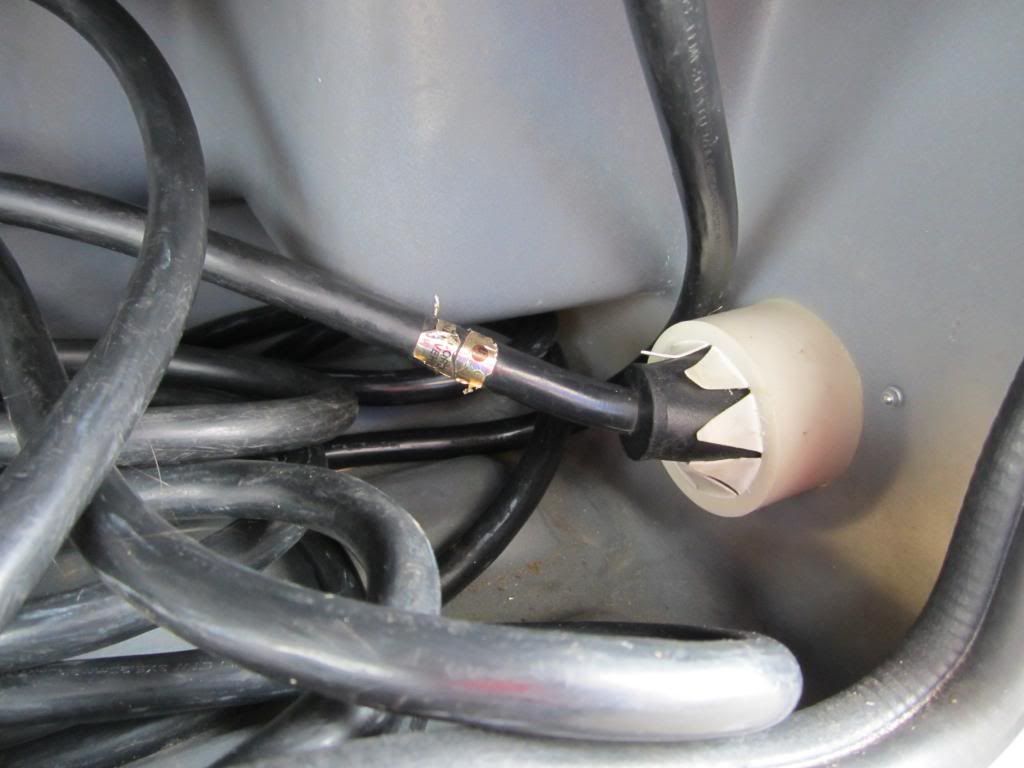
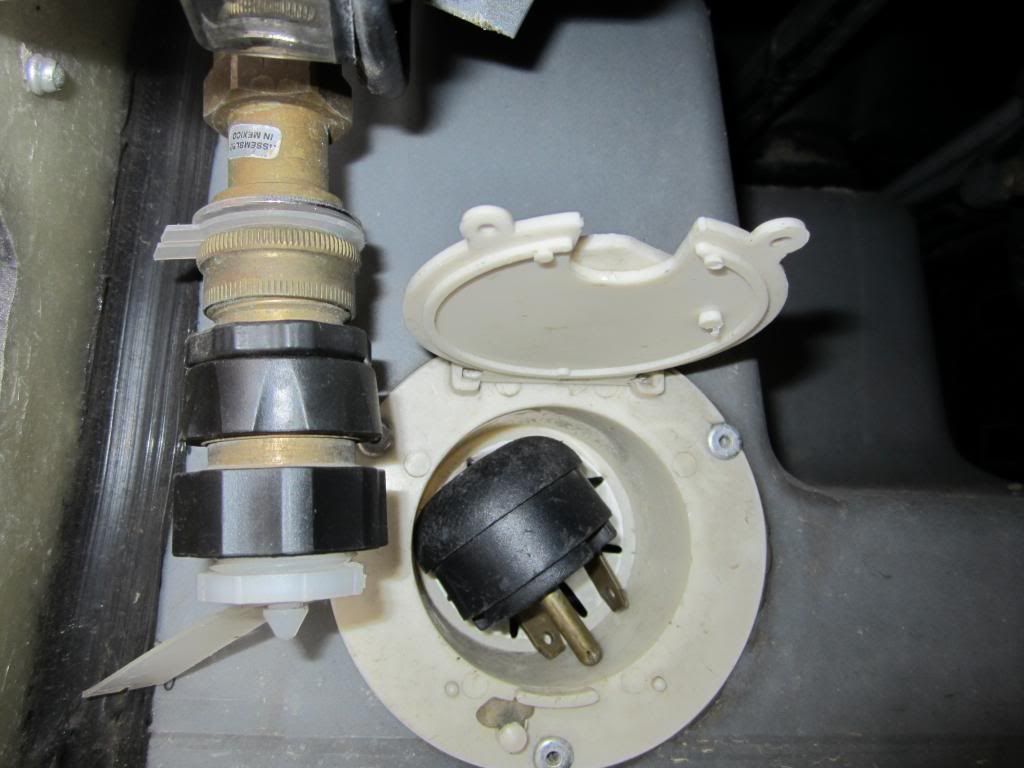
Simple steps - first you are going to get your Roadtrek power cord out and you will move it from inside the storage compartment though what is called "the mouse hole" and out under your Roadtrek. Here is the mouse hole as seen from inside the outside storage compartment (different models may look different):


Here is the view from outside the compartment where the plug pulls through. You can see here that the plug sits in a capped storage box that keeps the mouse hole closed when the power cord is not in use:


A side note about  the plug in the mouse hole - this plug is not always here when you first get your Roadtrek. Mine was not. It was inside the storage compartment. There are little V fingers that hold this cord in place here. If you pull too hard from the other side the plug will come back through. In the cold weather, it is very hard to move this plug then back through to this side past those fingers. It is much easier to do in the warm weather. Just don't pull it into the storage compartment at the end when you are putting it all away. (In the photo on the left you are seeing the City Water hose connection.)

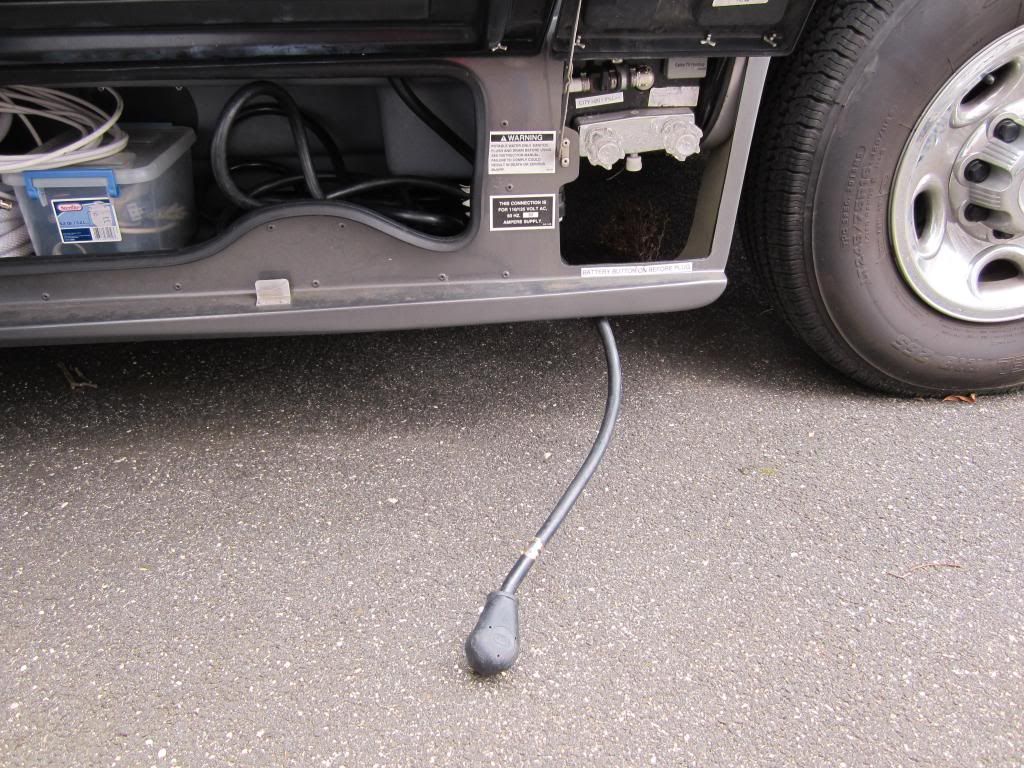
Here, below, you see the cord pulled through. This is just about all that I need because I am using the extension cord. If you don't need an extension cord you need to pull a lot more cord out until you can get the plug to the outlet.  In the cold, it is not easy to get this cord either in or out of the compartment though the mouse hole. In the warm weather, it is much less of a problem. A trick that Meryl has found is that hand over hand with two hands gets the cord out easily - and again, in the cold, it is still hard. What she does is pull a loop of cord from inside, out through the compartment door, so that the loop is not twisted and then pull - hand over hand - one hand inside and one hand outside at the mouse hole, alternating hands - and the cord comes out. Reverse this to get it back in and it is much easier than just trying to tug it out.


 Now, plug in the power/surge protector into the Roadtrek plug. If you are using an extension cord plug the end of the extension cord into the other end of the protector unit:


Another side note - in the cold and even sometimes when it is warm, the plugs and sockets are difficult to push together. It sometimes takes a lot of effort to get them together with no gap. It is even harder to get them apart. Plugs or sockets with pull handles are easier. There is something that I recently learned about to add to any RV plug or socket to make this easier when pulling them apart and I going to order some and will let you all know all about them when I get them.

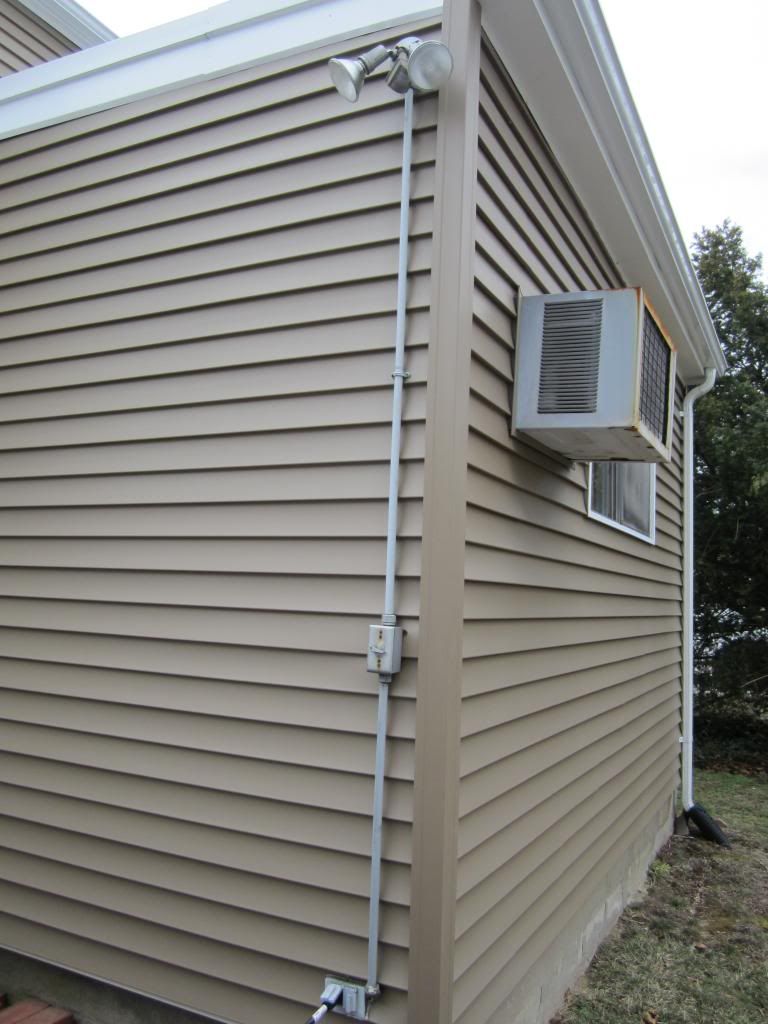
Take your extension cord or your Roadtrek power cord plug (if no extension cord, also the protection unit) to your outlet. Your house outlets are generally either 15 amps or 20 amps. I am lucky enough to have a 20 amp outlet in my backyard with nothing else on the circuit except a flood light that I wired permanently into the outlet box. When I connect the Roadtrek here, I turn that flood light switch to off so that the motion sensor does not turn the light on while the Roadtrek is plugged in. With 20 amps I can just about use everything inside the Roadtrek when it is plugged into my house with the exception of running the air conditioner and the microwave at the same time. They can each be run without the other. What would happen if I put them both on at the same time is that I am going to trip a circuit breaker - most likely in my house. See my articles on The Electric System to understand all of this better. When just charging the Roadtrek, any house outlet will do.

Now, take the adapter plug and plug the extension cord large plug into the large socket on the adapter. If you are not using an extension cord, then plug the large plug on the power/surge protector unit into the large socket on the adapter.


Now, for the moment we have all been waiting for - take the small plug on the adapter and plug it in the wall outlet!  Note, that this all has been done in this order so that until this moment, there has been no live electricity running through anything that you have been connecting - and this step is just plugging a regular plug into a regular household outlet, just like you do every day.


The power/surge protection unit had a delay before it sends current through its socket and into your Roadtrek (or any RV). When you plug in the unit you will see a Line Voltage LED light come on but it takes two and a half minutes for the current to be allowed to pass through and out. This is to protect your circuits should the unit shut down power because of a variation of voltage - too low or too high. It automatically turns itself back on then when the voltage is correct but it does not allow the voltage to just push immediately through - and that is why there is this delay. The delay can seem like it takes forever. During the delay an LED flashes next to where it says "Time Delay When Flashing". When the power starts to flow you hear a loud "click" and a green LED  lights showing "POWER ON". Newer units than mine now have a digital readout instead of the LEDs.


That is it! Your Roadtrek batteries are now charging!

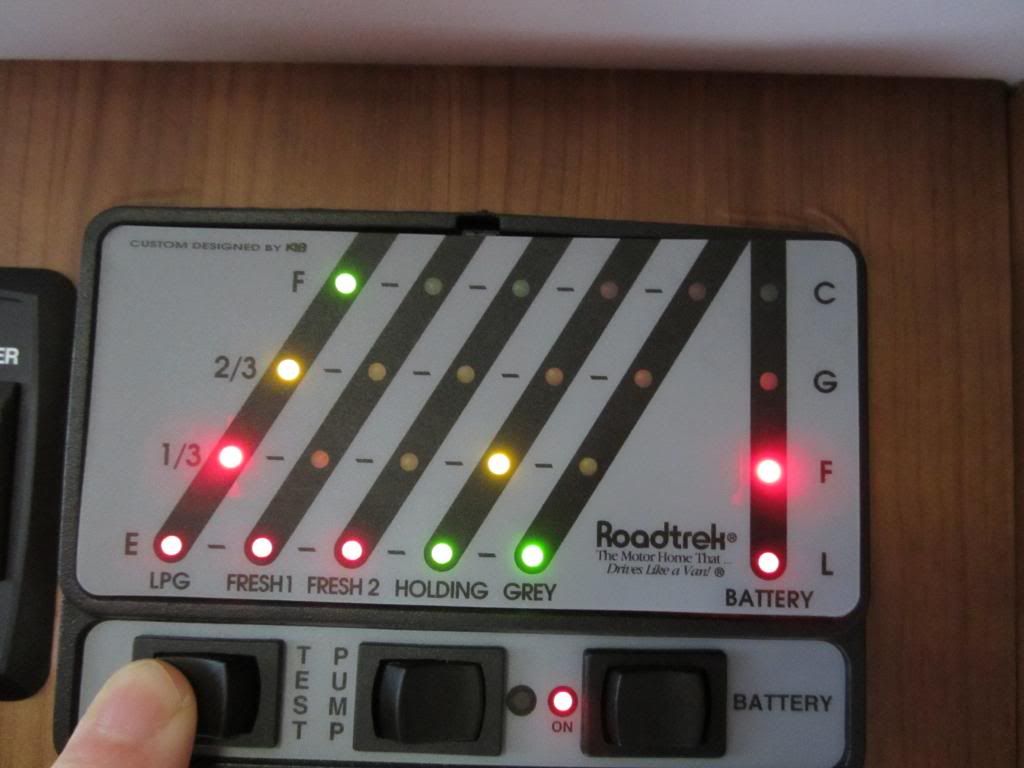
How do you know?  Go inside the Roadtrek and push and hold the Test button on the monitor panel and you will see this:


You should see all of the Battery LEDs lit all the way to the "C" on the top. That C indicates "CHARGING". When you are plugged in as you just did (or your generator is running you should see this.

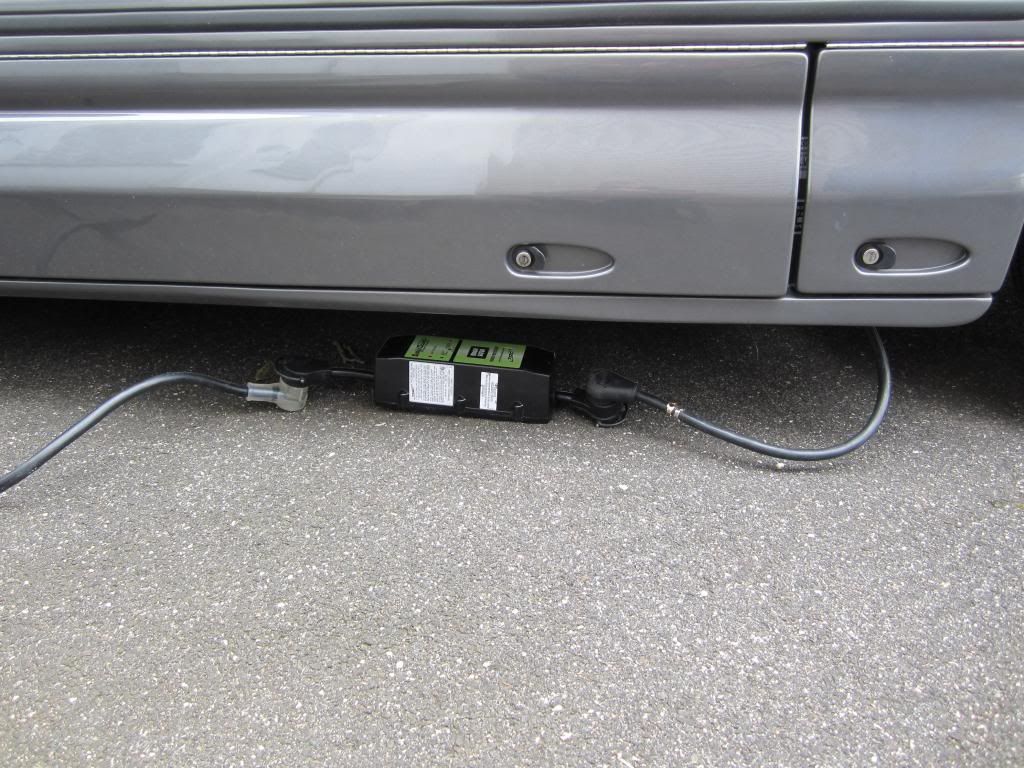
I take the power/surge box and put it under the van just to keep it out of the weather should there be any. All is weather proof and can stay out in the rain. Since I am leaving this plugged in for a length of time it is also (in my neighborhood) better to hide it all under the van out of sight from the nearby street.


How long should you charge your Roadtrek's batteries?  I asked a Roadtrek Service Technician this question and he told me that to fully charge the batteries the Roadtrek needs to be charged for 12 hours. I plug the Roadtrek in during the day and 12 hours later go out and unplug it. Yes, sometimes in the middle of the night and sometimes well after midnight.

When it is time to unplug the Roadtrek do the
 steps in reversing - taking the plug out of the wall outlet first and then disconnect everything and put it all away. As soon as you unplug from the wall outlet go inside the Roadtrek to shut OFF the battery switch, but before you do, push the test button again. This soon after charging you will still see all the LEDs lit up to and including the top green LED at "C". This may even light like this when you test for several hours. I am told that residual electricity in the circuit to the panel keeps the monitor showing "C" when you have the battery switch on and push the test button for a short while after unplugging. So don't be surprised if it still looks like this photo (as it was above). After a short while, if you check the battery level it will be at "G" which is where it should be. Before you leave shut off the battery switch - why waste the charge!

I said it was simple and it is. Why has this article taken so much to say - plug it in. Well, as you have seen, while you could just plug it in, there are a few things to do along with that. And as we went along you had an opportunity to see how everything should look, how the monitor panel will read, what the "mouse hole" is all about, and you got to see what the new battery compartment looks like in the 190 with its two AGM batteries.

I have a schedule set up to charge the Roadtrek in the months that it gets little to no use. The generator is run for its exercise (which also charges all of the batteries) on the 15th of the month and the Roadtrek is plugged in and charged on the 28th. The batteries hold their charge much longer in the warm weather and when the Roadtrek is out on trips every few weeks the batteries stay nicely charged on their own. Every time you plug in at a campground you are charging the batteries. In the winter, however, the level drops in two weeks after the generator's two hour run to what you saw in the photo above of the monitor panel with only the bottom two LEDs lit. After charging, by the 15th usually the panel is lit up to the "G" which is fine.  I had been forgetting to run the generator for its needed monthly exercise and also plugging the Roadtrek in to charge. It is now on my computer and cell phone calendars and I am reminded that day to take care of business.

While I have been writing this, the Roadtrek has been charging on my driveway all day. Now, I am going out (it is 1:30 am) to unplug it - and it is unexpectedly snowing outside... (What else is new?!)


Wednesday, February 6, 2013

In Search of the Elusive Roadtrek Inverter

I am going to take you with Meryl and me on an journey. Not one that we took with our Roadtrek but one we took inside our Roadtrek. One in search of the elusive Roadtrek inverter!

You just read an article here last week all about the Roadtrek inverter but I never told you where to find it inside the Roadtrek. That is because I did not know where it is. I had an idea of where it is but I have never seen it. Meryl thought that she saw it but it as it turns out from discussion the night before we took this journey, that she had never seen it either.

When I first got the Roadtrek, someone told me - and I really cannot recall who - that the inverter was located on the inside of the first bottom cabinet on the passenger side below the bed area of the Roadtrek. When we were first setting up the Roadtrek for traveling, Meryl was inside placing things to be stored in various cabinets. She opened that cabinet and was about to place several things - some heavy things - in there and I stopped her. I told her that inside that cabinet is the inverter and it would not be a good idea to put anything inside there that could be bounced around and damage such a vital piece of the Roadtrek like the inverter. She looked inside and told me she saw a plastic box inside and we both assumed - since I have been told that this is where the inverter is - that this was the inverter. Enough for us to leave storage out of that cabinet.

Recently one of our readers had been asking about the inverter and I had been reading forum posts about the potential needs to get to the actual inverter to make adjustments or turn it on and off with its own switch rather than the remote switch on the wall. Meryl and I got to talking about the inverter. She asked me, "What does the inverter look like?"  I got out the inverter manual and showed her the picture. She looked at me and said, "There is nothing at all that looks like that inside that bottom cabinet." OK, then what is inside there? I have not been able to look inside that cabinet for myself and I asked her to describe what she sees when she looks there. She described a large plastic box type of thing that goes beyond the cabinet. What she was seeing is the rear interior water tank that is a feature of Roadtrek 190s and Roadtrek 210s.  So where is the inverter?

We got out the Roadtrek manual. Let me tell you right away that for somethings the Roadtrek manual are very useful but for many things they are useless BECAUSE they have not been updated with the change in models. There is a diagram inside our manual that shows the locations of all of the "appliances" which includes equipment that has been installed inside the Roadtrek. This diagram is for a Roadtrek that is much older than our 2011 and even in the 2007 manual that we were given with our 2011 Roadtrek (don't ask), the diagram is the same as the manual that Roadtrek emailed me for a 2010 190 and as the so-called revised and updated manual that I downloaded from Roadtrek that includes the 2011 190. There is a symbol shown on the key of the diagram for the inverter. We found that symbol on the driver's side of the Roadtrek in the first cabinet on the floor under the bed area. This is the cabinet that contains the hot water heater tank and the water pump.  Could the inverter be there too? Well, the manual diagram did not show the water pump or the hot water heater as being there at all. These were in a different location. In fact a number of things were in a different location from where they actually are in our Roadtrek. The furnace is not across that aisle as shown on the diagram. The propane detector is on the opposite side. I started to wonder if the whole thing was just reversed but no - the sink was where it belongs and the toilet was where it belongs. This was a diagram for some long past Roadtrek. (By the way - I plan to create my own correct diagram and share it with you all in the future.) We started speculating where could the inverter be? OK. The next day we would go out and search.

As it turned out, Meryl lost sleep over this wondering where was the inverter. She went out before I did the next morning and came back still baffled. She even opened the cabinet where the water pump is and said there was some electric box on the wall in there but it did not look anything at all like the picture of the inverter that I had showed her. We both, then, went out together - and I took my camera along - as any journey should be well documented.

She went back to that front cabinet that we "thought" the inverter was. She confirmed that it had to be the interior water tank that she was seeing. She could see the sensor wires attached to the tank if she looked deeper in toward the rear. She looked around as we saw in the inverter manual that it can be attached to a wall. Nope. Nothing like it. Someone had described being able to see it deep in from the back of the Roadtrek under the bed behind the rear passenger door inside a small cabinet that is in there. I knew that cabinet but never looked inside. This whole section is actually one long continuation on the passenger side of the Roadtrek from the front cabinet that we had been looking at and thinking all along that it was in. Perhaps we could just not see in deep enough. But this inverter has got to be accessible. There are things that one must be able to see and reach the inverter to do. It could not be buried someplace.

I went to the rear cargo doors and opened the passenger side and looked in. Here is what I saw.


Let me explain first that MY Roadtrek 190 Popular has the non-power bed in the rear. If you have the power bed which is more common than what I have you will most likely see a different view in general than what you see above in the photo of the back of my Roadtrek. When you look in yours you will see the bottom of the power sofa - but you will also see this cabinet or something very similar.

 So, forgive the mess and look off the the right. See what looks like a door with a hole in it.I reached in and put my finger in that hole. I gave a gentle pull and nothing moved. I looked for a hinge. At the back of the door was an aluminum frame but no hinge. this door was not going to swing out as far as I could see and started to wonder if it was a really a door at all. I was not going to pull hard. I do not want to break anything that I will regret. Meryl tried to see in that direction from inside that front cabinet but could not see anything there. We got a flashlight and tried to look into the hole. Something was inside. Meryl got down closer - as I have said in the past, I cannot really bend down in ways that I would like to without starting to feel dizzy. (Readers who are medical professionals please refrain from offering a diagnosis.) She took the light and looked into the hole. "I found it!", she exclaimed. "It is in there!"  Great, but how do we get to it. I tried another little tug on the hole. I tried feeling for a catch. Nope, this was tight. It slightly moved toward the back of the van like it would slide. I tried sliding it. Nope. that was not it either.


I asked Meryl who makes the bed on the platform right above the point we were at if there is an access door or panel above here under the bed cushion. She did not think so. I said, well let's look to make sure. We went inside and took off the long mattress cushion off the wooden platform - remember this is the non-powered rear bed. Here is what we saw - 


Close up, please...


An access panel! At last, we found a way to get to the inverter! I got out my small, rechargeable, lithium battery screw driver that I keep on the Roadtrek for minor repairs and getting into trouble. Put on the square drive bit for the square drive screws that are used throughout the Roadtrek and apparently all RVs and started removing screws, hoping that I would not find out later that they would not go back. The screws backed out easily. It seemed almost too easily. I opened the panel...


And this is what I saw! Two household metal electric boxes on the outside wall and below...


THE INVERTER!

The inverter is the white box off to the back. The junction wiring is what is close up here with the red and yellow connections. All things that you do not want to touch! I stuck the camera in the confirm what I thought I was seeing. 


 And while here was the inverter. This access is not very practical.There had to be a way through that door in the rear! I took the camera and explored the back of the door...


I had to get a close up of the other corner. I reached inside with the camera and got as close as I could and snapped the photo and looked at the camera's screen...

A catch!

OK! Then I knew that I would do no damage if I really gave this door a yank. I went back outside the van and to the under bed storage area to the door. I reached my finger into the hole and really gave a pull and at the same time slid the door forward out from behind the aluminum frame at the other side-


Here is the elusive inverter and in a position where you actually can lean in and see the indicator LEDs and get to the dip switches and the setting switch.


Here is what the inverter looks like overall -


And here is the part up close that you may need to get to...


There to the left are the dip switches that need to be set if you change the type of battery you have. There in the middle on each side of that blue plug are the Green, Yellow, and Red banks of LED indicator lights, and to the right of that is the Switch - Auto/Remote - DC Off - Charge Only.

The two electric outlets in the metal boxes above - the one nearer to the rear of the van is labeled "Inverter INPUT" and the one near to the front of the van is labeled "Inverter OUTPUT". 

There it is in all of its glory! Elusive no more! And most important - no need to remove any screws in the panel above to get to it. Just give the hole in that door a tug and pull forward and slide out - it has to come out from behind that metal frame on the other end!

The inverter in your Roadtrek if it is another model or an older model may not be here at all - then yo will need to take your own journey! But I am pretty sure that that all recent year 190s and 210s with or without the power sofa/seat will have the inverter right where I have showed you!

Now that all is said and done - I could have just written "The inverter is located in..." but taking you on the journey seemed like so much more fun! It was an exciting journey and we did not have to leave our driveway for it! I thank you all for coming along for the excitement!  Now, if it only would get warm outside again, we could take the Roadtrek on a real journey! When it is 95 degrees outside in July, I will think back to the cold and wonder which is better - sweating in the heat or being able to get warm by putting on coat and gloves? Well, since you can travel easier in the Roadtrek when it is 95 degrees I guess the answer is sweating in the heat and in the Roadtrek you always have the A/C.