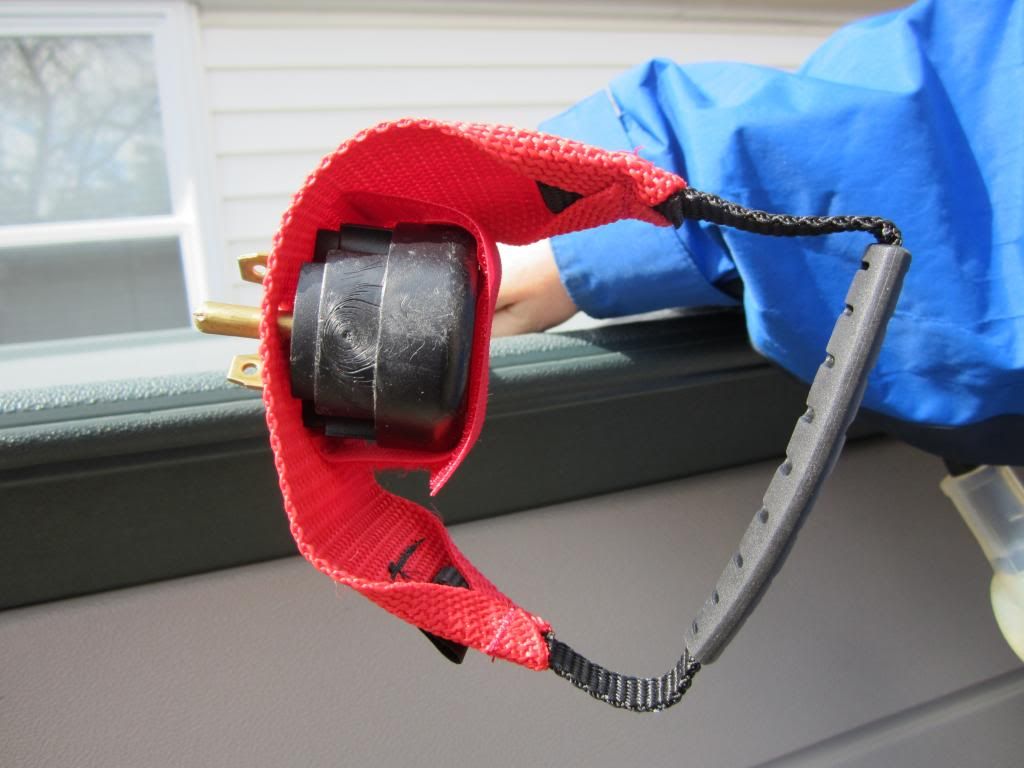
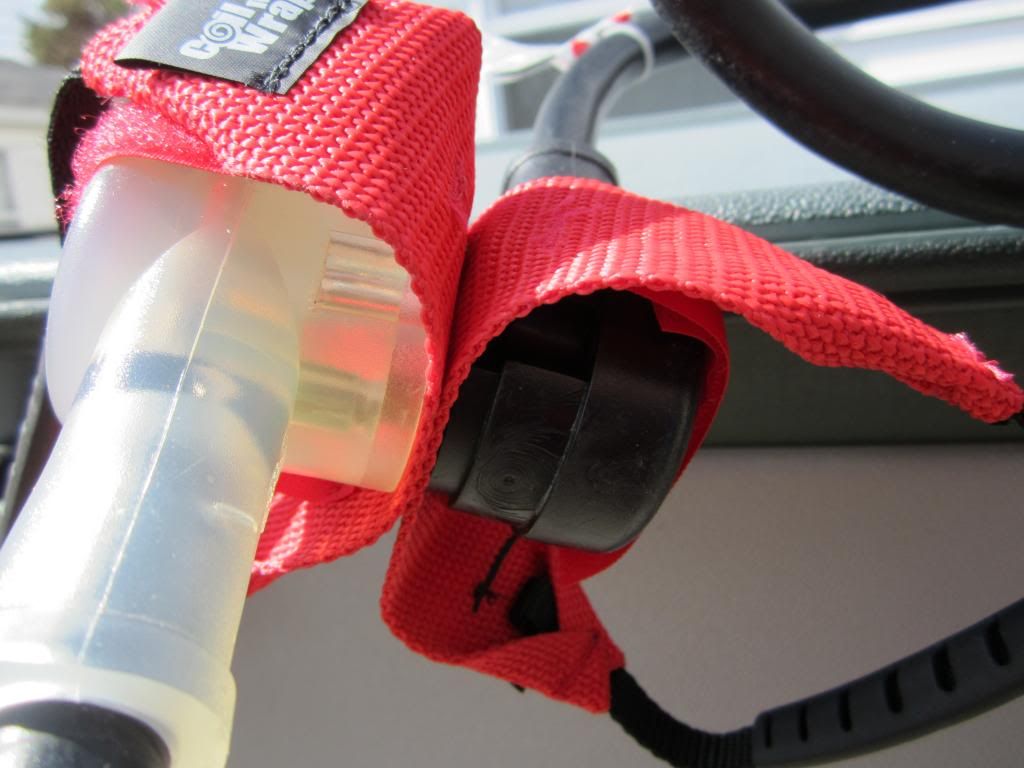
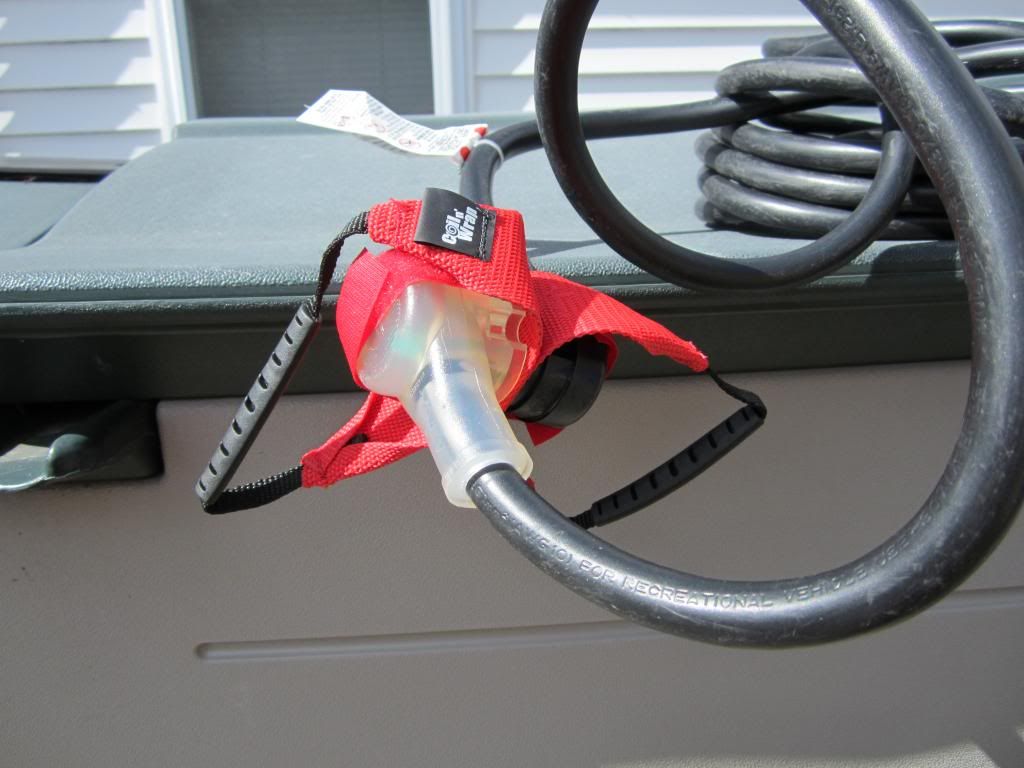
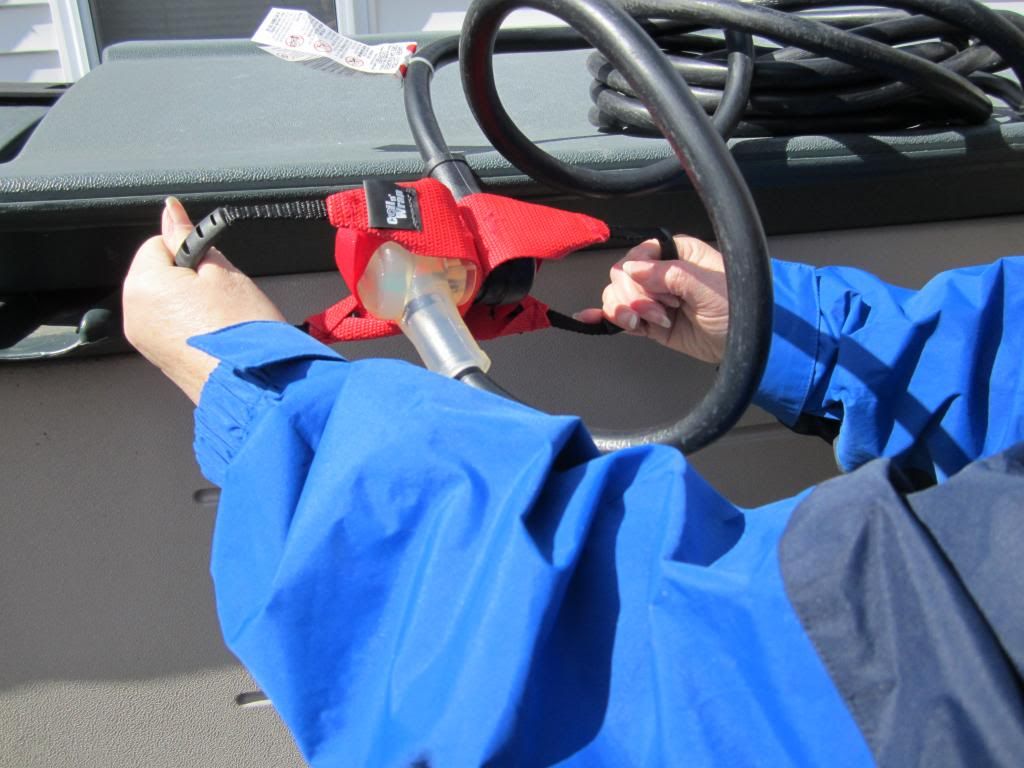
I am interrupting the series, "It Isn't All Peaches and Cream" once again for an article that is more timely and of use to all who own a Roadtrek or an RV. I have written before about my RV extension cord. It is a 30 amp, 10 gauge M/F extension cord that is 30 feet long that I use when my Roadtrek's power cord is not long enough to reach the power pedestal or my outdoor 20 amp house outlet at home. We have rarely needed it at a campground but we do need it at home and that is where it gets monthly use.
This winter with temperatures incredibly colder than we have had in this area in many, many years we found a big problem with our RV extension cord. There is a lip around the socket - made to securely hold the plug in place, I suppose, or to keep moisture out of the connection, but that lip combined with our Plug Dog handle on both the extension cord socket and the Roadtrek power cord plug in the cold was not seating together properly. This was causing all types of problems including the connection coming apart or when pressured together to stay connected, almost impossible to pull apart in the frigid cold - even with the Plug Dogs. This extension cord socket has always been a tight connection.
After one cold night of panic trying to pull these apart standing in the cold and ice, I decided that I had to get a better extension cord. I have seen RV extension cords with built on handles in RV stores and in Camping World. Of course, snowed in we were not going anywhere near one of those soon. I started searching the internet for anywhere close that had it or if I was available site to store from the Walmart website. I like shopping on the Walmart website with their site to store service. They sell things that are not found in the Walmart stores and they ship for free to any Walmart store that you select. Even better is that you can return the item to any Walmart store for a full refund.
At first my search on the Walmart website was not coming up with anything other than the cord that I already have. A general Google search brought up the cord that I was looking for with a link to the Walmart website. Apparently, RV extension cord was not bringing it up on their site- it needed to include the manufacturer's name - Camco. There was the cord that I felt should be better. It has a large plug and socket and both have solid handles that are part of the plug and socket.
This is a 30 amp, M/F 10 Gauge RV Extension Cord. The cord matches the power cord on the Roadtrek - same gauge. The cord is five feet less than my original cord and is 25 feet long. Twenty five feet is plenty. The name is Camco Power Grip Extension Cord 30 amp Model 30-30 RV. As you can see this cord's socket base is flat - no Plug Dog is needed on the socket side of the connection as there is the nice BIG yellow pull handle. The Plug Dog on the Roadtrek power cord plug allows the two flat surfaces to attach properly. The price is less than the original RV extension cord that I have. This cord costs only $36.21 - free shipping site to store. My old cord costs $50.
It took ten days to ship and it arrived on the date promised. All I had to do was go to the store's Site to Store desk and pick it up.
Now, I have a better RV extension cord for my Roadtrek. This cord comes also in 50 amp for larger RVs. There is also a 50 foot length 30 amp cord with the same large handled plug and socket that sells for $64.38 if one needed a cord that long.
No matter which RV extension cord that you use, if it is cold outside, the cord will be stiff - as will the Roadtrek power cord. It will not unroll easily nor will it roll back up easily. I now keep the extension cord in the house where it stays warm until it is needed and after use in the cold it can warm up to roll it back up. We only put it in the Roadtrek if we are uncertain about the distance to the pedestal at the campground - and when we have carried it "just in case" we have not needed it. IF you are planning on staying at a friend or family's house when traveling take this cord with you. Outdoor outlets are not always conveniently placed to driveways. Combine this cord with a good 15/20 amp plug to 30 amp socket adapter and you can plug in safely.
I am not sure what I will do with the old cord. One thought that I had was to cut away or grind away the lip on the socket. The plug and socket on that cord are lighted - nice if you want to know that it is plugged into power, but not really necessary. I am not sure if removing that lip will interfere with any wiring. Another thought is to purchase the same handled socket that is on the new cord, cutting the socket off of the old cord, and install the new socket on the old cord. I have seen that socket at RV parts stores. That is something to consider when it is warm again. Will it ever be warm again? Remind me that I asked that when it is 100 dF on July Fourth!
Now, just one word about RV extension cords because I have heard before to just use any household heavy duty 15/20 amp extension cord. I have also read and heard about the fires that have started when those cords get hot because they are overloaded. It was recommended to me and I recommend to you - if you need to use an extension cord on your Roadtrek or RV always match the gauge of the extension cord to the gauge of the power cord on the RV. For $36 why would anyone take a chance?
FIELD TEST -
I fit all of the connections - using the old extension cord plug as a
stand in for the Roadtrek power cord plug - inside before going out into
the cold with the whole thing just to make sure things fit and came
apart easily. The 15/20 amp adapter pulled off the extension cord plug easily easily. The extension cord socket was not as easy and it took holding on to the socket's handle and giving a sharp, quick tug on the Plug Dog handle to get them separated.
We had to plug into the house to charge the batteries and we were lucky enough to have a dry 38 dF day. (Imagine being lucky to have a 38 dF day!) I plugged the plug of the extension cord into my dog bone 30 amp female to 15/20 amp male adapter and plugged the adapter into the outlet inside our very small, screened porch and ran the extension cord out the aluminum screen door and down to the Roadtrek. The Roadtrek power cord plug got one of the Plug Dog handles and plugged that into the extension cord power grip handle socket. They went together easily. Because there was a lot of ice on the ground toward the front of the van that if it melted would come down into the connection I used Velcro straps to hang the connection from the frame of the Roadtrek's little door that covers the power and city water connection.
The connection worked well and the Roadtrek batteries showed that they were charging on the monitor panel. I checked that there was power in one of the Roadtrek's inside outlets and all was well. The Roadtrek remained plugged in for its usual charging time of 12 hours.When we went out the temperature was 27 dF. The Roadtrek plug and power grip extension cord socket came apart with a sharp pull much easier than the plug and old extension cord socket ever did in the cold. The cord came into the house to be kept warm and manageable for the next time it is needed. Maybe by the end of March the temperatures will be much better! I certainly hope so!
Our travels in and life with a 2011 Roadtrek 190 Popular. An adventure in RVing by two people who have never been inside an RV or travel trailer before but find out of necessity that this is now their method of travel... In addition to our travels, you will find here many how to's about the Roadtrek and RVing in general, presented in a clear and concise way that are easy to follow - why reinvent the wheel when someone has done it before! DON'T PANIC
Roadtrek
Showing posts with label Plug Dogs. Show all posts
Wednesday, March 4, 2015
A Better RV Extension Cord
Labels:
190,
camper,
campgrounds,
camping,
Class B,
electric,
electricity,
extension cord,
gizmos,
motorhome,
Plug Dogs,
Popular,
power cord,
Roadtrek,
Roadtrek 190 Popular,
RV,
rving,
travel,
traveling,
vacation
Wednesday, February 5, 2014
Extreme Winter and Charging the Roadtrek Batteries
This winter has been extreme all over the country. In the west there are droughts, in the mid-west, central and eastern states there is extreme cold and deep snow. This has is the worst winter that Meryl and I have experienced with the Roadtrek. Since we got her it has been cold and it has snowed but there has been nothing like this. As a result the temperatures are taking their toll on our Roadtrek's batteries.
I wrote in a recent article, "After Winterizing", I spoke about our schedule to keep the batteries charged. I have a schedule to plug the Roadtrek into shore power at our house on the 28th of every month (28th chosen because of February) and I exercise the generator for two hours on the 15th of every month. This schedule has been fine until now. With single digit and below zero temperatures day after day, and wind chills that bring those down even lower, I have been going out at least once a week to check to see that the battery level is still on the green LED on the monitor panel inside the Roadtrek. Suddenly with these temperatures combined with what seem like regular snow storms, a once a week check is not seeming to be enough.
I looked at the battery monitor panel a week ago before a snow storm and everything looked fine. The 28th came on the day of another snow storm and when I was able to get into the Roadtrek to check the batteries the level had dropped to the red LED second from the bottom. This one is labeled "F" for Fair which is an indication to me that the batteries are getting too low and need to be charged as soon as possible. You really never want that monitor to read at the bottom red LED - "L" for Low.
Had this been an ordinary, no snow, normal winter temperature day - normal being upper 20's into the mid-30's or higher - I would have pulled out the RV extension cord, plugged that into my Surge Guard Power Protector, and connected that to the Roadtrek's cord - which needs to be pulled about four feet out for the two electric cords to reach the outside outlet in the rear of my house. This would have been plugged into that outlet and the Roadtrek would have charged for 12 hours. That is our usual routine. But the snow was coming down and would not stop until the next morning. The night temperatures were going into single digits. And the forecasts for the coming days were as uncertain as they always are. All of this and the Roadtrek's batteries needed to be charged.
Let me stray a moment to talk about Roadtrek 190 Populars from 2011 on and why I have to rely upon the Roadtrek's battery monitor LED panel which I know some of you will say is highly inaccurate and does not provide a much needed digital reading of the battery voltage. In 2010, the Roadtrek 190 came with two coach battery compartments. All were outside - one was located behind the rear passenger wheel on the side of the van and one was located on the same side in front of the rear wheel. The one in front of the wheel contained a tray on which the battery slid out. The one behind the wheel opened with clear and easy access to the battery that was there. In 2011 for some reason, Roadtrek changed this design. For one thing, they changed from using wet cell batteries to AGM batteries for 12 volt coach power. The new design put both batteries into one battery compartment located where the former compartment was in front of the rear wheel. From the outside you see the same compartment door as before, but once you look inside the compartment, there now sit two batteries on a fixed platform that no longer slides out for access to the batteries. Without getting deep into this compartment there is no access to the battery terminals and therefore no convenient way to touch the test leads on an electric voltage meter to the terminals and read what the actual voltage is. There are also no 12 volt outlets inside the Roadtrek (not since several model years earlier) to be able to use that to connect a voltage meter to - another way that many with such outlets read the actual voltage of the coach battery(ies). So what I am stuck with are the LEDs on the battery monitor panel. There are estimates of the battery level and the LEDs - this is from the Notes for the Roadtrek Electric Simulator - "The “C” light will be on if the voltage is above about 12.7 volts, the “G” light comes on at about 12 volts, the “F” light comes on at about 11.3 volts. The “L” light will come on with less than 5 volts." Notice that the "L" is less than five volts. This why you never want the battery to fall that low - it will potentially damage the battery and charging the battery(ies) back will take much longer. I know that one Roadtrek owner with a much older model was able to wire a small digital voltage meter into the back of the monitor panel and have the reading show on this meter affixed to the wall adjacent when pressing the test switch. This is not something that I am confident in doing myself. It has been suggested to tap into an empty fuse spot in the fuse box, but when I looked there are no accessible empty fuses spots and certainly no ground wire that is accessible - and I am not about to remove the fuse panel to look for what may be available inside. So, again, I rely on the LEDs which under ordinary circumstances - in that normal winter world that may or may not exist any more - the future will tell.
So - here I am, in the snow and I am not sure how close to that second LED going out and the bottom LED remaining the Roadtrek actually is. I had to charge as soon as possible.
The next day when the storm was over, the temperatures were not much better and they would remain that way for at least two days with maybe or maybe not a rise after that. First I had to shovel the path out of the house, the driveway, the sidewalk, and attempt to shovel a path to the rear of the house that had not really been shoveled since the last storm a week before. I got enough cleared in the back of the house to get to the outlet, but all the while I was realizing that I would have to deal with the other problem of charging the Roadtrek in the cold - the lack of flexibility of the Roadtrek's power cord and the RV extension cord. The RV extension cord was secondary. I could just drag that into the house after use and warm it up to put the long, wild snake of a cord into a store-able condition. The Roadtrek's power cord is located in the lower outside storage compartment and comes out through what has been called a "mouse hole". The mouse hole is located on the rear side of the compartment and comes out into the next covered section where the city water connection is. The "mouse hole" is made up of a flex opening - a round of plastic that is cut like a pizza in the middle. The Roadtrek plug is pushed through this plastic with the flex fingers holding it on place and not permitting any little critters to crawl in around it into the storage compartment. On the outside of the "mouse hole" is a flip cap with space inside the "mouse hole" outer cup for the plug to sit in. We learned the hard way that getting the plug through those so-called flex fingers and into that cup section looks a lot easier than it actually is - and this is in the heat of summer - and you never want that plug to pull back into the storage compartment. In the winter there is no flex. And in just regular winter cold, the cord is difficult to pull out and even more difficult to push back in. Now with this so-called Arctic Vortex this cord if it came out too far from the opening was going to be a problem getting back in - and with this weather, I was not going to let this plug just hang out after the charging was finished. There was no way that I was going to pull it out enough to meet up with the RV extension cord to reach the backyard outlet.
I have two outlets outside and one outlet inside a small porch where our house's side door is. The second outside outlet is in the front of my house - close to the Roadtrek, but to get to it one must go into the front garden and the front garden is where two winter storms' snow was put when shoveled. This outlet was not an option. The outlet inside the porch would work - as long as it was not connected to any wiring for other electric service inside the house, and I had to check the circuit breakers to see if it was - it wasn't and surprisingly it was a 20 amp outlet. The only thing that shared that line was the porch light which does come on with an electric eye but that would not be a problem with 20 amp service.
I don't really know how much amperage the Roadtrek's charging system uses. Once the Roadtrek is plugged into shore power and nothing else is turned on inside the only thing that comes on other than the Tripp-Lite 750W Inverter/Converter/Charger is the microwave (at least the microwave display panel lights up). In my Roadtrek with the all electric refrigerator the fridge turns to 110 volt power automatically but the dial inside is turned to Off. I tried looking at the Tripp-Lite specs but did not see this listed.
When we were finished shoveling and after a short break in the house for feeling to return to our fingers, we went out to charge the Roadtrek. My first thought was to charge for a several hours into the early night and then charge again longer the next day with hopes that maybe it would be warmer. Our usual routine of charging twelve hours straight involves a trip outside at about 2 am to shut it all down and put everything away. With our late night schedule this is not a problem normally. Yes, we are late night people and 2 am is not an issue for us at all. But at 2 am there were temperatures in the low teens predicted and that would be a problem. After we got it all going we decided together that we would just leave it charging overnight until the next day and let it charge for 24 hours - no problem with AGM batteries and no problem with the Tripp-Lite that would allow the charging to continue without a problem is the Roadtrek was always plugged in.
We decided to forget for this time plugging in the Surge Guard. The power from our house should be fine without it. We worked the Roadtrek power cord less than a foot out of the "mouse hole" pushing out from the inside. The cord was very cold and very stiff. The RV extension cord is kept on a reel inside the porch an while it was cold in there, the cord did roll off the reel to the floor of the porch - maintaining the coils which it does not do when it is warmer. We got out the Plug Dogs - the pull handles for RV plugs. These are one of the BEST things that we have bought for the Roadtrek. Over and over they prove their extreme value and benefit! We also got out the 30 amp female to 15/20 amp male adapter plug cord. I went inside the Roadtrek and turned on the battery switch - necessary before plugging into shore power. A Plug Dog went onto the plug of the extension cord and one went onto the female socket of the adapter. The adapter has a plastic pull on the socket but with this cold I was not going to trust that not to break if pulled on. Two more Plug Dogs were used between the Roadtrek plug and the RV extension cord socket. I am so glad that I ordered four Plug Dogs when I got them. The Roadtrek plug was hard to get into the extension cord socket and I was afraid to force it as I did not want them to be stuck together due to the extreme cold. I managed to get them together and the adapter plug was plugged into the wall outlet in the porch. The porch door when closed would have to sit on the cord and the door would sit out about an inch open as a result - letting a lot of cold into the porch. I went into the Roadtrek to check that all was well and the batteries were charging (shown as C on the panel monitor when the test button is pushed). I pushed the test button and... Nothing. Oh boy! Now we had to troubleshoot.
We don't often use that porch outlet and perhaps it was not working. The light attached on the same line works fine. We found a lamp and plugged it into both sockets on the outlet and the lamp lit. The extension cord and the adapter were tight together. This put the problem either inside or outside of the Roadtrek. I first went to the Roadtrek plug which we had hanging in mid-air plugged into the extension cord. As soon as I touched them, they fell apart. There was the answer - simple but now, to get them together as they need to be I was going to have to push them together hard - which even in the summer means put them on the ground and using a foot to apply enough pressure for them to mate. This is only a problem with the heavy rubber socket on the extension cord. The Roadtrek plug plugs easily in and out of a campground 30 amp socket. OK. If I had to force them together I would have to hope that they would come apart - and hopefully, in this cold the Plug Dogs would work as well as always. I got the plug and socket mated, put it on the ground and gently with my foot pushed them firmly together. Meryl plugged the adapter into the house outlet and I went in again to check. Yes! The test switch showed Charge on the battery LEDs. I decided to unplug the microwave. While the lit display panel should not make a difference I decided that it was easy enough to just have the Tripp-Lite charger circuits running on the 110 volt electric circuit.
We left it to charge for 24 hours. Twice after plugging in I checked that all was well inside and it was still charging. I was. The next day was sunny and felt warmer though the thermometer was not showing any better than the day before. We went out about 2 pm to shut it down and put it all away. The Plug Dogs did their job well on the Roadtrek plug and extension cord socket that sat out all night and with a sharp yank the two separated. Thank goodness! The adapter and extension cord was not as easy and it took several yanks to get these apart even though they had been inside the porch all night. They did come apart and I thought how good it was that I did not rely on just one Plug Dog and the adapter's little plastic pull ring that is screwed like a hinge around the upper half of the socket. With a little effort I was able to get the RV extension cord back on the reel. The Roadtrek plug was pushed reluctantly (on the cord's part) back through the "mouse hole" and into the cap. Done.
Lessons learned. In extreme cold, checking the battery voltage level once every week may not be enough. I will be checking twice a week in temperatures like this. With this weather it may be a good idea to charge the batteries twice a month and will check the level just before exercising the generator and then plug in the next day if the battery is low. The generator does charge the batteries but not enough in the two hour run. With this weather consider moving to a warmer climate - but heck, it snowed and froze over in Virginia, Georgia, and parts of Florida this past week (the week I am writing this).
Asides - you can charge the Roadtrek coach batteries by driving. This is fine for some - maybe many - but we live on a four lane avenue that has steady traffic. It is difficult to pull out in good weather. I am not sure that the area of the cut into the street is even large enough for the Roadtrek to get in and out of - plus I would not want to drive it now on the roads here that are thick with salt - and where would I drive for two hours?
If the coach batteries are too low or dead, the generator will not start - even if you run the van engine as a boost. If you think of the Roadtrek as a shelter in the event of a power outage which can happen during these cold, snowing, and iced conditions, it is no good to you if the batteries have no charge.
When you charge the coach batteries you are also charging the van battery. This is important in the winter as well!
If you have a Roadtrek with the new solar panel option, the batteries will charge in the light of day from the solar panel and inverter charging circuits. This is one big benefit to the optional solar package.
Well, I had intended this as a short article. It is longer than I anticipated but adding the whys and what happens to this small tale is perhaps more important to you all than the tale itself. Stay warm!
I wrote in a recent article, "After Winterizing", I spoke about our schedule to keep the batteries charged. I have a schedule to plug the Roadtrek into shore power at our house on the 28th of every month (28th chosen because of February) and I exercise the generator for two hours on the 15th of every month. This schedule has been fine until now. With single digit and below zero temperatures day after day, and wind chills that bring those down even lower, I have been going out at least once a week to check to see that the battery level is still on the green LED on the monitor panel inside the Roadtrek. Suddenly with these temperatures combined with what seem like regular snow storms, a once a week check is not seeming to be enough.
I looked at the battery monitor panel a week ago before a snow storm and everything looked fine. The 28th came on the day of another snow storm and when I was able to get into the Roadtrek to check the batteries the level had dropped to the red LED second from the bottom. This one is labeled "F" for Fair which is an indication to me that the batteries are getting too low and need to be charged as soon as possible. You really never want that monitor to read at the bottom red LED - "L" for Low.
Had this been an ordinary, no snow, normal winter temperature day - normal being upper 20's into the mid-30's or higher - I would have pulled out the RV extension cord, plugged that into my Surge Guard Power Protector, and connected that to the Roadtrek's cord - which needs to be pulled about four feet out for the two electric cords to reach the outside outlet in the rear of my house. This would have been plugged into that outlet and the Roadtrek would have charged for 12 hours. That is our usual routine. But the snow was coming down and would not stop until the next morning. The night temperatures were going into single digits. And the forecasts for the coming days were as uncertain as they always are. All of this and the Roadtrek's batteries needed to be charged.
Let me stray a moment to talk about Roadtrek 190 Populars from 2011 on and why I have to rely upon the Roadtrek's battery monitor LED panel which I know some of you will say is highly inaccurate and does not provide a much needed digital reading of the battery voltage. In 2010, the Roadtrek 190 came with two coach battery compartments. All were outside - one was located behind the rear passenger wheel on the side of the van and one was located on the same side in front of the rear wheel. The one in front of the wheel contained a tray on which the battery slid out. The one behind the wheel opened with clear and easy access to the battery that was there. In 2011 for some reason, Roadtrek changed this design. For one thing, they changed from using wet cell batteries to AGM batteries for 12 volt coach power. The new design put both batteries into one battery compartment located where the former compartment was in front of the rear wheel. From the outside you see the same compartment door as before, but once you look inside the compartment, there now sit two batteries on a fixed platform that no longer slides out for access to the batteries. Without getting deep into this compartment there is no access to the battery terminals and therefore no convenient way to touch the test leads on an electric voltage meter to the terminals and read what the actual voltage is. There are also no 12 volt outlets inside the Roadtrek (not since several model years earlier) to be able to use that to connect a voltage meter to - another way that many with such outlets read the actual voltage of the coach battery(ies). So what I am stuck with are the LEDs on the battery monitor panel. There are estimates of the battery level and the LEDs - this is from the Notes for the Roadtrek Electric Simulator - "The “C” light will be on if the voltage is above about 12.7 volts, the “G” light comes on at about 12 volts, the “F” light comes on at about 11.3 volts. The “L” light will come on with less than 5 volts." Notice that the "L" is less than five volts. This why you never want the battery to fall that low - it will potentially damage the battery and charging the battery(ies) back will take much longer. I know that one Roadtrek owner with a much older model was able to wire a small digital voltage meter into the back of the monitor panel and have the reading show on this meter affixed to the wall adjacent when pressing the test switch. This is not something that I am confident in doing myself. It has been suggested to tap into an empty fuse spot in the fuse box, but when I looked there are no accessible empty fuses spots and certainly no ground wire that is accessible - and I am not about to remove the fuse panel to look for what may be available inside. So, again, I rely on the LEDs which under ordinary circumstances - in that normal winter world that may or may not exist any more - the future will tell.
So - here I am, in the snow and I am not sure how close to that second LED going out and the bottom LED remaining the Roadtrek actually is. I had to charge as soon as possible.
The next day when the storm was over, the temperatures were not much better and they would remain that way for at least two days with maybe or maybe not a rise after that. First I had to shovel the path out of the house, the driveway, the sidewalk, and attempt to shovel a path to the rear of the house that had not really been shoveled since the last storm a week before. I got enough cleared in the back of the house to get to the outlet, but all the while I was realizing that I would have to deal with the other problem of charging the Roadtrek in the cold - the lack of flexibility of the Roadtrek's power cord and the RV extension cord. The RV extension cord was secondary. I could just drag that into the house after use and warm it up to put the long, wild snake of a cord into a store-able condition. The Roadtrek's power cord is located in the lower outside storage compartment and comes out through what has been called a "mouse hole". The mouse hole is located on the rear side of the compartment and comes out into the next covered section where the city water connection is. The "mouse hole" is made up of a flex opening - a round of plastic that is cut like a pizza in the middle. The Roadtrek plug is pushed through this plastic with the flex fingers holding it on place and not permitting any little critters to crawl in around it into the storage compartment. On the outside of the "mouse hole" is a flip cap with space inside the "mouse hole" outer cup for the plug to sit in. We learned the hard way that getting the plug through those so-called flex fingers and into that cup section looks a lot easier than it actually is - and this is in the heat of summer - and you never want that plug to pull back into the storage compartment. In the winter there is no flex. And in just regular winter cold, the cord is difficult to pull out and even more difficult to push back in. Now with this so-called Arctic Vortex this cord if it came out too far from the opening was going to be a problem getting back in - and with this weather, I was not going to let this plug just hang out after the charging was finished. There was no way that I was going to pull it out enough to meet up with the RV extension cord to reach the backyard outlet.
I have two outlets outside and one outlet inside a small porch where our house's side door is. The second outside outlet is in the front of my house - close to the Roadtrek, but to get to it one must go into the front garden and the front garden is where two winter storms' snow was put when shoveled. This outlet was not an option. The outlet inside the porch would work - as long as it was not connected to any wiring for other electric service inside the house, and I had to check the circuit breakers to see if it was - it wasn't and surprisingly it was a 20 amp outlet. The only thing that shared that line was the porch light which does come on with an electric eye but that would not be a problem with 20 amp service.
I don't really know how much amperage the Roadtrek's charging system uses. Once the Roadtrek is plugged into shore power and nothing else is turned on inside the only thing that comes on other than the Tripp-Lite 750W Inverter/Converter/Charger is the microwave (at least the microwave display panel lights up). In my Roadtrek with the all electric refrigerator the fridge turns to 110 volt power automatically but the dial inside is turned to Off. I tried looking at the Tripp-Lite specs but did not see this listed.
When we were finished shoveling and after a short break in the house for feeling to return to our fingers, we went out to charge the Roadtrek. My first thought was to charge for a several hours into the early night and then charge again longer the next day with hopes that maybe it would be warmer. Our usual routine of charging twelve hours straight involves a trip outside at about 2 am to shut it all down and put everything away. With our late night schedule this is not a problem normally. Yes, we are late night people and 2 am is not an issue for us at all. But at 2 am there were temperatures in the low teens predicted and that would be a problem. After we got it all going we decided together that we would just leave it charging overnight until the next day and let it charge for 24 hours - no problem with AGM batteries and no problem with the Tripp-Lite that would allow the charging to continue without a problem is the Roadtrek was always plugged in.
We decided to forget for this time plugging in the Surge Guard. The power from our house should be fine without it. We worked the Roadtrek power cord less than a foot out of the "mouse hole" pushing out from the inside. The cord was very cold and very stiff. The RV extension cord is kept on a reel inside the porch an while it was cold in there, the cord did roll off the reel to the floor of the porch - maintaining the coils which it does not do when it is warmer. We got out the Plug Dogs - the pull handles for RV plugs. These are one of the BEST things that we have bought for the Roadtrek. Over and over they prove their extreme value and benefit! We also got out the 30 amp female to 15/20 amp male adapter plug cord. I went inside the Roadtrek and turned on the battery switch - necessary before plugging into shore power. A Plug Dog went onto the plug of the extension cord and one went onto the female socket of the adapter. The adapter has a plastic pull on the socket but with this cold I was not going to trust that not to break if pulled on. Two more Plug Dogs were used between the Roadtrek plug and the RV extension cord socket. I am so glad that I ordered four Plug Dogs when I got them. The Roadtrek plug was hard to get into the extension cord socket and I was afraid to force it as I did not want them to be stuck together due to the extreme cold. I managed to get them together and the adapter plug was plugged into the wall outlet in the porch. The porch door when closed would have to sit on the cord and the door would sit out about an inch open as a result - letting a lot of cold into the porch. I went into the Roadtrek to check that all was well and the batteries were charging (shown as C on the panel monitor when the test button is pushed). I pushed the test button and... Nothing. Oh boy! Now we had to troubleshoot.
We don't often use that porch outlet and perhaps it was not working. The light attached on the same line works fine. We found a lamp and plugged it into both sockets on the outlet and the lamp lit. The extension cord and the adapter were tight together. This put the problem either inside or outside of the Roadtrek. I first went to the Roadtrek plug which we had hanging in mid-air plugged into the extension cord. As soon as I touched them, they fell apart. There was the answer - simple but now, to get them together as they need to be I was going to have to push them together hard - which even in the summer means put them on the ground and using a foot to apply enough pressure for them to mate. This is only a problem with the heavy rubber socket on the extension cord. The Roadtrek plug plugs easily in and out of a campground 30 amp socket. OK. If I had to force them together I would have to hope that they would come apart - and hopefully, in this cold the Plug Dogs would work as well as always. I got the plug and socket mated, put it on the ground and gently with my foot pushed them firmly together. Meryl plugged the adapter into the house outlet and I went in again to check. Yes! The test switch showed Charge on the battery LEDs. I decided to unplug the microwave. While the lit display panel should not make a difference I decided that it was easy enough to just have the Tripp-Lite charger circuits running on the 110 volt electric circuit.
We left it to charge for 24 hours. Twice after plugging in I checked that all was well inside and it was still charging. I was. The next day was sunny and felt warmer though the thermometer was not showing any better than the day before. We went out about 2 pm to shut it down and put it all away. The Plug Dogs did their job well on the Roadtrek plug and extension cord socket that sat out all night and with a sharp yank the two separated. Thank goodness! The adapter and extension cord was not as easy and it took several yanks to get these apart even though they had been inside the porch all night. They did come apart and I thought how good it was that I did not rely on just one Plug Dog and the adapter's little plastic pull ring that is screwed like a hinge around the upper half of the socket. With a little effort I was able to get the RV extension cord back on the reel. The Roadtrek plug was pushed reluctantly (on the cord's part) back through the "mouse hole" and into the cap. Done.
Lessons learned. In extreme cold, checking the battery voltage level once every week may not be enough. I will be checking twice a week in temperatures like this. With this weather it may be a good idea to charge the batteries twice a month and will check the level just before exercising the generator and then plug in the next day if the battery is low. The generator does charge the batteries but not enough in the two hour run. With this weather consider moving to a warmer climate - but heck, it snowed and froze over in Virginia, Georgia, and parts of Florida this past week (the week I am writing this).
Asides - you can charge the Roadtrek coach batteries by driving. This is fine for some - maybe many - but we live on a four lane avenue that has steady traffic. It is difficult to pull out in good weather. I am not sure that the area of the cut into the street is even large enough for the Roadtrek to get in and out of - plus I would not want to drive it now on the roads here that are thick with salt - and where would I drive for two hours?
If the coach batteries are too low or dead, the generator will not start - even if you run the van engine as a boost. If you think of the Roadtrek as a shelter in the event of a power outage which can happen during these cold, snowing, and iced conditions, it is no good to you if the batteries have no charge.
When you charge the coach batteries you are also charging the van battery. This is important in the winter as well!
If you have a Roadtrek with the new solar panel option, the batteries will charge in the light of day from the solar panel and inverter charging circuits. This is one big benefit to the optional solar package.
Well, I had intended this as a short article. It is longer than I anticipated but adding the whys and what happens to this small tale is perhaps more important to you all than the tale itself. Stay warm!
Wednesday, April 10, 2013
Plug Dogs for Your Shore Power Connections
One of the things that we have struggled with when connecting shore power connections - particulary between the Roadtrek power cord and the surge/power protector unit and between anything and the 30 amp power extension cord that we have - is getting a grip on the plug and socket and pulling them apart. This has never been a problem with a campground power box outlet, as these are often so frequently used that they are easy to pull the plug out of. Some adapters, 30 amp power extension cords, and surge/power protection units plugs and sockets have handles built in on the back. The Roadtrek shore power cord does not and appropriately so because it needs to fit in the mousehole when the cover cap is closed. Our Surge Guard does have handles on the plug and socket and our 30 amp adapter plug/sockets also have handles. Our extension cord does not, but I have seen ones that do. Had I known how difficult these plugs and sockets can be to separate I would have bought a 30 amp extension cord that had the handles.
This problem is worse in the cold when things contract. If it is a very hot day, the plugs are usually easier to pull apart - sometimes. I kept looking in RV shops and websites for something that would add a handle. Short of cutting off the plug or socket and wiring ones on with handles I did not find anything. Until I heard about these...
I read about Plug Dogs when looking through a general RV forum. I did a search and eventually found the manufacturer's website. A Plug Dog is a handle that you temporarily add on to any connection between a plug and a socket. They are made for 30 amp connections, 50 amp connections, and regular household three prong connections. What you want for your Roadtrek is the 30 amp Plug Dog. Here is how they work -
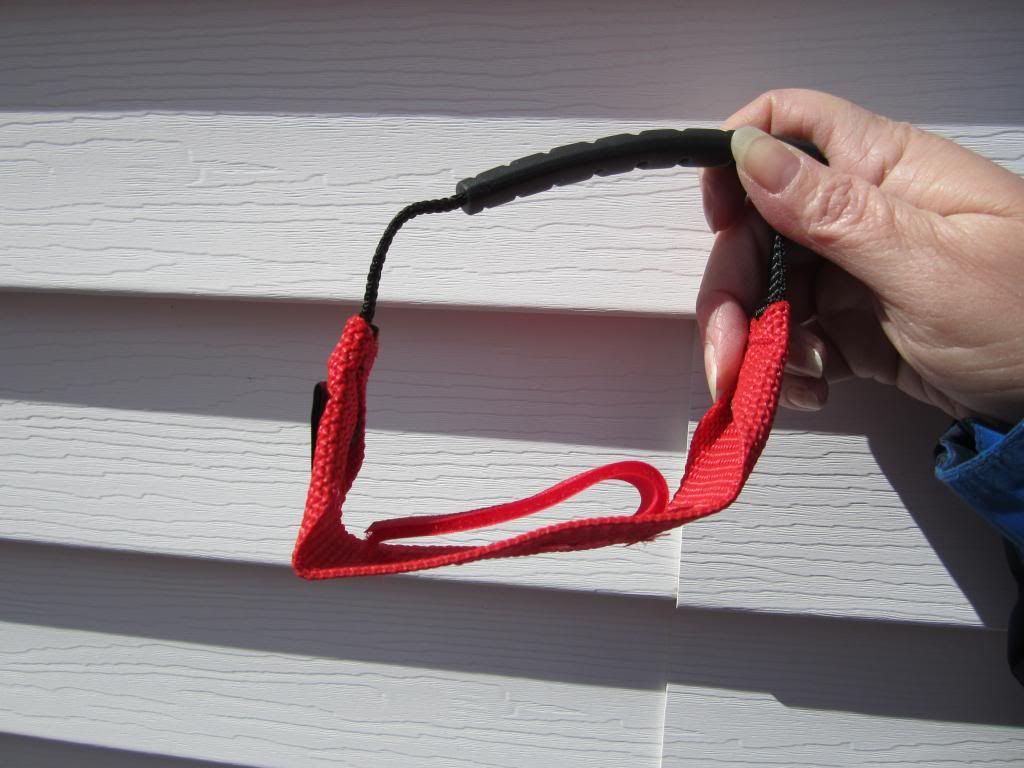
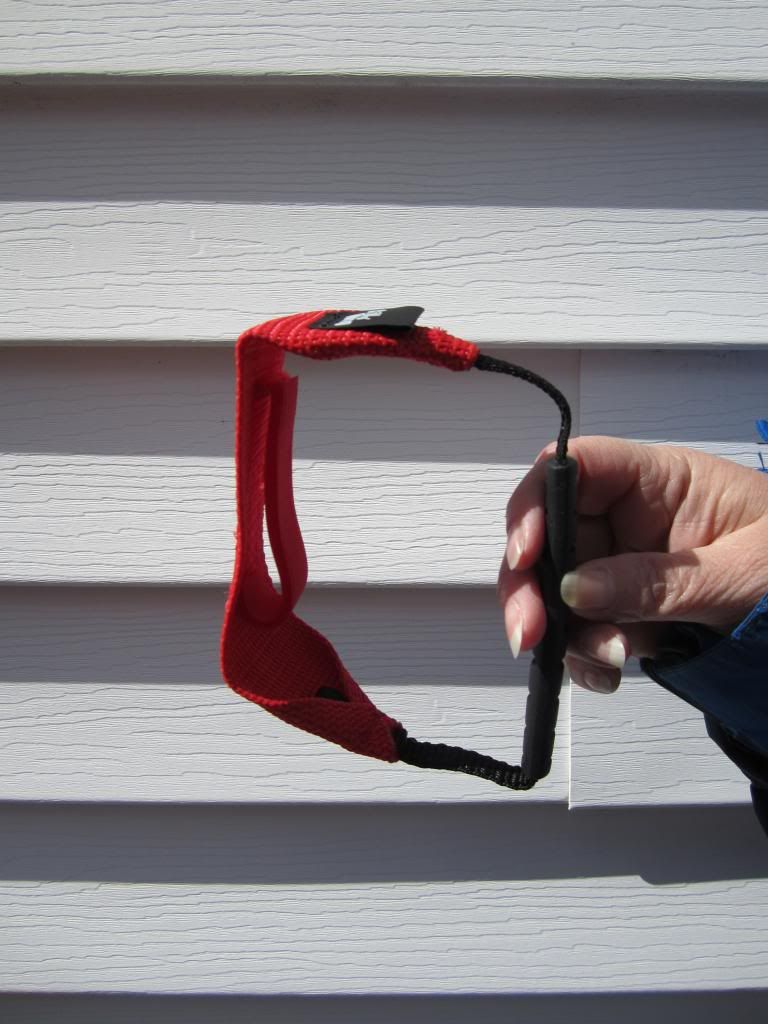
Here is the Plug Dog out of the package. You see the rubber grip handle on the back and a velcro strap between the handle and the face of the Plug Dog. The strap is to secure the Plug Dog to the plug or socket. There is only one style of Plug Dog - you use the same for both plugs and sockets.
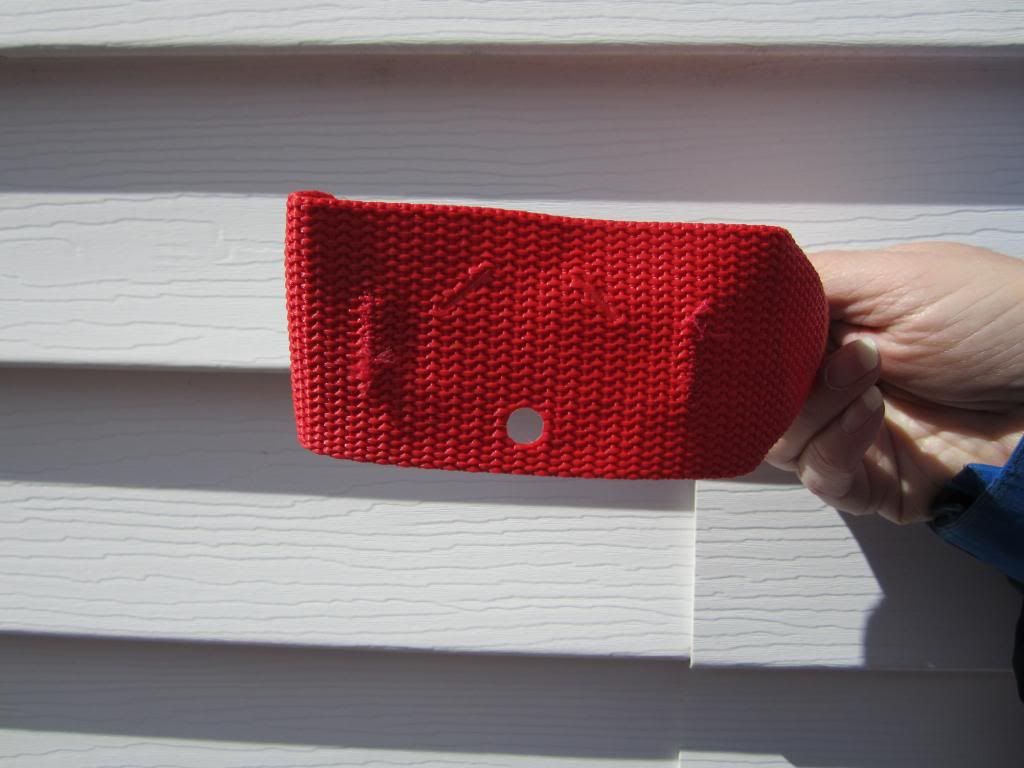
Here is the face of the Plug Dog - see the slots at the top and the hole in the middle - this is what your plug fits through. Like this ->
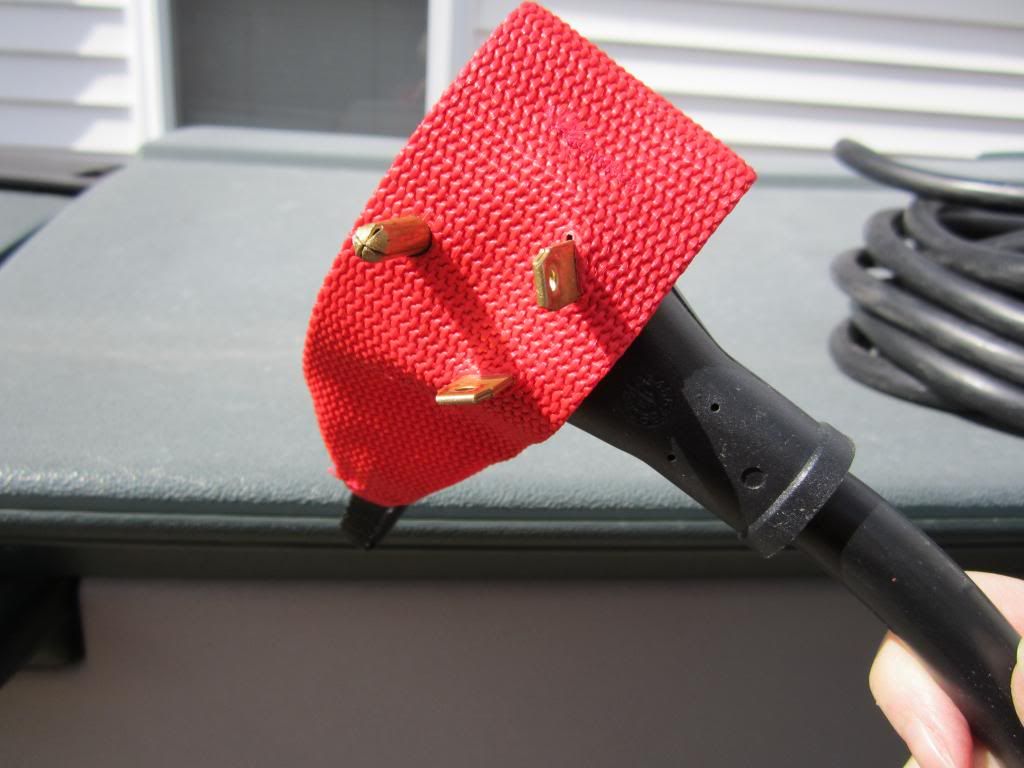
You just slip the prongs of the plug through the slits and hole and use the velcro on the back to secure it to the plug. The material according to the company is non-wicking and non-conductive and they state that it will not interfere with the electrical connection - even in the rain.
This is installed on the plug. Obviously, there are no prongs on a socket to push through the Plug Dog - so if you have a socket that you are plugging into that also needs a handle all you do is put the Plug Dog onto the plug with the handle facing front rather than behind as you see here. A plug and a socket that both need handles that you are plugging one into the other - just put the socket's Plug Dog over the plug's Plug Dog and then plug into the socket. Attach the velcro strap on the back of the socket and you have a plug and socket each with a Plug Dog.
That is all that is involved in putting them on. Simple! Now do they work? YES! Here is Meryl pulling the two ends apart. She could do it with very little effort and she has not been able to separate these ends herself before. And I have struggled just as much to get them apart - often resorting to slipping something between them - NO POWER ON, of course - to pry them apart.
And according to the company, if you still can't get them apart, the handles are made strong enough and large enough so that you can put one side on the ground, slip the toe of your shoe into the handle loop, step down, and pull with the other hand and they will definitely come apart - but I don't think this will be necessary as they came apart so well just with a pull.
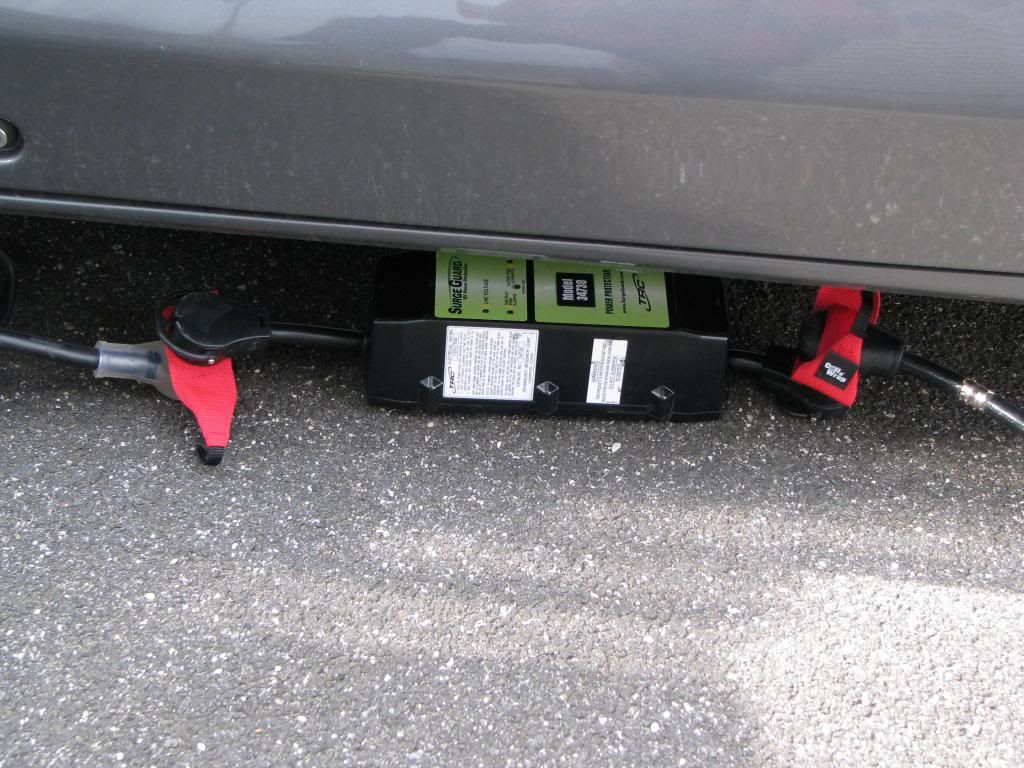
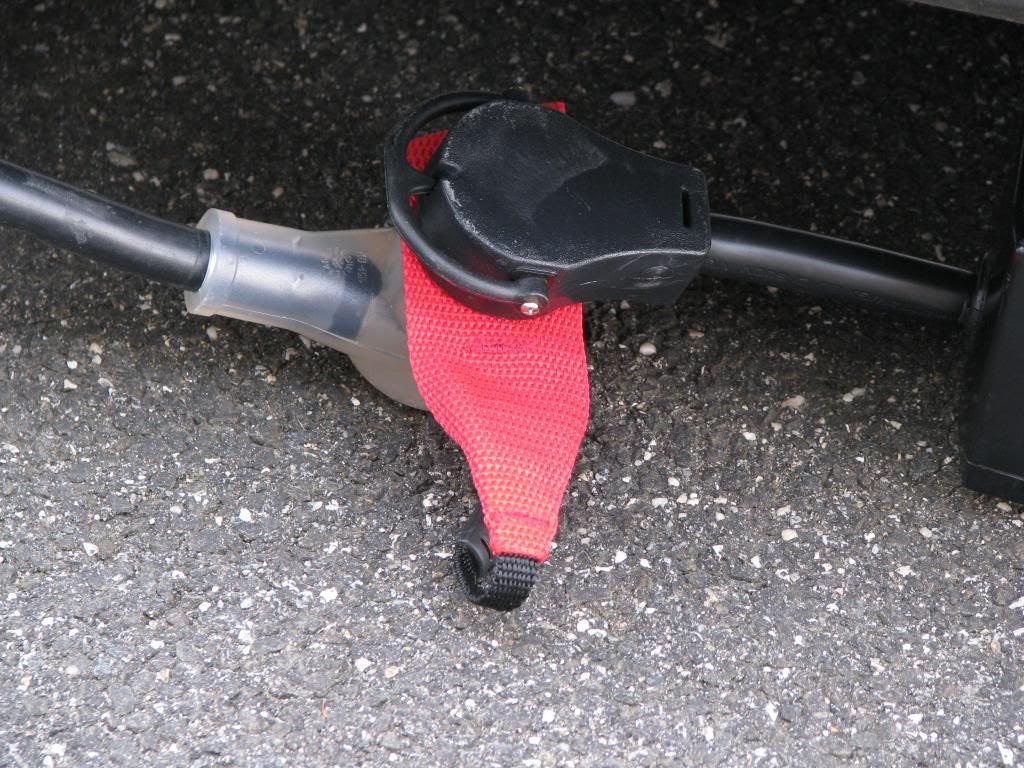
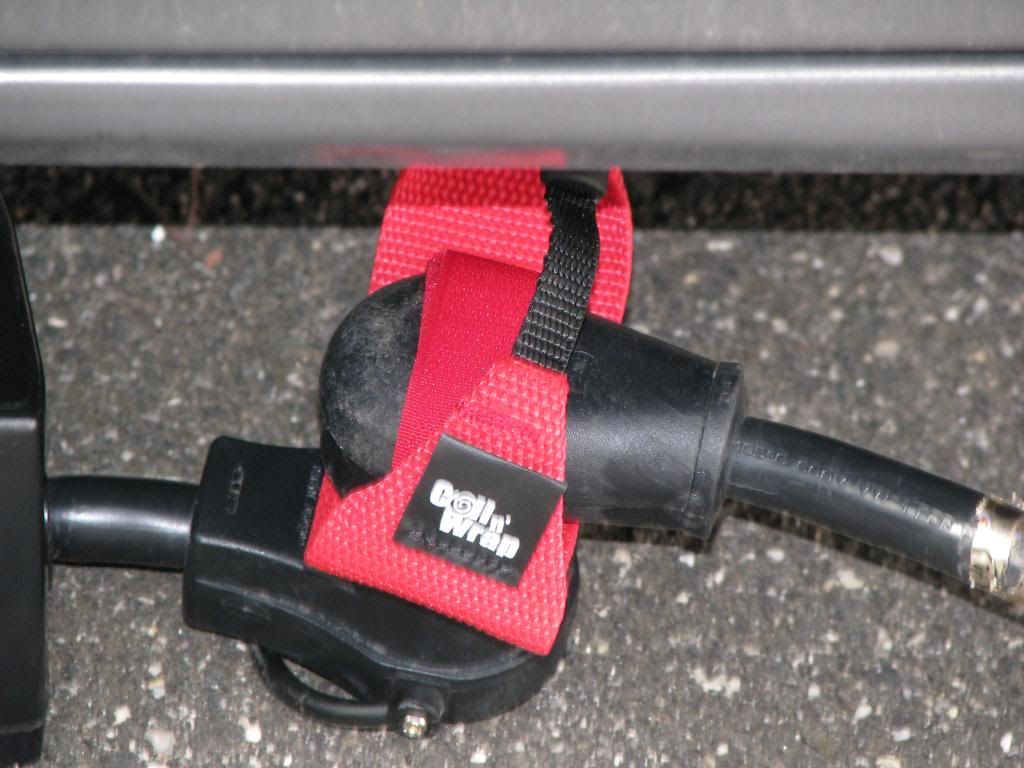
Plug Dogs in use with my extension cord, the Surge Guard, and the Roadtrek power cord:
The Surge Guard plug and socket have their own handles so only one Plug Dog was needed for each connection shown here.
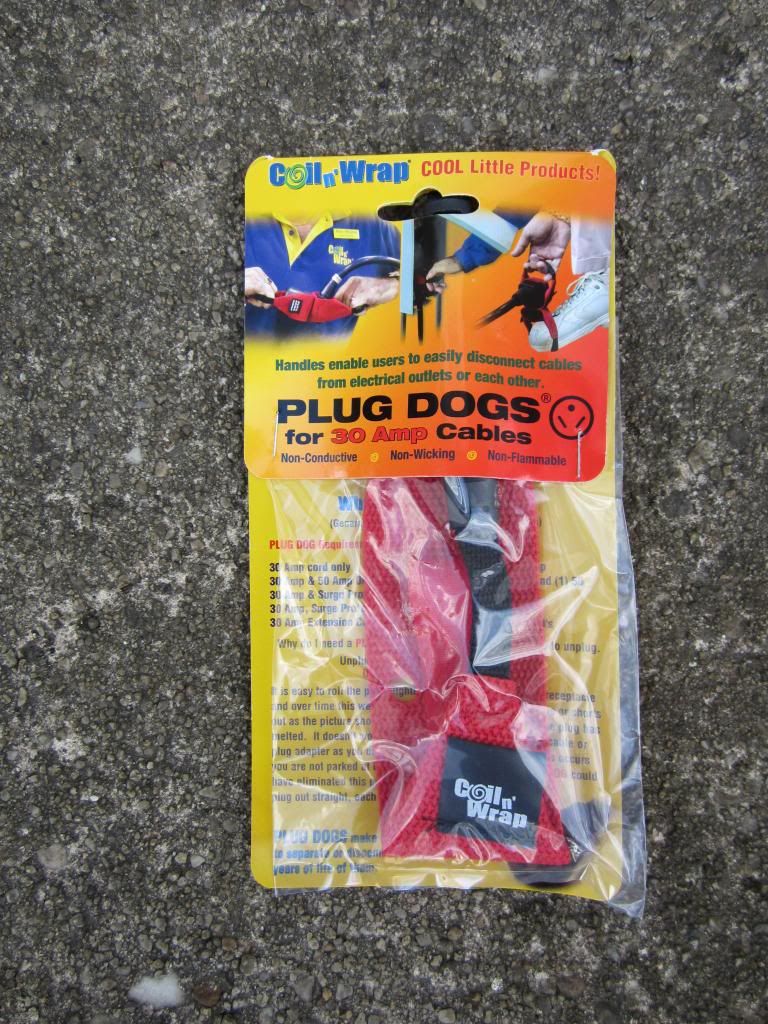
This is what the package looks like.
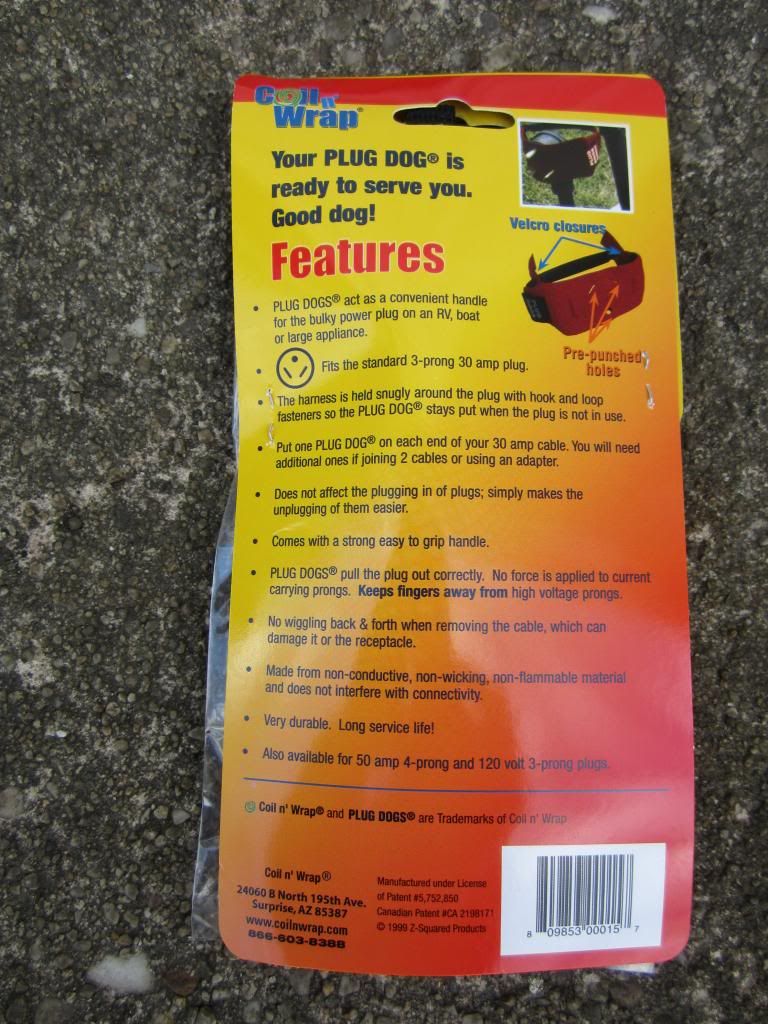
And here is the back of the package -
I looked for these in RV shops and did not find them anywhere including Camping World. I purchased mine directly from the manufacturer's website which is here - PLUG DOGS . They cost $10 each. I purchased four of them - we counted all of the plugs and sockets that we have that may have to go together that do not have handles of their own. You do pay shipping (USPS) but it is not unreasonable and they shipped that same night and arrived about four days later at our post office box. I have no connection to the company that makes Plug Dogs. They are a good product that works and does just what it claims to do. There are few things that you buy now a days that this can be said about. (Roadtrek is another company you can say this about.) They solved the problem we had. If you have the same difficulty getting plugs and sockets apart on your shore power connections, you may find these great too!
This problem is worse in the cold when things contract. If it is a very hot day, the plugs are usually easier to pull apart - sometimes. I kept looking in RV shops and websites for something that would add a handle. Short of cutting off the plug or socket and wiring ones on with handles I did not find anything. Until I heard about these...
I read about Plug Dogs when looking through a general RV forum. I did a search and eventually found the manufacturer's website. A Plug Dog is a handle that you temporarily add on to any connection between a plug and a socket. They are made for 30 amp connections, 50 amp connections, and regular household three prong connections. What you want for your Roadtrek is the 30 amp Plug Dog. Here is how they work -
Here is the Plug Dog out of the package. You see the rubber grip handle on the back and a velcro strap between the handle and the face of the Plug Dog. The strap is to secure the Plug Dog to the plug or socket. There is only one style of Plug Dog - you use the same for both plugs and sockets.
Here is the face of the Plug Dog - see the slots at the top and the hole in the middle - this is what your plug fits through. Like this ->
You just slip the prongs of the plug through the slits and hole and use the velcro on the back to secure it to the plug. The material according to the company is non-wicking and non-conductive and they state that it will not interfere with the electrical connection - even in the rain.
This is installed on the plug. Obviously, there are no prongs on a socket to push through the Plug Dog - so if you have a socket that you are plugging into that also needs a handle all you do is put the Plug Dog onto the plug with the handle facing front rather than behind as you see here. A plug and a socket that both need handles that you are plugging one into the other - just put the socket's Plug Dog over the plug's Plug Dog and then plug into the socket. Attach the velcro strap on the back of the socket and you have a plug and socket each with a Plug Dog.
That is all that is involved in putting them on. Simple! Now do they work? YES! Here is Meryl pulling the two ends apart. She could do it with very little effort and she has not been able to separate these ends herself before. And I have struggled just as much to get them apart - often resorting to slipping something between them - NO POWER ON, of course - to pry them apart.
And according to the company, if you still can't get them apart, the handles are made strong enough and large enough so that you can put one side on the ground, slip the toe of your shoe into the handle loop, step down, and pull with the other hand and they will definitely come apart - but I don't think this will be necessary as they came apart so well just with a pull.
Plug Dogs in use with my extension cord, the Surge Guard, and the Roadtrek power cord:
The Surge Guard plug and socket have their own handles so only one Plug Dog was needed for each connection shown here.
This is what the package looks like.
And here is the back of the package -
I looked for these in RV shops and did not find them anywhere including Camping World. I purchased mine directly from the manufacturer's website which is here - PLUG DOGS . They cost $10 each. I purchased four of them - we counted all of the plugs and sockets that we have that may have to go together that do not have handles of their own. You do pay shipping (USPS) but it is not unreasonable and they shipped that same night and arrived about four days later at our post office box. I have no connection to the company that makes Plug Dogs. They are a good product that works and does just what it claims to do. There are few things that you buy now a days that this can be said about. (Roadtrek is another company you can say this about.) They solved the problem we had. If you have the same difficulty getting plugs and sockets apart on your shore power connections, you may find these great too!
Labels:
190,
camper,
campgrounds,
camping,
Chevrolet,
Chevy,
Class B,
electric,
electricity,
motorhome,
Plug Dogs,
Popular,
Roadtrek,
Roadtrek 190 Popular,
RV,
travel,
traveling,
vacation
Subscribe to:
Posts (Atom)