Roadtrek

Roadtrek
Showing posts with label battery. Show all posts

Friday, March 21, 2025

HOW TO CHECK THE COACH BATTERY(IES)' VOLTAGE ON A ROADTREK THAT HAS A TRIPPLITE

 With the battery switch on, when you press the test button on the monitor panel in Roadtrek the battery column of LEDs light up to show you how much charge is in the coach batteries, The top C green LED indicates that the Roadtrek is charging (if plugged in, running the generator, or running the engine). The next LED down - G amber LED - if  lit indicates that the voltage is approximately between 12.5 and 12.7 volts (12.7 is considered full charge). The next two LEDs down to the bottom of the column - both RED LEDs - indicate from the one below the G to the one on the bottom that the batteries are 12.4 volts for the upper one and 12.3 volts for the bottom one. When the upper red LED is lit at 12.4 volts the batteries are at half charge - and at this point the Roadtrek needs to have the batteries charged by either plugging in for 12 to 24 hours, running the generator (which is the slowest way to charge), or taking a two to three hour continual drive on a limited access road at the speed limit.  BUT with the monitor panel battery column what you are seeing is not exact but an approximation of the level of charge. If you want to see an exact battery voltage level you need a multi-meter - an electronic device that will read both AC and DC voltage (separately) by putting a positive and negative probe on the battery terminals. You want a multi-meter with a DIGITAL display.  Using one with a dial and needle is not going to be easy to read. These can be found in Home Depot or Lowes or any electronics store or auto store - or on line. A digital meter will cost about $40 or more but is well worth it both for the Roadtrek and at home. Prior to 2011, Roadtrek had the battery(ies) in a slide out tray inside an outside cabinet on the passenger side of the van. This was either one or two cabinets - when there were two cabinets there was a battery in each. When there is one cabinet both batteries are in that cabinet.  When these cabinets has sliding trays it was easy to slide the tray out and have access to the battery terminals.  In 2011 Roadtrek changed from using deep cycle RV wet cell battery(ies) to no maintenance AGM batteries. With no way to open an AGM battery and no need any longer to check battery fluid levels - there was no need to access the top of the battery(ies) and since Roadtrek did not want you to even attempt to do that - they took away the slide. Here is a photo of my 2011 190 Popular with AGM batteries with the battery cabinet door open - 


With this getting to the terminals of these two 6 volt AGM batteries wired in series to output 12 volts DC to the Roadtrek is a major pain as the batteries need to be lifted out as it is awkward to get to the terminals needed to take a reading with a meter. 

BUT - there is a simpler way!  For Roadtreks equipped with a TrippLite Inverter/Converter/Charger you can easily get a reading right from the battery connections going into the TrippLite. This works with both the earlier TrippLite 600 and the TrippLite 750 that Roadtrek uses later. 


This is the TrippLite 750.  This is located in the back of the Roadtrek behind the passenger side cargo door.  To see where this is and how to access it - in many Chevy based Roadtreks - but Roadtrek over the years had a way of putting things in different locations so it is possible yours may be elsewhere - this linked article will help you get to it (with photos)  in the same location mine is.  One thing for certain it is inside near where the battery(ies) are outside. 

Take a look at this photo on the bottom left. There is a black cable and a red cable - the black cable is the negative battery cable coming DIRECTLY from the battery(ies).  The red cable is the positive battery cable coming DIRECTLY from the battery(ies). The TrippLite is directly connected to the battery(ies). IT BYPASSES THE BATTERY DISCONNECT/CONNECT SWITCH ON THE WALL INSIDE THE ROADTREK. THESE TWO CABLES HERE ARE ALWAYS LIVE - THEY HAVE POWER GOING THROUGH THEM EVEN WHEN YOUR BATTERY SWITCH IS OFF AND/OR THE ROADTREK IS COMPLETELY SHUT DOWN. 

NEXT - take a look at the top of the BLACK cable in the photo - SEE THE SCREW HEAD THERE. That holds the cable into the TrippLite. There is the  another of that SCREW HEAD on the top of the red cable (hidden in the photo by the red cable - but it is there just as easy to reach. (Don't touch the two at the same time with your fingers - these are live connections.)
 
NOW - Take out your multi-meter - set it on DC - if there is a voltage range set the range to include 12 volts. There will be a probe with a red wire and a probe with a black wire that you plug each into the meter. Some meters have a button to hold the reading on the screen once the reading is taken and this makes it easy to look at once you have crawled out from where the TrippLite is located, stand up outside and read what it says - especially if you have a Roadtrek with a power sofa bed and the TrippLite is under the bed and the bed frame is in the way of the TrippLite. Once your meter is all set - and you can get it set up even before you start - you can take your reading.
 
HOLD each probe, each in a different hand and put the metal tip of the probe on the top of the corresponding battery cable screw head.  Hold the probes away from the metal tip on the end of each prob. Do this not plugged in, best if the battery wall switch is of inside so there is no draw on the batteries when taking the reading, van engine off, generator off. Inverter wall switch OFF . Instantly the meter will display the exact voltage of both batteries - or your single coach battery on its display screen. 

That is all there is to it. No struggling with battery(ies) in a small cabinet - no need to slide out anything. You just use this easy access method to see what the exact voltage of your Roadtrek coach battery(ies) is.
 
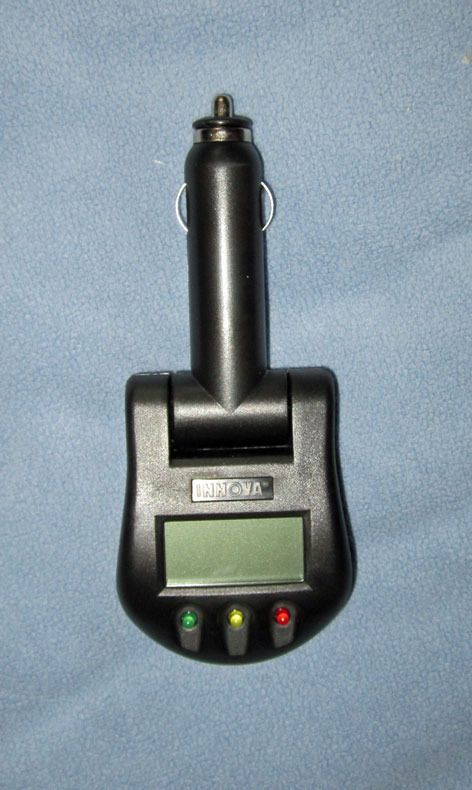
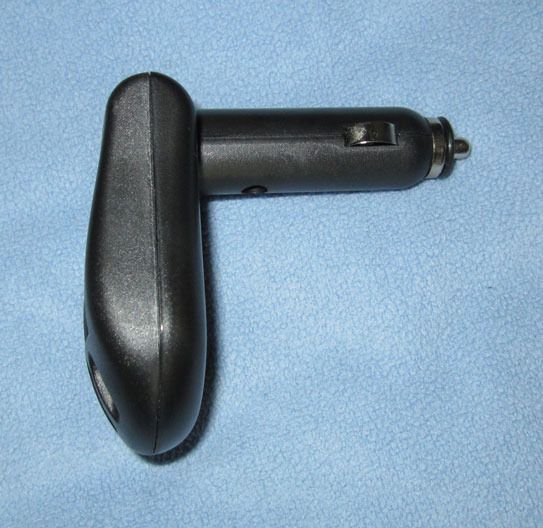
This is the meter I have. I bought it either in Home Depot or Lowes. This meter comes with the standard probes but it also has a temperature probe used to show the temperature coming out of a air conditioner, etc. It uses batteries to run but I do not keep those batteries in the meter unless I am using it - as I am not using it often. The pouch came from Walmart - though I have not seen these there in awhile. In the pouch it is an easy grab and go with everything needed inside to use it. I keep it in the house and it is on the what to pack into the Roadtrek before a trip check list. It is easy to find a place for it inside the Roadtrek!


Saturday, February 29, 2020

JUST WHEN YOU THINK EVERYTHING IS GREAT- IT'S NOT!

I have been holding off writing this article since the end of October 2019.  My last post of August 2019 - ended on a happy note. My new batteries were in, The battery separator was replaced and when driving the batteries were charging. It seemed like all was great. Well... no it was not.

Why have I waited to write this? I wanted to make sure that now things really were OK. And I just wanted to not tempt fate - once again.  At this point as you read this, hopefully, all is well, but for a long time it was not.  Now I have pages of documentation and voltage checks that I made shortly after the last article was published, but I, promise, I will not include all of that in this article. I don't even want to look at all of that again. I will give you some details to explain what took place.

The last article came out on this site on August 30, 2019. On  September 6th, I went out to check the voltage of the batteries and they read 12.56 volts. That is a lot for brand new batteries to drop. Three days later - September 9th - I went to the Roadtrek again and checked the voltage of the batteries and the battery voltage was -----   10.1 volts!   Essentially the new batteries drained to dead. This part is important to understand - there was NOTHING ON INSIDE THE ROADTREK TO DRAIN THE BATTERIES LIKE THIS. 

I downloaded the technical manual for LifeLine AGM batteries to find out what to do?  The manual is 40 pages long!  In the manual there is a section called "Deep Discharge Recovery". What I had was a "deep discharge"!  The second paragraph in this section says, "WARNING: This procedure should only be done by a trained technician." That warning was followed by another "WARNING" and also a  "CAUTION". All of which I was in no position qualified or capable of doing." What I did instead was plug the Roadtrek in for 72 hours plus to try to bring the batteries back to charge. After it charged - and the batteries did charge  - I turned off the TrippLite 750 inverter/converter/charger on the  unit slide switch on the front right of the TrippLite. To do this you slide it to the middle position DC OFF. This cuts its connection with the batteries - whether the battery switch is on or off.  In this position the TrippLite has ZERO drain on the batteries. It is the same as if you disconnected the battery cable from the TrippLite.

Hoping that all now was OK - we decided to take a trip and we drove on a one day and back trip 400 miles. - Another point of interest - when you drive the Roadtrek the batteries charge when the engine is running. The battery switch can be ON or OFF. AND MORE IMPORTANT TO KNOW - the TrippLite has NOTHING TO DO WITH THIS PROCESS OF CHARGING. It is strictly the connection between the battery separator (or in older RTs the battery isolator) and the Roadtrek batteries with the Engine battery - and the engine alternator which is doing the charging.  -  So, we drove 400 miles after charging the batteries at home plugged in using the TrippLite set to "Charge Only" and that battery voltage went to 12.8 which is very good. 12.8 v DC is a fully charged battery or battery bank.  Sounds good, right? Wishful thinking. In four days (which included two hours of exercising the generator under half load - which also charges the batteries through the TrippLite set to "Charge Only" - the batteries dropped - with the TrippLite set to "DC OFF" to 12.1 volts.  Again, I plugged in to charge.

During all of this I went out and bought a fairly good - recommended - multi-meter so that I would be sure I was getting accurate readings. I was - as I checked this to my 12 volt plug in digital meter. I stopped in at the mechanic who works on our car and the Roadtrek and asked him if he would test the Roadtrek to determine if there was any drain on the batteries. He took the RT into his shop and the results - there was ZERO drain on the batteries from the Roadtrek or the van.  Something was very wrong.

I contacted the shop in New Jersey that I bought the batteries from and that installed the new AGM batteries. What I got in response was that I could bring the RT back to them and that they would need it "for awhile" and they had to determine what was wrong with the Roadtrek before they would test the batteries and put in a claim for replacement under the batteries one year full replacement warranty. What troubled me by what they said was the "for awhile" part. They charge by the hour - a lot by the hour - and I could see this becoming even more expensive than dumping these batteries and starting all over again taking the loss of the money. They would not give me a clear answer about when and how long they would be charging for labor. I made an appointment to bring it in to them - in New Jersey and leave the Roadtrek. But in the meantime until the appointment I started doing what I should have done before I even bought the batteries from them. I looked up customer complaints and reviews about this shop. What I found was greatly disturbing. Not one but the same comments over and over - they take an RV in for service - keep it an extended period of time - little is done - nothing really is resolved - and they charge for all of that - and more. Oh boy! I try not to stress over the Roadtrek but this was really getting me down. I was not sure what to do. I did not trust this shop at all any longer.

As always, Meryl had the solution. She said - call the Roadtrek dealer/service - which I did.  I both called and emailed all of the details - all of the documentation about what was happening and all of the voltage readings - and what we knew - which basically was that zero drain was found on the batteries from the Roadtrek.  Initially they were going to take it in for one day. Even I felt that it really needed to be there for more than a day - just to monitor what was happening with the batteries and to  really go fully over the electrical system in the Roadtrek and make sure that there was nothing not functioning as it should that was causing the batteries to drop. I spoke with the customer service rep that we have been working with since we got the Roadtrek in 2011 from this dealer new - and spent a lot of time with getting things put in correct order after it came out of the factory with a lot of problems. We are on a first name basis - and have had many pleasant conversations with over the years. She told me that they thought I was in a hurry and it would be better if they kept it. We set a day to bring the Roadtrek and leave it with them. At the same time we learned that they have moved their service facility off the property where the sales room is and they were now down the road some. We got detailed directions. To bring the Roadtrek there to leave it we had to also bring our car to get home. That meant one follows the other.  The next day I cancelled the appointment at the shop we bought the batteries at.

I put together a very extensive package of materials about the batteries and my log of what was going on since we got the new batteries. At this point I was not sure if the Roadtrek shop - from which I did not buy the batteries from - would be able to get replacements under the batteries' warranty. I just wanted things fixed - and for me to tell any shop what I told the Roadtrek shop under any other circumstances would be just craze - but I wanted this fixed and done with - I said, "if the batteries are bad and you can't get them replaced under warranty I will take the loss - take them out, throw them away - and get me two good AGMs that you would use to replace the Roadtrek originals". Yep, I was pretty much at the end of my tolerance in dealing with getting working batteries in the Roadtrek. As it was the entire summer when we should have been traveling in the Roadtrek we were getting the batteries replaced -and then dealing with bad batteries. The only trip we took the entire summer in the Roadtrek was four days the week of July Fourth  - plus the one day and back the same day trip of 400 miles (which was rather pleasant).  We usually go away for a few days at the end of October and I was planning on that trip as the last trip of 2019.

The trip down to Pennsylvania to drop off the Roadtrek we set off with Meryl driving the Roadtrek and me driving our passenger van.  (Ah yes! With all the excitement going on with the Roadtrek just before this trip down, our car started making noises when shifting down. I asked our mechanic if I could drive it to PA and he said - "I wouldn't" - so I didn't. My passenger van is a 1996 and I have only driven it locally for a long number of years.  So I asked the same mechanic - who knows it well - if it would make ti to PA and back and he said sure. Just in case I took it out on a highway at night for an hour to make sure it would.  It did that fine - and that is what I was going to drive to PA - a trip this van has not taken in maybe over 10 years or longer.) SO - We have Midland Walkie Talkies with a 28 mile range (clear open field outside) and we each took one - and they kept us in contact the entire trip. The only time we lost contact was when the Roadtrek got ahead of me and went around a long curve- but as soon as we both were on straight highway again the radios connected.  Meryl rarely gets to drive the Roadtrek and had not driven it that far since she drove it home from Pennsylvania with me following. We got to the service center  in its new location. Had a nice chat with our friend - talked about Roadtrek and the new owners - and we left it in good hands. They were planning on our having it back in about 12 days. And they were not charging me for labor unless they were actually working on it. They have been very good with us since we first met this dealer in 2009 when we started looking at Roadtreks - and met them at an RV show in New York.

Getting home was a lot more exciting. We stuck around the area for a couple of hours - had lunch and stopped at a store that was not far for a couple of pies - not just any pies - and not chocolate shoofly but a cake in a pie called Funny Cake which is mostly only found in this area of Pennsylvania.  We were this close - we had to go and pick up a couple. Well. We finally almost got to the PA Turnpike - coming from a direction we have not come from before and had to head east from and we made a wrong turn that took almost a half hour to correct - and we got back to the PA Turnpike rush hour had started. Six hours later - we got home. Thank goodness we were together in the van because had this happened on the way down in two vehicles it would have been even more of a mess. We made a mental note - when coming back to pick up the Roadtrek - get there early and come straight back home!

Back home and life goes on. I was getting email updates from Roadtrek dealer/service. During this time Meryl's 90 year old mom needed some help getting to routine medical appointments and we were taking her.   We got a call from Roadtrek and they said it would be ready in two days.

Findings from Roadtrek dealer service - Roadtrek electrical systems and charging - ALL GOOD! New batteries - one bad, one good. The bad one was bringing the whole thing down. A new replacement added to the good battery would make all GOOD. AND THEY HAD A DISTRIBUTOR WHO WOULD TAKE THE BAD BATTERY AND REPLACE IT WITH THE SAME UNDER WARRANTY.

SO as far as the Roadtrek was concerned all was going to be good. The minor problem at home was we were scheduled to take Meryl's mom to the doctor when we should have gone back for the Roadtrek.  I let the shop know this and they said no problem - call us next week and we will set a day to expect you.  That would have been good if the weather had not changed - and it got suddenly very cold and a bit snowy -  not at home but in PA. Just before I was going to call the next week, I got a call that morning from the Roadtrek shop - the weather forecast is predicting well below 28 degrees in the next few nights and your Roadtrek is not winterized. May we winterize it if you can't come right now to get it?  Well, I had heard this same thing about the weather and it was there and here - and even if I could have gone right then to get it - I would have it home in the same cold. I told them absolutely yes - as I had thought to ask them to do this anyway when I called later that day. So they would winterize the Roadtrek.  Of course, those who have read my articles on winterizing the Roadtrek I have little things that I do that the shops often don't do - and I had to make sure they knew not to use compressed air in the lines - as this is a never do according to Roadtrek (at least the "old Roadtrek").  I went through my please don't and please make sure to do this and that - which I would have done if I was doing it myself.  She said, of course. And for the first time since they did the winterizing that first year we owned the Roadtrek - and took their one to one winterizing class - which is the basis for my steps on winterizing - plus my additions - I was not winterizing the Roadtrek. And like a parent with his child away for the first time when something they do together is not done - I worried if they were really going to do it all the way I do. (And they did!)

 We finally got to get to PA and pick up the Roadtrek - and as we were sure to do after our first experience getting home in rush hour PA, NJ, and NY style - we picked it up around 11 am. Stopped for twenty minutes to have lunch. Got on the southbound road to the PA Turnpike - did not make the same mistaken turn as we did the last time - now following each other - and got home in the expected three hours - and only got into traffic in New York - Walkie Talkies with voice activated transmission making sure that each was finding the correct turns.

I will not say what I was charged except that everything to do with the batteries and checking out the Roadtrek's systems to make sure they were good was reasonable.  The winterizing surprised me as to what it now costs which is a lot more than it was 8 years before - but checking around I was charged ballpark for what winterizing costs to do today. It is a good thing to do it yourself- as you save a LOT!

I learned a very important lesson in all of this. The lesson is don't try to go cheap! I got a quote from the Roadtrek dealer/service on the batteries and installation before I decided to go to the place in New Jersey to buy the batteries.  The quote was higher on the batteries but lower on the installation (and I was charged in addition by the shop in NJ for shipping the batteries from LifeLine to them - and they were supposed to be a LifeLine distributor. plus parts that were not needed.to do the install).  Had I gone to the Roadtrek dealer/service from the start the total price - as there was no shipping involved - they were going to the same distributor that did the warranty exchange a few miles away from them - and there were no added, unnecessary parts - would have been less than what it cost me in New Jersey plus they would have fully checked out the batteries at the time of install - and I would have had the Roadtrek for travel - no need to make two trips down and back with multiple vehicles which involved tolls and gas - and not had to pay for getting everything checked out. All in all - I should have listened to Meryl when she told me to go to the Roadtrek dealer/service from the start  - why? Because Meryl is always right. I don't say that mockingly. She will tell you, herself, that she is always right - and you know - honestly - she is.

We never did get to take that trip at the end of October. The weather was bad. Things were going on at home that could not be put aside. But the Roadtrek was fixed and fixed right.

Our Roadtrek dealer/service is Fretz RV in Souderton, PA. As I have said they have always been good to us! 

I have been checking voltage regularly ever since I got the Roadtrek back. It has gone on a day trip since then. The generator gets its monthly exercise. And until today - because I don't want o get into the habit of not plugging it in - even though it really does not need to be charged - I had only plugged it in once. As I write it is outside plugged in and charging. Other than when plugged in or running the generator when I put the TrippLite into Charge Only setting, I keep the TrippLite on the DC OFF setting - and there is still zero drain on the batteries.  The batteries stay at 12.9 volts - may go to 12.8X volts with x being a 100th of a volt . The lowest I have seen is 12.82 volts - all indicating that they are fully charged and holding that charge.  It has been four months now. The green light on the battery monitor inside the Roadtrek on the wall always shows C - top LED - for the momentary check of the batteries inside with the plug in 12 volt meter - and then the battery switch goes right off.

Would I still recommend LifeLine  AGM batteries to replace your Roadtrek AGMs?  I am not sure if I would. Maybe it is not unusual for one to get a bad battery. I don't know. I have never gotten a bad vehicle battery. These batteries are supposed to be hand assembled at the factory in California. They are supposed to be the best - and at a price for the best. When I read though the LifeLine technical manual they talk about all the things one is supposed to do annually to maintain these batteries. Well, the AGMs Roadtrek put in when they built my Roadtrek in 2011 lasted until - and maybe even would have lasted longer past - 2019. I decided to replace them because they were not charging when driving - and we found out after buying the new batteries that the problem with that was not the batteries at all but the battery separator going bad. So I might still have had the OEM batteries now if that had not happened.  And all I ever did to maintain those batteries was to plug in every month and charge them - once a month up to when they were four years old and then I started plugging in twice a month - to keep them charged. And with these new batteries- well that is my plan also -they will get plugged in once a month - which is also good for keeping the engine battery charged (depending on the year of your Roadtrek).  I can't be doing what they say to do and I have no idea how to do what they say to check and record, discharge, and ,,.  Well. they will get plugged in. You can download the manual on the LifeLine website and decide for yourself.

I will be writing some articles about what I have learned about the Roadtrek electrical system which goes beyond the basics I have written about in the past. There are things that work a lot differently than I had thought they did. i have mentioned some of them so far. But that is for another article.

Once again, thanks for coming along on this journey - one I rather I would have not had to take.

Friday, August 30, 2019

Sometimes one writes TOO SOON - An Unanticipated PART 2

When I finished the last article, all was happy and hopeful.  Had I only waited to write that article, as a few days later I went out to turn on the batteries, start the engine, and watch the voltage on my plug in voltage meter rise up to charging voltage (around 13.8 to 14.5 volt) showing that the new batteries charging. This, after all, was what pushed me to buy the new batteries - as the old batteries were not doing this.  Well... The voltage meter stayed at 12.6 volts - a decent charge on the new batteries but not right when the engine is running. We took it for a ride. We are getting too used to late night drives in the Roadtrek toward the end of Long Island. Long Island is 100 miles long and the only roads there that the Roadtrek is allowed to drive on due to its height. So we get on the Long Island Expressway (495) and to get to that we used the Seaford Oyster Bay Expressway - yes, it is referred to as the S.O.B. or more kindly the 135.  Long Island is shaped like a fish and we drive out when we do this drive we head east and turn around in the town of Riverhead which is located where the fish's tail starts - this is an hour's drive (when there is no traffic) and about a 65 mile drive for us.  The best way to charge the batteries in the Roadtrek while driving is two drive for two hours at highway speeds without stops. And that is what we did. When we got to the hour point I pulled over into a parking lot with the engine running and plugged in and looked at the voltage meter for the Roadtrek batteries and it read 12.6 volts - no charging took place. We turned around and headed home - and back at home - the same 12.6 volts and no indicator to show it was charging. Oh BOY!

As it happened the day before I decided to purchase a spare Sure Power bidirectional battery separator - the same model that I had in the Roadtrek - just in case I should ever need it. This is not an easy part to find and has to be ordered - I ordered it from a battery supply house in Washington State.  It would take three business days for it to arrive.

I stopped at the mechanic the next day and told him that I needed him to check out the engine battery, the alternator and to please test the battery separator which is not something he would usually do but he could do it.  He could take it the Tuesday of the next week. That weekend I printed out everything I have about the battery separator - and I also contacted an email Roadtrek friend who I met as a reader of this site. His name is Bruce.  The details about how the battery separator works is rather confusing as the wording seems to contradict how we know it works by experience. In fact, it turns out I was not the only one confused by this. 

Did you ever have what seems to be an unsolvable puzzle and become obsessed with solving it? Well that was me! I went back and forth with Bruce about how we each were interpreting Sure Power's description of how the separator worked. He had some good ideas about this but suggested I contact someone he has contacted before about his Roadtrek - Norm - who writes a blog site similar to ours but with its focus on the Roadtrek 210, which is a bigger version of our 190.  Bruce also sent a link to an article that Norm wrote on his site about the Sure Power Battery Separator. I read his article and he also seemed to find contradiction on how we know it works and how it is described as working.  I emailed Norm the details of what was going on and if he has any insights beyond his article. (Norm's site is linked to our LINKS section on the right column of the page - and has been for sometime - Roadtrek 210.) While waiting for Norm's response I sat down with Meryl who often looks at things purely logical - much more so than I do, explained the battery separator and gave her all of the documents I have about to read and come to her own opinion on how it works - and that did seem the most likely and logical. (This was no surprise to me - I knew she would see it differently than I was seeing it.) Norm did respond and we went back and forth with a few emails discussing what it might be - what it should be - etc.  We knew how it should work from shared experience in how it works - and that is what I needed to go by - despite the paperwork.

The new battery separator was delivered to the post office on Saturday and I had it in my hands on Monday. If it was needed, I had it ready.

We got the Roadtrek to the mechanic the night before.  And the next morning I eagerly awaited a phone call which by after 1:00 pm had not come. We were heading out of the house and I said to Meryl that we would stop there on the way.  She suggested that I bring the new battery separator and I put it in the car. When we got there, it seemed to be ready. The engine battery was bad - and not holding a charge. (I had thought that might be the problem.) He had tested the battery separator and it was connecting. He talked about the other things he did and handed me the keys.  I asked him if the RV batteries were charging when the engine was running. He said he was not sure how to turn on the battery switch inside and did not want not to push any buttons he was uncertain of. Understandable - he is not an RV mechanic.  We started the engine first, turned on the battery switch for the Roadtrek batteries, I put the meter in the socket and the batteries were not charging. He then decided that perhaps the alternator was not putting out enough current and went back into the shop to check on alternators.  He said we did not want a cheap import alternator and he only wants to put a good one in. He was finding the alternator he wanted to use but they were not available. We talked about the alternator some and then ... I just had a feeling that I needed to ask him if he did one more thing - when the engine was running - and the alternator showed 14 volts on the dash - did the Roadtrek side of the battery separator also show 14 volts. He told me he had not checked that and we all went back outside to the Roadtrek. He brought his meter - and he tested this. There was no current coming into the Roadtrek battery side of the separator.  He said we don't need an alternator. I told him that I had a new battery separator in the car and he might want to check that out.  He installed the new one in a few minutes - it is just three connections - a cable from each battery system - engine and Roadtrek - and a common ground - all there on the old separator. As soon as he had the new one in, the Roadtrek battery started to charge with the engine running, While the separator was connecting before the voltage was not going through it.  The new battery separator is what was needed all along. We were going to need the new batteries in the Roadtrek - both  RV and engine anyway - so while that might have been put off for a time - I was still playing Russian Roulette with RV batteries that were past due. 

As we were leaving he told me to drive the Roadtrek to charge both sets of batteries- the new engine battery and the Roadtrek batteries - or I could plug in the Roadtrek to charge both.  Since there were "strong storms" predicted that afternoon we decided not to plug in at the house and wait until that night for one of our late night Roadtrek excursions.  We did that and all was well. And since I have been checking and double checking and it is working.

My special thanks to Bruce and Norman! You both helped a great deal!!!


Tuesday, July 30, 2019

New Batteries for the Roadtrek - A Three Year Long Epic Adventure

 THIS ARTICLE HAS BEEN EDITED SINCE IT WAS FIRST PUBLISHED.  THE BATTERIES INSTALLED IN THIS ARTICLE HAD MAJOR PROBLEMS AND IN DEALING WITH THAT I COULD NOT TRUST THE SHOP THEY WERE PURCHASED AND INSTALLED AT AGAIN. THE NAME OF THAT SHOP HAS BEEN REMOVED.  

I WILL NOT REVEAL THE NAME - PLEASE DO NOT EMAIL AND ASK.

THE NEXT TWO ARTICLES WILL TALK ABOUT WHAT TOOK PLACE FOLLOWING THIS ARTICLE.  


Batteries do not last forever. The batteries that are the heart of the electrical system in my 2011 Roadtrek 190 Popular are two 6 volt AGM deep cycle batteries. And until now have been the original batteries installed by Roadtrek at the factory.  I have been told that these batteries last about 7 years - and the first time I started to question that the batteries were still good was three years ago.

At the time electrical things that should happen a certain way just were not happening. When the batteries should have been charging when driving - something that Roadtreks after around 2006 should do - was not always happening. It might take an hour or more of driving before the charging light was showing lit on the battery monitor panel in the Roadtrek.  There are a few reasons why this might happen - the RV batteries (often referred to as "coach batteries") are going bad, the engine battery is going bad, the vehicle alternating is going bad, OR a device put into the Chevy engine compartment by Roadtrek - called a Battery Separator - is going or has gone bad. The problem was not every time but often enough for concern. Let me explain the battery separator.  This is a device that has the engine battery connected to one side of it and the RV batteries connected to the other side of it. It is a "smart" switch - when the engine is running and the RV batteries need to be charged it connects the engine battery to the RV batteries and charges them through the van's alternator. It also will charge the engine battery when the RV is plugged into shore power - an outlet connected to the outside world of 110/120 volts of electricity or when the Roadtrek's electrical generator is being run which also provides 110/120 volts of AC electrical current. It is a nice little system - as long as it is working.  So - one of these things would have been the problem three years ago.

SO - I started checking things out as best that I could on my own. There are ways to test the Battery Separator - that I am not equipped to do but we go to a very friendly mechanic and for many, many years he has worked on our car so I spoke with him and if it came down to it he could test the separator for us.  When the separator is working and connects or disconnects there is an audible click. And I was hearing that click when plugging into shore power and I was pretty sure it was, therefore, working. But I was not fully convinced. So at the time I started researching buying a new battery separator of the same make and model that is there. This proved to not be quite so easy. I called two RV dealerships with repair shops on Long Island. Long Island is a wasteland for RVs - finding them here or service for them here is like - well, let's say not worth the effort. Basically they had not worked with RVs that had separators - they did know about battery isolators which are similar but work differently - but they could not get the one I had and were not really interested in working on my Class B RV - which they don't usually work on.  I started searching the internet for the part - as it is not hard to install - and my friendly mechanic could do that for me - and found that only a handful of retail websites around the US - none anywhere near here - sell this make and model. That was going to be what I would have to do if it came down to that. I also started asking on a group I was on what was the best - absolutely THE BEST - coach battery for my Roadtrek and without question from several more experienced than I when it comes to RV batteries the same answer came back - Lifeline batteries. One even said to me that they were "overkill" but they were the best - and they are expensive. And I need TWO.

The first thing I had the mechanic do is check the engine battery - the easiest of the things that needed to be tested and - hooray! He found that the engine battery - even though it started the van easily when started - had a bad cell and was only putting out less than ten volts - and he replaced it.  After that things started working - and with all of this in the back of my mind we continued to hear out int the great well known and kept traveling in the Roadtrek - for three more years.

Every so often things would hiccup but came back to working as it should be working - but the coach batteries were getting older - and this year at 8 years old I kept feeling that I was playing Russian Roulette with the batteries. I had figured that going into 2019 we would need to buy new batteries. And then the macerator problem happened - as I wrote about two articles back - and that took the money that we would have used for the batteries.  Before we left the dealer service when we bought and had installed the new macerator and macerator hose, I asked if they could get Lifeline batteries - and they said yes but they could not tell me a price - and would check. A week or so later they told me - $550 EACH battery plus labor to install! Oh BOY!  It was back to Battery Russian Roulette.

It seemed like maybe things would go the right way and with short day trips things were working as they should. Then we set out on a trip during Fourth of July week. Our procedure when we travel is just before pulling down the driveway and off, we start the engine of the van, turn on the battery switch - to turn on the coach batteries - and also turn on the RV refrigerator.   I get the van running and Meryl does the rest.  And I asked her to turn on the test button that shows battery level - which as the van is running should show the coach batteries charging - and that LED was NOT lit! OK - this has happened before and we drive a little and the light comes on, it is charging and all is well. That did not happen. And after a short time we pulled over to check again and it was still out and I could only figure that we either turn around and go home or we turn off the fridge - no meds in it this trip - as the main med for the fridge once started does not need to be refrigerated - and I sat there on the side of the road contemplating what to do - turn back or go on.  Meryl made the decision. We had paid in advance for one night of the three nights in the campground and we should go on and IF there were problems resulting for this all we could stay the night, the next day go to the Festival in PA that we go to every year that runs during Fourth of July week and just come home tomorrow night. Fine. And - have I mentioned this before - Meryl is ALWAYS RIGHT - truly!

We headed off.  We stopped at a rest area on the New Jersey Turnpike and I put the battery switch back on and with the engine running - after about two and a half hours of driving - there was a lot of traffic getting there - the charging LED lit. Wonderful! We left the fridge off to not push our luck and continued on the trip and stayed the three nights and four days - with the last two days with the fridge on to bring home some treats - but not too many because the week before our fridge at home died and we had to buy a new fridge which when delivered did not work correctly and a new, new fridge would not be delivered until we got home - unknowing if that one would work any better than the first. (Another unexpected, not affordable expense.)

We had reasons to start the Roadtrek when we got back from this trip - and the batteries did and then didn't show they were charging when the engine was running and it was three years back all over again. Only this time the research had been saved from three years past. While we were on the trip to PA I said to Meryl that we can't play Russian Roulette with the coach batteries any longer. That one day we are going to find ourselves off somewhere and these batteries - the ones I wanted - were not going to be found where ever we were stuck. She agreed. And the decision was made that we needed to find and buy and have installed the new Lifeline batteries.

I thought that this might be easy. Yes they were on a few websites. There are even dealers for these batteries on Long Island - all marinas. Long Island is "Boat Happy - RV Deprived". I started calling and emailing these marine shops. Yes they could get the batteries - each over $500 - no they could not install them. I went to the websites that sold these batteries and the price from at least two - across the country - was $329 each with free shipping.  I had thought that our friendly mechanic could install them - which he said he could - but he had been and was very busy at his shop with his usual business - including work on our small passenger van - and I felt that I should not impose on him - especially if I wanted the job done right away.  I also found on the battery manufacturer's website two dealers of the batteries in New Jersey. I contacted one - a dealer who is also a Roadtrek dealer who could get the batteries at just a little more than the $329 and he could install them - AS LONG AS  I waited for his next available service appointment at the end of September. I thanked him and said that was not going to work out for us.

The second shop in New Jersey was a little closer but not an RV dealership but rather an RV repaid and body work shop.  I contacted them and yes they could get the batteries - they would take about a week to arrive and they could take us to install them right after they arrived. The price was a little less than the $XXX each - two hours of labor to install - and I told them order them and thank you very much!

The batteries - for those Roadtrek owners seeking new batteries - Lifeline GPL-4CT - 6 volt AGM deep cycle battery. Here is a XXXXX . The shop we bought them from that installed them XXX RV in XXXX, New Jersey.

The batteries came in the time stated - one week on a Thursday. We set up an appointment for the installation on the coming Monday.  All was set! And then weather forecasts started saying that Monday and Tuesday in the coming week were going to have severe storms both in NY and NJ.  OK. I am never happy driving the Roadtrek in the rain and absolutely not in severe storms.  In that time when you would not like to wake up yet on that next day - Friday morning - this kept going through my head - Monday was not a good day to make this trip. And we called and postponed the appointment to Wednesday. The lady at XXXX that we were working with was incredibly nice - extremely helpful and had no problem moving the appointment. As it turns out the storms did come Monday and Tuesday and were more than severe - and caused a lot of damage especially in New Jersey and right in the county that this shop is located in.

Wednesday morning came. The charging LED did not come on to show the old batteries were charging when we left that morning - and was still not on over two and a half hours later when we arrived at the shop. The trip there took a long time just to get out of New York State.  There are two bridges that most be crossed to do that - I just love living on an island connected to other islands before you get to mainland U.S.A. - and the first and main bridge was closed in both directions as we heard as we were on our way to it - because of a car fire.  We were stopped in traffic bumper to bumper along the way and that took so long that by the time we got to the bridge - despite the traffic reports still saying the bridge was closed - we drove right across it without a problem.  We called ahead to the shop to explain that we would be later than we even had expected to be.

There were various ways in New Jersey to get to this place and the fastest route takes the Garden State Parkway. It seems that while this part of the Garden State Parkway is closed to trucks, it allows RVs - and more than one website - and our asking the shop when we made the appointment about taking this parkway  - said we could drive on it. With fingers crossed we did. No other RVs were to be seen but highway patrol cars passing us - we were not stopped.  As we got off the parkway and were near the shop there were electric company repair trucks everywhere. Red lights were out on the roads. Large trees were down. The storm hit there HARD!

The night before we left I wrote out everything that I know specific to installing new batteries in a Roadtrek plus where all the switches were and what does what.  I will include that at the end of this article. They would know all this anyway but they may never have worked on a Roadtrek before. One of the things I told them in person was that I wanted to know once the new batteries were installed that the batteries were now charging on the engine running as they are supposed to do.

When we arrived I handed that to the woman who was expecting us and we sat down to wait in their waiting room.  There was one other person waiting and we started talking as we were waiting. He said that the shop we were at had no electricity and they were running on generators - still able to do the work. The big lobby was a little warm - but there were big ceiling fans that made it comfortable enough. There was a big screen TV and chairs and sofas. They had display and sales racks of RV accessories and parts.  We spent the time watching the TV and walking around looking at what was on the shelves. At one point there was a loud roar of a big engine and they were working outside an open garage door to the side of this big lobby on a big Class A engine.  It was interesting but the diesel fumes were getting overwhelming and were also coming into the lobby so I went outside to get some air and saw that my Roadtrek was parked in an lane outside in the parking lot on the other side of a Class A. I could not tell if they had worked on it or not. We were there for about three hours or so between waiting for the Roadtrek to be taken to be worked on to when we were told it was ready. I asked if it was charging and was told that it was all tested and was working as it should be. Skeptic as I am I went outside - started the engine and the charging LED came on when I pushed the test button. For the moment I was happy.

It was a hot day. We were in New Jersey near a restaurant we like to eat at and decided we would kill the time between lunch and dinner in a large mall and a Barnes and Nobles bookstore and a Walmart before waiting for dinner. And that is what we did.

Someone reading this I know is thinking why didn't he just install these batteries himself.  The 2011 Roadtrek does not have a sliding battery drawer. The two batteries are fixed in place inside an outside access cabinet. These batteries weigh 66 pounds each. There is no way that I could lift one of these batteries much less remove the old heavy batteries and get two of these up and into place - plus there is no access to wire the cables to the back of the batteries. I am not sure how the shop did this. 

When thing seem well my head starts poking me to think hmm, maybe things are not all as well as they should be. Was it the batteries that needed to be replaced - which they did anyway - or is that battery separator at the root of what has been going on. The engine battery is three years old and it is rated for five years - and that should be fine - but those early morning wake ups and your mind starts working in high gear...  So I start looking things up. I start trying things. I know the new batteries are good and fine. Are they charging when the engine is running is what is bothering me. I go outside and into the Roadtrek and without the engine running I turn on the battery switch and push the test button and no engine running - the charging LED comes on. This is not supposed to happen - I think - or is it?  I have a volt meter. I check the voltage on the batteries and they are fully charged - a reading of about 12.87 volts - 12.8 volts is fully charged. Is this because they are new or did the engine charge them up to that on the drive home from New Jersey. I start researching again.

This is what I learned - and should have learned reading these same documents before - the engine does not connect to charge the RV batteries if they are over 12.8 volts. They do not need to be charged and the engine does not charge them. Seems logical.  If the batteries are 12.8 volts or above the C charge indicator LED will remain lit - even though no charging is taking place. (This is new to me for some reason - as I have believed from other things I have read that if charged fully the C LED will go out and leave the third up from the bottom LED lit showing that the batteries are within charged range. THAT IS NOT SO. If the batteries are 12.8 of over the C LED will be lit.)  Good to know - good to pass along and I am thinking a detailed battery separator article is coming here soon.

I went out for the next several days checking the status of the battery level. Five days later - I turned the battery switch on - no engine running - and had my volt meter plugged in for actual voltage - and the C LED was no longer on. The yellow G LED was lit and this is what I had expected to see all along. The voltage in the batteries - five days later - was now 12.75 - below 12.8 - and the monitor panel indicated that. I started the engine and right away the C LED lit up as it should! Happy me!

In all of this I made a decision with Meryl to buy a spare battery separator and have it with us when we travel. This way if that ever does go bad - and they do go bad over time - we will have it with us - we can find a mechanic to put it in - and I - not we - have to worry about it any more. I am in the process of doing that now.  With that I will have three of the Roadtrek weak spots covered that are not easy to just get repaired or replaced anywhere - new batteries, new macerator - and with this - a new battery separator to use when necessary.

Here are my new batteries -


 Here is the list I wrote up for the install to give the shop:


ROADTREK BATTERY CHANGE


1.            Two 6 volt deep cycle AGM Batteries in my Roadtrek are original from Roadtrek when the Roadtrek was built at the factory in 2011.

2.            The batteries are wired in SERIES -  pos on one battery to neg lug on the other battery connected together and the battery cables from the Roadtrek to the batteries are then connected to a positive on one battery and a negative on the other battery.

3.            The battery compartment is on the outside passenger side in front of the rear passenger tire. The square key opens the lock on the compartment.  In 2011 when AGM batteries started to be used by Roadtrek the sliding battery tray was discontinued. The tray is fixed.

4.            The Roadtrek has a TRIPPLITE 750 INVERTER/CONVERTER/CHARGER. I have been told that the Tripplite must be turned OFF while batteries are being installed.  The Tripplite is located inside the Roadtrek right behind the passenger side cargo door on the floor- it can be seen as soon as you open the cargo door – I have removed the door that sits in front of it.

5.            The TRIPPLITE ON/OFF switch is a slide switch on the upper right front – OFF is the MIDDLE position.  Left is Auto/Remote the default position and right is Charge Only.  Now it is set to Auto/Remote – if you want me to put it off I will OR you can put it off.  After batteries are installed return the position to Auto/Remote.


6.            Dip switches on the TRIPPLITE were set by Roadtrek for AGM batteries.

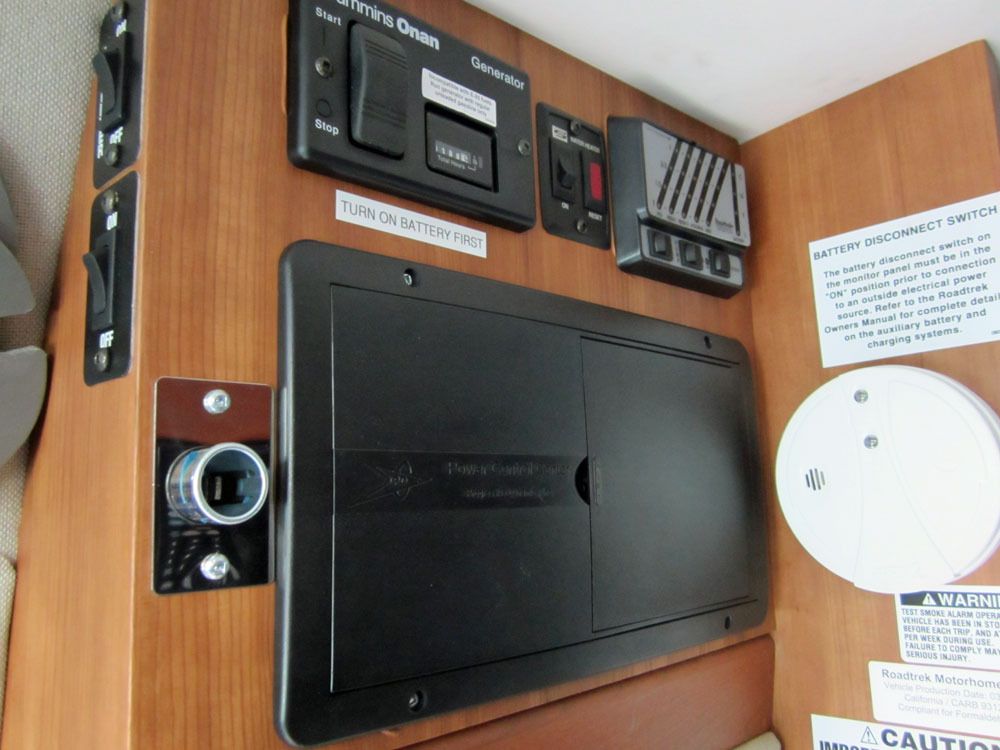
7.            The Battery Disconnect switch is inside the Roadtrek – at the entry door just past the passenger front door – it is on the wall below the ceiling on the right side of the monitor panel. It is OFF at this time.  Just push and let go to turn it on.  The test switch on the other side of the monitor panel will show a column of LEDs for battery charge. Turn the battery on if needed.

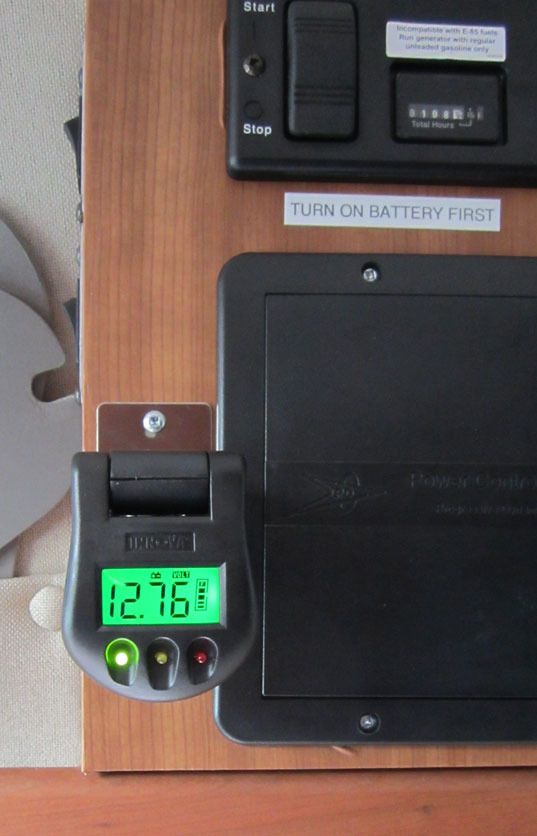
8.            There is a 12 volt DC socket to the left of the monitor panel to plug in a 12 volt voltage plug in meter. Battery Switch must be on to use this.


Wednesday, January 6, 2016

Taking the Roadtrek for a Drive...

We have been having some odd things happen in the Roadtrek going back to our trip this past August. When I wrote about that trip I talked about the coach batteries not starting to drive when we started the engine to leave for the trip. It took about twenty minutes of driving when we stopped to check to see that the charge LED had come on the battery monitor. This has been happening since then. The engine is started and the charge LED does not come on to show the coach batteries are charging when the "test" button is pressed. After awhile it does come on, but this is not how this was before and this is not right.

I have been doing some research and asking some friends on the Roadtrek Owners Facebook Group and have learned some things about the relationship between the engine battery and the coach batteries and the Separator unit that is installed between them. It seems that the Separator connects the systems when one or the other voltage is 12.8 volts. So if the engine battery is below 12.8 volts it is not going to be connected to the coach system to charge the coach batteries  until the engine battery comes up in charge. And conversely - I am told - if the coach batteries are below 12.8 volts the engine battery will not be charged until the coach batteries come up in charge. I am not an engineer and I really do not understand all of this but others who are knowledgeable about these things have it explained it this way to me.

While the battery is a 12 volt battery, apparently that does not mean that at 12 volts it is OK. I am told that it should be up around 12.9 or higher to be charged and that at 12.1 it is at half charge. This holds for the Roadtrek's coach battery system as well - 12.1 is half charge and with the Roadtrek batteries (likely all batteries) you never want the charge to go to half as it shortens the charging life of the battery - or so I am told.

Had the Roadtrek been just a regular van without the Roadtrek conversion, I would not think anything at all about the engine battery at this point.  Turn the key and the van starts right up with no hesitation. In a car or just a van, that is all I would care about. In the Roadtrek, the inter-relationship of the van's electrical system with the Roadtrek electrical system was what was giving me concern and alerting me to give this attention. The system with the Separator and the Roadtrek's inverter/converter/charger - in my Roadtrek the Tripp-Lite 750 - is designed to charge all batteries when driving, running the generator, or plugged into shore power. This system if not functioning as it had always functioned before.

A few days before Christmas I decided to take an opportunity of good weather and unseasonably warm temperatures and plug in the Roadtrek to shore power at the house to charge all of the batteries - coach and engine. Before starting I checked the charge with the digital meter and the engine was around 12.3 volts. I plugged in to shore power and the digital meter in the 12 volt vehicle socket in the dash did not indicate that the engine battery was charging. I checked four hours later and it was with a reading of 14.5. So I left the Roadtrek plugged into shore power for almost 24 hours. The coach batteries charged fine. The engine battery about a half hour after pulling the shore power cord was reading only 12.1 volts! Not good. I had two thoughts - the engine battery was going bad - it is just going on five years old - or the separator is going bad which I have read they do and that when there are odd things happening in the electric system it may be an indication that the separator has gone bad. I did not know which. I went back to the Facebook group with that question and what I got back was that five years is long for the engine battery. What I did was start the engine and let it run at idle on the drive way for one hour and it did charge the engine battery up to 12.65 volts. The vehicle alternator was charging the battery. A day latter it had dropped and it dropped more after a few more days. The engine battery seemed to be on its way out.

I had been talking with Meryl before this all took place that we should change the plug in schedule for the Roadtrek from charging once a month to perhaps charging two or three times a month in addition to the generator exercise of 2 hours a month - which, if all are working correctly, will also charge all of the batteries. I also said to her that we really should take the Roadtrek out for a drive every so often. The only reason that we don't do this is the difficulty getting it off the driveway and into the four lane avenue in front of our house. That road is full of traffic day and night. It can take as much as 45 minutes when backing out of the driveway to wait for a clear and safe spot to back  the Roadtrek into the street and then get to the curb so that Meryl can get in. She has been out in the street during this maneuver with a walkie-talkie telling me when it is clear to back out into the road. We knew this before we started out with the Roadtrek and it is a pain but the price to pay to be able to have the Roadtrek so we put up with it.

I had been thinking that on Sundays during the day the traffic is less than it is at other times and that was an idea for taking the Roadtrek out for a drive. We did not do this the Sunday after Christmas. I did decided to try on New Years Day when there were very few cars (or trucks) passing by the house. I wanted to drive for at least two hours on a highway with the Roadtrek which should when all is well charge all of the batteries to full. So for New Year's Day 2016 we took the Roadtrek for a ride!

Even with the little traffic going past it took ten minutes for a clear spot to back out and be on our way. I had to get to the North Shore of Long Island to get to the Long Island Expressway and if I wanted to drive a hour each way out and back I had to head east toward the end of the Island. To get to the LIE I had to head north and I wanted to not take streets to do that I headed to the Seaford Oyster Bay Expressway that the Roadtrek is permitted to drive on due to height restrictions on other highways (parkways). This is Route 135 - an expressway built to cross the Island around mid-way that was intended to join a bridge that was never built that would cross the Long Island Sound to Connecticut. That idea ended a long time ago along with the expressway ending abruptly into a field. You see on Long Island we have something called NIMBY - "Not in my backyard!" and some decided they did not want a bridge in their backyard - so we don't have one. Anyway, we drove by streets to the 135, headed north and joined the 495 - the Long Island Expressway eastbound toward the end of Long Island that is shaped like a fishes tail into the Atlantic Ocean.

The 495 is not a very scenic drive. Mostly what you see are barricades along both sides of the Expressway that block the road noise from the backyards of houses, industrial parks, and shopping centers that line the road. Of course, those barricades have to be there or the NIMBYs would rise up and demand that there be no main highway that almost runs the length of the Island. So we talked and drove and I wondered if things related to the batteries were actually working. Around the village of Shirley we got off at an exit and looked for a place to stop to check to see if the coach batteries were charging.

We seemed to pick the one southbound road that had no place to easily stop. We drove for 15 minutes south before a shopping center came up to our right and we pulled in. Yes, the coach batteries were charging. The Chevy has a volt meter on the dash and all along I could see that this was up above the middle (14 volts) mark indicating that the engine battery was charging. I left the engine running while we were stopped. Pulling out every exit was going the wrong way. The road from the parking lot that led to the road we had come in on was no left turn onto that road. We went straight and crossed that road and had to drive to a parking lot to the left down the road to be able to pull in there and eventually get out by the single exit that allowed a right turn and then back up to the main road to make a right to head north back to the Expressway. Isn't Long Island wonderful?

So a half hour lost on this stop but a half hour added to our trip as I was determined to do an entire two hours at highway speed so we while we were more than an hour driving, I wanted to drive for two full hours at highway speed - just to give the van and the battery charge a workout.  It had been almost two months since we had driven the Roadtrek before this. I got back on the 495 and kept heading east. I glanced at the clock which in my Roadtrek is on the GPS screen and it said that it was after five. I could not believe that we had been driving that long - and it was not getting dark out. Meryl scrambled around to reach her cell phone to check the time and it was only just after four. I then realized that the last time we were in the Roadtrek was before the change to Standard Time and the clock had never been turned back. Well, this was a good time to gain that extra hour...

It has been awhile since I have driven this far out east and I did not remember that the LIE actually ends when it comes to the split of the two east end forks - one to Montauk Point on the south and the other to Orient Point on the north. The town where the forks meet is Riverhead. Signs came up that the Expressway was ending. It ended and I headed to the North Fork and and shortly we had come to  the hour of highway driving that I was looking to do. So did we stop and look around? Nope! I found a shopping center and turned around. When we got into that parking lot, Meryl announced that this must be the new Walmart that was a big controversy in the local newspaper. It was to be the first Super Walmart 24 hour store on Long Island. Why is that a big deal? NIMBY - a few didn't want a 24 hour Walmart near them. Well, here it was, but its not a 24 hour Walmart - it closes at Midnight though that is better than the rest here that close at 10 pm, but that does not do much for us as it is an hour away. We pulled out and now headed west toward home.

The Roadtrek was back now on the 495 heading west. An interesting thing about US 495 is that the number does not fit with the standards for federal route numbering. As 495 it should connect someplace with US 95, and it doesn't. The intent may have been that a bridge would be built to connect it to 95 in Connecticut but, of course, that bridge never happened. As we drove home I realized that I was getting close to half a tank of gas and with the need to run the generator to exercise it for the next several months, it would be a good idea to stop for gas. In Huntington I pulled off to head for a BJ's Wholesale Club with a gas station that we know. Gas was $2.03 with no extra to charge it - the lowest gas is here and the lowest that the Roadtrek has gotten gas at home in NY. Of course, out of NY we have found gas lower and that has made a difference in the cost of travel this past year with the Roadtrek. I am still waiting to see gas fall below $2.00 here. It would be a pleasant surprise but the last time gas was approaching that here, it went right back up again. After filling the tank, it was back to the 495 West to connect shortly to the 135 South and home.

When the trip was over I waited three hours to check the charge on the engine battery. It read 12.65 volts. The next day it was 12.47 volts. Two days later it was 12.2. It was time to speak to the mechanic who has taken care of my Roadtrek's vehicle side since we got it. He wants me to bring it to him to check the battery and I will do that in the next two days - if I can back it out into weekday traffic and get there.

I will let you know what happens...

ADDENDUM:

My mechanic load tested the engine battery with a load of 300 amps and the result was 9.5. He told me that this number should be higher than 9.6 and that this indicated that the Chevy Roadtrek battery was low. He replaced the battery with an equivalent and it only cost me $155 including labor.

When I got home I left the engine running and I checked to see if when I put the battery switch on, the LED would go to C (Charge) when I pushed the test button. The coach batteries read 12.4 volts. I had expected to see that top green C LED light. I am guessing that this coming season I am going to need to replace the two AGM coach batteries as well - or have my Roadtrek dealer service check out the Separator.  When plugged in the C LED immediately comes on so I do not thing there is any problem with the Tripp-Lite 750 inverter/converter/charger.

While I was with the mechanic we were talking about the engine charging the coach bateries while driving and it is his opinion that the alternator in the Chevy will only put a surface charge on the coach batteries and would not charge them from low to full. He does not know anything about the Tripp-Lite which has the function to charge the coach batteries when the engine is running. He said that when there were generators in old cars' engines instead of alternators they would be able to charge the batteries from low to full as they put out much more power - but they no longer exist in cars or vans.


Wednesday, July 22, 2015

Troubleshooting on a Dark and Stormy Night...

It was a dark and stormy night. The sky was growing darker and lightening could be seen flashing in the distance. We were driving back to the campground hoping to beat the storm that was approaching. As we backed into our campsite and got out of the Roadtrek to hook up the electric and the cable for our last night of a five night and six day trip, it seemed like we had enough time to pull out the flag and stand that we put out in our site and get that put away while it was still dry. The forecast for the next day was for fair weather but that all depended on which weather service you looked at. National Weather Service was predicting more rain. Everyone else was going with fair. Get the flag in and then get the electric hooked up seemed like the best thing to do. As we got to pulling the electric cord out of the outside cabinet of the Roadtrek, we both felt a few drops of rain. Work faster. Don't stop to go back inside the Roadtrek and pull out the jackets, scarf, and rain hat. Get the cord out enough to reach the electric box. Plug the Roadtrek's plug into the socket of our power/surge protector, get that into the campsite's electric box and flip the 30 amp circuit breaker to put 120 volts of electricity into the Roadtrek. Always start with the circuit breaker off - what is it that men on death row say... "Its not the volts that will kill you, its the amps." As I was flipping the breaker the sky opened and it began to pour.

We both ran inside with the television cable still in Meryl's hand. That could wait. Not only was it raining but the humidity and remaining heat from the day would make the inside of the van very uncomfortable without the air conditioner. No 120 volts, no air conditioner. We were inside and dripping. If it let up we would go outside again and plug in the cable - if it didn't we had plenty to watch on DVDs and here at this campground we received a number of good channels with just the antenna still down on the roof. We were inside and drying off. I looked out the driver's window to see the lights on the power/surge protector go from red to green indicating all was well with the circuit and the power would be let through. It delays about three minutes and those three minutes were going by very slowly. Outside you hear a click and the lights change - all is well. Inside I kept watch through the window. Red to green. All is well.

Meryl was getting the jackets and rain gear to have if we were going out to plug in the cable. he rain seemed to be letting up and out we went, jackets on, scarf and rain hat on, cable in hand. Once outside, of course, the rain picked up and since we were then soaked we plugged in the cable anyway and headed back inside for the night. At least at that point, I thought it was for the night.

Now the lightening was flashing outside and the thunder was clapping loud. All seemed well inside and Meryl put a plastic sheet over the third seat and put two hooks on the wooden ledge above to hang the dripping jackets. The hat and scarf went into the sink. The jackets dripped down partly on the cover and partly into the door well. More lightening. More thunder. Meryl started to do what she does every night as we settle in for the night. She closed the curtains in the front windows and started to rotate the seats from driving position to lounge position - facing the rear of the van and the television. I put the TV on and the air condition was already on making the steamy inside bearable on this hot July night. There was a huge crack of thunder and the sky lit up, and then Meryl said, "What is that noise?" She was not talking about the thunder.

There was a whining noise. A motor noise coming from the front of the van. Was the van engine off? Of course, the engine was off. Where was the noise coming from. We started searching around. What might make such a noise - and it started with the clap of thunder! Was there a surge on the electric line? If there was the power/surge protector would have shut down all power. I pushed the window curtain out of the way and looked outside - the light on the unit was still green. The air conditioner was still working. The television was still working. And the high pitched noise continued. What else had a motor? I put my ear up to the refrigerator. The noise was not coming from there. The water heater was off. The water pump was on but did not seem to be running. Meryl went down into the cabinet where the water pump is located, which is below the bed, to see if the noise was coming from. No, it was silent. Did it work? Turned on the faucet, water came out, and the pump ran normally and shut off when the faucet was turned off. The whining noise still continued. What was wrong? Where was the noise coming from and we both knew that whatever it was, it was not good. What to do next? I shut off the TV - no change. I shut off the air conditioner. No change. I made sure the ceiling fan was off - it was. I turned on the furnace switch as that has a motor also and the noise was centered right around the inside furnace vent. No change in the noise. I turned the furnace off. The whining continued. We went around the inside of the van again and kept listening at the furnace vent as the location was just too close. Then suddenly it stopped and a second later it started again - higher pitched at first and then whirred on as it had been.

"OK", I said, "I am going outside!" I was going to see if I could find the location of the noise from outside. Meryl insisted on coming and the wet jackets went back on with the hat and the rain scarf. It was pouring. Outside we went all around - listening at all of the outside vents - nothing. We could barely hear the noise outside but it was not coming from the outside furnace vent, the refrigerator vent or the hot water heater vent. An ear up to each wet vent and there was nothing come from any of them. I told Meryl to go inside as there was no reason for both of us to be out in the downpour and I would shut down the electric box and eliminate that from the equation. Rather than pull the plug I clicked off the circuit breaker on the outside pedestal for the outlet we were plugged into. The power/surge protector unit shut down and I headed for the door to find out if the noise was still whining. It was. Could the noise be related to the inverter/converter/charger which hums and buzzes when the power is on as its cooling fan runs? No, the 120 volt power was off and the noise continued. Then with the 120 volts off, I shut off the 12 volt circuits by turning off the battery switch. The noise stopped and we were in the dark. Battery switch back on and the noise started again. Back out and the power was put back on. Inside there was no change and we waited another three minutes for the protector's delay to allow power through.

I was ready to give up. All was working normally except for the noise. Maybe we could just let it go and wait for the morning when we could try calling dealer service to ask and hopefully they would let us come over - we were about an hour and a half away from them. Meryl was reluctant to let it go on, but what were we going to do. This was definitely coming from something that ran on 12 volts but many of the systems and components inside run on 12 volts. I pulled the circuit breaker/fuse panel door off and looked at the fuses and the chart on the back of the door. Meryl said to try pulling the fuse for the furnace since that was were the noise was most located. I read down the labels - furnace - fuse number 7. I put my fingers on the fuse but it would not come out - it needs a fuse puller to get it out and back in again because of the small space the fuses sit in. Now there was a mad dash for the tool bag to find the fuse puller - we each thought it was in a different place and I found the main tool bag and got the fuse puller.

Clipping the fuse puller on the fuse, I pulled it out. The noise continued. So did the thunder outside. I managed to get the fuse out and we decided to go one by one. I clipped the fuse puller on fuse number 1 and pulled. The noise stopped. What was this fuse for? It is a 20 amp fuse - one of the largest. Oh boy - it was for the waste macerator pump! It also was the fuse that the new 12 volt outlet was connected to. Did dealer service cause a problem when they wired that outlet? It did not seem so as we had been out for more than ten days with no problems after the outlet was installed. But the worst thing was that this noise was the macerator running - and running dry which you are never, ever, ever and never supposed to do lest you burn out the motor and have no way to empty the black - or for those of you non-RVers - "doody" tank and after six days it was full. What was causing this pump to run? My hands were now shaking and it took me a bit to get the fuse back in somehow I hoped that something would have reset and the noise would be gone - but, of course, the noise started right up again. In a way this was a good sign as the motor had not burned out - yet.

The switch for the macerator pump is a push button switch - push and hold and it is on, take your finger off the switch and it stops. Could the switch have blown out? Could the switch be stuck? The switch is on a metal frame on the side of the driver's seat next to the door. I started to move the seat around and the seat would not move. There is a small folding table that is stored behind the seat but the seat cannot swivel with the table there so the table is moved out of the way. I pulled the table and the noise stopped. I looked at Meryl. The noise stopped. The table had caught between the driver's door and the seat in such a way that it pushed in the macerator pump's button.

Well, the mystery was solved and the noise was gone, but what damage had been done? We would not know for sure until the next morning. I had to know if the pump still worked and, of course, I reached around and pushed the button and let go right away - the noise started and stopped as soon as I let go and that seemed to indicate that we might be OK. The rest of the night was an anxious one, waiting for the next morning when we went out to empty the tank.

The next morning it was overcast, but dry. We went out to dump the waste tanks and I held my breath as I pushed the macerator button to empty the tanks. The motor whirred and whined and what needed to come out pumped out - normally - and the tanks emptied. We both breathed a sigh of relief - but had future problems been initiated?  Hopefully, not. 

A number of owners of Roadtreks have problems with the macerator. Some claim it is because they let the pump run dry when they were at the end of dumping a tank and let the macerator run on to take out the last few spurts. I am not sure how long it ran dry that night - maybe twenty minutes, maybe a half hour - it seemed like a lot longer. Maybe it was. I had visions of the compartment that the hose sits in having spewed its slop all over the inside of the compartment while it was running but the tank valves were closed and nothing should come out. The macerator is a good idea but it is a bad idea if it is the only way to empty the tanks other than a clean out port that when opened will drop the contents of the tank under the van with no way to direct it where to go. I had thoughts of where one could (would) even do such a thing? Where can you drop ten gallons of human waste just down onto the ground? Not in the campground. Not at home. Who would think of designing such a thing without a way to connect a hose to it? Most RVs have gravity dump waste systems. A hose is attached to a port to the tank and the other end of the hose is connected to the sewer hole at the campsite. The valve is opened and gravity does the rest. After that the tank can be flushed out with a garden hose attached to the end of the hose. This is a relatively fool proof system as long as you have gravity on your side. With the permanently attached macerator, if it does not work, you've got problems. And many have had those problems. So far we have been lucky. The unit's specs actually say that it can be run dry, but everyone using one says no. I certainly would not intentionally run it dry, but sh_t happens - and in this case that is more literal than when generally said.It has not happened for four years - until now - and now we know it is possible. I am thinking of creating a box-like cover for the button, perhaps held in place with magnets as there is metal all around the button. When I come up with something I will share it. Until then we are going to be very careful where that table gets placed when the driver's seat is turned.

What is gained from this experience that I wish we had never had was what to do when troubleshooting a problem - 'cause there is no instruction manual that tells you what to do when you hear a strange noise. There is no guide that says "Don't Panic!" on the cover - though sometimes one sure would come in handy. Some our our readers have complimented us on this website being just that for them - and if others can benefit from our experiences and problems, that is good. Though I would really like less problems to have to share and more dry days and nights. Keep in mind that "May you live in interesting times!" is an Oriental curse. Perhaps another RV Lifestyle verses Endurance Challenge moment... Anyway - So the next time you hear a strange noise, don't panic (as I was that night) and start troubleshooting - check for the location of the noise, turn things off, turn things on, and start pulling fuses or throwing circuit breakers. Sooner or later - if you are lucky - as we were - you will find the source and hopefully be able to deal with it simply by moving a folding table and hopefully not have had damage done in the interim. And should it be a dark and stormy night, always remember to have your towel...


Wednesday, June 10, 2015

The Best Way to Know Coach Battery Voltage

On our first trip of this season, our first stop was at dealer service. (I will write about this trip in a coming article.) One of the things we wanted done was to have a 12 volt outlet that is connected to the coach or house batteries installed (the batteries for the RV, not the engine).  This was a project long in planning. It started with my idea to install digital voltage meter that would be connected to the coach batteries and the TEST button on the monitor panel. I went searching for how this would be done and it is relatively simple IF you know what wire is which and where it is connected - plus how to get to the wires.  The monitor panel - while it is similar to models made by the company that manufactures it, is made for Roadtrek by that company. Finding a schematic for the wiring and even knowing how to pull it from the wall without damaging it was not becoming a simple task. I knew that we had to be going to service anyway - if for nothing else but to get the generator oil changed for its annual change - so why not let the dealer service department do all this for me. I then started looking for a digital voltage meter that could be installed in the space that was available adjacent to the Test button and monitor panel. There are many to be found on Amazon and Ebay but most are designed to be installed into a dashboard and not the half inch wood of the Roadtrek wall in this location. I could rig something with a frame to have it surface mounted but then found this.

What is this? This is an Equus Innova Model 3721 Battery and Charging System Monitor. It is made for a vehicle battery and plugs into the 12 volt cigarette lighter or appliance outlet in a dashboard. It has an LCD digital display with both numerical voltage and a graph, and also LED lights. On the back is a chart that tells you what voltage levels indicate. The numerical voltage is the exact reading to within the accuracy of the meter. It also folds for different angle viewing. From reading the hundreds of reviews, this is supposedly one of the best of these meters and it was available through the Walmart website's "Site to Store" free delivery for just $13.86. It may be at local retailers but it was not in the several Walmarts in two three states that I looked for it. I ordered it and had it in five days.


This gave me a new idea. Instead of having a permanently mounted meter installed I could have a 12 volt coach outlet installed. This would enable me to use this meter and also have the outlet for any other 12 volt charger or appliance. Now, some of you with newer or older Roadtreks will say, "But there already is a 12 volt coach outlet in the Roadtrek!" Well not in the 2011 or the 2010. I am not sure when Roadtrek stopped including a 12 volt coach outlet or started including them again, but I don't have one. Newer Roadtreks have the outlet as part of the antenna booster and I could have done it that way also - probably on my own, but inside the cabinet over the TV on the  cabinet ceiling was not going to be very convenient - particularly since we keep the bed made up when traveling and opening that cabinet means climbing up on the bed. So I started looking for and found quickly a common and standard RV part - a 12 volt outlet - which it just so happened was in stock on our dealer's website's part's page. There were two to choose from. One the size of a light switch plate and the other much smaller - small enough to fit in where the monitor panel is.  A discussion with Meryl and it was decided. I sent an email to our friend at dealer service - good friends after all of the time we have spent with her over the four years of our visiting her at the service center - and told her my plan and included the part number and a photo of the vicinity that I wanted to outlet installed. She said she would show the photo and the part to the tech and see what he said. A couple of days later, we were good to go - she had ordered the part and we just had to wait the month for our appointment (more about that in my article about the actual trip). 

So once at service I showed her the spot that I wanted the outlet, she said it may need to be moved slightly lower which was fine and we left it to her and the tech to have the outlet installed. Five hours later - there were other things to be done - I had an outlet. 


 So here is how it all works - turn on the coach battery switch and just plug the meter in!


This reading is two and a half days after getting home from our trip. When this reading was photographed the "C" charge light was still lit on the monitor panel (this stays lit from a couple of days to a couple of hours after the batteries have been charging), but flickered (usually an indication it is about to drop to the next LED). A few minutes after I pulled the meter from the socket, I pushed the Test button and the panel LED was now on the "G" for "good" third up from the bottom yellow LED. I put the meter back in and the reading now was 12.4 volts. Still very good. Sitting without driving or charging even with the battery switch OFF, there is drain on the battery(ies). 

When I plugged the meter in during the trip while plugged into shore power with the batteries charging the reading was 13.8. During the trip during the day while on batteries only - with the fridge on DC (AC/DC only fridge) readings were 12.6 to 12.8. We were driving during each day and plugged in each night. Finally, I am free from the monitor panel LEDs - constantly guessing what the "G" LED and the second "F" (red) LED mean. No more guessing. 

I had a cap from a 12 volt socket splitter and it fit perfectly so now the outlet is not open when not in use. Not really necessary but a nice touch!


So without the Innova meter you are left with the option to take digital readings in the engine compartment at the Separator or Isolator. This is so much easier. 

After I purchased the Innova I came across a small plug in LED digital 12 volt meter on Amazon for only $3.00 - with Free Shipping. I wondered how this could be sold for only $3.00 and still be shipped free and I decided to take a chance and buy one of these also. The estimated delivery date was a month and a half after the purchase date. I thought that someone could put this in their pocket and walk it to my post office from just about anywhere in the country in less time. It shipped three days after purchase and arrived one week after purchase. The meter was shipped from China -in a brown mailing envelope and inside the meter was in a bubble wrap pouch. The postage on the envelope was from China. This little LED meter works. It lights up with bright red LED readings - the difference is that this meter has only three digits where the Innova meter shows four digits on the display. Used one after the other, the LED meter read the battery voltage as 12.4 while the Innova read the battery voltage as 12.42. If the Innova only had three digits, the  readings would have been the same BUT had the reading on the Innova been 12.49 and the LED meter still read 12.4 that would be somewhat different - though still not dramatic. So if you want a three dollar plug in digital 12 volt meter, search Amazon.

And just in case it needs to be said - I have nothing to do with the companies that makes these meters or this 12 volt outlet.  I get nothing from anyone and I give no "official" endorsement. If there is something good that is worth sharing I share it.