Roadtrek

Roadtrek
Showing posts with label Chevy 3500 Express Van. Show all posts

Monday, June 2, 2025

THE BEST CABINET LATCH REPLACEMENT IN YOUR ROADTREK

 In December 2013 I wrote an article about the cabinet latches in the Chevy chassis Roadtrek models. 

https://roadtrek190popular.blogspot.com/2013/12/roadtreks-cabinet-latches.html

Since the original Roadtrek that built the Chevy chassis Roadtreks is long gone and the new owners no longer support the Chevy chassis Roadtreks the latches once available from them are no longer available from the "new" Roadtrek. The brown push bar latch is infamous for how easily it breaks. While there is a way to avoid as best as possible to keep it from breaking - when closing the cabinet door keep the brown push bar pushed all the way in until the cabinet is completely closed so that inside the cabinet the latch goes over the metal catch open - and once completely closed and you let go of the latch bar it is not pushed and broken by the metal catch - eventually that latch will break. What is available looks like these latches but are even less strong than these are. 

So when you need a new latch what should you get?  The best way to go is to get a latch with NO movable parts and nothing to break.  Does such a latch exist? Yes!

You want a latch that has strong enough hold that the cabinet door will only open when you want it to open and not when taking a sharp curve on an interstate or when something in the cabinet falls against the door and pushes it open. What you want is a 40 pound pull 90 degrees magnet latch. What does 40 pound pull mean? To pull the magnet off the metal catch it takes a physical pull of 40 pounds. There is nothing that is going to push the cabinet door open from inside - and no way that cabinet is opening by the pull of gravity going while driving. 

 Here is what such a latch looks like - in its parts -  


This 40 pound pull magnet latch is made of stainless steel.  Two screws go onto the 90 degree magnet bracket into the side of the cabinet door (before putting in any screws check to make sure they are not too long and will come through the wood of the cabinet to the outside of the cabinet. One screw goes around the metal disk into the back of the cabinet door frame to match up with the 90 degree magnet on the bracket. Again - make sure the screw is not too long. IF the screws are too long - stainless steel screws like these are available in all sizes in Home Depot, Lowes, or Ace Hardware.

Since you need a strong hold on the door to pull it open - get a decorative and functional door pull handle - again -  Lowes, Home Depot, Ace or any other local store that sells cabinet hardware. The handle must be put into the solid wood edge frame of the door. Do not put the pull handle on the thin wood on the center of the cabinet door - that wood is too thin and will break if you pull on it.

Now you have a cabinet door that is going to stay closed when it should be closed and likely will never have to replace that cabinet's latch again. This will work on cabinets, wardrobe doors, and the bathroom door. 

Where to get these - I have not seen these in the local big box home stores' hardware departments. They are available on Amazon, and other hardware supplies who will ship. The lowest price I have seen for these is $10,99 each. They do go up - for the same ones - to over $20 - for one. Google this - 

" 40 pound pull magnet 90 degree cabinet latch " 

and they will come up on a search. 

Woodcraft Stores - a tool and woodworking specialty stores has these in their stores and online for $10.99 each. 

Rockler woodworking supplies - another tool and woodworking specialty stores has these in their stores and online also for $10.99 each.

Some listings for these will also show lower pound pull magnet latches that look the same - 10 pound pull and 20 pound pull are NOT strong enough to keep the door closed. 

Walmart online shows the 40 pound pull magnet for almost $30 - way too much to pay for this.

Amazon - $17.00 and they claim "free shipping" but it is being shipped by a third party. 
 

Wednesday, April 16, 2025

ROADTREK TIRE PRESSURE

 When we first got our Roadtrek 2011 190 Popular new I was curious about the tire pressure that should be used. Inside the driver's door frame there is a sticker that says 50 psi front tires and 80 psi rear tires.  It sounded to me to be a big difference between the front and the rear psi - so I called Roadtrek's factory number and spoke with a Roadtrek service technician that I was connected with. 

I am going to share what he told me - as this comes up often on the Roadtrek Facebook groups and Roadtrek forums. He was very clear that the 80 psi in the rear is a MUST - do not go higher and do not go lower. He then said that the 50 psi in the front is a suggested starting point for the front tires. He said that by varying this number up in increments of five the ride of the Roadtrek changes. 

He said to drive with the tires at 50 psi in the front and evaluate how the ride feels. Then go to 55 psi in the front tires and do the same. Do this for each more 5 psi until you get to 65 psi - and stop. He said that after 65 psi in the front the ride starts to degrade - so do not go over 65. 

We did this - and found that the best ride (for us) was at 60 psi in the front.  We have kept the tires in the front at 60 psi since then. I have read that others also have preferred the feel of the ride at 60 psi - but this does not mean that you will like it there - so you should do the changes by 5 psi from 50 to 65 psi and see what you like. 

One more thing that we learned right away with the Roadtrek and the front tires, was when Meryl drove the Roadtrek home from the dealer in Pennsylvania with me following in our car (yes - Meryl was the first to drive our Roadtrek) she found that the Roadtrek was not holding straight in the lane of the highways we were on to get home. She felt it moving all over the road.  When we got home she told me about this and we both got into the "new" Roadtrek and I drove it on a local expressway - and sure enough it was all over the road. (I did not doubt that it was doing this when she drove it home - but if we were going to call the dealer - etc. I wanted to be able to describe it myself.)

 We thought it needed an alignment and we called Roadtrek who told us to call Chevy - and show them the papers we were given showing the warranty started on the Chevy chassis when we took delivery of the converted  Chevy Express 3500 van a couple of days before when we picked up the Roadtrek.  When we got to the local Chevy dealer they said that they do not do alignments but send them out to a local alignment shop and they sent us there. When we got there the manager looked at the Roadtrek and told us that it would not fit into his shop and his alignment rack would not hold the weight of the Roadtrek. He suggested a local truck service shop that could do the alignment - but he said wait a minute and let him check the front tire pressures. (This was before we set the fronts to 60 psi - what was in the tires at this point was what the Roadtrek left the factory in Canada with in the tires which was driven to the dealer in Pennsylvania by a Roadtrek driver.) 

The tire alignment manager checked the two front tires. They were over 20 psi apart from each other. He got the tire hose from his compressor and put the two tires at 50 psi (which is what they should have been when they left the factory). He said take it out for drive and see how it is now. He also said watch to see that they don't go down in case there is a leak that caused this. 

We took it out on the expressway and drove for a distance and it was perfectly holding the road and centered in the lane! Driving and days went by and the tires never lost any air - there was no leak.  It needed no alignment! It made us wonder why the Roadtrek driver who drove from Canada to PA did not report to the dealer that the van was all over the road... (but this was typical of Roadtrek at that time in 2011!) 

So the point of this little tale -  make sure that both front tires are exactly the same psi - or the van will go all over the road and not hold straight in a lane.  

What to know about the PSI when you are driving:

When any vehicle - van, car, truck, RV, Roadtrek is driven the friction between the tires and the road cause heat to build up inside the tire and that results in the tire pressure increasing. This is normal and tires are manufactured to allow for this to happen. SO while you are driving the Roadtrek and if you have tire pressure monitors on the tires (my Roadtrek came standard with this - and the readout is shown with the push of a button to the left on the dash) you may see the back tires not at 80 psi but close to or over 90 psi - not a problem - this is expected.  You might see your 60 psi in the front tires reading 70 psi  - again this is expected - and one of the reason's why the Roadtrek tire size has an E at the end of the tire size - E rated for high pressure in the tires. Don't get excited if you see this. Don't panic! 


Tuesday, August 9, 2022

GETTING UP TO THE ROADTREK ROOF

 The roof of the Chevy Roadtrek's - 170, 190, and 210 are added to the van to raise the indoor ceiling so that walking around inside the Roadtrek is possible.  The height is a little over six feet - and is lower in the bed area by a few inches where the floor is raised and where the air conditioner is the ceiling is lowered by the air conditioner.  The increase in height brings the exterior height of the Roadtrek to 8 feet 10" tall. This, according to Roadtrek, includes the television antenna and the lid of the Fanatastic Fan ceiling ventilation van.  The roof is made of fiberglass.

When one needs to get up to the roof outside to do any work - perhaps on the antenna or the ceiling fan, Roadtrek was very clear that the fiberglass roof cannot support full body weight.  Their recommendation was to use a ladder to get up to the roof up to your waist and lean over onto the roof still standing on the ladder which would evenly support part of your weight and be able to get to whatever you needed to work on. 

I have several ladders and step stools. The only place that I can store my Roadtrek when we  are at home is at the top of our suburban driveway which does have an incline  Going up to the roof of the Roadtrek means the ladder is not sitting on level ground but rather at an angle of the incline of the driveway. Going up on ladders is not one of my favorite things and whenever I have needed to go up there I have had Meryl on the ground holding the ladder on the side where if gravity wants to take the ladder down at that angle she is there to stop it.  She has been very good at doing this. 

The ladder I used for several years was a regular step ladder that would get me up to the top of the Roadtrek but was rather precarious and with me on the top, top heavy.  I never was really happy going up on that ladder to the roof of the Roadtrek - especailly if I had to move around up there to do whatever it was that I had to do.  I would first try using one of the step stools we have - one with two steps which never got me all the way up to the roof - so that did not work unless I wanted to reach the A/C vent over the cargo doors in the back of the van.  We also have a taller one that got me up a little higher but not enough to get up high enough to lean over the roof. At some point, I bought an extension ladder to be able to get up at the side of my house to outdoor light fixtures or the roof of the detached garage - all of which have level ground to put the ladder on.  I tried this ladder with the Roadtrek and it was not bad, but I did not want the metal ladder to lean on the painted roof of the Roadtrek. I bought rubber bumpers that went on the ladder but when they leaned on the side of the Roadrek with me moving around they were going to scuff the roof. That was no good. I got a thick, quilted moving blanket at Harbor Freight,  That was a little better but it slid easily on the side of the roof - and when it slid so did the ladder.  Not good - as far as I was concerned. 

I said to Meryl why don't they make a really tall step stool. She did not know. I did not know. So I went to find out. I found the ladder in the photo below at Home Depot. This was several years ago and they may not carry this same ladder but they do have very similar ladders. This ladder is made by Werner.


The ladder takes you up 5 feet 5 inches. One is not supposed to stand on the very top platform which is there for tools. The ladder is very sturdy and even on the angled driveway next to the Roadtek it gets me up to the roof easily - and not as precariously as the regular ladders were. I still have Meryl holding the ladder when I am up on the roof - though I did go up on my own once - not wanting to wait for Meryl to come out of the house to hold the ladder - and it was OK. It does not touch the side of the Roadtrek. I am not tall and I can get up to the roof enough to put myself bending at the waist with my upper body flat on the roof and my arms and hands free to do whatever I have to up there.  I will share this - I cannot get to the three windows on the roof from the side of the Roadtrek with any of the ladders I have including this one because it means leaning way too far toward the downward angle of the driveway by how these windows are positioned over the windshield.  When I clean these windows I do so the way I wash the rest of the Roadtrek from the ground with an extending pole hose nozzle  and an extending pole vehicle cleaning brush.   See this article - https://roadtrek190popular.blogspot.com/2013/10/washing-roadtrek.html

 This, of course, is not a take with you when traveling ladder. It is too large to put anywhere inside the Roadtrek - much less even get it inside the Roadtrek without damaging something.  There is no need to get up to the roof of the Roadtrek when we are traveling - and if there was, I would go over to the campground office and ask to borrow a ladder.

 I know that some Roadtrek owners will say it is no problem going up on the roof - being up on the roof with full body weight - we do it all the time.  My response is "Do whatever you want with your Roadtrek. I heed the advice given by Roadtrek, not to do this."  Many of my readers know we bought the Roadtrek new. It is now 11 years old and it still looks the same as the day we took delivery of it. It was a major investment for us and we have to keep it in as best condition we can - so I do not take any chances with it.  I think of what "Dirty Harry" said in one of the movies - "Feeling lucky?" - when I hear or read the "we do it all the time". Sooner or later luck is not always with you. 


IF YOU WOULD LIKE TO CONTACT US TO ASK A QUESTION ABOUT ANYTHING YOU READ IN THIS ARTICLE PLEASE EMAIL US USING THE LINK IN THE RIGHT COLUMN OF THIS PAGE.


Saturday, May 29, 2021

TIRES FOR THE ROADTREK

Tires, even with good tread and good sidewalls have a lifespan.  Different brand tires have different lifespans. Our Roadtrek came from Roadtrek with Bridgestone tires. Checking on the Bridgestone website, Bridgestone tires have a lifespan of 10 years - as long as the tires are inspected each year to be certain that they are still good. Each year our Roadtrek is inspected for the New York State required annual inspection by the local mechanic that we bring it to (along with our car) who does has done all of the work on our Roadtrek and our car.  I ask him to inspect the tires when he does the inspection. Our Roadtrek is inspected in May each year which coincides with the month that the Roadtrek was registered and received its New York State license plates. While not planned, this gives the Roadtrek a thorough inspection before the start of traveling season.

I knew this year we would need new tires for the Roadtrek because they were 10 years old.  They were in very good condition - and they wore well. I have liked Bridgestone tires on my cars and I wanted to replace the Roadtrek tires with Bridgestones. We have not had good experience with Michelin tires on our cars, but I know many do like them.  I went on line and checked on several models of Bridgestones that would fit the Roadtrek.

The Roadtrek has tires that are LT245/75R16E.  LT stands for "Light Truck". R is the speed rating of the tires. The E is the most important in the size - this is the weight load rating of the tire and the Roadtrek must have an "E". There are other 245/75/16 tires that are not E. I discovered looking at tires that to find the tires for the Roadtrek, if you put in Chevy Express 3500 the correct tires do not come up. I also found that if you put in both Chevy Express 3500 and the size you get "This size does not fit your vehicle."  I put only the LT245/75R16E and tires came up for the Roadtrek. I saw "All Terrain" and "All Season" tires. I took down the tire names and read reviews and then went to the Roadtrek Group on Facebook to find out if anyone has these tires on their Roadtreks. Some did - and I heard good things about the ones I was considering. One of the tires I was uncertain about as while it should be fine many descriptions of this tire online was that it was an All Terrain tire that was best for Off Roading -and we drive on the highway and never go Off Roading - into the muck and the mire, the snow, the sand, etc. The closest we come is the gravel in the campground RV site or the driving on grass. It was the tire I most leaned to - and one Roadtrek owner said he liked it. More had the other tire I was considering. I was prepared to go shopping. 

I never expected, however, that getting tires for the Roadtrek locally was going to be so difficult.  

The difficulty was not because the tires are not available - they are very available. The problem is finding a tire shop that will install them on a van that is 9 feet tall and weighs over 8,000 pounds. Their shops are not tall enough or their lifts are not strong enough. Now, some reading this will say but X tire shop or Z tire shop did mine and that company is all over the country. It seems though that some of the very popular chain tire shops are not in New York - at least not anywhere near here. The Discount Tires chain is very popular but it turns out the closest one to us is in Pittsburgh is 420 miles one way. That is a little far to go to buy tires - and to drive with tires that are ready to be changed. There is one local tire chain that dominates tires here - and they are in every town, but the shops are small, the parking lots are small - and the Roadtrek would not fit through the doors into the bays. Independents are even smaller shops with even smaller property to bring the Roadtrek onto. I knew from the forums and Roadtrek groups that Costco is a popular place to go to have tires put on the Roadtrek and we have Costco here.  I went to one of the Roadtrek groups and asked about going to Costco for tires for the Roadtrek. The response was maybe - as it seems some Costco Tire Centers will install on a Roadtrek and some will not. Oh boy? What would the one here do? 

We are just starting to venture out of the house on a semi-regular basis following our Covid-19 vaccines and do so with caution. As it was, we had to go to the Costco for a few items and while we were there we stopped into the Tire Center and asked the man at the counter. His answer was you have to ask our manager. The manager who was standing nearby talking to a customer came over when he was done and we asked him. I described the Roadtrek - because no one around here knows what you are talking about is you say Roadtrek - as a van RV built into a Chevy Express 3500 van. I told him it is 9 feet tall and weighs 8,000 pounds (which is approximate). He stood there not saying anything and then said that they no longer put tires on RVs - they did up to two or three years ago but they don't any longer. I, again, tried to give him a description of how the Roadtrek is not the image of the large Class A that comes to mind when "RV" is said. He considered it for a minute or so and said, "I have to see it to decide!".  hat was better than a flat out "No!". I asked when he would be in, he gave me when he would be there over the next several days and we left. 

The next day I decided we need to find out from him as soon as possible and called the day after that which was one of the days he would be at the Tire Center. It turned out that he was not the overall manager but the Assistant Manager of the Tire Center. (Perhaps all department heads at Costco are "Assistant Managers" but whatever his title he was the man in charge at the moment.  We went to Costco with me hoping that he would say yes looking at the Roadtrek and have the tires - and we would be coming home with them on the van.   

When we got there the Assistant Manager who we had spoken to came out and looked all around the Roadtrek. He looked under it. He looked at all sides. He looked at the tires. He stepped back and took photos of it.  While he was looking, we were standing by watching him look. He asked some questions and was writing on a pad the entire time.  Finally, he said. "I will have to let you know - tomorrow!" Oh boy! Before he walked away I pulled out the paper I printed out from the Costco website that had the tire I was thinking about on it. This was the one that more Roadtrek owners said they had on the group I asked. He looked at it and said, "These tires would be ripped up in no time on this. You need a tire that will last!" My response was to suggest the other tire that I was considering. He said, "That one would be much better. It will last!" 

The next day we got a call from him. YES! He said they will do the install. He would have to put the Roadtrek up using a floor jack to lift the van at each tire to change each one. This was what I had told him both times we had spoken in person. Putting the Roadtrek up on a lift - one that uses the chassis and not under the tires to lift it - needs to be positioned so that none of the tanks, plumbing, etc. is not crushed. This is something most shops do not want to chance. And I would not want them to chance. He told us on the phone that we needed to come in and order the tires and make an appointment to have them installed.  We went there the next day in the afternoon.

This time I bought a print out of the tire he said would be good. We went in and started talking about the install and I handed him the paper. He took it and went into his computer to get more details about the tire. I asked him how smoothly it would drive on the road.  He said that since they are All Terrain tires they were more intended for off road - and while they are OK on a highway they would not be as smooth ride on a highway. I told him we primarily drive on highways.  I had looked at another tire - the same name as this tire we were talking about but was described as an All Season tire. It had many of the hard wearing characteristics of the tire we were talking about - there was a minor difference in specs. He looked that tire up and said it would be just as good for the Roadtrek and would drive much smoother on highways than the tire that was the All Terrain version of this tire. He ordered four Bridgestone - DURAVIS R500 HD in LT245/75R16E. They were coming from a Bridgestone distribution facility in Allentown, PA and would arrive in four days - a Friday - the Friday of Memorial Day Weekend. He told us that he personally would do the install.  They would call us when they came in.

That Friday morning we got a call. The tires were there  - when did we want to come in to have them installed. I took a shot and said - "We can be there this afternoon if you can take us!" Sure - either 3 or 4 pm. I picked 3:00 pm.

I have written about how long it can take us to back the Roadtrek out of our driveway into the four lane road our house is on. It can take up to a half hour to get a clear break in traffic to back up across the the lanes on our side of the street. It took only fifteen minutes that afternoon - Meryl in the street with a walkie talkie telling me - "NOW!".  The weather report was for rain starting at 7:00 pm - no problem at all! We headed over to Costco which is a half hour drive all on streets - the Roadtrek cannot go on any of the parkways that would get us there quicker. 

It was 2:45 when we walked into the tire center and handed the Assistant Manager the keys. We would go into Costco and walk around while the tires were installed. I asked about how long and he told us about two to two and a half hours - because he had to use the floor jack. OK.

I set a timer on my phone to go off in two hours.  We walked around the store in those two hours - some of it through parts of the store we had walked earlier again.  We went outside to see what was happening. I did not want to go into the Tire Center - we could see where we parked the Roadtrek and into the garage from a distance. As we got outside it was raining. So much for 7 pm!  The Roadtrek was no longer in the parking lot. It was in a bay in the garage being worked on. We went back into the store to walk around - some more! I set my phone alarm to go off in another hour. 

Before Covid, it would not be hard to waste time in Costco. There would be food samples being given out. The snack bar/lunch counter would have tables set up all around to bring a hot dog, soda, pizza, etc. to a table to eat - but with Covid-19, the tables were all removed and the snack/lunch bar became take out only. While it is open like this, there is no place to sit. In fact there is no place to sit in the store. We kept walking. 

The alarm went off - now three hours after we arrived. We were very tired of walking. We went back outside  and it was raining harder. Now there was a white Sprinter van sitting next to the Roadtrek in the next bay - just as tall - but it did not look like an RV conversion. The Roadtrek was not finished yet.  We went into the Tire Center and there was a young man at the counter. We asked about the Roadtrek - he said that it takes a long time. We asked if they had our cell number to call us when it was ready. He looked up our service ticket on the computer and read us our home number. I said if he calls us on that to tell us it is ready, we will not be there because we are in the store! He took down the cell number. 

We returned to the store wondering when store security would come over to question us for wandering around the store for more than three hours. This time I did not set the timer - I set the stopwatch on the phone going to see when we got the call to come and get the Roadtrek. We continued walking through the store. At a half hour I could not walk around the store any longer. We had not gotten a call and we left the store and walked into the tire center. We saw that the rain had gotten worse. As we went through the door to the tire center we saw the young man standing at the counter holding up the keys to give us. I just smiled. I did not ask why he had not called us. I just wanted to see the Roadtrek with its new tires. and go home. I asked where it was parked. He told us. We went out into the rain and ran through the rain to the Roadtrek - Meryl got in and I walked quickly around to see the tires. They were hard to see in the rain. It was 7:00 pm as we were driving home. 

I do not know why it took this long. I can tell you just about where everything you might be looking for is located at this Costco. It will be awhile before I want to go to shop in a Costco.  

They did us a favor putting the tires on the Roadtrek when they don't usually do this. We are very happy that we were able to get tires put on and they are good tires. They rode very well driving home in the heavy pouring rain and it was a smooth ride. 


Friday, August 30, 2019

Sometimes one writes TOO SOON - An Unanticipated PART 2

When I finished the last article, all was happy and hopeful.  Had I only waited to write that article, as a few days later I went out to turn on the batteries, start the engine, and watch the voltage on my plug in voltage meter rise up to charging voltage (around 13.8 to 14.5 volt) showing that the new batteries charging. This, after all, was what pushed me to buy the new batteries - as the old batteries were not doing this.  Well... The voltage meter stayed at 12.6 volts - a decent charge on the new batteries but not right when the engine is running. We took it for a ride. We are getting too used to late night drives in the Roadtrek toward the end of Long Island. Long Island is 100 miles long and the only roads there that the Roadtrek is allowed to drive on due to its height. So we get on the Long Island Expressway (495) and to get to that we used the Seaford Oyster Bay Expressway - yes, it is referred to as the S.O.B. or more kindly the 135.  Long Island is shaped like a fish and we drive out when we do this drive we head east and turn around in the town of Riverhead which is located where the fish's tail starts - this is an hour's drive (when there is no traffic) and about a 65 mile drive for us.  The best way to charge the batteries in the Roadtrek while driving is two drive for two hours at highway speeds without stops. And that is what we did. When we got to the hour point I pulled over into a parking lot with the engine running and plugged in and looked at the voltage meter for the Roadtrek batteries and it read 12.6 volts - no charging took place. We turned around and headed home - and back at home - the same 12.6 volts and no indicator to show it was charging. Oh BOY!

As it happened the day before I decided to purchase a spare Sure Power bidirectional battery separator - the same model that I had in the Roadtrek - just in case I should ever need it. This is not an easy part to find and has to be ordered - I ordered it from a battery supply house in Washington State.  It would take three business days for it to arrive.

I stopped at the mechanic the next day and told him that I needed him to check out the engine battery, the alternator and to please test the battery separator which is not something he would usually do but he could do it.  He could take it the Tuesday of the next week. That weekend I printed out everything I have about the battery separator - and I also contacted an email Roadtrek friend who I met as a reader of this site. His name is Bruce.  The details about how the battery separator works is rather confusing as the wording seems to contradict how we know it works by experience. In fact, it turns out I was not the only one confused by this. 

Did you ever have what seems to be an unsolvable puzzle and become obsessed with solving it? Well that was me! I went back and forth with Bruce about how we each were interpreting Sure Power's description of how the separator worked. He had some good ideas about this but suggested I contact someone he has contacted before about his Roadtrek - Norm - who writes a blog site similar to ours but with its focus on the Roadtrek 210, which is a bigger version of our 190.  Bruce also sent a link to an article that Norm wrote on his site about the Sure Power Battery Separator. I read his article and he also seemed to find contradiction on how we know it works and how it is described as working.  I emailed Norm the details of what was going on and if he has any insights beyond his article. (Norm's site is linked to our LINKS section on the right column of the page - and has been for sometime - Roadtrek 210.) While waiting for Norm's response I sat down with Meryl who often looks at things purely logical - much more so than I do, explained the battery separator and gave her all of the documents I have about to read and come to her own opinion on how it works - and that did seem the most likely and logical. (This was no surprise to me - I knew she would see it differently than I was seeing it.) Norm did respond and we went back and forth with a few emails discussing what it might be - what it should be - etc.  We knew how it should work from shared experience in how it works - and that is what I needed to go by - despite the paperwork.

The new battery separator was delivered to the post office on Saturday and I had it in my hands on Monday. If it was needed, I had it ready.

We got the Roadtrek to the mechanic the night before.  And the next morning I eagerly awaited a phone call which by after 1:00 pm had not come. We were heading out of the house and I said to Meryl that we would stop there on the way.  She suggested that I bring the new battery separator and I put it in the car. When we got there, it seemed to be ready. The engine battery was bad - and not holding a charge. (I had thought that might be the problem.) He had tested the battery separator and it was connecting. He talked about the other things he did and handed me the keys.  I asked him if the RV batteries were charging when the engine was running. He said he was not sure how to turn on the battery switch inside and did not want not to push any buttons he was uncertain of. Understandable - he is not an RV mechanic.  We started the engine first, turned on the battery switch for the Roadtrek batteries, I put the meter in the socket and the batteries were not charging. He then decided that perhaps the alternator was not putting out enough current and went back into the shop to check on alternators.  He said we did not want a cheap import alternator and he only wants to put a good one in. He was finding the alternator he wanted to use but they were not available. We talked about the alternator some and then ... I just had a feeling that I needed to ask him if he did one more thing - when the engine was running - and the alternator showed 14 volts on the dash - did the Roadtrek side of the battery separator also show 14 volts. He told me he had not checked that and we all went back outside to the Roadtrek. He brought his meter - and he tested this. There was no current coming into the Roadtrek battery side of the separator.  He said we don't need an alternator. I told him that I had a new battery separator in the car and he might want to check that out.  He installed the new one in a few minutes - it is just three connections - a cable from each battery system - engine and Roadtrek - and a common ground - all there on the old separator. As soon as he had the new one in, the Roadtrek battery started to charge with the engine running, While the separator was connecting before the voltage was not going through it.  The new battery separator is what was needed all along. We were going to need the new batteries in the Roadtrek - both  RV and engine anyway - so while that might have been put off for a time - I was still playing Russian Roulette with RV batteries that were past due. 

As we were leaving he told me to drive the Roadtrek to charge both sets of batteries- the new engine battery and the Roadtrek batteries - or I could plug in the Roadtrek to charge both.  Since there were "strong storms" predicted that afternoon we decided not to plug in at the house and wait until that night for one of our late night Roadtrek excursions.  We did that and all was well. And since I have been checking and double checking and it is working.

My special thanks to Bruce and Norman! You both helped a great deal!!!


Tuesday, July 30, 2019

New Batteries for the Roadtrek - A Three Year Long Epic Adventure

 THIS ARTICLE HAS BEEN EDITED SINCE IT WAS FIRST PUBLISHED.  THE BATTERIES INSTALLED IN THIS ARTICLE HAD MAJOR PROBLEMS AND IN DEALING WITH THAT I COULD NOT TRUST THE SHOP THEY WERE PURCHASED AND INSTALLED AT AGAIN. THE NAME OF THAT SHOP HAS BEEN REMOVED.  

I WILL NOT REVEAL THE NAME - PLEASE DO NOT EMAIL AND ASK.

THE NEXT TWO ARTICLES WILL TALK ABOUT WHAT TOOK PLACE FOLLOWING THIS ARTICLE.  


Batteries do not last forever. The batteries that are the heart of the electrical system in my 2011 Roadtrek 190 Popular are two 6 volt AGM deep cycle batteries. And until now have been the original batteries installed by Roadtrek at the factory.  I have been told that these batteries last about 7 years - and the first time I started to question that the batteries were still good was three years ago.

At the time electrical things that should happen a certain way just were not happening. When the batteries should have been charging when driving - something that Roadtreks after around 2006 should do - was not always happening. It might take an hour or more of driving before the charging light was showing lit on the battery monitor panel in the Roadtrek.  There are a few reasons why this might happen - the RV batteries (often referred to as "coach batteries") are going bad, the engine battery is going bad, the vehicle alternating is going bad, OR a device put into the Chevy engine compartment by Roadtrek - called a Battery Separator - is going or has gone bad. The problem was not every time but often enough for concern. Let me explain the battery separator.  This is a device that has the engine battery connected to one side of it and the RV batteries connected to the other side of it. It is a "smart" switch - when the engine is running and the RV batteries need to be charged it connects the engine battery to the RV batteries and charges them through the van's alternator. It also will charge the engine battery when the RV is plugged into shore power - an outlet connected to the outside world of 110/120 volts of electricity or when the Roadtrek's electrical generator is being run which also provides 110/120 volts of AC electrical current. It is a nice little system - as long as it is working.  So - one of these things would have been the problem three years ago.

SO - I started checking things out as best that I could on my own. There are ways to test the Battery Separator - that I am not equipped to do but we go to a very friendly mechanic and for many, many years he has worked on our car so I spoke with him and if it came down to it he could test the separator for us.  When the separator is working and connects or disconnects there is an audible click. And I was hearing that click when plugging into shore power and I was pretty sure it was, therefore, working. But I was not fully convinced. So at the time I started researching buying a new battery separator of the same make and model that is there. This proved to not be quite so easy. I called two RV dealerships with repair shops on Long Island. Long Island is a wasteland for RVs - finding them here or service for them here is like - well, let's say not worth the effort. Basically they had not worked with RVs that had separators - they did know about battery isolators which are similar but work differently - but they could not get the one I had and were not really interested in working on my Class B RV - which they don't usually work on.  I started searching the internet for the part - as it is not hard to install - and my friendly mechanic could do that for me - and found that only a handful of retail websites around the US - none anywhere near here - sell this make and model. That was going to be what I would have to do if it came down to that. I also started asking on a group I was on what was the best - absolutely THE BEST - coach battery for my Roadtrek and without question from several more experienced than I when it comes to RV batteries the same answer came back - Lifeline batteries. One even said to me that they were "overkill" but they were the best - and they are expensive. And I need TWO.

The first thing I had the mechanic do is check the engine battery - the easiest of the things that needed to be tested and - hooray! He found that the engine battery - even though it started the van easily when started - had a bad cell and was only putting out less than ten volts - and he replaced it.  After that things started working - and with all of this in the back of my mind we continued to hear out int the great well known and kept traveling in the Roadtrek - for three more years.

Every so often things would hiccup but came back to working as it should be working - but the coach batteries were getting older - and this year at 8 years old I kept feeling that I was playing Russian Roulette with the batteries. I had figured that going into 2019 we would need to buy new batteries. And then the macerator problem happened - as I wrote about two articles back - and that took the money that we would have used for the batteries.  Before we left the dealer service when we bought and had installed the new macerator and macerator hose, I asked if they could get Lifeline batteries - and they said yes but they could not tell me a price - and would check. A week or so later they told me - $550 EACH battery plus labor to install! Oh BOY!  It was back to Battery Russian Roulette.

It seemed like maybe things would go the right way and with short day trips things were working as they should. Then we set out on a trip during Fourth of July week. Our procedure when we travel is just before pulling down the driveway and off, we start the engine of the van, turn on the battery switch - to turn on the coach batteries - and also turn on the RV refrigerator.   I get the van running and Meryl does the rest.  And I asked her to turn on the test button that shows battery level - which as the van is running should show the coach batteries charging - and that LED was NOT lit! OK - this has happened before and we drive a little and the light comes on, it is charging and all is well. That did not happen. And after a short time we pulled over to check again and it was still out and I could only figure that we either turn around and go home or we turn off the fridge - no meds in it this trip - as the main med for the fridge once started does not need to be refrigerated - and I sat there on the side of the road contemplating what to do - turn back or go on.  Meryl made the decision. We had paid in advance for one night of the three nights in the campground and we should go on and IF there were problems resulting for this all we could stay the night, the next day go to the Festival in PA that we go to every year that runs during Fourth of July week and just come home tomorrow night. Fine. And - have I mentioned this before - Meryl is ALWAYS RIGHT - truly!

We headed off.  We stopped at a rest area on the New Jersey Turnpike and I put the battery switch back on and with the engine running - after about two and a half hours of driving - there was a lot of traffic getting there - the charging LED lit. Wonderful! We left the fridge off to not push our luck and continued on the trip and stayed the three nights and four days - with the last two days with the fridge on to bring home some treats - but not too many because the week before our fridge at home died and we had to buy a new fridge which when delivered did not work correctly and a new, new fridge would not be delivered until we got home - unknowing if that one would work any better than the first. (Another unexpected, not affordable expense.)

We had reasons to start the Roadtrek when we got back from this trip - and the batteries did and then didn't show they were charging when the engine was running and it was three years back all over again. Only this time the research had been saved from three years past. While we were on the trip to PA I said to Meryl that we can't play Russian Roulette with the coach batteries any longer. That one day we are going to find ourselves off somewhere and these batteries - the ones I wanted - were not going to be found where ever we were stuck. She agreed. And the decision was made that we needed to find and buy and have installed the new Lifeline batteries.

I thought that this might be easy. Yes they were on a few websites. There are even dealers for these batteries on Long Island - all marinas. Long Island is "Boat Happy - RV Deprived". I started calling and emailing these marine shops. Yes they could get the batteries - each over $500 - no they could not install them. I went to the websites that sold these batteries and the price from at least two - across the country - was $329 each with free shipping.  I had thought that our friendly mechanic could install them - which he said he could - but he had been and was very busy at his shop with his usual business - including work on our small passenger van - and I felt that I should not impose on him - especially if I wanted the job done right away.  I also found on the battery manufacturer's website two dealers of the batteries in New Jersey. I contacted one - a dealer who is also a Roadtrek dealer who could get the batteries at just a little more than the $329 and he could install them - AS LONG AS  I waited for his next available service appointment at the end of September. I thanked him and said that was not going to work out for us.

The second shop in New Jersey was a little closer but not an RV dealership but rather an RV repaid and body work shop.  I contacted them and yes they could get the batteries - they would take about a week to arrive and they could take us to install them right after they arrived. The price was a little less than the $XXX each - two hours of labor to install - and I told them order them and thank you very much!

The batteries - for those Roadtrek owners seeking new batteries - Lifeline GPL-4CT - 6 volt AGM deep cycle battery. Here is a XXXXX . The shop we bought them from that installed them XXX RV in XXXX, New Jersey.

The batteries came in the time stated - one week on a Thursday. We set up an appointment for the installation on the coming Monday.  All was set! And then weather forecasts started saying that Monday and Tuesday in the coming week were going to have severe storms both in NY and NJ.  OK. I am never happy driving the Roadtrek in the rain and absolutely not in severe storms.  In that time when you would not like to wake up yet on that next day - Friday morning - this kept going through my head - Monday was not a good day to make this trip. And we called and postponed the appointment to Wednesday. The lady at XXXX that we were working with was incredibly nice - extremely helpful and had no problem moving the appointment. As it turns out the storms did come Monday and Tuesday and were more than severe - and caused a lot of damage especially in New Jersey and right in the county that this shop is located in.

Wednesday morning came. The charging LED did not come on to show the old batteries were charging when we left that morning - and was still not on over two and a half hours later when we arrived at the shop. The trip there took a long time just to get out of New York State.  There are two bridges that most be crossed to do that - I just love living on an island connected to other islands before you get to mainland U.S.A. - and the first and main bridge was closed in both directions as we heard as we were on our way to it - because of a car fire.  We were stopped in traffic bumper to bumper along the way and that took so long that by the time we got to the bridge - despite the traffic reports still saying the bridge was closed - we drove right across it without a problem.  We called ahead to the shop to explain that we would be later than we even had expected to be.

There were various ways in New Jersey to get to this place and the fastest route takes the Garden State Parkway. It seems that while this part of the Garden State Parkway is closed to trucks, it allows RVs - and more than one website - and our asking the shop when we made the appointment about taking this parkway  - said we could drive on it. With fingers crossed we did. No other RVs were to be seen but highway patrol cars passing us - we were not stopped.  As we got off the parkway and were near the shop there were electric company repair trucks everywhere. Red lights were out on the roads. Large trees were down. The storm hit there HARD!

The night before we left I wrote out everything that I know specific to installing new batteries in a Roadtrek plus where all the switches were and what does what.  I will include that at the end of this article. They would know all this anyway but they may never have worked on a Roadtrek before. One of the things I told them in person was that I wanted to know once the new batteries were installed that the batteries were now charging on the engine running as they are supposed to do.

When we arrived I handed that to the woman who was expecting us and we sat down to wait in their waiting room.  There was one other person waiting and we started talking as we were waiting. He said that the shop we were at had no electricity and they were running on generators - still able to do the work. The big lobby was a little warm - but there were big ceiling fans that made it comfortable enough. There was a big screen TV and chairs and sofas. They had display and sales racks of RV accessories and parts.  We spent the time watching the TV and walking around looking at what was on the shelves. At one point there was a loud roar of a big engine and they were working outside an open garage door to the side of this big lobby on a big Class A engine.  It was interesting but the diesel fumes were getting overwhelming and were also coming into the lobby so I went outside to get some air and saw that my Roadtrek was parked in an lane outside in the parking lot on the other side of a Class A. I could not tell if they had worked on it or not. We were there for about three hours or so between waiting for the Roadtrek to be taken to be worked on to when we were told it was ready. I asked if it was charging and was told that it was all tested and was working as it should be. Skeptic as I am I went outside - started the engine and the charging LED came on when I pushed the test button. For the moment I was happy.

It was a hot day. We were in New Jersey near a restaurant we like to eat at and decided we would kill the time between lunch and dinner in a large mall and a Barnes and Nobles bookstore and a Walmart before waiting for dinner. And that is what we did.

Someone reading this I know is thinking why didn't he just install these batteries himself.  The 2011 Roadtrek does not have a sliding battery drawer. The two batteries are fixed in place inside an outside access cabinet. These batteries weigh 66 pounds each. There is no way that I could lift one of these batteries much less remove the old heavy batteries and get two of these up and into place - plus there is no access to wire the cables to the back of the batteries. I am not sure how the shop did this. 

When thing seem well my head starts poking me to think hmm, maybe things are not all as well as they should be. Was it the batteries that needed to be replaced - which they did anyway - or is that battery separator at the root of what has been going on. The engine battery is three years old and it is rated for five years - and that should be fine - but those early morning wake ups and your mind starts working in high gear...  So I start looking things up. I start trying things. I know the new batteries are good and fine. Are they charging when the engine is running is what is bothering me. I go outside and into the Roadtrek and without the engine running I turn on the battery switch and push the test button and no engine running - the charging LED comes on. This is not supposed to happen - I think - or is it?  I have a volt meter. I check the voltage on the batteries and they are fully charged - a reading of about 12.87 volts - 12.8 volts is fully charged. Is this because they are new or did the engine charge them up to that on the drive home from New Jersey. I start researching again.

This is what I learned - and should have learned reading these same documents before - the engine does not connect to charge the RV batteries if they are over 12.8 volts. They do not need to be charged and the engine does not charge them. Seems logical.  If the batteries are 12.8 volts or above the C charge indicator LED will remain lit - even though no charging is taking place. (This is new to me for some reason - as I have believed from other things I have read that if charged fully the C LED will go out and leave the third up from the bottom LED lit showing that the batteries are within charged range. THAT IS NOT SO. If the batteries are 12.8 of over the C LED will be lit.)  Good to know - good to pass along and I am thinking a detailed battery separator article is coming here soon.

I went out for the next several days checking the status of the battery level. Five days later - I turned the battery switch on - no engine running - and had my volt meter plugged in for actual voltage - and the C LED was no longer on. The yellow G LED was lit and this is what I had expected to see all along. The voltage in the batteries - five days later - was now 12.75 - below 12.8 - and the monitor panel indicated that. I started the engine and right away the C LED lit up as it should! Happy me!

In all of this I made a decision with Meryl to buy a spare battery separator and have it with us when we travel. This way if that ever does go bad - and they do go bad over time - we will have it with us - we can find a mechanic to put it in - and I - not we - have to worry about it any more. I am in the process of doing that now.  With that I will have three of the Roadtrek weak spots covered that are not easy to just get repaired or replaced anywhere - new batteries, new macerator - and with this - a new battery separator to use when necessary.

Here are my new batteries -


 Here is the list I wrote up for the install to give the shop:


ROADTREK BATTERY CHANGE


1.            Two 6 volt deep cycle AGM Batteries in my Roadtrek are original from Roadtrek when the Roadtrek was built at the factory in 2011.

2.            The batteries are wired in SERIES -  pos on one battery to neg lug on the other battery connected together and the battery cables from the Roadtrek to the batteries are then connected to a positive on one battery and a negative on the other battery.

3.            The battery compartment is on the outside passenger side in front of the rear passenger tire. The square key opens the lock on the compartment.  In 2011 when AGM batteries started to be used by Roadtrek the sliding battery tray was discontinued. The tray is fixed.

4.            The Roadtrek has a TRIPPLITE 750 INVERTER/CONVERTER/CHARGER. I have been told that the Tripplite must be turned OFF while batteries are being installed.  The Tripplite is located inside the Roadtrek right behind the passenger side cargo door on the floor- it can be seen as soon as you open the cargo door – I have removed the door that sits in front of it.

5.            The TRIPPLITE ON/OFF switch is a slide switch on the upper right front – OFF is the MIDDLE position.  Left is Auto/Remote the default position and right is Charge Only.  Now it is set to Auto/Remote – if you want me to put it off I will OR you can put it off.  After batteries are installed return the position to Auto/Remote.


6.            Dip switches on the TRIPPLITE were set by Roadtrek for AGM batteries.

7.            The Battery Disconnect switch is inside the Roadtrek – at the entry door just past the passenger front door – it is on the wall below the ceiling on the right side of the monitor panel. It is OFF at this time.  Just push and let go to turn it on.  The test switch on the other side of the monitor panel will show a column of LEDs for battery charge. Turn the battery on if needed.

8.            There is a 12 volt DC socket to the left of the monitor panel to plug in a 12 volt voltage plug in meter. Battery Switch must be on to use this.


Friday, August 3, 2018

Replacing the Propane Detector Alarm

Way back after our last trip in 2017 in October we were not hearing the usual beeping that always happened when the battery switch in the Roadtrek was turned on that came from the propane detector near the floor on the front of the cabinet that has the internal water tank inside. This beeping was the alarm warming up and self-testing itself. As it beeped the little red LED on the front would flash at the same time and then after several beeps it would stop and the LED would go out - as it was supposed to. A power LED in green remains on to indicate that there are 12 volts going into the detector for it to operate.

The Propane Alarm is tested, simply, by using a butane cigarette lighter. The lighter is held up in front of the alarm unit and pointing the gas toward the vent opening in the alarm, the button on the back of the lighter is pushed without flicking on the ignition wheel. The gas goes into the alarm and the alarm starts to scream - loudly and continuously with the red LED flashing - until you clear the air of gas by opening a window and turning on the ceiling van to suck all the gas out of the van - and the alarm goes silent. This alarm is hardwired into the Roadtrek's coach 12 volt battery run electrical
 system.


After that trip I tested the alarm with the butane lighter and it was silent and no red LED came on. The green power LED was lit. These units have a life span from about five to a few more years. Unlike the CO Detector that has an audible signal that the life of the alarm has expired, the brand unit that Roadtrek used for the Propane Detector had no such signal. I decided to wait for the Spring to replace it - as we would not be traveling in it again until then.


At some point after 2011, Roadtrek stopped using a standalone propane detector alarm and a standalone CO detector alarm (that is located under the cabinet on the passenger side over the bed), and installed a single combination Propane/CO Detectors Alarm - in the same place that the Propane Detector is installed in my 2011.

When it was time to order a replacement I looked up who made this unit and found that it was a company in Canada by the name of Electro Systems, Inc.. I did a search for the propane detector to match the same one in my Roadtrek and found only two places that it existed for sale. One was the manufacturer and the other was an online retailer also in Canada. I decided I would order it from the manufacturer. I am not going to provide the model number - and you will understand why as I go along here.

I ordered the propane alarm from the manufacturer's website. We had to pay through Paypal with a credit card. The money exchange rate was automatically handled and we paid about $15 shipping. It took two weeks to arrive.

The unit looked exactly like the unit installed in my Roadtrek. This is a flush mount unit. The cabinet wall that this is installed in has a three inch round hole cut into it to mount the propane detector alarm unit into and the wiring comes up from under the floor of the cabinet through a thin slot along the wall below the hole. At first the installation looked simple. Remove the screws that held the old unit to the wall outside the hole. It was not quite that simple as the screws were under the face plate of the detector and two clips hold the face plate to the unit. The two clips are both pushed toward each other at the same time (several inches apart) and the plate is supposed to come right off. With the two clips pushed nothing happened. It appeared that after 7 years either heat or age caused the plate to adhere closely to the the back of the unit. It took a thin and sharp edge of a metal paint scraper to get into the crack that was barely visible and pry the face plate off while also holding the clips together. Eventually it came off.

I removed the screws and opened the cabinet door to follow the wiring. It went down below the floor inside, not through the slit that was there for the wiring but along the edge of the floor. The wiring did not pull up. It moved a little and then moved toward the side just a bit more and then stopped.

Note in the photo that the original install by Roadtrek was at an angle - that it should not have been at.

The wiring was not coming up and the connections were somewhere below. Looking around the floor edge in the cabinet it appeared that the floor panel might lift up and out. This cabinet also has a door on top that lifts up. Inside this cabinet is the interior water tank and a number of its electrical sensor connections above the floor. One must be very careful inside this cabinet to not damage this fresh water tank or the wiring connected to it which easily could be pulled off. I tried picking up the floor panel, found a few screws holding it down, removed those and it would move a little and then stop. This is all happening with me sitting cross leg in the narrow aisle between the cabinet I was working in and the cabinet on the floor on the other side.

I tried for quite some time to carefully remove the floor panel and then gave up when I realized that what was stopping it was the piano hinge that the front cabinet door opens out on. The inside of the hinge goes straight down to the floor all along this section of the floor and there was no way this floor board would come up without removing the hinge with a number of screws on the inside of the cabinet at the floor - where there is no room to turn even a slim screwdriver. No, I stopped there.

At this point I decided that I would cut the wire on the old detector unit right where it went into the back of the unit and attach a new wiring extending the length of the wiring that was under the floor. I would use end to end crimp connectors to do this. The instructions for the propane detector recommended these crimp connectors to attach the wiring of the detector to the 12 volt wiring of the RV. I had initially thought to attach the detector with the same plug and socket crimp  connectors that I had used for the CO Detector 5 years ago when I had to replace that unit (see article). Since the instructions were so definite about the end to end connectors I used those instead.

So I added about 10 inches of wire - just to have extra - to the wiring that was cut from the old detector and I attached end to end crimp connectors to the end of the extension wires that would be attached to wires on the new propane detector. It was then that I discovered that the hole in the back of the unit was too small to fit the connectors through - and this was necessary as the face plate and "guts" of the unit had to fit into the back plate that is screwed into the cabinet to hold it in place and the hole would be too small to pass the connectors through. I decided to just drill that hole in the mounting case larger. Then I got the wires out from inside through the hole, connected the connectors to the unit wires and got it all back together again. This was all easy, if it were not for cramped legs while doing this.  I thought I was done!

New install - using the same screw holes. You cans see the angle it is on from the original install.


I had Meryl turn the battery switch on and I saw the green power light light up on the unit. It quickly flashed red once and there was a half beep and then silent. This was certainly not working like the old unit - nor was it working the way the instruction sheet said it should which described the familiar several beeps and flashing red LED throughout as it warmed up and self-tested. I was not happy.

I got the butane lighter and decided to test the detector. I sprayed gas into the detector as I had done with the old one and it sat there silent. I repeated spraying gas. Still silent. I did it a third time and in about ten minutes of waiting it suddenly started to blare the alarm. Was this how it worked? I was even more not happy.

We cleaned up and shut the Roadtrek down and decided to let it sit for another day. The next day was cool outside. This was all in the Spring which here did not warm up very much each day. It was about 50 degrees F. I went into the RT - turned on the battery switch - no beeps, no red LED - only the green power LED was lit. Not only was I not happy. Meryl was also not happy. We both have never been fans of natural gas or propane. We don't use propane often in the Roadtrek - only when really necessary - but the tank still hangs under the back of the chassis - under the bed inside the Roadtrek - and we take the propane detector alarm very seriously. I tried a few more times on different days. I also contacted the manufacturer which turns out - at least in any contact - to be a one man operation.  I was told that perhaps the detector does not need to warm up. I questioned this because the temp inside and outside the RT was below 50 degrees most days at this point. I was told it was fine. I tested it a few more times with butane (also recommended in the written instructions with the propane detector). Each time it would take awhile for the alarm to go off. Meryl wanted it out! I emailed again - asking about why the unit does not beep when it is first turned on - per the instructions - and per our experience with the same unit for the past seven years. I was told that the beeps were silenced at start up (regardless of what the written instructions say) because they were annoying. I then asked then why no red LED either at start up. There was no answer for this. Then Meryl got involved in the emails because she wanted this unit out and returned. She did not want another (and I agreed) as this unit could not be trusted. That no one sells this unit any longer other than the manufacturer and one retailer and that Roadtrek stopped using this unit just after my 2011, should have told me something. Eventually he said to send it back (at my expense) and he would refund the purchase price. I pulled the unit out and sent it back.

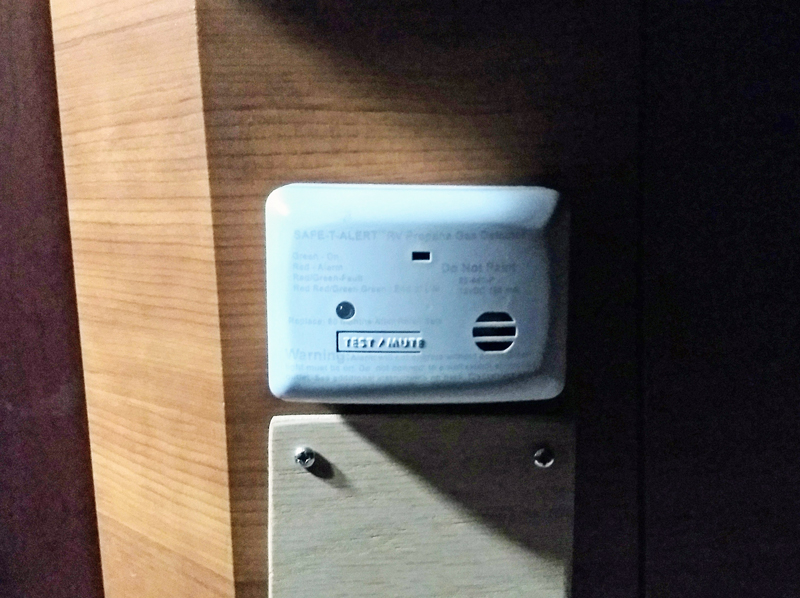
I now had to find a replacement. The new combo unit that Roadtrek uses is made by the same company that makes the CO Detector that RT used in my 2011, Safe-T-Alert.  Looking at that combo model I would have had to cut a new rectangular hole into the cabinet and with the large round hole already there this was not going to work out too well. Plus I had just replaced the CO Detector which had aged out at five years.  I looked to see what propane detectors that Safe-T-Alert has and there is a "mini" unit that is just a propane detector alarm that was a surface mount. This meant that it would stick out some into the aisle - which is generally under the bed when we travel so as long as storage under the bed did not interfere with it, it would work.

The model of this Safe-T-Alert mini propane detector is MTI Industries 20-441-P-WT Safe T Alert 20 Series Propane/LP Gas Alarm - White. I made sure that it had all the same specs as the larger units. It does. There was nothing different about it other than size from the full size propane detectors from Safe-T-Alert.  I was able to find it on Walmart.com with free shipping directly to the local Walmart where I could pick it up when it arrived and I had it in less than a week. And the price was decent - and less than the original.

I closed the hole in the cabinet with a quarter inch thick oak plywood board - furniture grade cut to a a square to cover the hole. I wanted the new propane detector mounted just above this and drilled a half inch hole into the cabinet so that the wiring would easily pass through. This unit is easily detachable from a mounting bracket that is what is screwed to the wall and the unit needs to be no higher than a specified height above the floor - which was no problem with the location I was mounting it. In the future when this needs to be replaced (the instructions say every five years - and this unit will sound an alarm when it is aging out - just as the CO detector from this company does) all that is necessary it to pull the detector up out of the snug mounting bracket, cut the wires at the crimp connector that I used for this as well (the wiring that I had done all remained in place), attach the new unit's wires to the wire in the cabinet and done!  I tucked all of the wires down the slot that is below this in the floor - and it all fit down and comes up easily because of the extended wire I added. The original wiring still comes up through the slit between the floor and the wall - and still does not budge.


I think you should also know the rest of the story - because I always have told it like it is. After over a month after the returned propane detector was received at the manufacturer, we still had not received a refund. We had asked for our credit card account to be credited back through Paypal - a simple process that we have done ourselves for returns in our own small business. We tried emailing - no response. An email from us saying that if we did not hear back we would file a claim with the credit card company finally got a response but when I asked for the refund to be processed by him back ot our credit card, I was told that he could not do that - I had to. ???  I had to process my own refund to my credit card?  I answered that the only way I could do that would be detrimental to his account - requesting a charge back on a disputed purchase - and I did not really want to do that to him. I got no reply back and we waited another two weeks and contacted the credit card company and Paypal. We did finally get the credit approved, processed, and closed - just a week ago. This went on from May.

If you need a new propane detector for your 2011 or previous Roadtrek do not get the same as is there. The Safe-T-Alert mini model works well- does everything it is supposed to - it starts and flashes for a specified length of time showing it is self-testing (just as their CO Detectors do) and goes steady green LED once it is ready. I have tested it with butane from the lighter and it immediately went off - very loudly! You will not sleep through this if there is a propane leak. Once the air was clear it resets itself and is ready again.

Things should be easier than they are. Sometimes with Roadtrek things that should be simple - like replacing parts that wear out every five years are not. The CO Detector wiring was also not accessible. This wiring is not accessible. Perhaps it is done in an effort to make business for the dealer shops.


Saturday, April 14, 2018

A Pre-Season Opener For My Roadtrek

It has been a very long and difficult winter in the Northeast this year. My Roadtrek has been winterized since mid-November and it has only been off my driveway for a single day - there and back the same day - trip in early December.  We enjoyed that trip in December and since then have been looking to do it again.

We usually take these one day trips in the car, but with the car being a little uncertain for long distance trips, we have decided that we might as well take the Roadtrek and put some driving hours on it rather than it just keep sitting on the driveway. Using it just to drive around town is not easy here as just getting it off our driveway and into the steady flow of traffic at most hours of the day can take up to 30 minutes to safely have a clear enough opening to back it out and get it on the road. We had hoped to be able to do a repeat trip in January. The weather was not cooperating. Despite some warmer days in February, that month did not work out. We were sure that when March came we were going to be able to do it and we had four Nor'easter snow storms in March with no hope of going anywhere - including one on the first day of Spring. With April coming we were really hopeful and until just now, April has been cold and raining - too cold to even consider de-winterizing. But then there was a forecast like no others in the recent past - it was going to become suddenly warm and not raining - maybe even hot - not necessarily here where the ocean influences the temperatures this close to the coast, but inland. Inland was good - inland was where we would like to go. This sudden gift was only to last two days because following this phenomenon the temperatures would drop again into the 40's and perhaps lower once again with a two day rainstorm. Circumstances here - as they often do - were not going to let us take advantage for more than one single day. It would be out and back in the same day - as it was in December - but one day was good. One day was wonderful considering!

We knew where we wanted to go - one of our favorite haunts in Pennsylvania which to most would make them wonder why - but during those snow storms and those cold days and nights, if someone asked me where would I rather be - it was there. It was outdoors. It put me in the middle of people that I very much like interacting with and being around. We were going!

We left at 9:30 in the morning- to avoid the heaviest of Metro NY rush hour traffic - and off we went. Getting out of the driveway only took ten minutes after a steady stream of cars whizzing by. I had plugged the Roadtrek into the outside house outlet two days before and let it sit for 24 hours plugged in so that the batteries would be fully charged and there would be no problem running our Roadtrek's compressor fridge on batteries for the trip. There were plans to bring back some foods that are not available here. After an hour and a half this fridge reaches temperature.

As always, traffic getting out of NY was heavy but at least moved. The trip should take no more than three hours - but it generally takes four to four and a half hours - not counting the time to get out of the driveway. As I have written in the past, the trip is bang, bang, vibrate on the roads in New York. Once into New Jersey the ride gets noticeably better. In Pennsylvania with a newly repaved PA Turnpike it gets much better. The PA Turnpike - I suppose because of its new road surfacing -increased the speed limit for most of the part we drive on to 70 miles per hour. The 6L engine in my Roadtrek 190 Popular handles that speed very nicely - in fact it is too easy to get to 80 and not realize it - and it handles that speed nicely also , but I am never comfortable driving it at that speed and pull it back down. One thing that is odd, however, on the PA Turnpike with this new speed limit is that some cars and trucks do not want to drive at it. In fact they are driving below 65 - and more like 60. This was not making me happy. With one day and the long a drive to get there, I wanted to be at least the speed limit. Where I live the speed limit is 55 mph. At any time of the day or night local drivers see that sign and see 65 and faster. Most of the roads here are not made to go that fast but fast most go. I try to avoid having to keep up with that at times here can be more dangerous than not - and I not just in the Roadtrek. But here I was with a legitimate 70 mph speed limit which if it was ever to be the speed limit here would translate to 95 or 100, and I was sitting behind 60 mph drivers. It was not just the time of day because the same happens when we head home - and we travel later at night most trips when we are heading home.

When we arrived it was after 1:30 pm and it was 82 degrees outside. Oh my! The sun was shining. The place we were going was hoping and I was looking forward to a wonderful day - which we had. The trip down, at least past NY, the Roadtrek rode smoothly. Parking is in a large gravel and grass parking lot and we usually head down to the farthest section where it is open enough to park even a larger RV - and there are always a few RVs parked there - and there is no concern of being boxed in by cars or the narrow lanes that the rest of the parking lot has.

As we roamed around I realized that I have been in the house too long this winter and what is generally not tiring was really tiring me out after about two and a half hours. Not good - and I had to readjust to what it is like to be in over 80 degrees. I did find a bench and sat down and listened to two gentlemen talking about hunting and their tales of learning to hunt from their fathers. These are things one does not much get to hear being discussed where I live - and while I was not involved in this discussion at all, I did enjoy it. It was only fifteen minutes or so later that I was ready to leave the bench and get back to Meryl and keep going. (If you are waiting to hear of some catestrophe that happens on this trip - there was none.)  This was a nice slow day with me trying to pack in months of not being there. Overall we were at this one location for over four hours. Nothing important to do. Nothing spectacular to find or even seen. As a mostly city boy, I have always had a special place in my heart for sprawling farm land and things that are basically plain - and this all is all around people that are, with no negative connotation, "The Plain People". Beaches don't interest me. Mountains only marginally appeal - and generally don't more than do. This is where I need to be to really relax  and it has been for many, many years. And there I seek out being away from the tourists and get to be among the locals, and especailly the Amish and Mennonites of this area. I have met some. I am never intrusive. I don't gawk as some people do there. Any interaction and I am especailly respectful. And I am grateful that my good wife recognizes this in me and enjoys it as well.

Past 5 pm we headed to a favorite restaurant - again not a fancy restaurant but one that is really only known by the locals - and had a great dinner. After dinner I was not really ready to leave, so we started out the long way back. We drove past the campground we usually stay at. We even stopped at a store before we actually were on the road to go home. It was past 1:30 am when we arrived home. There was no traffic coming home -in fact some roads were surprisingly empty - yet we still found ourselves behind slow drivers with the road empty in front of them - and again, I don't mean slow because they were just at the speed limit - but well below the speed limit. I was in no hurry to get home but the last thing I like have happen in the Roadtrek is for anyone behind us to think it is us slowing them down - and resulting that  - they speed around us and cut in too close.

Last Spring I took the Roadtrek for a ride to the East End of Long Island to get it on the road. I realized after that it would have been so much better had we come to this area instead. Eight plus hours of round trip driving plus multiple bridge tolls and turnpike tolls - almost a full tank of gas - and it was all worth it.

The Roadtrek did not balk the whole time. This is not always the case, and surprises no matter how minor are more the norm than the exception. I think it liked its drive. Had it not been for the past weather, it would have been on several more trips like this.

I am still not sure when I will dewinterize. Most years I would have done it already. Since I am hearing low 40s or colder in the forecast, I am not running to do it. One of the advantages of even a single day trip with the Roadtrek is having a bathroom along for the ride, I figured that were we in need, we would just use it and not be that concerned. I could always through more A/F down into the black tank when we got home.

So this was not a real - sleep in the Roadtrek trip - but we did most everything we would do if we went there to stay overnight for two days. What I knew before but this trip made me more immediately aware of was that the CO Detector has expired and needs to be replaced - which we will do when we dewinterize. That the Roadtrek Roadside Assistance policy needs to be renewed - and we have not heard anything from them about it. That we discovered after our last regular RV season trip was that our walkie talkies no longer worked and we needed to replace them which I put off until we were ready to start traveling again. We use the walkie talkies to get the Roadtrek out of the driveway and into the street in front of our house (Meryl "OK it is clear RIGHT NOW - GO QUICK!!!") and when backing into a campground site, Meryl guides me in using the walkie talkies. I know which I am going to buy and we will be doing that pretty soon!

So thanks for rambling along with me. Nothing exciting - but isn't that nice!


Monday, February 19, 2018

A SIMPLE REMINDER TO PUT YOUR CRANK UP ROOF ANTENNA DOWN BEFORE YOU DRIVE

On not so older Roadtreks, on the roof there is a crank up, directional television antenna on the roof. There is a crank on the ceiling inside, near the passenger side coach door. The crank is pulled down  and you turn the crank and the antenna lifts from flat on the roof to straight up into the air with flaps opening on the top. Around the crank inside is a ring that when it is turned the antenna is turned - which makes this type of antenna perfect for digital television broadcast signals - even more so than when there were analog signals which it worked well for also. The newest Roadtrek's have a multi-directional antenna that just sits down on the roof surface and does not lift or turn. I will reserve my opinion about those antennas. I very much like the Winegard Sensar antenna on my 2011 Roadtrek.


Everyone with an RV that has a crank up roof antenna knows that you never drive with that antenna still cranked up into its upright position. Aside from potential damage to the antenna as the wind pushes against it and around it as you drive, it adds height to the RV and if you come to an overpass or a low hanging tree branch it is going to hit and rip it right off the roof. This is an RV "No-No!" 😭

But it happens!

So, what can you do to make sure this NEVER happens? Getting underway when leaving a campground, or wherever you have been set up for the night before, gets hectic! You may be on a schedule and have to get going. You may think you have gone through everything that needs to be done before you leave - and believe - "Oh yeah, of course I put the antenna down - I think! It must be down. Let's go!"  You might even wonder why all those other campers sitting outside their RVs as yo pass are yelling and waving at you! They are not trying to tell you to have a nice trip. They see that antenna up - and they know what is going to happen.

So - easy, easy, easy -

1, Get a sock. A white sock is most obvious but the color is up to you. (Socks with holes in the toe or heel are OK! 😉 )

2. When the antenna is down on the roof, put that sock over the crank handle that is on the ceiling of your RV.

3. Leave that sock there.

IF THE SOCK IS ON THE CRANK HANDLE THE ANTENNA IS DOWN!

4. When you are about to crank the antenna up, remove the sock.

5. Take the sock IMMEDIATELY over to the steering wheel and put the sock on the gear shift lever.

6. Leave  the sock there.

IF THE SOCK IS ON THE GEAR SHIFT LEVER THE ANTENNA IS UP!

7. ONLY WHEN YOU CRANK THE ANTENNA UP DO YOU PUT THE SOCK ON THE CRANK HANDLE.


SO SIMPLE - You are ready to start driving. You put the key in and turn it. The engine starts. You are about to start driving. You go to put the gear shift in Drive or Reverse and you FEEL SOCK. Even without looking, you now know that your roof antenna is UP! And if you just take that sock off the gear shift and start driving - Well!  You won't. You are going to go and crank up the antenna and put the sock back on the crank handle and then come back to the driver's seat and get on your way.