
The Propane Alarm is tested, simply, by using a butane cigarette lighter. The lighter is held up in front of the alarm unit and pointing the gas toward the vent opening in the alarm, the button on the back of the lighter is pushed without flicking on the ignition wheel. The gas goes into the alarm and the alarm starts to scream - loudly and continuously with the red LED flashing - until you clear the air of gas by opening a window and turning on the ceiling van to suck all the gas out of the van - and the alarm goes silent. This alarm is hardwired into the Roadtrek's coach 12 volt battery run electrical
system.

After that trip I tested the alarm with the butane lighter and it was silent and no red LED came on. The green power LED was lit. These units have a life span from about five to a few more years. Unlike the CO Detector that has an audible signal that the life of the alarm has expired, the brand unit that Roadtrek used for the Propane Detector had no such signal. I decided to wait for the Spring to replace it - as we would not be traveling in it again until then.
At some point after 2011, Roadtrek stopped using a standalone propane detector alarm and a standalone CO detector alarm (that is located under the cabinet on the passenger side over the bed), and installed a single combination Propane/CO Detectors Alarm - in the same place that the Propane Detector is installed in my 2011.
When it was time to order a replacement I looked up who made this unit and found that it was a company in Canada by the name of Electro Systems, Inc.. I did a search for the propane detector to match the same one in my Roadtrek and found only two places that it existed for sale. One was the manufacturer and the other was an online retailer also in Canada. I decided I would order it from the manufacturer. I am not going to provide the model number - and you will understand why as I go along here.
I ordered the propane alarm from the manufacturer's website. We had to pay through Paypal with a credit card. The money exchange rate was automatically handled and we paid about $15 shipping. It took two weeks to arrive.
The unit looked exactly like the unit installed in my Roadtrek. This is a flush mount unit. The cabinet wall that this is installed in has a three inch round hole cut into it to mount the propane detector alarm unit into and the wiring comes up from under the floor of the cabinet through a thin slot along the wall below the hole. At first the installation looked simple. Remove the screws that held the old unit to the wall outside the hole. It was not quite that simple as the screws were under the face plate of the detector and two clips hold the face plate to the unit. The two clips are both pushed toward each other at the same time (several inches apart) and the plate is supposed to come right off. With the two clips pushed nothing happened. It appeared that after 7 years either heat or age caused the plate to adhere closely to the the back of the unit. It took a thin and sharp edge of a metal paint scraper to get into the crack that was barely visible and pry the face plate off while also holding the clips together. Eventually it came off.
I removed the screws and opened the cabinet door to follow the wiring. It went down below the floor inside, not through the slit that was there for the wiring but along the edge of the floor. The wiring did not pull up. It moved a little and then moved toward the side just a bit more and then stopped.
 |
| Note in the photo that the original install by Roadtrek was at an angle - that it should not have been at. |
The wiring was not coming up and the connections were somewhere below. Looking around the floor edge in the cabinet it appeared that the floor panel might lift up and out. This cabinet also has a door on top that lifts up. Inside this cabinet is the interior water tank and a number of its electrical sensor connections above the floor. One must be very careful inside this cabinet to not damage this fresh water tank or the wiring connected to it which easily could be pulled off. I tried picking up the floor panel, found a few screws holding it down, removed those and it would move a little and then stop. This is all happening with me sitting cross leg in the narrow aisle between the cabinet I was working in and the cabinet on the floor on the other side.
I tried for quite some time to carefully remove the floor panel and then gave up when I realized that what was stopping it was the piano hinge that the front cabinet door opens out on. The inside of the hinge goes straight down to the floor all along this section of the floor and there was no way this floor board would come up without removing the hinge with a number of screws on the inside of the cabinet at the floor - where there is no room to turn even a slim screwdriver. No, I stopped there.
At this point I decided that I would cut the wire on the old detector unit right where it went into the back of the unit and attach a new wiring extending the length of the wiring that was under the floor. I would use end to end crimp connectors to do this. The instructions for the propane detector recommended these crimp connectors to attach the wiring of the detector to the 12 volt wiring of the RV. I had initially thought to attach the detector with the same plug and socket crimp connectors that I had used for the CO Detector 5 years ago when I had to replace that unit (see article). Since the instructions were so definite about the end to end connectors I used those instead.
So I added about 10 inches of wire - just to have extra - to the wiring that was cut from the old detector and I attached end to end crimp connectors to the end of the extension wires that would be attached to wires on the new propane detector. It was then that I discovered that the hole in the back of the unit was too small to fit the connectors through - and this was necessary as the face plate and "guts" of the unit had to fit into the back plate that is screwed into the cabinet to hold it in place and the hole would be too small to pass the connectors through. I decided to just drill that hole in the mounting case larger. Then I got the wires out from inside through the hole, connected the connectors to the unit wires and got it all back together again. This was all easy, if it were not for cramped legs while doing this. I thought I was done!
 |
| New install - using the same screw holes. You cans see the angle it is on from the original install. |
I had Meryl turn the battery switch on and I saw the green power light light up on the unit. It quickly flashed red once and there was a half beep and then silent. This was certainly not working like the old unit - nor was it working the way the instruction sheet said it should which described the familiar several beeps and flashing red LED throughout as it warmed up and self-tested. I was not happy.
I got the butane lighter and decided to test the detector. I sprayed gas into the detector as I had done with the old one and it sat there silent. I repeated spraying gas. Still silent. I did it a third time and in about ten minutes of waiting it suddenly started to blare the alarm. Was this how it worked? I was even more not happy.
We cleaned up and shut the Roadtrek down and decided to let it sit for another day. The next day was cool outside. This was all in the Spring which here did not warm up very much each day. It was about 50 degrees F. I went into the RT - turned on the battery switch - no beeps, no red LED - only the green power LED was lit. Not only was I not happy. Meryl was also not happy. We both have never been fans of natural gas or propane. We don't use propane often in the Roadtrek - only when really necessary - but the tank still hangs under the back of the chassis - under the bed inside the Roadtrek - and we take the propane detector alarm very seriously. I tried a few more times on different days. I also contacted the manufacturer which turns out - at least in any contact - to be a one man operation. I was told that perhaps the detector does not need to warm up. I questioned this because the temp inside and outside the RT was below 50 degrees most days at this point. I was told it was fine. I tested it a few more times with butane (also recommended in the written instructions with the propane detector). Each time it would take awhile for the alarm to go off. Meryl wanted it out! I emailed again - asking about why the unit does not beep when it is first turned on - per the instructions - and per our experience with the same unit for the past seven years. I was told that the beeps were silenced at start up (regardless of what the written instructions say) because they were annoying. I then asked then why no red LED either at start up. There was no answer for this. Then Meryl got involved in the emails because she wanted this unit out and returned. She did not want another (and I agreed) as this unit could not be trusted. That no one sells this unit any longer other than the manufacturer and one retailer and that Roadtrek stopped using this unit just after my 2011, should have told me something. Eventually he said to send it back (at my expense) and he would refund the purchase price. I pulled the unit out and sent it back.
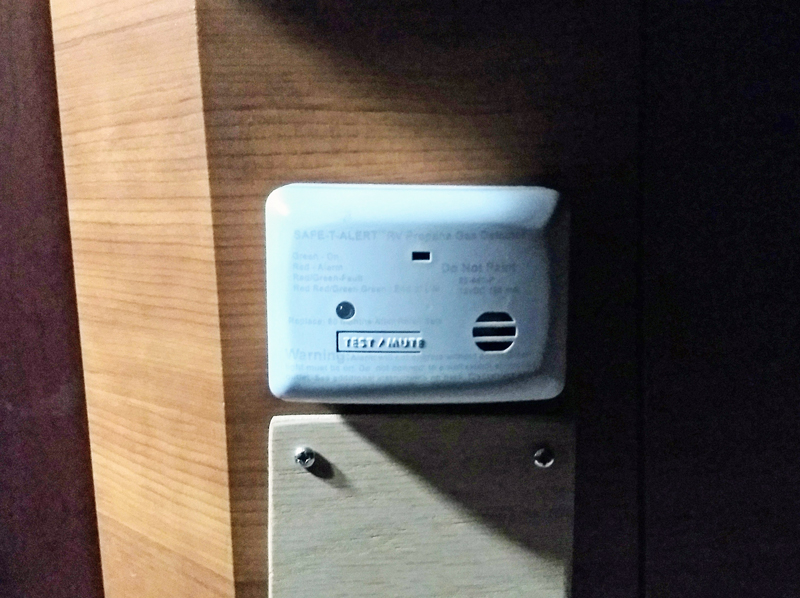
I now had to find a replacement. The new combo unit that Roadtrek uses is made by the same company that makes the CO Detector that RT used in my 2011, Safe-T-Alert. Looking at that combo model I would have had to cut a new rectangular hole into the cabinet and with the large round hole already there this was not going to work out too well. Plus I had just replaced the CO Detector which had aged out at five years. I looked to see what propane detectors that Safe-T-Alert has and there is a "mini" unit that is just a propane detector alarm that was a surface mount. This meant that it would stick out some into the aisle - which is generally under the bed when we travel so as long as storage under the bed did not interfere with it, it would work.
The model of this Safe-T-Alert mini propane detector is MTI Industries 20-441-P-WT Safe T Alert 20 Series Propane/LP Gas Alarm - White. I made sure that it had all the same specs as the larger units. It does. There was nothing different about it other than size from the full size propane detectors from Safe-T-Alert. I was able to find it on Walmart.com with free shipping directly to the local Walmart where I could pick it up when it arrived and I had it in less than a week. And the price was decent - and less than the original.
I closed the hole in the cabinet with a quarter inch thick oak plywood board - furniture grade cut to a a square to cover the hole. I wanted the new propane detector mounted just above this and drilled a half inch hole into the cabinet so that the wiring would easily pass through. This unit is easily detachable from a mounting bracket that is what is screwed to the wall and the unit needs to be no higher than a specified height above the floor - which was no problem with the location I was mounting it. In the future when this needs to be replaced (the instructions say every five years - and this unit will sound an alarm when it is aging out - just as the CO detector from this company does) all that is necessary it to pull the detector up out of the snug mounting bracket, cut the wires at the crimp connector that I used for this as well (the wiring that I had done all remained in place), attach the new unit's wires to the wire in the cabinet and done! I tucked all of the wires down the slot that is below this in the floor - and it all fit down and comes up easily because of the extended wire I added. The original wiring still comes up through the slit between the floor and the wall - and still does not budge.

I think you should also know the rest of the story - because I always have told it like it is. After over a month after the returned propane detector was received at the manufacturer, we still had not received a refund. We had asked for our credit card account to be credited back through Paypal - a simple process that we have done ourselves for returns in our own small business. We tried emailing - no response. An email from us saying that if we did not hear back we would file a claim with the credit card company finally got a response but when I asked for the refund to be processed by him back ot our credit card, I was told that he could not do that - I had to. ??? I had to process my own refund to my credit card? I answered that the only way I could do that would be detrimental to his account - requesting a charge back on a disputed purchase - and I did not really want to do that to him. I got no reply back and we waited another two weeks and contacted the credit card company and Paypal. We did finally get the credit approved, processed, and closed - just a week ago. This went on from May.
If you need a new propane detector for your 2011 or previous Roadtrek do not get the same as is there. The Safe-T-Alert mini model works well- does everything it is supposed to - it starts and flashes for a specified length of time showing it is self-testing (just as their CO Detectors do) and goes steady green LED once it is ready. I have tested it with butane from the lighter and it immediately went off - very loudly! You will not sleep through this if there is a propane leak. Once the air was clear it resets itself and is ready again.
Things should be easier than they are. Sometimes with Roadtrek things that should be simple - like replacing parts that wear out every five years are not. The CO Detector wiring was also not accessible. This wiring is not accessible. Perhaps it is done in an effort to make business for the dealer shops.
Priceless advice. I ended up installing mine covering the original hole, just vertically. LOVE your site!
ReplyDeleteThank you - ordering one as we speak
ReplyDeleteThanks for sharing your experience. I’m looking at replacing my propane detector soon.
ReplyDeleteI installed the flush mounted SafeTAlert after the one in the 2012 RT 190 P went bad and notified us by a persistent beep. That lasted one year to the month and I've ordered a new one on Amazon.
ReplyDeleteThe propane alarm should last at least five years - if not longer. You should contact SafeTAlert and let them know. It had to have been defective to go bad in just a year.
DeleteHow does the detector come out. My repair shop cut the 12v line closest to the detector and it needs to be taken out and reconnect the power. No screw holes from the front and there's no screw hole on the opposite side. I assume the front cover has to come off but what are the two plastic tabs on the middle of the unit for? buttons or tab to hold the front cover from falling out? Anyone know?
ReplyDeleteStart reading at paragraph 7 and on to see how I had to take the old propane detector out - and then what I had to do with the wiring to install the new detector.
Delete