Roadtrek

Roadtrek
Showing posts with label checklist. Show all posts

Wednesday, June 22, 2016

Routine Maintenance

One of our readers emailed and said that they looked for a list of routine maintenance items on our site for their Roadtrek and could not find anything. She was correct - I have never put them all in one place - though they are scattered throughout various articles on this site. I responded with a detailed list and I am going to share that here with all of you. I will note on each if it does not apply to all Roadtreks - and some of these apply to all RVs and travel trailers. There is no particular order to these maintenance items. So here they are -

Routine Maintenance


1. For those with a Onan generator -> Change the oil in the generator every 150 hours or at least once every year. It takes one quart of oil.  In 2012 Onan came out with a new model with a few changes that don't apply to Onan generators from 2011 and earlier, and Roadtrek used the new one in later models - so the manual on their website now is for the newer model. If you are looking for the Onan manual for the older model - Microlite 2800 KV do a search on Google and it is out there. The manual shows how to change the oil.  There is a maintenance schedule in there plus diagrams and how tos. The new and the old manual have the same maintenance schedule and the oil is changed exactly the same way. You can do this yourself or have an RV service center do it. It involves being upside down under the van and doing most of the job by feel. You will need some way to get the oil from the bottle to the dipstick hole. There is a pump that attaches to oil bottles sold in marine stores and Walmart's fishing/marine aisle also has this. Connect the pump to the oil bottle, put the tube into the dipstick hole - after draining all of the oil and closing the drain plug securely - and pump. For the KV - one quart of oil only. For the newer model - up to 20 ounces of oil. Type of oil varies by usage - see the manual.

2. Again for Onan owners - Run the generator for two hours under half load once every month. Half load is anything that uses 1400 or more watts. The A/C while cooling does this. The A/C/Heat Pump while heating does this. (For both I turn the thermostat up or down to keep the compressor running.) When it gets too cold for the heat pump - 40 dF outside or colder - I bring in a house ceramic electric heater and plug that in and run it. So that I don't forget, it is on my calendar on my phone and computer with a reminder alarm for the 15th of every month.

3. Charge the batteries by plugging into shore power at least once a month - and keep an eye on battery level in case it falls to two LEDs and if so plug in then. This past year I started going to a twice a month schedule because the batteries were not making it through the month. The cold weather will drain the batteries faster even without use. I had set the schedule on my calendar for the 28th of every month and now I have added the 13th of every month. Plug in to shore power to charge. (Of course, if we are traveling on any of these days I don't do this - it is getting charged by driving and being plugged in every night at the campground.)  If you don't have AGM coach batteries which are maintenance free - always check the fluid level of deep cycle wet cell RV batteries regularly to make sure charging has not boiled the fluid too low or away completely. Always keep an eye on the battery level and charge when needed. You never wan to allow the batteries to go below half charge. If they are getting low, charge them! It is easy - plug in, run the generator, or drive (drive with a Roadtrek after 2005).

4. If you have a crank up, directional roof television antenna - Lubricate the crank up antenna once each year. Here is an article on how to do that (hard part is getting up to the antenna (I don't like heights and I need a big ladder to reach - never get on the roof or put any weight on it that is not evenly distributed - best to not put any weight on the roof) -  http://roadtrek190popular.blogspot.com/2013/01/lubricating-crank-up-roadtrek-tv-antenna.html

5. Lubricate the black tank and grey tank seals by pouring a half cup of plain mineral oil (found in pharmacies) down the toilet and down the sink. With the sink, follow with some water to push it past the drain trap. The next time you dump the tanks you will be lubricating the macerator also (if you have one) with the oil that is coming through from the tanks. Do this about three times during a season. I do this before the first trip. Then during a mid-summer trip and then again during a Fall trip.

6. Change the van oil either per what the percentage is on the van info panel says on the dash or at least once a year. Also rotate the tires if you feel it is necessary. I have a mechanic that changes the van oil. His garage is not tall enough to put the van up on a lift so he does the oil change and the tire rotation outside with the van put up on floor jacks. He has been really nice about doing this for me and we always wait for a dry day. We do this as soon as we can after we dewinterize. He also does the New York State vehicle inspection at the same time.

7. Winterize in late October/early November or as soon as it seems that there will be nights at 28 dF or below and days no longer in the upper 40's, low 50's. See my various articles on how to do this. Flush the hot water tank with a flush wand after you drain it in this process and also check the condition of the anode rod. Change the rod if necessary. When it gets to the thickness of a pencil or thinner, change it!

8. Dewinterize as soon as you believe there will no longer be any freezing weather. Watch the temps closely. I was going to do this in March when we were getting some really warm days and Meryl said not to - and good thing as we had two snows and a few freezes after that. We did it in late April. See my articles about how to do this.  Sanitize the tanks per my instructions when you do this. Sanitize anytime when you feel the water in the tanks is "funky".

9. Before every trip check the air pressure in the tires. The rear of the 190 should always be 80 in both tires. The fronts can vary between 50 and 65. I was told by Roadtrek to change the front psi if I wanted to improve the ride. They said start at 50, drive and see how it feels on the road, then increase in steps of 5 psi and test drive. Stop when the ride feels the best. They said never go over 65 in the front as the ride starts to worsen after that.  I like the fronts at 60. Make sure you have a tire pressure gauge that goes above 80 psi - car ones don't. I use a gauge and then compare to the dash tire readings. And also if you want to carry a tire compressor get one that goes to 120 psi so that it will not work so hard to put air in the tires. If you get a 12 volt one, always plug into the accessories socket in the dash with the engine running. Your tire psi may be different. Check with Roadtrek for your year and model or go by the sticker on the door frame if there is one from Roadtrek. Don't forget to check the spare tire. I keep the spare at 80 psi - easier to take out air for mounting on front than putting in air to mount on a rear wheel.

10. If you are not driving the Roadtrek during the winter, start the engine at least once every two weeks and let it run for a half hour to an hour.

11. At the end of my last trip for the year, I put an ethanol treatment into the van gas tank. Not for the van but for the generator. This gas and treatment will be used by the generator for all of the exercises during the winter months and into the Spring, cleaning the generator of any deposits. I use something called Lucas Ethanol Treatment. Some use Seafoam and some use Stabil. I like the Lucas because one bottle lasts two years - only need half a bottle for the Chevy Express size gas tank. I buy it at Walmart - each of these is sold at Walmart or any auto chain store.

12. After every time I dump the tanks, I put one gallon of clean water into the black tank down the toilet and then add tank chemical. I use Camco TST concentrate that has a waste digester, a deodorizer and a lube. There are many different ones other there - use any of your choice. Water is the most important thing. Always use a lot of water for the black tank. Flush solids with a good flush of a lot of water. If you put a lot of water in the black tank you should never have a problem with the macerator or even with a gravity system. Also dump when the tank is at least 2/3 full. If you are not sure (my black tank monitor has never worked) pour water down the toilet until you see the water coming up in the toilet drain pipe when the flap is open. That means the black tank is FULL. Then dump. Dump black tank first and then grey tank (which cleans out the hose).

13. You have a fire extinguisher in your Roadtrek (or RV). There is a dial on that fire extinguisher. Make sure that the arrow is fully in the good range. You don't want to find out too late that it will not work. If it is in the red, you can get it recharged or replace it.

There is a Baker's dozen. If I think of more or realize that I have forgotten something that I do, I will add it to this list in an addendum.  Seems like there should be more - and I have not gone into things like cleaning, washing, tightening screws and nuts that come loose from the vibrations of driving (just keep an eye out for those), etc.

Wednesday, July 10, 2013

ANATOMY OF A TRIP Part 1


This article is an exercise in presenting a trip in the Roadtrek in a different way and it is also being written in a different way which I will not reveal until the end. We are about to undertake a road trek in our Roadtrek. I am going to take you though this trip with us day by day from preparation to departure to return. I will present the mundane and not always interesting things involved in a trip in the Roadtrek. You will get rather the things that happen on some and all trips day by day. Bear with me and you will learn about what you may also need to do when traveling in your Roadtrek.  As I write this at this moment the trip has not yet taken place. Each day after it occurs will be noted. Look upon this as a “Captain’s Log”.

Reservations were made for this trip one year ago - yes, one year ago as this trip takes place over the week of Fourth of July. When we were at this campground a year ago we were advised that if we wanted the same site or any reservation at all for the following year then we better make it right then. I did decide about a month before the trip to increase the trip by a day at the beginning. The campground did have a site but not the site that we had reserved for the rest of the trip. This was not a problem. We would just move the next day into the other site. I made the reservation. The destination for this trip is Lancaster, PA where I have spent the Fourth of July for almost every year for the last 50 or so years. Lancaster is a home away from home for me and the Roadtrek makes it even more so. The trip will last four nights and five days.

Many look at the Roadtrek and feel that you can just take off at any time- and for some this is true, but we don't keep it ready to go at a moment’s notice. There are things in the house that we need with us that we cannot keep duplicated in the Roadtrek. There are many things that we do have that are always kept in it. It does take us a bit of time to prepare for a trip.

TRIP DAY minus 5 Thursday:

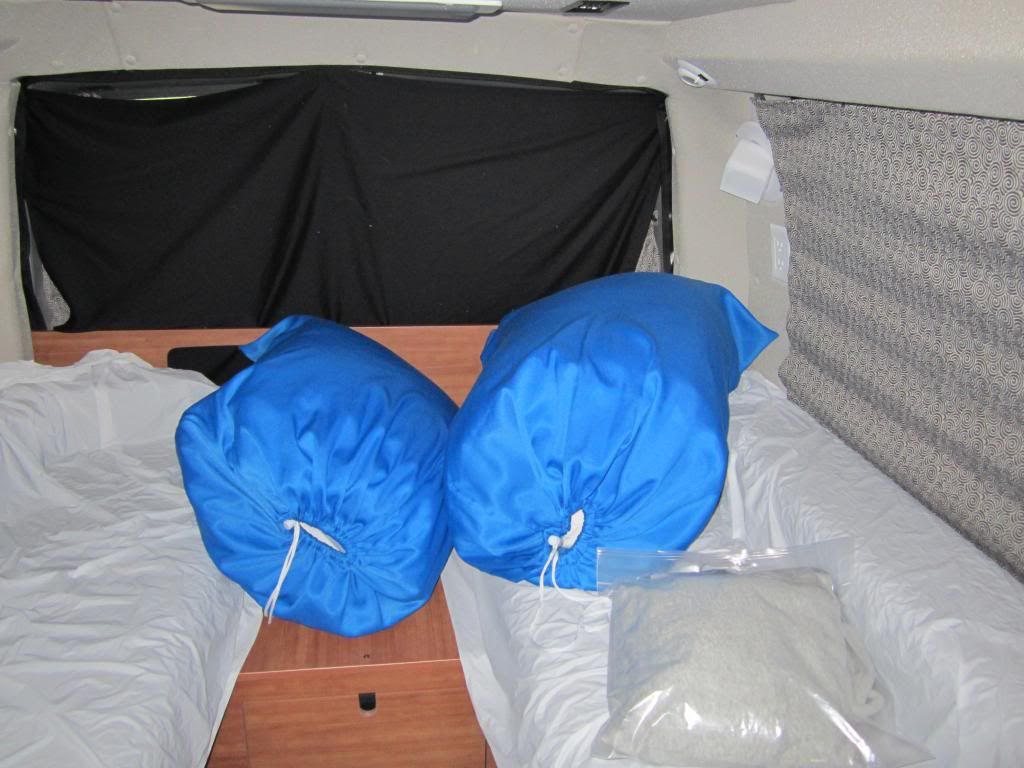
The weather reports for the trip week are not good. As it was this week every day, next week is to be scattered thunderstorms. So far this week we only saw brief showers on Monday. Perhaps next week will be the same. In anticipation of possible rain, Meryl decided to bring some of the bedding items that we had moved into the house after the last trip into the Roadtrek to avoid having wet pillows. These were taken out so that they would not be in the way when we did some work inside the Roadtrek during the month.
 

We store the pillows and blankets in large laundry bags between trips. These bags usually sit on the seat cushions in the back. 
We also stopped the mail and newspaper for next week. Meryl printed out her check lists for preparing for a trip. This is a list with all the do not forgets on it and it includes all of the things that need to be done when we return. She crosses each item off after it is done and before we leave the house for the trip it must be all crossed off except for the return section that is set off on the page. The list is left home and does not come with us. If as we walk out the door to leave, there is something not crossed off, we better go and get it.

TRIP DAY minus 4 Friday:

I checked the tire pressure using the dash tire monitor. Front tires are both 60 psi . This is where I like them to be. Rear tires are both 81 psi. The rear tires should be 80 but the dash monitor can be off by 2 psi so it is close enough. The tires are good to go.

We plugged into shore power at the house so that we could turn on the air conditioner so that Meryl could go inside an make the beds in the heat. It is better to make the beds before we leave as it takes awhile and it is easier to do this when you are not tired after a day of travel. Many with the power sofa bed just set up the bed each night and if using sleep sacks this is easy to do. We make the king bed with full sets of sheets.   The bed gets made up and stay made up for the entire trip.

The weather reports have not changed, but they not having gotten worse is a good thing. This is reminding me of our main vacation trip last summer where the weather reports were similar. 

END OF PART 1. PART 2 NEXT WEEK.
 

Wednesday, January 25, 2012

Living in the Roadtrek: CHECKLISTS

During these winter months when it is to cold to travel in the Roadtrek, I will write some more articles about what it is like to live in the Roadtrek on a trip. This article is about Checklists.

Most RVers use some form of checklist to make sure that things that need to be stowed away, shut down, closed up or not be left behind are put away and accounted for. There are a variety of methods that are used. Some use a paper checklist. Some use some type of reminder device. Airplanes have the same thing and use a red cloth tag that says "REMOVE BEFORE TAKE OFF" or "REMOVE BEFORE FLIGHT" that is hung from strategic parts of the plane and each must be taken off and accounted for before the plane takes off showing that the ground crew inspected and did whatever needs to be done at those points before the planes takes off. It is important for RVers to do the same thing before they get into their RV and go off on the road.

Now, you are going to say, "What is the big deal?" What do you have to check for anyway?" Well, the big deal comes when you have been in a campground for the night and you are hooked up to the water or electric box - drive away without remembering to dis-attach those connections and you have problems. Go off driving down the road with your TV antenna still upright, and you have problems. These and other similar problems are ones that you don't want to have and can be avoided with a simple and routine check - that must be done every time you are about to get in and start to drive off.

I thought about how to do this in our Roadtrek from before the day we picked it up. I had read about several things that others have done. I really want to use those red ribbon tags like the airplanes use - you can purchase smaller versions of them as souvenirs at air history museums, but I realized that this was going to be hard to attach to the places that they would need to be attached to and that it could get rather expensive. I liked the idea of something physical that had to be accounted for. Meryl, on the other hand, likes paper lists. One RVer uses large center spring hair clips and labels each one representing something that must be accounted for - sticks each on the steering wheel when the attachment is made or the night before leaving for items that must be checked. In this way, it is rather hard to drive with these large hair clips on the steering wheel and anyone still remaining is an obvious reminder that something has been forgotten. I could see, with all of the things that I foresaw needing to be checked and accounted for that there was not that much room on the steering wheel. Another RVer uses a sock to remind him that his TV antenna is still up. The sock is kept on the antenna crank handle which is on the inside on the ceiling of the Roadtrek when the antenna is down, when the antenna is up, the sock is moved to the gearshift handle of the van. It is hard to drive with a sock on the gearshift - so again, you are going to know that the antenna has not been put down. (Antennas are a common thing to be forgotten.) I liked all of the ideas and we decided to make a combination of them in our own way.

What is worth checking, is worth checking twice. Our two systems are a double check and believe me, even with these there have been a few almost forgotten things that we were forgetting on several occasions. I liked the sock idea so much that it is a third check on the antenna being down. Drive with the antenna up and you can damage the antenna, hit what should be an OK height overpass unless the antenna is sticking up, and get a lot of laughs from everyone in the campground that you pass - who will all be shouting that your antenna is up!

Here is Meryl's paper checklist:

This was created with Excel. Any spreadsheet software will work and there are some free office packages legitimately available on the Internet. Creating one this way makes it easy to modify and easy to print out. We print out copies for more than the number of days that we plan to be away. You need one every morning. What you see included on the list is fairly obvious -and you will notice what comes first on the list. You might want to copy all of this or modify it to your own needs of things to absolutely remember The rear curtain refers to un-attaching a security curtain that Meryl made for the Roadtrek. I will talk about that specifically in another article to come. Return the bench refers to a small stool that we have if we need to sit instead of bending down to do something. That gets stored inside the rear cargo doors and is easy to forget. Secure the TV is to make sure the TV is locked down on its brackets so that it will not move while the Roadtrek is in motion. We added several items after our first winter trip because when we made up the list it was during the summer and the furnace never crossed our minds.

Before we take off each morning Meryl goes through this list and checks things off as we do them - unhook the electric cable from the campground outlet box - check, turn the water pump off - check, and all the way down the list until everything has a check mark next to it.

This is Meryl's system. I have my own and pretty much mine duplicates hers. While it is possible that we could drive off if something was missed on the paper list, with my system, there is an physical reminder.

As one of my many creative talents (self-plug - hey, if you don't compliment yourself, who is going to do it?), I am a leather worker. I decided to take the idea of the hair clips and the red airplane ribbons and create leather straps that go on the steering wheel. Each leather strap has a snap button to secure it to the steering wheel and each is labeled with something that has to be checked. I must admit that I do not have all of the things in my system that Meryl has in hers - for example, I don't have a strap that says "bench" but I have all of the crucial items. When the item is accounted for the strap comes off the steering wheel. When we end the day at night and hook up at the campground each strap of something that is in use or connected goes onto the steering wheel. You can't drive away the next morning without seeing a strap that you forgot. Here is a photo of one of my straps:

Not my neatest work, but since they are for me and done in a bit of a rush before our first trip, they have well served their purpose and will continue to do so. It snaps easily on the steering wheel and they pretty much fill up the wheel when all are on. Of course, you only put the ones needed during that trip on - so some do stay in their Ziploc bag in the overhead drawer in the front of the Roadtrek. Those that are being used are kept in the front tray behind the cup holders. They go there when they come off to make it easier that night to have what will be needed close at hand. The easier you make this for yourself to do, the more you are likely to do it.

I take off the ones for the things that I have secured and checked in the morning and then ask Meryl one by one about the things that she has checked and secured. So how long does this all take. It becomes part of the process of unhooking in the morning so it is hard to say how long the double checking takes, but the whole unhooking process takes just ten or fifteen minutes at the most. The final checks inside do add about two minutes to the whole process. Of course, on some mornings when I am anxious to get underway, these two minutes can seem like forever. But in the end, the process is very worthwhile. It is best not to start to feel that the checklist is not necessary any longer because unhooking and hooking up has become routine. It is when something is routine that things are forgotten.