Roadtrek

Roadtrek
Showing posts with label table. Show all posts

Tuesday, June 7, 2022

THE VERSATILE POOL NOODLE AND ITS MANY USES IN A ROADTREK!

 I know - some of you are saying as you read this - "What the heck is a pool noodle?" Pool Noodles start showing up in stores as Summer approaches. It is a swimming float made of molded foam plastic. 

The photo is a section of pool noodle. They come in different colors and they come in a few diameters. The size I find that is best is two and a half inches in diameter. The length is six feet when you buy it. They cut easily with a razor blade knife. The center of the pool noodle is a hole. The easiest way to cut it is to insert the blade of the knife into the foam and turn the pool noodle holding the knife in place to cut all around to get a section of the length you want to use.

BUT WHAT AM I GOING TO USE IT FOR IN A ROADTREK?!

Here are things we have used a pool noodle for in our Roadtrek - and I often find new ways when I need to figure out what can I use to ?

A POOL NOODLE IN THE MICROWAVE:

As the Roadtrek drives along there is a lot of vibration inside from the tires on the road surface - bumps, and bounces as you go along. Inside the microwave as you all know is a glass plate that you put what you are going to cook in the microwave on top of. That glass plate just sits inside - and it bounces a lot. Aside from the noise sooner or later if you don't protect it, it is going to break. When we first got the Roadtrek Meryl made a cushioned cloth case for the plate using two quilted placemats and a towel that she stitched into a pouch and put a Velcro closure on to put the plate into. She also made a case for the wheeled plastic rack that sits under the plate to rotate the plate while cooking. She attached the two pouches and they go into the bottom of the microwave. But as we drove the plate was still bouncing around and there are enough noises inside the Roadtrek  to not need this one so we needed to fix the plate into place so that it would not move. What did we do? We used a section of pool noodle!

The section of noodle was cut just a little longer than the height from the plate to ceiling of the microwave. The pool noodle will push into itself and act like a spring when pushed into a space that is just slightly shorter than it.  Don't make it too long or you could push the inside of the top of the microwave too much. This works perfectly in our Roadtrek!

NOODLES IN THE FRIDGE - POOL NOODLES THAT IS!

We want to have cold soda with us when we are traveling, especially when the weather is going to be hot. Soda cans on the shelves in the door of our fridge in the Roadtrek rattle around  a lot. There had to be something that would prevent them from moving.  AS it happens - the two and a half inch diameter pool noodle is about the diameter of a soda can. I cut sections of pool noodle the height of a soda can.  We may fill a shelf with soda cans but as we go along and use up cans the shelf gets emptier - and the cans rattle more - so a  pool noodle section takes its place. And one always joins the cans from the start to stop them from moving along the shelf.

No more rattling cans!  There are other places in the fridge that you can do the same thing. 

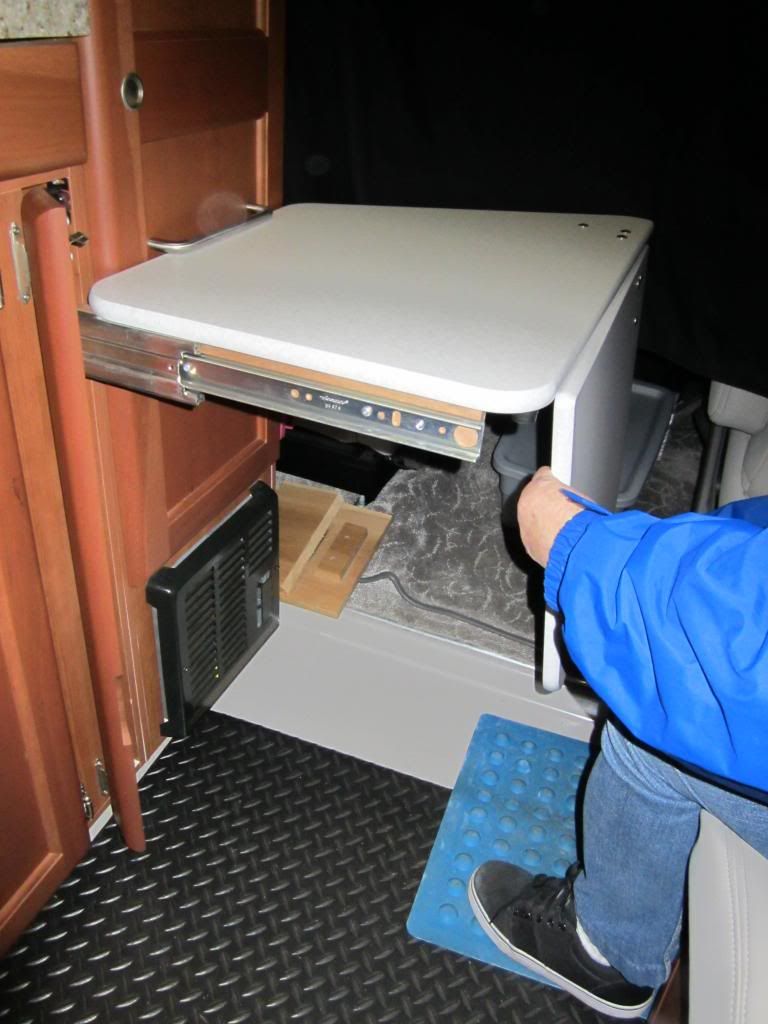
A POOL NOODLE TO STOP THE FRONT TABLE FROM BANGING INSIDE ITS CABINET:

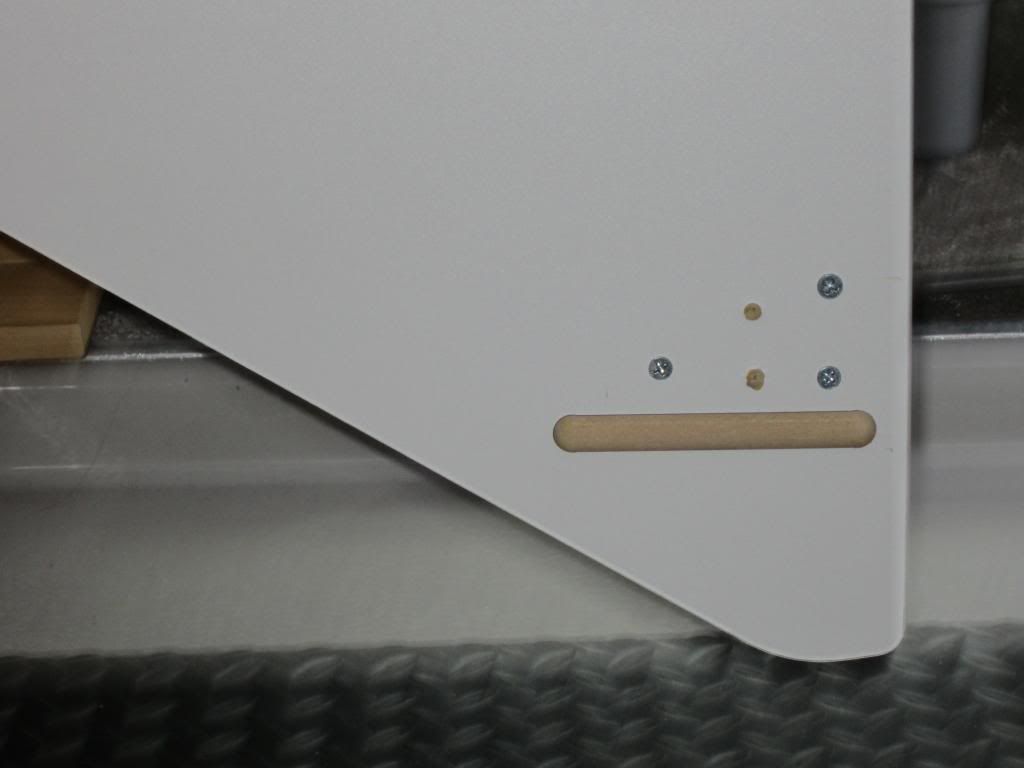
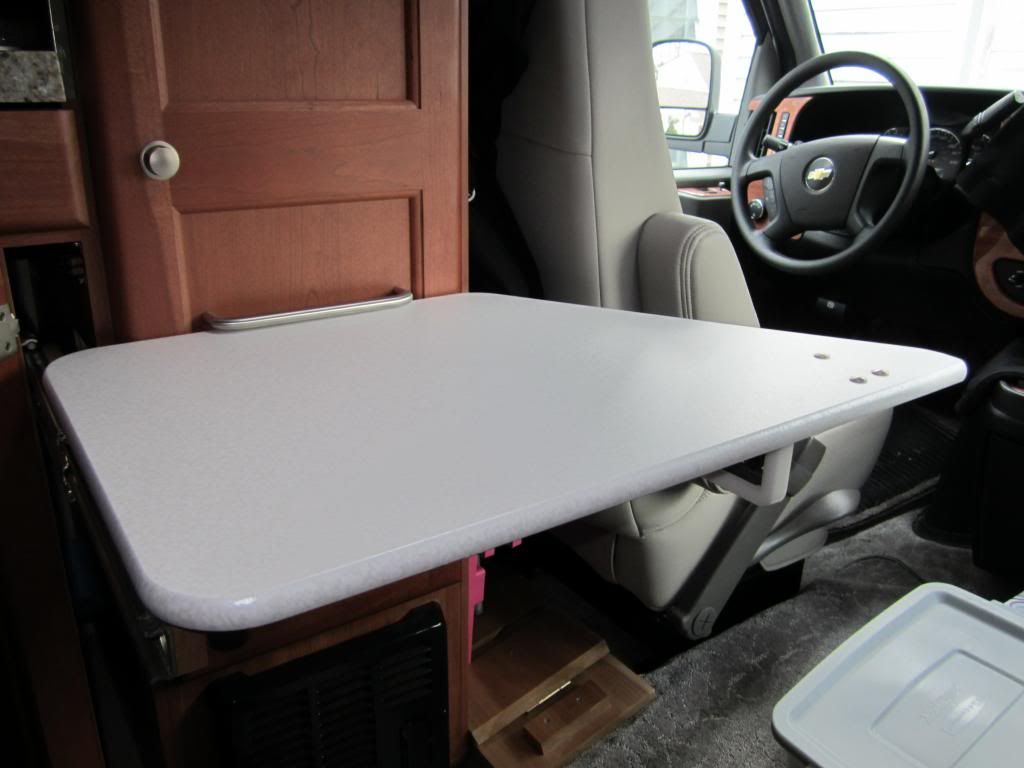
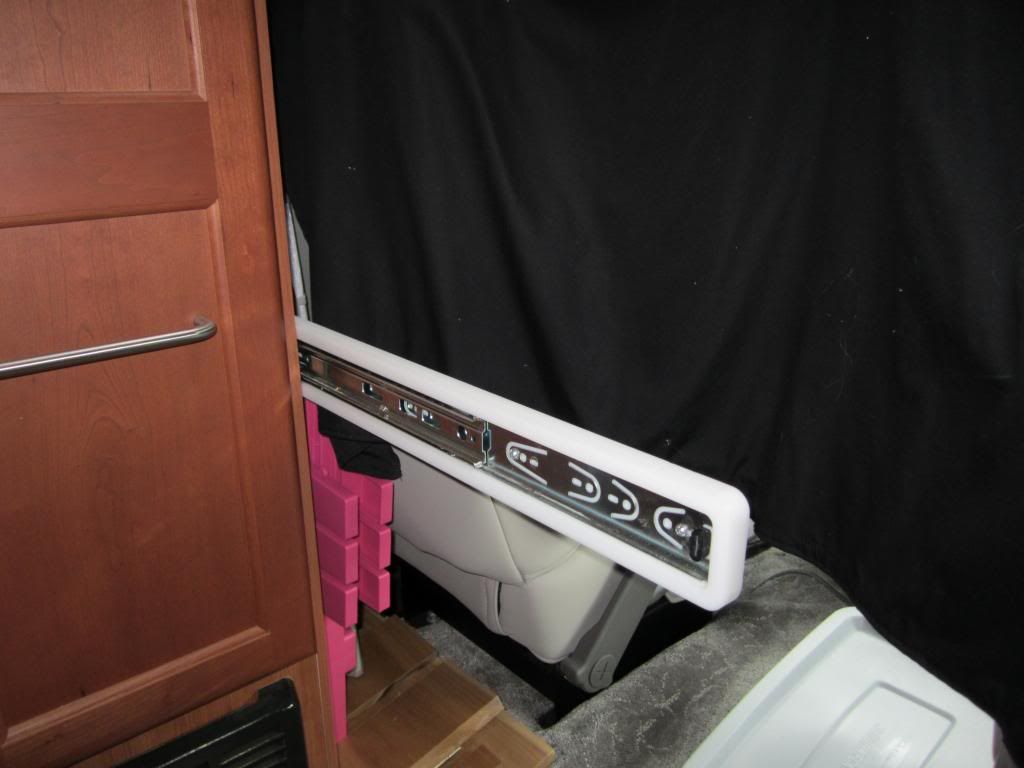
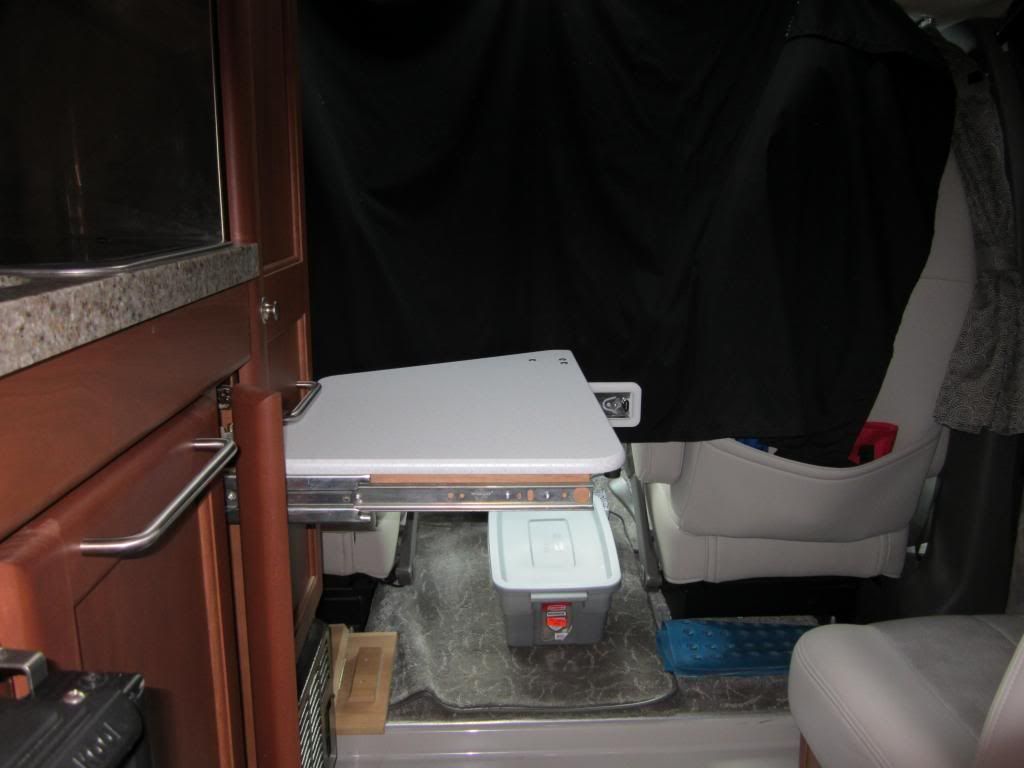
Some Roadtreks have table top that is placed on a leg and it stands in a post in a hole on the floor. Our 2011 Roadtrek 190 Popular has a front table that is on a sliding hinge that goes into a cabinet just a few inches wide and it pulls out when in use and sits on a support that slides out from the side of the wardrobe cabinet behind the driver's seat. The table on its hinge bangs and hits the two side walls inside the cabinet. Talk about loud! So a section of pool noodle to the rescue! 


There is also no latch on this door - never was since it came from the factory, and on sharp turns, before the noodle took its place standing guard, the table would hit the door and open it - sliding the table out, which at 60 miles an hour around a highway curve can become very exciting - the kind of excitement you don't want! No more since the pool noodle was pushed into place! 

MOVING OUTSIDE THE ROADTREK!

A POOL NOODLE WHEN THE MOUSE HOLE GOES BAD: 

New owners are going to say - "First its noodles, now its MOUSE HOLES?!" The mouse hole is an RV term for the hole between where the shore power cord is stored and brought outside without having to leave the outside storage cabinet open. It is a hole - with a snap cap on the outside, looks like a cartoon mouse hole in a wall BUT the name is twofold because since the cord is smaller than the opening of the hole to get the large 30 amp socket out with the cord, mice have enough room to walk on the power cord outside, up the cord to the "mouse hole" and walk right into the outside storage cabinet - and from there find their way inside your Roadtrek. (EEEK!)  When the Roadtrek comes from the factory the mouse hole unit comes with flaps to take care of that. Over time, however, the flaps fold out of place - no longer close together to keep anything out - and because Roadtrek in all its wonder, riveted everything instead of installing with screws (yeah - rivets don't come loose - but they also prevent easy repairs requiring drilling  out the rivets). Ours went bad. I thought so what. Nothing is coming in (and nothing has) BUT Meryl said we need to close this! I thought about it - and, of course, what better than a pool noodle!


When doing this you have to get the pool noodle around the power cord - there is no end to just slip it through. I sliced along one side into the center hole of the pool noodle. It just gets pulled open and slips around the cord and is moved into the mouse hole around the cord filling the hole. It has to be slid back - and taken off when pulling the cord back in - and you do not put the noodle on the cord to put in the mouse hole until all of the power cord you need is outside the Roadtrek. Again, the two and a half inch diameter pool noodle is perfect for this - it fits just right - and does need to be squeezed into the hole to fill all gaps and stay in place.

A POOL NOODLE FOR YOUR FRESH WATER HOSE:

When at a campground, the ground can get muddy and you never do know what dog or other animal just came by and added some biological moisture to where you will be dragging your fresh water hose as you stretch it out to empty it of any water when you put it away.  I just did not like the idea of the end of the hose dragging along the ground in the mud - and what else. So I cut a pool noodle section and when we are ready to get the water out of the hose as we wind it up to put it away, the pool noodle goes on the threaded end of the hose. Simple - and I know where the inside of the pool noodle touching the hose end has been. 

SO - there you have the versatile pool noodle - every RVer's friend! I am sure you will figure out other uses for them.  You may even want one to go swimming with! 


IF YOU WOULD LIKE TO CONTACT US TO ASK A QUESTION ABOUT ANYTHING YOU READ IN THIS ARTICLE PLEASE EMAIL US USING THE LINK IN THE RIGHT COLUMN OF THIS PAGE.


Wednesday, March 30, 2016

Table for One

There are two tables in my Roadtrek - one dining table for the back which fits in the rear aisle where the bed gets made up and one in the front that slides out of and flips up from a slim cabinet that is there just to hold this table. The rear table is held up by a post that sits in a hole in the floor. The front table is held up by a slide that comes out from the outside wall of the clothes closet behind the drivers seat and sits under the table to hold it. The rear table is useless and we have never used it. When it is in place it sits so close to one side of the aisle that anyone would want to sit on the cushion seat there does not fit - no matter how thin that person may be. One person could slide though on the other side and get to the cushion and platform that makes up the head of the bed but once there, if someone sits on the side where they just slid through, they are trapped back there unless the other person gets out to allow them through. Useless. We keep the bed made up all of the time that we are traveling and have never used the rear table. (We actually still carry it with us - I am not sure why - though it is better there than finding a place for it in the house to store it.)  The front table since I modified it to half its size is more usable and that is the table that we use if the two of us are having a meal inside the Roadtrek. Once open it is also not very convenient to move around. After we eat the table is folded back into its cabinet and stays there.

We found early on that there are times at night when one of us needs a table - either to use a laptop on or for whatever reason. We went out and looked at the usual folding tables and kept looking until we found one that is small, but usable, light in weight, folds and unfolds easily, and that we could find a convenient spot to keep it in for quick retrieval and use. We found one, that turns out to be a very common table to find, at a summer clearance sale at an Ace Hardware store. This is the table that we found -


The only color they had was pink but it was just what we were looking for and for the price it was not too hard to get used to it being pink.

The table folds flat and I keep it behind the driver's seat. It just happens that there is an indention between the cabinet wall and the door post of the van that this slides into perfectly.  To keep it from unfolding if it should fall out - which it has never done - I wrap an elastic strap that closes with Velcro around the table (found in Home Depot or Lowes with other Velcro utility products). 


The table is made of a molded plastic and opens very quickly and closes just as fast. It is made for the outdoors so it can be taken outside to use as well as being used inside the Roadtrek. It fits next to the third seat in the aisle or in front of the front seats swiveled around. If someone needs to get by, just pick it up and move it out of the way.


Since we purchased this table we have also seen it at Camping World - sold for RVs! They want more for it than it sells for in home stores and discount stores. They do have it in brown, green, and tan - so you don't have to get it in pink. During the Spring and Summer when stores start to get their garden and patio furniture and yard accessories, you will start to see these tables. They sell for between $12 and $15.00.

It comes in handy if you need a folding table and most important it is easy to store when storage space is at a premium.  Need a table for one (or a cozy two)  - take a look at this one.


Wednesday, February 27, 2013

Modifying the Front Table

The front table in the Roadtrek has changed over the years and from model to model. It has been a clover-leaf table supported by a leg that fits into a hole in the floor. It is a table on a tripod in some models. In the 2011 Roadtrek 190 Popular that front table is stored in its own thin cabinet and it slides out on a rail and is hinged to swing up into place supported by a poly support that slides out from the outside of the wardrobe behind the driver's seat. This table is a drop-leaf table hinged in the middle with a spring mechanism to keep it open.

The first time we opened the table I went to sit behind it in the driver's seat swiveled into lounge position. I could not get into the seat behind the table as it was too long. It was slightly easier to get in behind the table in the swiveled passenger seat - but still the seat was just too close. As it was the table was not very usable. To use it I would sit and Meryl would swing the table up and we would both hold it to open it. Then she could get into her seat. I was pretty much trapped. There had to be a better way.

I went out on the forums and learned that a number of people had this same feeling and there were a variety of modifications to the table - in addition to those who just did not use the built in table at all and used a folding table in its place. Examining the table, it did not look hard to remove the leaf which while reducing the table's size in half would make it much more usable to sit at. There are two hinges on the bottom of the table - one with the spring mechanism. I got a screwdriver and removed the screws - and nothing came apart. It was still solidly assembled. Back to the internet and I learned that the hinges are not only bolted on but also glued down.

So now what? I did not want to ruin the table trying to break the glue. I could see breaking the table with the glue. I then had a suggestion on a forum to use a paint scraper slid under the hinge and cut the glue bond.

What you will need -

1) a flexible paint scraper. Buy a cheap one.

2) a phillips head screw driver

3) a square head screw drive (for the usual RV Robertson head - square head - screws)

My table had a combination of both types of screws used on the hinges.

4) a hair dryer (a heat gun will be TOO hot for this job)

5) a mallet or small hammer

How to do it -

First open the table. You will be removing the fold down leaf and not the side of the table that slides on the slide attached to the inside of the cabinet.

Next remove all of the screws from the two leaf hinges on the side of the table that will REMAIN in the Roadtrek.

Now you are going to break the glue. I started with the plain hinge and not the spring hinge. I found quickly that if the hinge was heated with a hair dryer this task is much easier and the glue bond breaks much cleaner.

Slip the paint scraper against the edge of the hinge - on the top of leaf of the table that will remain.With the mallet or a light weight hammer, tap the top of the paint scraper's handle gently. The blade of the paint scrapper will start to move behind the hinge. Start at the point of this hinge. We will call this Hinge #1 and I will label it as such in the photos below. I found that a few taps actually broke the handle of my paint scrapper. I just proceeded by tapping the top of the blade once the handle broke off. If the blade is hard to move deeper behind the hinge heat the hinge with the hair dryer again. DO NOT tap so that the blade is moving into the table top. Just move it along straight down. Once the blade is mostly through the length of the hinge, heat the hinge again and give the handle of the scrapper (or  in my case since the handle broke off - the end of the blade) a slight twist and the hinge should come off. If it does not, just heat it again, and drive the blade a little deeper. In this way the hinge will come of. There will be glue residue left behind on the table bottom.

Once this first hinge comes off you need a partner to hold the table together where the hinge once was or you run the risk now of flexing the table top at the other hinge and the table top breaking. This partner is needed now for the rest of the removal.

Repeat now what you did on Hinge #1 on Hinge #2 - the spring hinge (which will be labeled in a photo below).  This hinge is heavier metal and will need more heat to penetrate than Hinge #2. Heat the blade of the scrapper also. Move it in behind the metal, again careful not to dig it into the table top. When you have most of the blade in give a twist and the bond should come apart and the hinge will be free. At this point your partner is supporting the table leaf you are removing. It is heavy and awkward.

The photos that I have taken were taken after the leaf was removed.

The table leaf removed. Here you see what the hinges look like.

Hinge # 1

Hinge #2 CLOSED
 (I kept the screws that I removed in the plastic bag attached)

Hinge #2 HALF OPEN - this is a very strong spring!

The three holes are where Hinge #1 was removed.
Above, you see the slide that moves the table out of the cabinet.

 The five holes are where Hinge #2 was removed. The routed groove is where the hinge spring slid.


You now have half the table as show above. In this photo you see it hanging from its slide/hinge from inside its storage cabinet. Above it you see the slide that supports the table. To open this table, first slide out the table and pick it up from the bottom to above where the slide support will be. Then slide out the slide support to hold the table securely up. Remember that you now have half the table that you started with and the slide support is made for the full size open table. This is no problem. Just slide the slide out enough now for the smaller table. It will securely stay in place.

Notice in the photos that there is no sign of glue residue. The glue was easy to remove with a little scrapping and alcohol. Household cleaner finished the job to make the table ready for use. 

 Here is a good shot of the table now open. Look to the right front corner and you see three circles. These are the outer caps to the screws that went through the hinge. I returned these caps and the screws that were opposite so that the table would have no holes through it left behind by the missing hinge.

SLIDE SUPPORT
That is all that there is to reducing this table to usable size. We find it most comfortable to eat at this table with one of us sitting in the passenger seat and the other in the third seat as both reach this table nicely. I have used the table while sitting in the driver's seat to work on the laptop. The driver's seat,  when turned around to face the rear of the van, does not slide back very far because of the steering wheel. It still can be a tight fit but with the table in half it is much easier now to get out around it. 

Now you may ask, why not just leave the table as it was, and just not open the leaf. The leaf would hang down and would get in the way. It was also awkward and very heavy with the leaf hanging down like this. 

Here are some shots of the table open. 


If you look into the cabinet in the photo above you will see a blue cylinder. Once the table is reduced to this size it is not half as wide as the cabinet is wide. Before with the full table there was some swing inside the cabinet when the van was moving. I cushioned that with a sponge. Now, with half the table gone there was a lot of movement inside. Once again, a swimming pool noodle float came in very handy. I cut a six inch length of the float and trimmed the foam flat on two sides to fit between the table and the wall of the cabinet. This was pushed into the cabinet when the table was inside - at first. I then glued the foam inside to hold it in place with some stick on adhesive. The foam now prevents any swing and any noise from the table while driving. Swimming pool noodle floats have many uses inside the Roadtrek to keep things from moving around and making noise! Buy them in the summer for a dollar!

ADDENDUM:  It was suggested that the table could be left with both leaves attached and just let the leaf that folds up hang down. We did not find this convenient - you may. Here is a photo of what that would look like (Meryl is holding the table in place where it would be if it was still attached and hanging down).