Roadtrek

Roadtrek
Showing posts with label mods. Show all posts

Wednesday, May 14, 2014

Adding a FIlter to the Toilet Water Line

Since our second season in the Roadtrek we have been experiencing an odd thing. When flushing the toilet - sometimes - chunks of a white and/or black chalk-like substance come through the water running into the toilet. These chunks look exactly like the mineral deposits that form in the hot water tank that are seen when the tank is flushed out. Where do these deposits form? No one really has had an answer to that. Since they look exactly like what is in the hot water tank one would wonder if these are those same minerals somehow finding their way from the hot water line to the cold water line but everyone says that this is impossible - and, yes, it does seem to be impossible. One thing that I do know is that they are not forming in the fresh water tanks and here is why I know that. The water comes from the fresh water tank(s) and first through a filter that you can see, open, and clean before the water passes through to the water pump. This protects the water pump from anything that might be in the water that would damage the inside of the pump. I have examined that filter many times and it has been perfectly clean. These chunks are originating after the water pump.  What is more interesting is that there are no such deposits coming through the sink faucet as the end of the faucet also has a small, mesh screen and that screen too has been clean.

This has caused all types of problems with water flow from the toilet. The water running through the toilet valve slows down and runs with little pressure. The valve that is part of the toilet that regulates the flow of water through the toilet when the flush pedal is pushed becomes clogged and on two occasions has broken - once requiring full replacement and once requiring a part to be replaced. Last summer during each trip there was a problem with the water flowing into the toilet - on our first trip the water ran slow. On the first night of our major trip of the summer the water in the toilet did not flow at all and we had to flush the toilet with a jug of water filled at the sink. Almost at the end of that trip we again saw the chunks come through into the toilet with the little water that has started flowing into the toilet and just before the end of that trip there was suddenly a rush of this debris out and the toilet water started flowing normally. The last trip of last season we had a water leak running from the bottom edge of the toilet where it meets the floor. This was the same leak that we had when the toilet valve broke the first time and it was the same thing again. Something had to be done about the water flowing into the toilet valve.

Some blame hard water for this. The thing is that we live in an area that is not known for hard water. Where in many parts of this country people regularly have water softening systems in their homes to treat their hard water, this is unknown in this area. Most of the water that goes into our fresh tanks is water from home. We always start each trip with full tanks and these last for all of our short trips and partway into our longer trips. Water from away from home has gone into the tanks but more water from home has gone into the fresh tanks than other water. I am not ruling out the idea of a hard water problem and have looked at portable water softening systems for RVs. 

All along I was thinking that there had to be a way to catch these chunks somewhere before the toilet valve. I thought that a filter just like the one before the water pump would do the job. This winter I started to put my idea into a plan and started researching. I would start with the company that makes the water filter that is used before the water pump in the Roadtrek and find out if that would work if placed on a water line somewhere along after the water pump. The company replied that it certainly could be used that way. I then started looking for that filter to purchase one and also what I would need to attach it to the Roadtrek water line leading into the toilet valve. The filter could be purchased at various websites but because of delivery problems at our house, we try to buy locally before having to order anything that needs to be shipped. I was able to find the exact same water filter that is on the Roadtrek at a boating store chain named West Marine. There was a store not far away and we went there to purchase it. Just an aside - marine stores have a lot of things that are also used on RVs and we had a great time looking through the entire store at things that could be used in our Roadtrek.

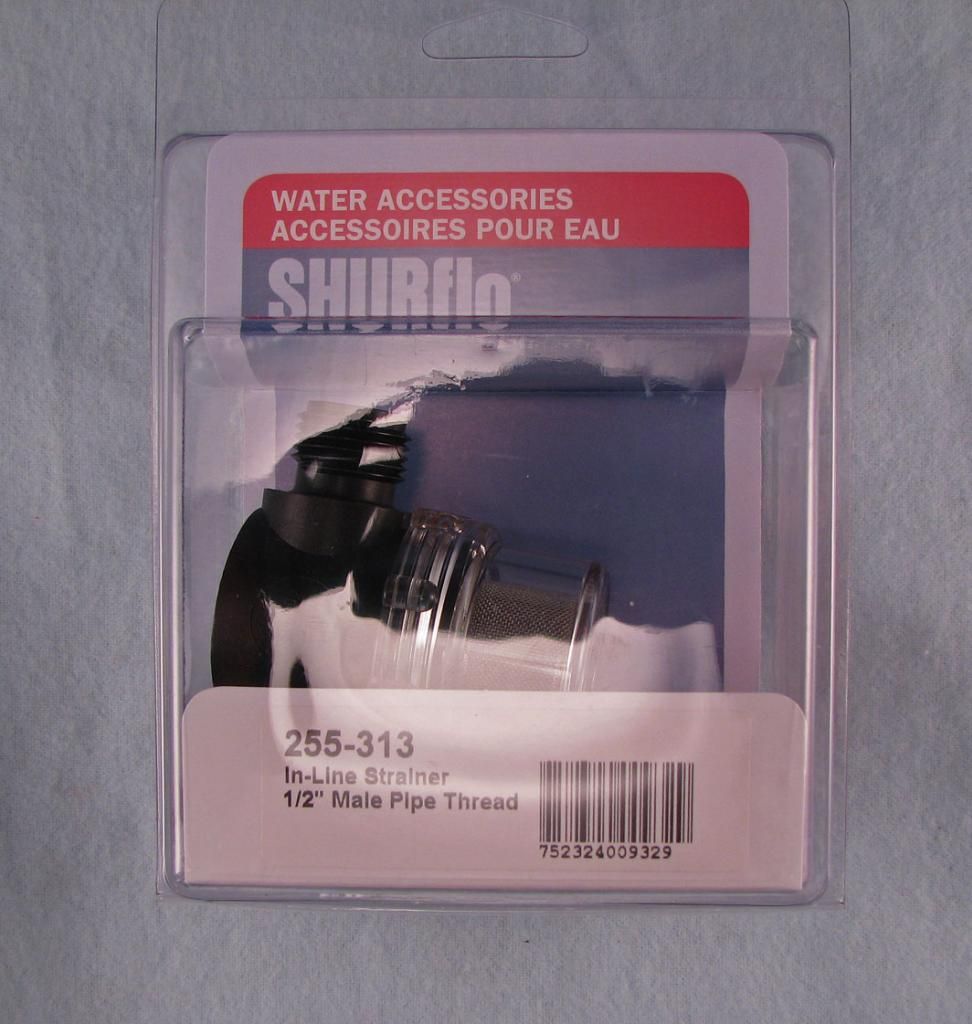
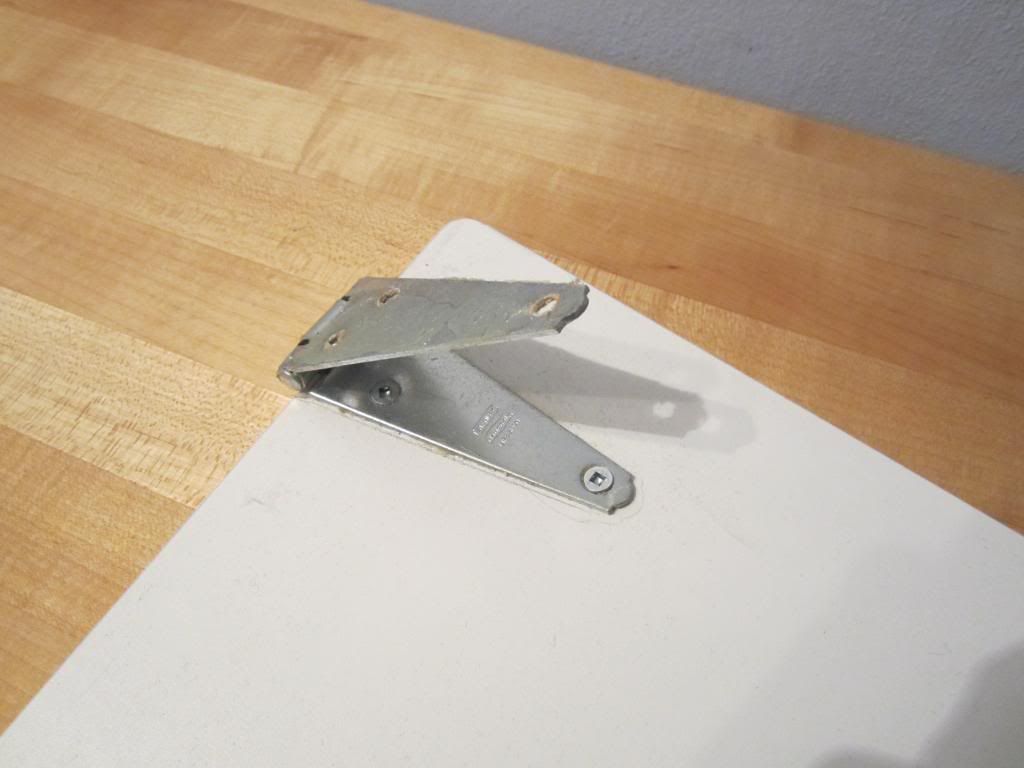
The filter - note the name and parts number


Now I needed to attach this into the water line going into the toilet valve. The plumbing in the Roadtrek is 1/2" pex pipe and fittings. This filter has 1/2" fittings. The water in the filter must flow in one direction only and that is marked on the side of the filter. You can just about make out the arrow right in the middle of the black base of the filter in the photo above. It flows from the male end into the female end. The connection coming from the water line is male. The connection on  the toilet valve is male. I did not want to cut into any pipes. I wanted to be able to put this in so that if for some reason it had to come out, it could come out easily. I found the following fittings -


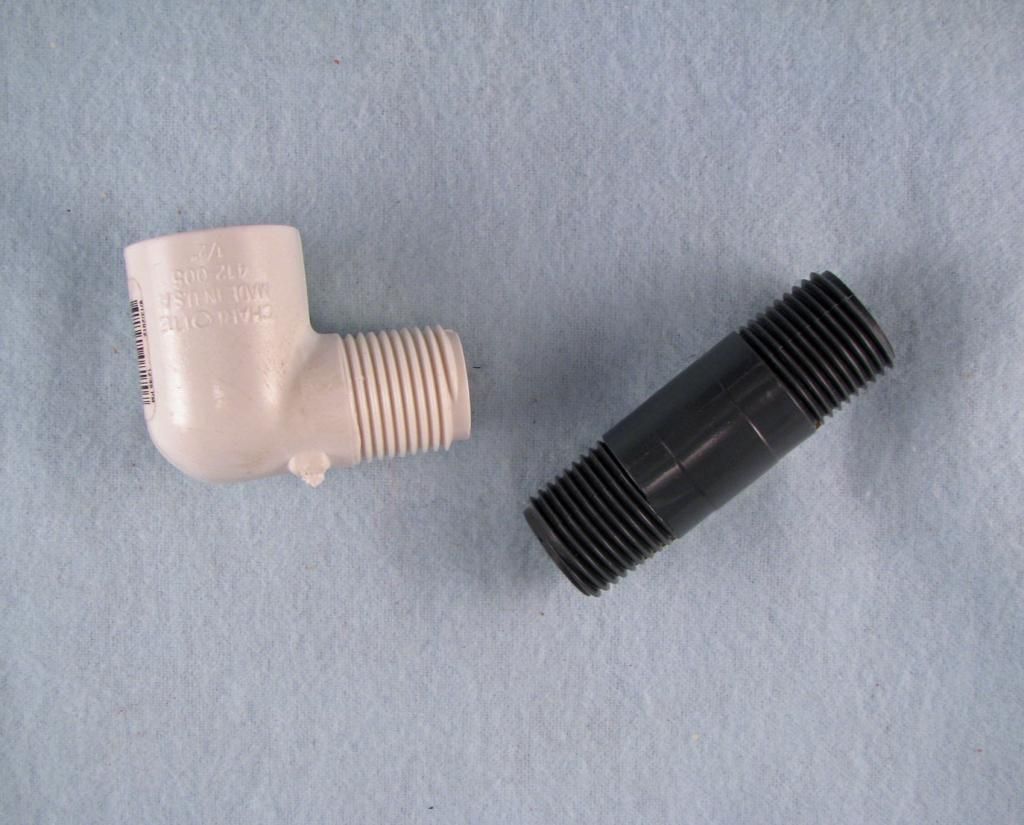
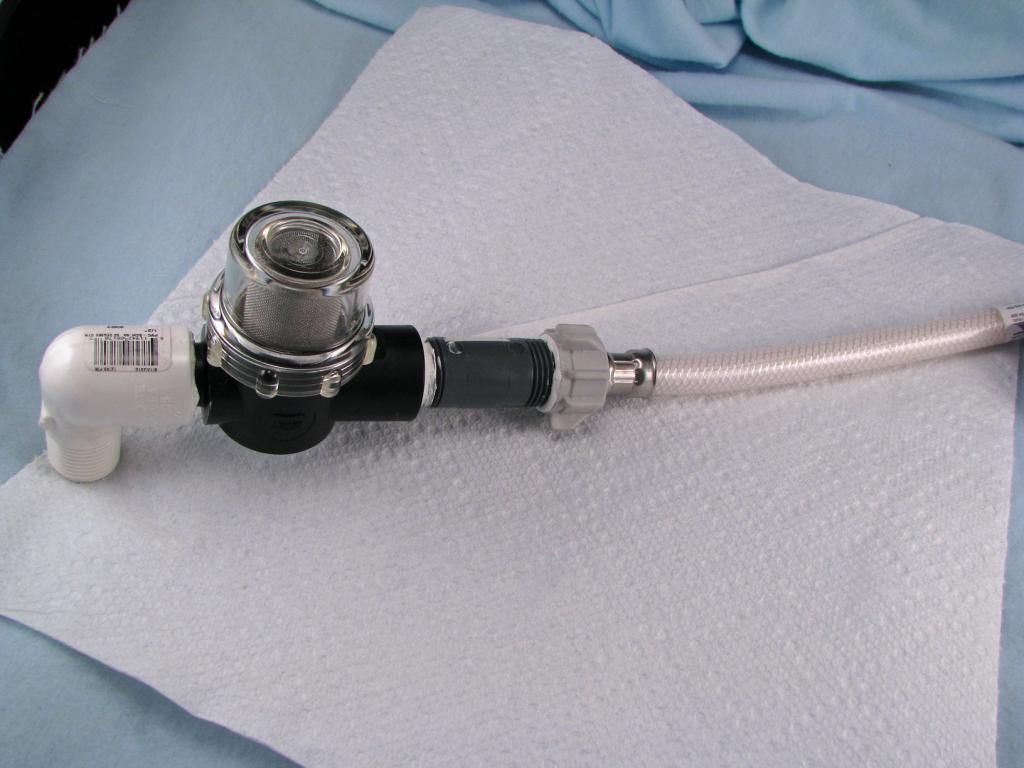
The fittings were not easy to find. Home Depot and Lowes did not have the 1/2" fittings as shown in the first photo above. I found them at Ace Hardware. Their larger stores seem to carry a bigger assortment of plumbing fittings than the big box stores. The water line is used for a sink and is common but only Lowes had this flexible PVC reinforced water line. The ones at Home Depot were all flex metal construction. This is the shortest available with 1/2 inch connectors and it is 12 inches long.

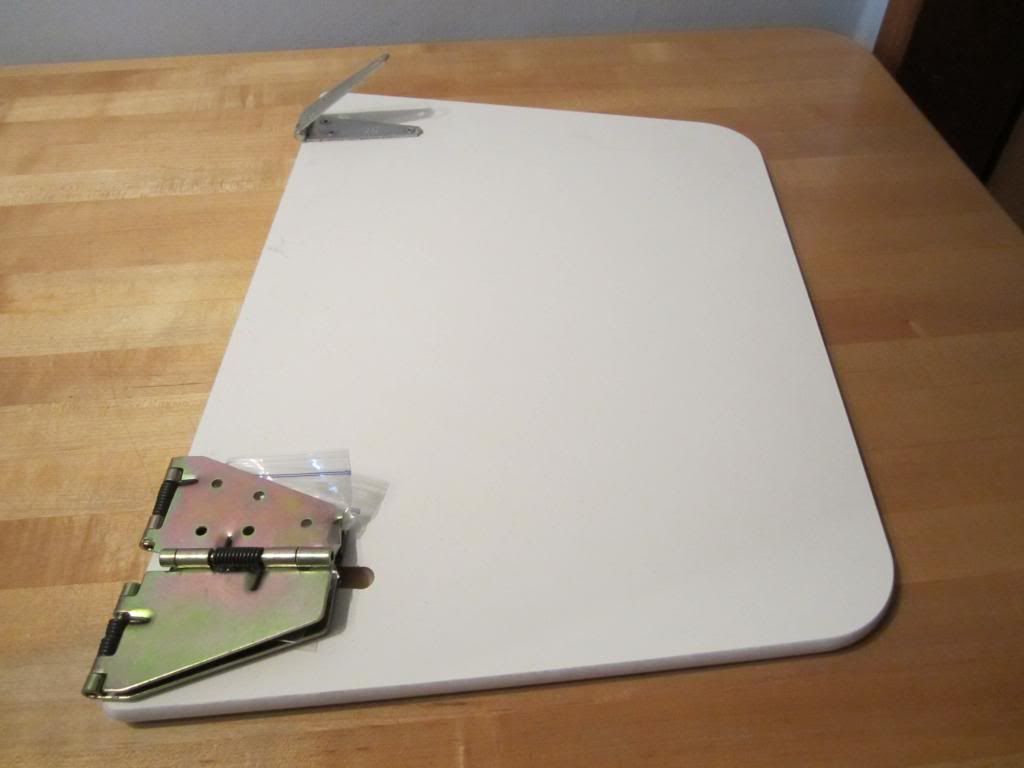
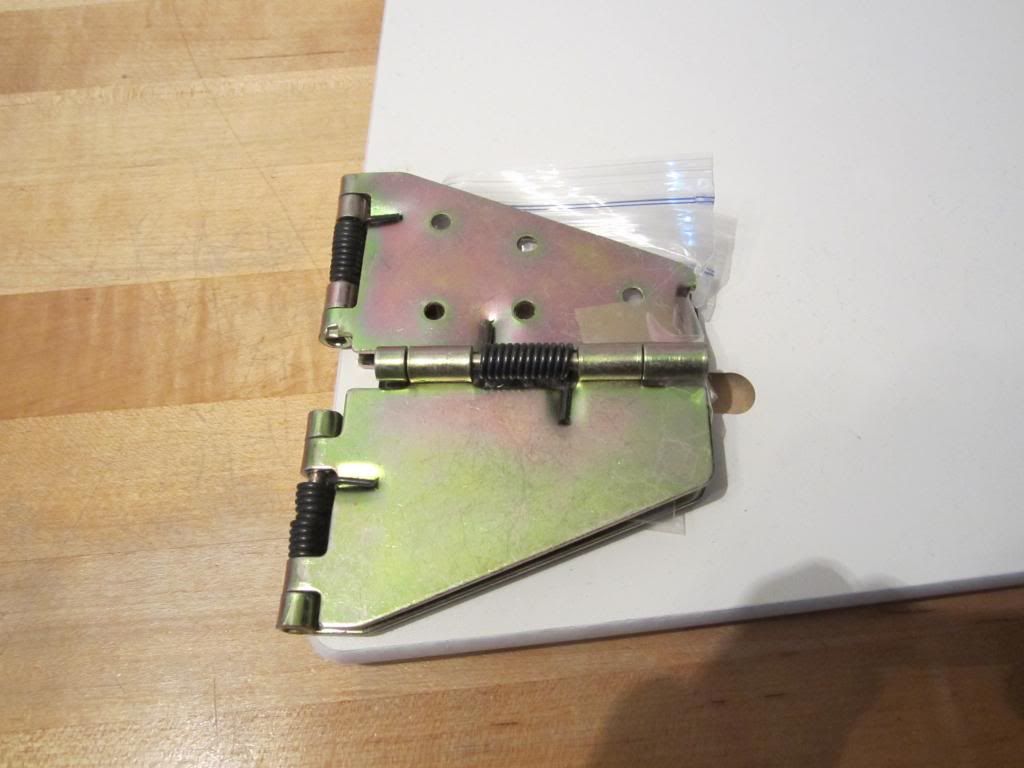
I proceeded to assemble what I wanted to install into the Roadtrek.


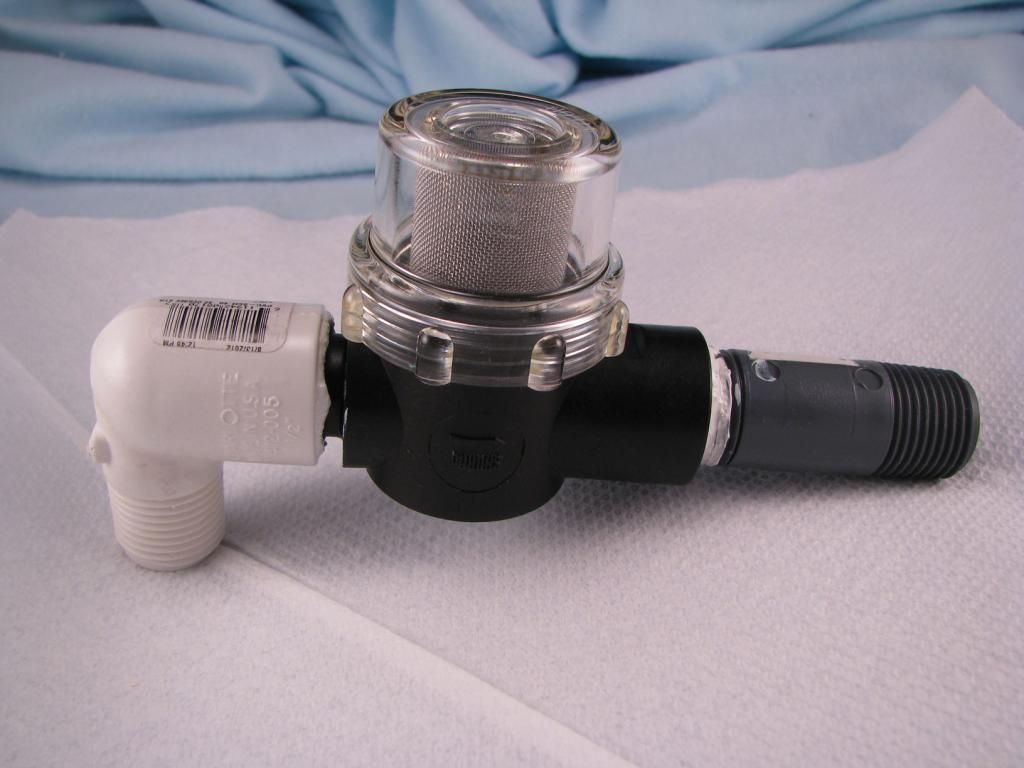
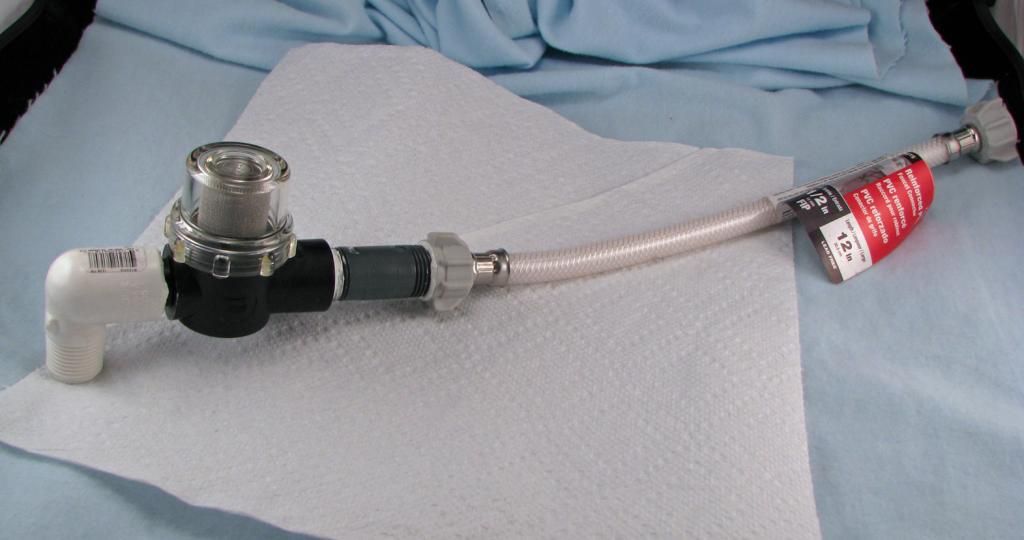
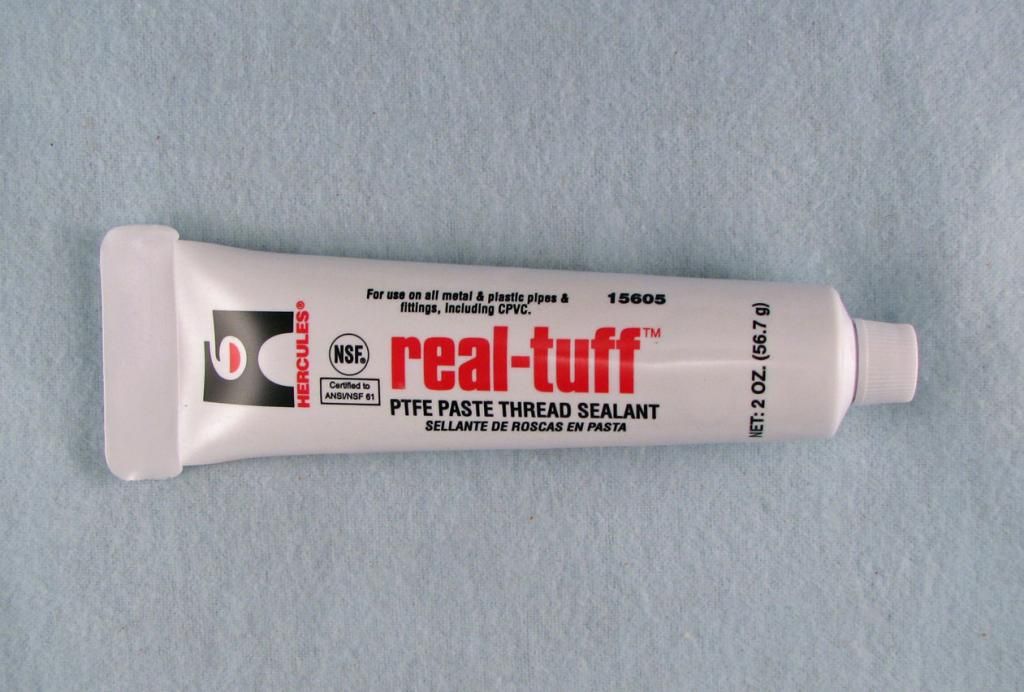
There it is all together. It is all hand tightened and not wrench tightened. Recently I have found that using pipe seal paste is better than Teflon tape on plumbing thread connections. It is easier to apply than wrapping the Teflon tape around the threads and from my research is better at preventing leaks. Its only drawback is that is never dries and always stays a paste so the joints are messy to touch. Usually you are not touching the joints once they are together so that is not a problem. It is drinking water safe and can be used for both cold and hot water pipes. It can be found anywhere that plumbing supplies are sold.


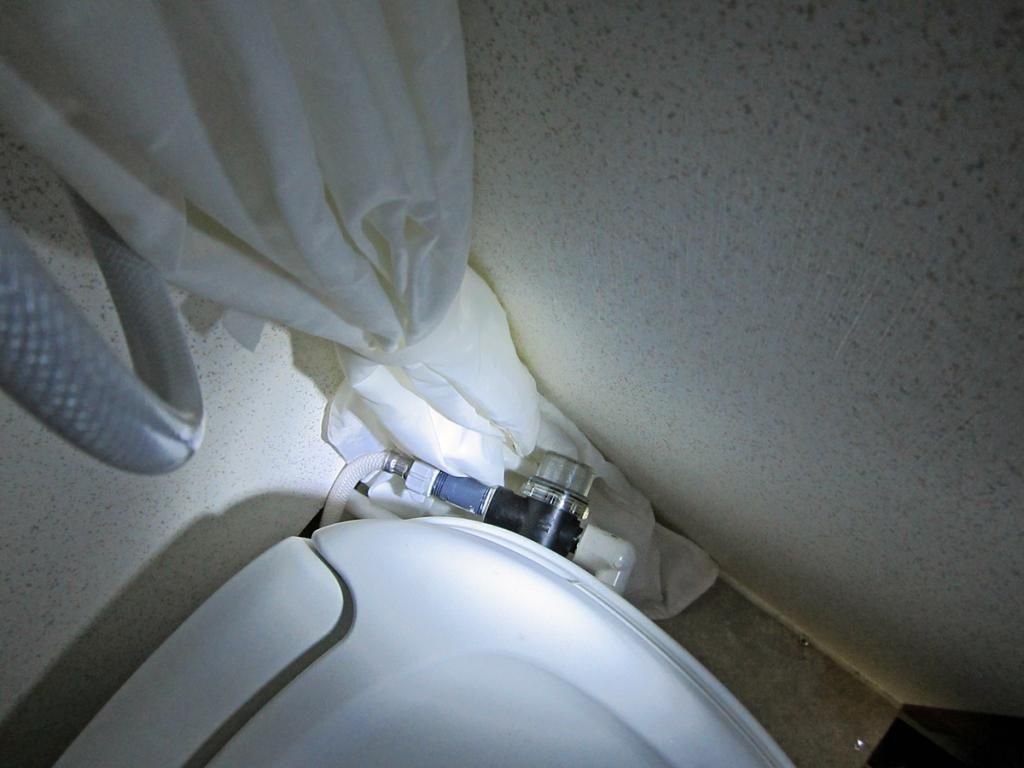
So, it was all together. It next had to be installed in the Roadtrek. Meryl and I went out to install it before we winterized and while the temperature outside was still reasonable. I looked again at the connections and it would fit perfectly. The only problem was that when I tried to open the connection at the toilet I could not get my hand on the connection to get it open.  The connection goes into the top of the toilet valve which is located behind the toilet on the left side as you face the toilet. To get to the connection without removing the toilet completely one most reach down blindly behind the toilet and find the connection. It is also close to the back wall.  I decided before I even put pressure on the connection that I would wait and pay our Roadtrek service center to install this for me. We put the assembled filter away until Spring.

With Spring we dewinterized and called for an appointment at dealer service for a variety of things the most important of which was the water leak that we found during October's trip - the leak that occurred before I decided on making this filter. We brought the filter and when we got there for our service visit I showed it to the Roadtrek service tech, explained what it was and why I wanted this installed - asked them to install it in such a way that the filter dome would be easy to see and to get to to take off and clean the filter, and also to make sure nothing would leak once it was installed. I also offered for them to install it any way that they wanted to if there was a better way than my assembly.

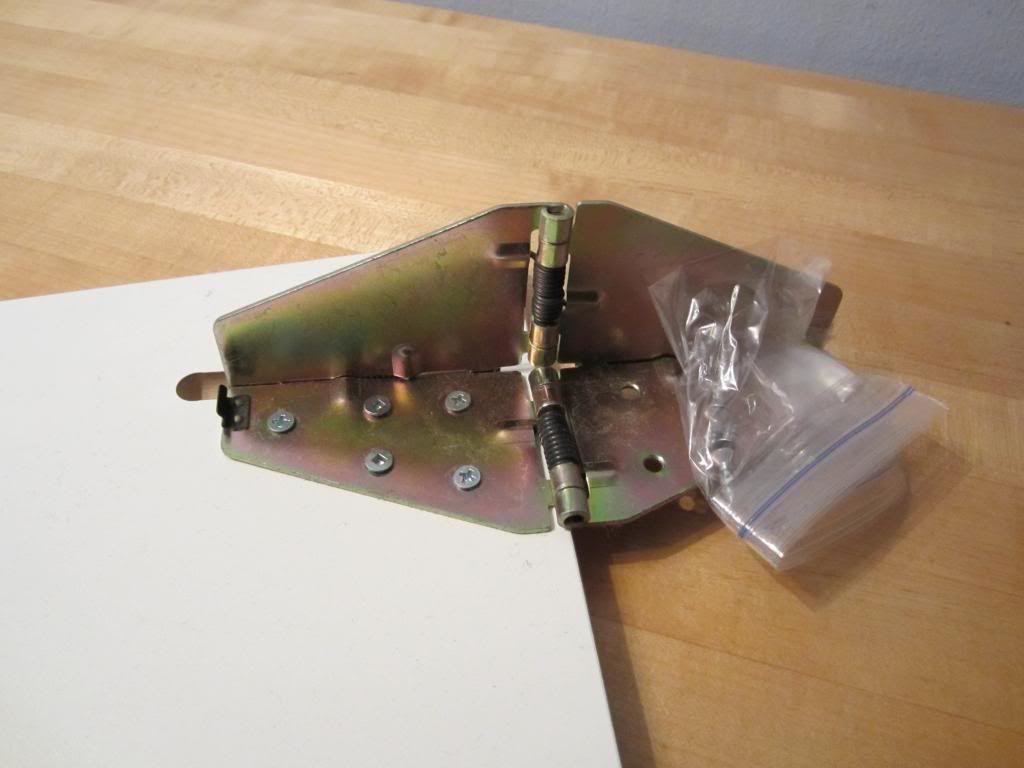
They installed the filter and used the assembly as I gave it to them. They tested for leaks and it held dry. Great! Here is the filter now installed -


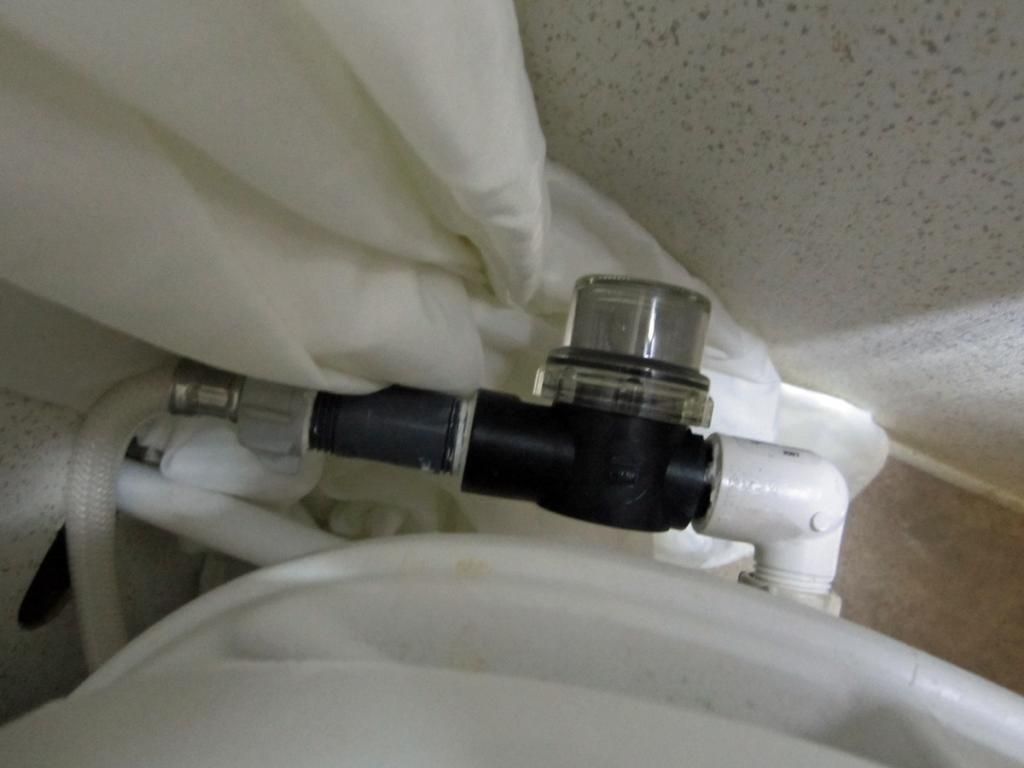
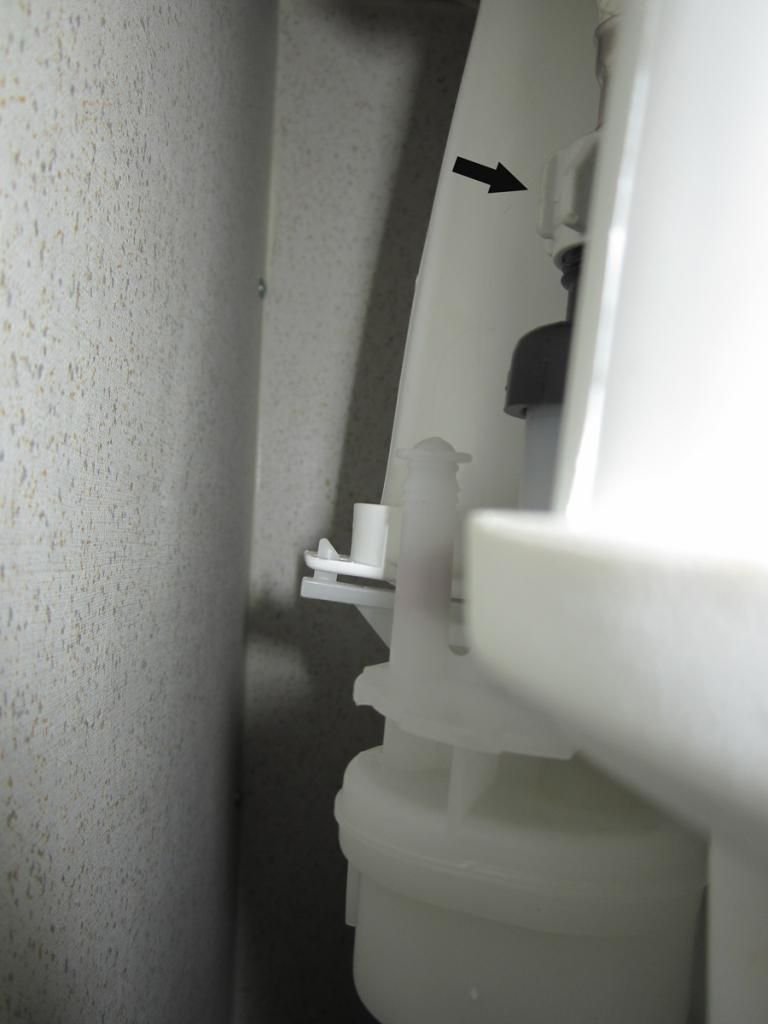
In the photo above you can see the connection into the top of the toilet valve at the arrow.

I recently read in a forum that another Roadtrek owner was having this same problem. He also has chunks of minerals flowing into the toilet bowl from the water supply. I was glad to find out that I am not the only one. I don't know how many this is a problem for. It has certainly been a big problem for us and I am hoping that this will do it. So far the water runs through the filter with no lack of pressure and comes through into the toilet as it is supposed to. Only time will tell if the same problem comes back even with the filter in place. I am hoping that those minerals will get caught in the filter and from the size of them they certainly should. Beyond this the only other fix I can think of is the water softening system. These systems use salt to "recharge" the chemical reaction that removes the "hard" from the water to make it soft and Meryl is concerned about that salt in the drinking water. I am not so sure that is any problem at all. But hopefully, this has fixed the problem and we will flush with a smile from now on.

This will work for any RV or trailer that is experiencing the same problem - not just Roadtreks. Just check the size fittings your pipes use - but more than likely they are the same 1/2 inch.

May you all always flush with a smile!

ADDENDUM - After a full season of use we had no problems with the toilet valve. 


Wednesday, November 27, 2013

After Winterizing

Once you have winterized your Roadtrek, then what? You can still travel in your Roadtrek with it winterized and we will have an article about that coming soon. For some, once they have winterized they are putting their Roadtrek "away" until the seasons pass and the warm weather comes again. But can you just winterize and walk away?

The answer is no. There are things that you need to do all winter regarding your Roadtrek. This article will detail winter maintenance.

Check your propane level when you have finally decided that it is time to give the Roadtrek a rest for the rest of the winter. A full propane tank is best during the cold weather. Take it to be filled if it is not full. 

If you have a built in generator, whether gas or propane, that generator needs to be exercised every month. While Roadtrek only recommends 45 minutes of generator "exercise", the company that manufacturers and warranties the generator, Onan Cummings, says that the generator needs to be exercised for two hours a month. The total time that the generator runs from the time it is installed is recorded on the dial that appears on the wall of the Roadtrek with the generator on and off switch. These hours and minutes are reported to Onan Cummings when warranty work is required. I have been told by our service center that if the time on the meter does not equal or exceed the minimum of hours that amount to two hours a month since installation, warranty payment may be refused. So there is more than one reason to exercise the generator properly. And the most important reason is not to make the company happy, but to keep the generator operating properly. Generators work better if they are run often and not allowed to sit without use. This is why "exercising" the generator is required.

During the winter I exercise the Roadtrek generator two hours a month. It is necessary to power at least half of the generator's load capacity when exercising the generator. During the warm months I use the A/C to put this load on the generator, but what should you use when it is cold? If you generator has a 2800 watt capacity, half of that is 1500 watts. Most electric heaters are 1500 watts. I bring a household ceramic electric heater into the Roadtrek during the winter when I am exercising the generator, start the generator, plug in the electric heater and turn it up the thermostat on the heater to high. If it seems that it will get too warm or hot inside the Roadtrek I open the ceiling vent to let some of the heat out as the heater runs. After two hours, all is turned off and the heater comes back into the house until the next month.

Cold weather causes batteries to discharge more quickly. It is important to regularly check the charge level of your coach battery(ies). If the level on the batteries on the wall LED meter shows less than G, it is necessary to charge the batteries. You can do this one of two ways. Drive the Roadtrek for two hours at highway speeds OR plug the Roadtrek into "shore power" at your house for 12 hours. Both will charge both your coach and vehicle batteries. Do not leave your Battery Switch ON when you are not using your Roadtrek. This will drain the batteries in the best weather quickly.

I plug the Roadtrek into shore power for a period of 12 hours on schedule once each month throughout the year. In the winter I check weekly to make sure the batteries have not drained between scheduled charges. 

Some will leave the Roadtrek plugged in to shore power throughout the winter and this is possible as long as you have a Roadtrek with a "smart" charger component (for newer Roadtreks this is part of the 3-way inverter unit). The "smart" charger will charge the batteries until full and then drop back to a "float" charge which will monitor the battery levels and charge when the level drops. AGM maintenance free batteries used by Roadtrek since 2011 are safely charged this way, but wet cell batteries should be checked regularly if left plugged in this way to be sure that the fluid level is not evaporated or boiled away. While Roadtrek states that the engine battery - which is not an AGM battery - will charge without problem this way, if that battery has fluid levels that can be checked they should also be checked regularly. It is better safe by taking a few moments to check the fluid levels, than to be sorry later. (If you have AGM batteries DO NOT open them to check fluid levels.)

As with any motor vehicle it is best not to let it sit for long periods of time without starting the engine. Go out every one or two weeks and start the engine. If you can, take it for a drive.

If you drive the Roadtrek in the winter on roads that have been salted for ice and/or snow, the road salt will do damage to the underside of the van. If you can rinse off the under-chassis with fresh water using a hose. Sometimes, the weather just won't allow this. In that case, as soon as the weather starts to get warm enough to do this, do it. I have seen one Class B owner who places a lawn sprinkler that moves the water back and forth under the van to wash off the salt. After doing one area, he moves the sprinkler back to do the rest.

This is a good time to get to any of the little repairs or modifications that you have been thinking about inside the Roadtrek. You are not going anywhere, it is sitting out there, and you can spend some time inside and get an "RV" fix while you do those things you have been putting off inside the Roadtrek (as long as they are not water related).

How do you remember to do all of this? I do it on a schedule and that schedule is set into my computer's calendar software with reminder alarms. I have an "appointment" with my Roadtrek on the 15th of every month to charge the generator. I have an "appointment" with my Roadtrek on the 28th of every month to plug into shore power. Why the 28th? Not all months have 31 days and February only has 28 unless it is leap year. So, the 28th works for all months. On those days when I turn on the computer, an alarm goes off from the calendar that tells me its Roadtrek Day. With computer calendars easy to sync with smartphones, the reminder comes up on my phone on those days as well.

With all of this your Roadtrek will be ready for you to get going without difficulties in the Spring!

Wednesday, September 4, 2013

Adding a Digital Antenna Signal Finder

One of the most frustrating things about digital television is that the signal is directional. In order to see all of the digital broadcast channels that are available in an area the antenna must be turned in the direction of the signal being broadcast. There are websites and apps that will tell you by zip code or GPS on the phone or tablet that the app is installed on what the directions of these signals are - but the GPS has a hard time finding a GPS lock inside the Roadtrek in the middle of the night and you don't always know by zip code.

Roadtrek has now discontinued using the Winegard Sensar directional antenna on the roof and now uses a multi-directional antenna that does not have to be turned. The model that they are now using may work very well, but it has been my experience when trying this type of antenna out at home that they still need to be turned to get the best signal reception. I like the Winegard. It can be easily turned to find all of the digital broadcast signals - but in what direction? Until now it has been trial and error. Turn, scan for channels on the TV (which can take up to ten minutes or longer) and then turn and scan again if you did not have the correct direction - and this repeats until you have found the correct direction for the area that you are in.

I had seen a device in the RV shop at my Roadtrek dealer that eliminated the guesswork. I always looked at it when I was there and each time I put it down for the $70 price tag. After a few frustrating nights of trying to find a signal, I decided that I would get this device. It happens that I found it on the Walmart website and had it shipped to my local store after ordering it. I paid  $50 for it. It is called the King Controls SL1000 Digital TV Signal Finder or Sure Lock. 


Installation is easy and can be temporary or permanent. I decided to rearrange the A/B box and add a second A/B box into the cables for this installation. 

What you need - the Sure Lock, a cable A/B switch found at any home electronics store or department, and coax cable with connectors. 

Let me state right now that I have had a lot of experience making cable television coax cables of various lengths and I cut and made cables to suit my needs. You may wind up with a lot more cable in the cabinet that you might like so for some steps here you want as short a cable as you can get.

Now, the installation ->

I wanted to move the Roadtrek's A/B box to within easier reach from the front of the cabinet door so I did move that box first. In this photo you will see the Roadtrek's splitter that has an input that connects to the antenna's coax cable and splits that signal to

1) the antenna input of the Roadtrek's A/B black box.
2) the home entertainment center where it is connected to the back for FM radio reception.


I wanted a connection to the antenna and I wanted it before it went into the Roadtrek's A/B box. For this I went to the Roadtrek splitter and disconnected the output coax that goes down to the Home Entertainment Center (DVD, etc). To that leg of the splitter I attached a short piece of coax and that coax was attached to the input of a new A/B switch that I bought in the Walmart TV department for $6.00. To that new A/B switch's  A output I connected the coax that used to be connected to the splitter that went down to the Home Entertainment Center. Now that was connected just as it had been. To the other output of the switch - the B side I connected a six foot length of coax cable connected to nothing on the opposite end. Below you can see the additional A/B switch installed. I attached this to the floor of the cabinet with heavy 3M velco like plastic strips to keep it in place. I labeled which side to slide the switch to for radio or for antenna scanning. When slid to radio everything works exactly as it did before.


What I had then was a completely working TV connection to the antenna just as it worked before AND a completely working Home Entertainment Center FM radio just as it worked before - provided the new A/B Switch was slid over to the correct side of the switch. I also had at that point was a coax cable connected to nothing that I could connect to the Sure Lock signal finder. The photo below shows the cabinet connections completed. The coil of coax on the right is ready to connect to the Sure Lock when I want to scan. I attached a push on coax connector onto the end of the coax for easy on and off of the scanner.


Now, when I need to scan I take out the scanner - stored in a zipper bag in this cabinet - and attach it to the end of the coax with a simple push on. There are two coax leads on the top of the Sure Lock that will enable you to attach it between the coax coming down to the TV from the antenna and a new coax going into the TV for a permanent installation behind the TV. The problem with this is the crank/direction bezel for the antenna is in the front of the Roadtrek and you need to easily see the scanner as you turn the antenna. This is why I have used six feet of coax in my set up. So I now take my scanner connected to the loose coax in the cabinet and walk over to the crank. 

You turn the scanner on with a switch on the side. It runs on a 9 volt battery. Turn down the adjustment knob at the top as per the instructions. And start to turn the antenna. When four LEDs (or as many LEDs will light if in a weak area) you stop turning the direction of the antenna. Then you turn the adjustment knob up until the last light just goes out. Next you slightly adjust the antenna direction a fraction until that LED comes back on. You have now found the best direction for your antenna and that is where you leave it. Next - as always - you turn on the TV - go to channel source in the menu and make sure it is on Antenna and then in the menu below, scan for channels. You should see as many channels as available in that area lock in to the TV. 


We tried this on our driveway and it worked. The real test was on a trip and we were at the same campground that we had problems finding channels at the trip before. I scanned and found the direction - and all channels came in. 

If you are going to be in the same campground site for a few days and will be moving the Roadtrek to leave the campground at any point to visit the area, you want to be able to find the exact same direction for the antenna without having to scan again - so I came up with an idea. I bought removable peel and stick round color labels and placed one right at the antenna's direction pointer on the ceiling of the Roadtrek. It comes right off without leaving a mark and it will stay up for as long as you are at that campground. 


 With the level markers that I put down on the ground on the site next to the tires to show where to park that is level, I always come back to very close to the same position on the site, so all I need to do is move the antenna pointer to the middle of the dot and all of the TV channels are back where they need to be.  When moving to the next campground or home, just peel off the dot and throw it away.

This little gadget works. It saves a great deal of the frustration of a directional antenna. There are units that do the same thing that are built into the ceiling at the crank but these involve cutting into your Roadtrek. This little Sure Lock does it without any permanent changes to your RV.

Wednesday, May 8, 2013

A Comfortable and Easy Floor Covering

In our Roadtrek 190 Popular there is carpeting in the front of the cabin where the driver and passenger seats are and there is carpeting under the area that is made up as a bed. If you make the beds up as twins, then you step down on some very nice carpeting. If you make the bed ups as a King then when you step off the end of the bed toward the bathroom and the kitchen area, you are stepping onto a hard, fiberglass floor that gets cold in the winter and sometimes cold in the summer with the air conditioner going over night when stepped on with bare feet.

There is a reason why the carpet is not carried into this middle area. It is because the shower drain is there in the floor. You also want an easy to clean floor around the toilet and also where you are standing when cooking, not to mention coming in with wet feet when it is raining outside. We knew that it would be nice to put something down in that area but we were not sure what that would be. It had to be removable when using the shower, comfortable to walk on, and provide some insulation to the floor to keep it warmer. About a year ago we found just what we were looking for.

We were in Sears in the tool department and I saw a mat that is intended to be used to ease standing in a workshop. It is called the Craftsman Anti-fatigue Workshop Mat and it comes in your choice of red or black. Some of you have already seen this mat in some of the photos I have used to illustrate articles here on the site. We decided on the black color mat. This mat is made of a thick and heavy rubber-like material with a "diamond" pattern on the top. The mat fits almost exactly in the space that is uncovered in the Roadtrek 190. It will fit smaller, of course, in the 210 but should cover much of the area you would want to cover. It is comfortable to walk on - it has a bit of a sponge push back on your foot when you step on it. In the winter, the mat keeps the cold off your bare feet. If you are taking a shower, you just roll up the mat and put it on the side. If the mat gets dirty, you just roll it up, carry it outside, wave the dirt off it, and if necessary, clean it with a hose. Here is what the mat looks like in our Roadtrek -

Looking from the front to the back - the area uncovered in the back is under the mattress when the bed is made.
Looking from the back to the front.

The mat falls about seven or eight inches short of the carpet in the front.
Looking in from the side entrance door.


It is easy to recognize this mat in the store as it has this label on it that is part of the mat and does not come off. This part of the mat is barely noticed by the aisle bathroom door.
 
With the mat in place we also wanted something that we could put out right at the entrance for when it is raining. A door mat would not fit and would slide on the smooth floor. So what do you put on a floor that is slippery when wet - a bath mat.


We bought this mat in a home closeout store and it was inexpensive, durable and has rubber suction cups on the bottom. These mats are common and should be easy to find. It is soft rubber and can be laid where you see it in the photo above, or pulled more toward the step and let about an inch of the mat fold over. It is perfect to walk in with wet feet and with the third seat right there, you can just sit and take off your wet shoes and leave them on the mat to dry.


The mat rolls up easily and we just store it under the back of the passenger seat. It does not move from that spot when we are driving. It also does not interfere with the seat swiveling or moving forward or back. Any bath mat would do the same thing but be sure to get one that has the suction cups on the bottom. When we were shopping for this I discovered that not all of them do.

The Craftsman Anti-Fatigue Workshop Mat sells in Sears for $39.99. It does occasionally go on sale. As I recall it was on sale when we purchased it and it was less than $30. When you buy the mat, let it air out and unroll before you put it in the Roadtrek. It did have a rubber odor at first that was gone in a few days - and then we brought into the Roadtrek. It needed no cutting to fit in the width of the aisle and covers all that is necessary side to side. When it first goes down, the ends do tend to roll, but a few hot days in the van flattened it right out.

As usual, I am not paid by Sears or connected to them in any way. This was just something that worked so well that it is something to share with you!


Wednesday, February 27, 2013

Modifying the Front Table

The front table in the Roadtrek has changed over the years and from model to model. It has been a clover-leaf table supported by a leg that fits into a hole in the floor. It is a table on a tripod in some models. In the 2011 Roadtrek 190 Popular that front table is stored in its own thin cabinet and it slides out on a rail and is hinged to swing up into place supported by a poly support that slides out from the outside of the wardrobe behind the driver's seat. This table is a drop-leaf table hinged in the middle with a spring mechanism to keep it open.

The first time we opened the table I went to sit behind it in the driver's seat swiveled into lounge position. I could not get into the seat behind the table as it was too long. It was slightly easier to get in behind the table in the swiveled passenger seat - but still the seat was just too close. As it was the table was not very usable. To use it I would sit and Meryl would swing the table up and we would both hold it to open it. Then she could get into her seat. I was pretty much trapped. There had to be a better way.

I went out on the forums and learned that a number of people had this same feeling and there were a variety of modifications to the table - in addition to those who just did not use the built in table at all and used a folding table in its place. Examining the table, it did not look hard to remove the leaf which while reducing the table's size in half would make it much more usable to sit at. There are two hinges on the bottom of the table - one with the spring mechanism. I got a screwdriver and removed the screws - and nothing came apart. It was still solidly assembled. Back to the internet and I learned that the hinges are not only bolted on but also glued down.

So now what? I did not want to ruin the table trying to break the glue. I could see breaking the table with the glue. I then had a suggestion on a forum to use a paint scraper slid under the hinge and cut the glue bond.

What you will need -

1) a flexible paint scraper. Buy a cheap one.

2) a phillips head screw driver

3) a square head screw drive (for the usual RV Robertson head - square head - screws)

My table had a combination of both types of screws used on the hinges.

4) a hair dryer (a heat gun will be TOO hot for this job)

5) a mallet or small hammer

How to do it -

First open the table. You will be removing the fold down leaf and not the side of the table that slides on the slide attached to the inside of the cabinet.

Next remove all of the screws from the two leaf hinges on the side of the table that will REMAIN in the Roadtrek.

Now you are going to break the glue. I started with the plain hinge and not the spring hinge. I found quickly that if the hinge was heated with a hair dryer this task is much easier and the glue bond breaks much cleaner.

Slip the paint scraper against the edge of the hinge - on the top of leaf of the table that will remain.With the mallet or a light weight hammer, tap the top of the paint scraper's handle gently. The blade of the paint scrapper will start to move behind the hinge. Start at the point of this hinge. We will call this Hinge #1 and I will label it as such in the photos below. I found that a few taps actually broke the handle of my paint scrapper. I just proceeded by tapping the top of the blade once the handle broke off. If the blade is hard to move deeper behind the hinge heat the hinge with the hair dryer again. DO NOT tap so that the blade is moving into the table top. Just move it along straight down. Once the blade is mostly through the length of the hinge, heat the hinge again and give the handle of the scrapper (or  in my case since the handle broke off - the end of the blade) a slight twist and the hinge should come off. If it does not, just heat it again, and drive the blade a little deeper. In this way the hinge will come of. There will be glue residue left behind on the table bottom.

Once this first hinge comes off you need a partner to hold the table together where the hinge once was or you run the risk now of flexing the table top at the other hinge and the table top breaking. This partner is needed now for the rest of the removal.

Repeat now what you did on Hinge #1 on Hinge #2 - the spring hinge (which will be labeled in a photo below).  This hinge is heavier metal and will need more heat to penetrate than Hinge #2. Heat the blade of the scrapper also. Move it in behind the metal, again careful not to dig it into the table top. When you have most of the blade in give a twist and the bond should come apart and the hinge will be free. At this point your partner is supporting the table leaf you are removing. It is heavy and awkward.

The photos that I have taken were taken after the leaf was removed.

The table leaf removed. Here you see what the hinges look like.

Hinge # 1

Hinge #2 CLOSED
 (I kept the screws that I removed in the plastic bag attached)

Hinge #2 HALF OPEN - this is a very strong spring!

The three holes are where Hinge #1 was removed.
Above, you see the slide that moves the table out of the cabinet.

 The five holes are where Hinge #2 was removed. The routed groove is where the hinge spring slid.


You now have half the table as show above. In this photo you see it hanging from its slide/hinge from inside its storage cabinet. Above it you see the slide that supports the table. To open this table, first slide out the table and pick it up from the bottom to above where the slide support will be. Then slide out the slide support to hold the table securely up. Remember that you now have half the table that you started with and the slide support is made for the full size open table. This is no problem. Just slide the slide out enough now for the smaller table. It will securely stay in place.

Notice in the photos that there is no sign of glue residue. The glue was easy to remove with a little scrapping and alcohol. Household cleaner finished the job to make the table ready for use. 

 Here is a good shot of the table now open. Look to the right front corner and you see three circles. These are the outer caps to the screws that went through the hinge. I returned these caps and the screws that were opposite so that the table would have no holes through it left behind by the missing hinge.

SLIDE SUPPORT
That is all that there is to reducing this table to usable size. We find it most comfortable to eat at this table with one of us sitting in the passenger seat and the other in the third seat as both reach this table nicely. I have used the table while sitting in the driver's seat to work on the laptop. The driver's seat,  when turned around to face the rear of the van, does not slide back very far because of the steering wheel. It still can be a tight fit but with the table in half it is much easier now to get out around it. 

Now you may ask, why not just leave the table as it was, and just not open the leaf. The leaf would hang down and would get in the way. It was also awkward and very heavy with the leaf hanging down like this. 

Here are some shots of the table open. 


If you look into the cabinet in the photo above you will see a blue cylinder. Once the table is reduced to this size it is not half as wide as the cabinet is wide. Before with the full table there was some swing inside the cabinet when the van was moving. I cushioned that with a sponge. Now, with half the table gone there was a lot of movement inside. Once again, a swimming pool noodle float came in very handy. I cut a six inch length of the float and trimmed the foam flat on two sides to fit between the table and the wall of the cabinet. This was pushed into the cabinet when the table was inside - at first. I then glued the foam inside to hold it in place with some stick on adhesive. The foam now prevents any swing and any noise from the table while driving. Swimming pool noodle floats have many uses inside the Roadtrek to keep things from moving around and making noise! Buy them in the summer for a dollar!

ADDENDUM:  It was suggested that the table could be left with both leaves attached and just let the leaf that folds up hang down. We did not find this convenient - you may. Here is a photo of what that would look like (Meryl is holding the table in place where it would be if it was still attached and hanging down).